1. Introduction
This manual provides detailed instructions for the installation and use of the KITQLPG Car Frame Fascia Adapter and Canbus Box, designed for Ford I-Max and Premacy models manufactured between 2005 and 2010. This kit allows for the seamless integration of a 9-inch Android car radio into your vehicle's dashboard, replacing the original factory radio panel.
2. Safety Information
- Always disconnect the vehicle's battery before beginning any electrical installation to prevent short circuits or damage to electrical components.
- Ensure all connections are secure and properly insulated to avoid electrical hazards.
- If you are unsure about any step of the installation process, consult a qualified automotive technician.
- Keep small parts away from children.
- Wear appropriate personal protective equipment, such as gloves, during installation.
3. Package Contents
Verify that all components are present in the package before starting the installation:
- 9-inch Car Frame Fascia Adapter
- Canbus Box
- Necessary wiring harness (may vary based on specific vehicle model and Android radio)
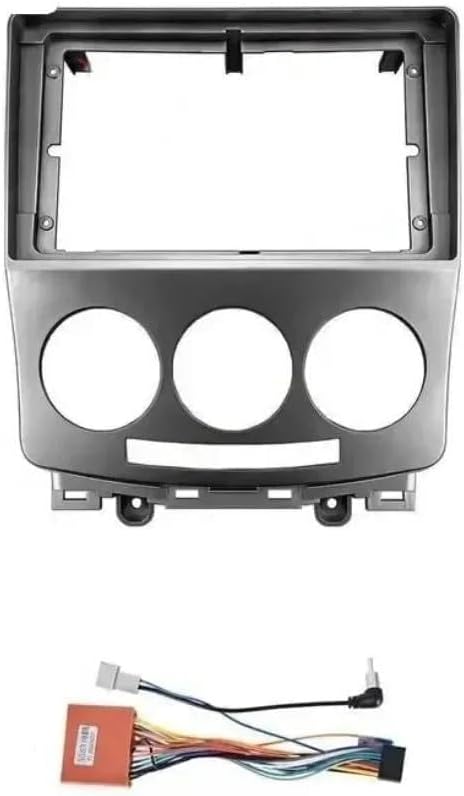
Image 1: The KITQLPG 9-inch car frame fascia adapter. This component replaces the original dashboard panel to accommodate a larger Android radio unit. It features a rectangular opening for the screen and three circular openings for climate control knobs.
4. Installation Guide
This section outlines the general steps for installing the car frame fascia adapter. Specific steps for removing your vehicle's original dashboard components may vary. Refer to your vehicle's service manual for detailed instructions on removing the factory radio and trim panels.
4.1 Tools Required
- Plastic trim removal tools
- Screwdrivers (Phillips and flathead)
- Socket wrench set (if applicable)
4.2 Step-by-Step Installation
- Prepare the Vehicle: Ensure the vehicle is turned off and the parking brake is engaged. Disconnect the negative terminal of the car battery.
- Remove Original Fascia: Carefully use plastic trim removal tools to pry off the existing dashboard trim panels surrounding the factory radio. Locate and remove any screws or clips securing the original radio and fascia.
- Disconnect Factory Radio: Once the original radio is accessible, disconnect all wiring harnesses and antenna cables from the back of the unit.
- Install New Android Radio (Not Included): Mount your 9-inch Android radio into the new fascia adapter. Ensure it fits securely.
- Connect Canbus Box and Wiring: Connect the provided Canbus box and wiring harness to your new Android radio and the vehicle's existing wiring. The Canbus box facilitates communication between the new radio and the vehicle's systems (e.g., steering wheel controls, vehicle information display). Follow the wiring diagram provided with your Android radio and Canbus box for correct connections.
- Test Connections: Before fully reassembling, reconnect the vehicle battery and briefly turn on the ignition to test the new Android radio's functionality, including power, audio, and steering wheel controls (if applicable).
- Install New Fascia: Carefully position the new fascia adapter with the installed Android radio into the dashboard opening. Ensure all clips and mounting points align. Press firmly until the fascia snaps into place, creating a seamless contour fit. Reinstall any screws removed earlier.
- Final Check: Reconnect the negative battery terminal. Verify all functions of the new radio and ensure all dashboard components are securely fastened.
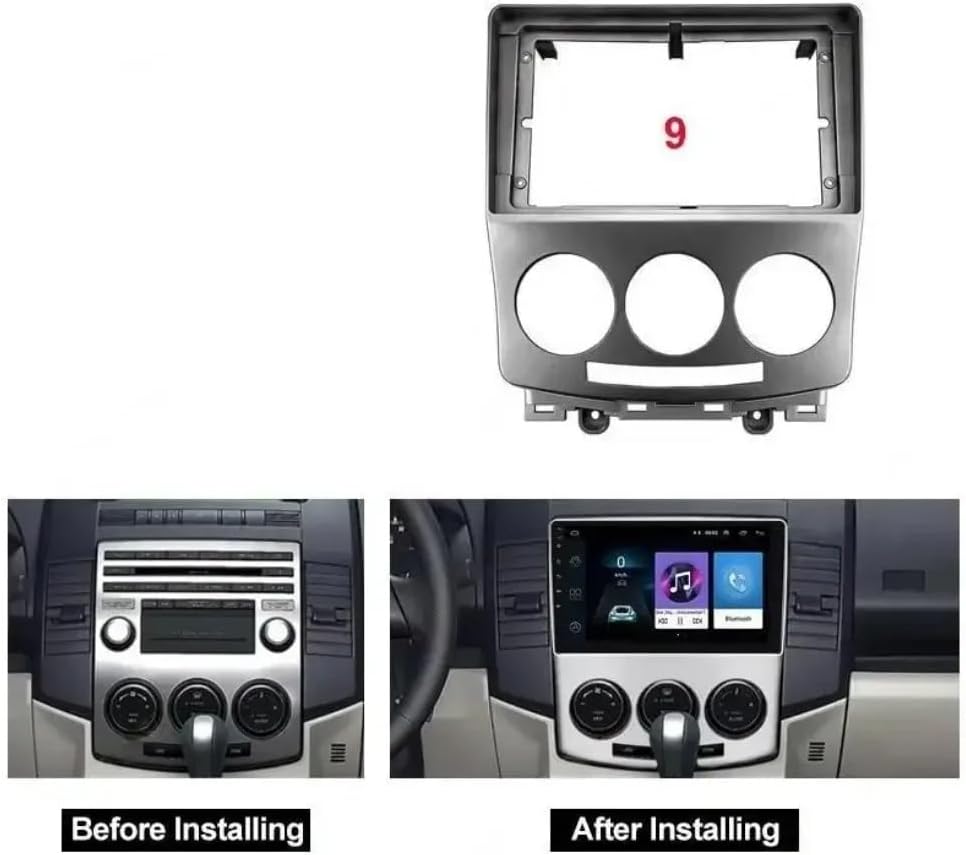
Image 2: A visual comparison of the car dashboard before and after the installation of the KITQLPG fascia adapter and a 9-inch Android radio. The left panel shows the original setup, while the right panel demonstrates the integrated new system.
5. Operation
The KITQLPG Car Frame Fascia Adapter itself does not have operational controls. Its function is to provide a secure and aesthetically pleasing mounting solution for a 9-inch Android car radio. All operational aspects, such as navigating menus, playing media, or using navigation features, are controlled directly through the installed Android radio unit. Refer to the instruction manual provided with your specific Android radio for detailed operating instructions.
The Canbus box included in this kit ensures that your vehicle's original functions, such as steering wheel controls and vehicle information displays, remain compatible and functional with the new Android radio. If you experience issues with these functions, verify the Canbus connections.
6. Maintenance
The fascia adapter requires minimal maintenance. To keep it in good condition:
- Cleaning: Wipe the surface with a soft, damp cloth. Avoid using harsh chemicals or abrasive cleaners, as these can damage the finish.
- Inspection: Periodically check that the fascia remains securely fitted and that there are no loose connections around the radio unit.
- Environmental Care: Avoid prolonged exposure to extreme temperatures or direct sunlight, which can cause material degradation over time.
7. Troubleshooting
If you encounter issues after installation, refer to the following troubleshooting tips:
| Problem | Possible Cause | Solution |
|---|---|---|
| New radio does not power on. | Loose power connection; Blown fuse; Incorrect wiring. | Check all power connections to the radio and Canbus box. Inspect vehicle fuses. Verify wiring against the radio's manual. |
| Steering wheel controls do not work. | Canbus box not connected correctly; Canbus box malfunction; Radio not configured for steering wheel controls. | Ensure the Canbus box is properly connected to both the vehicle and the radio. Consult the radio's manual for steering wheel control setup. |
| Fascia panel does not fit flush. | Obstruction behind the panel; Incorrect alignment; Clips not fully engaged. | Re-check for any wires or components obstructing the panel. Ensure all mounting clips are aligned and fully pressed into place. |
| No sound from speakers. | Speaker wires disconnected; Amplifier not powered (if external); Radio settings. | Verify all speaker wire connections. Check amplifier power. Review radio audio settings. |
For issues specific to the Android radio's software or advanced features, refer to the radio's dedicated user manual or contact the radio manufacturer's support.
8. Specifications
- Model Number: XWJ-D04-23
- Material Type: ABS Plastic
- Compatibility: Ford I-Max / Premacy (2005-2010)
- Screen Size Compatibility: 9-inch Android Radio
- Item Weight: 1.76 ounces (approximately 50 grams)
- Package Dimensions: 0.39 x 0.39 x 0.39 inches (1 x 1 x 1 cm) - Note: These dimensions appear to be placeholder values and may not reflect the actual product size.
- Number of Pieces: 1 (Fascia Adapter) + Canbus Box and cables
- Assembly Required: No (for the fascia adapter itself, but installation into vehicle is required)
9. Warranty and Support
Information regarding specific warranty terms or direct customer support for the KITQLPG Car Frame Fascia Adapter is not available in the provided product data. Please refer to your purchase documentation or contact the seller directly for warranty claims and technical assistance.