1. Introduction
This manual provides detailed instructions for the installation, operation, and maintenance of your Generic G80 Black 180 Degree 3D Adjustable Hidden Hinge. This hinge is designed for interior wooden doors, offering a full 180-degree opening angle and 3-dimensional adjustment capabilities for precise door alignment. Please read these instructions carefully before installation to ensure proper function and longevity of the product.
2. Safety Information
- Always wear appropriate personal protective equipment (PPE) such as safety glasses and gloves during installation.
- Ensure the door and frame materials are suitable for hinge installation and can support the door's weight.
- Use sharp, appropriate tools for mortising to prevent splintering or damage to the door and frame.
- Keep small parts, such as screws, out of reach of children.
- If you are unsure about any step, consult a qualified professional.
3. Package Contents
Verify that all components are present before beginning installation:
- 1 x G80 Hidden Hinge (Black)
- Mounting Screws (Quantity as supplied)
- Allen Wrenches (for adjustment)
- Decorative Cover Plates (Quantity as supplied)
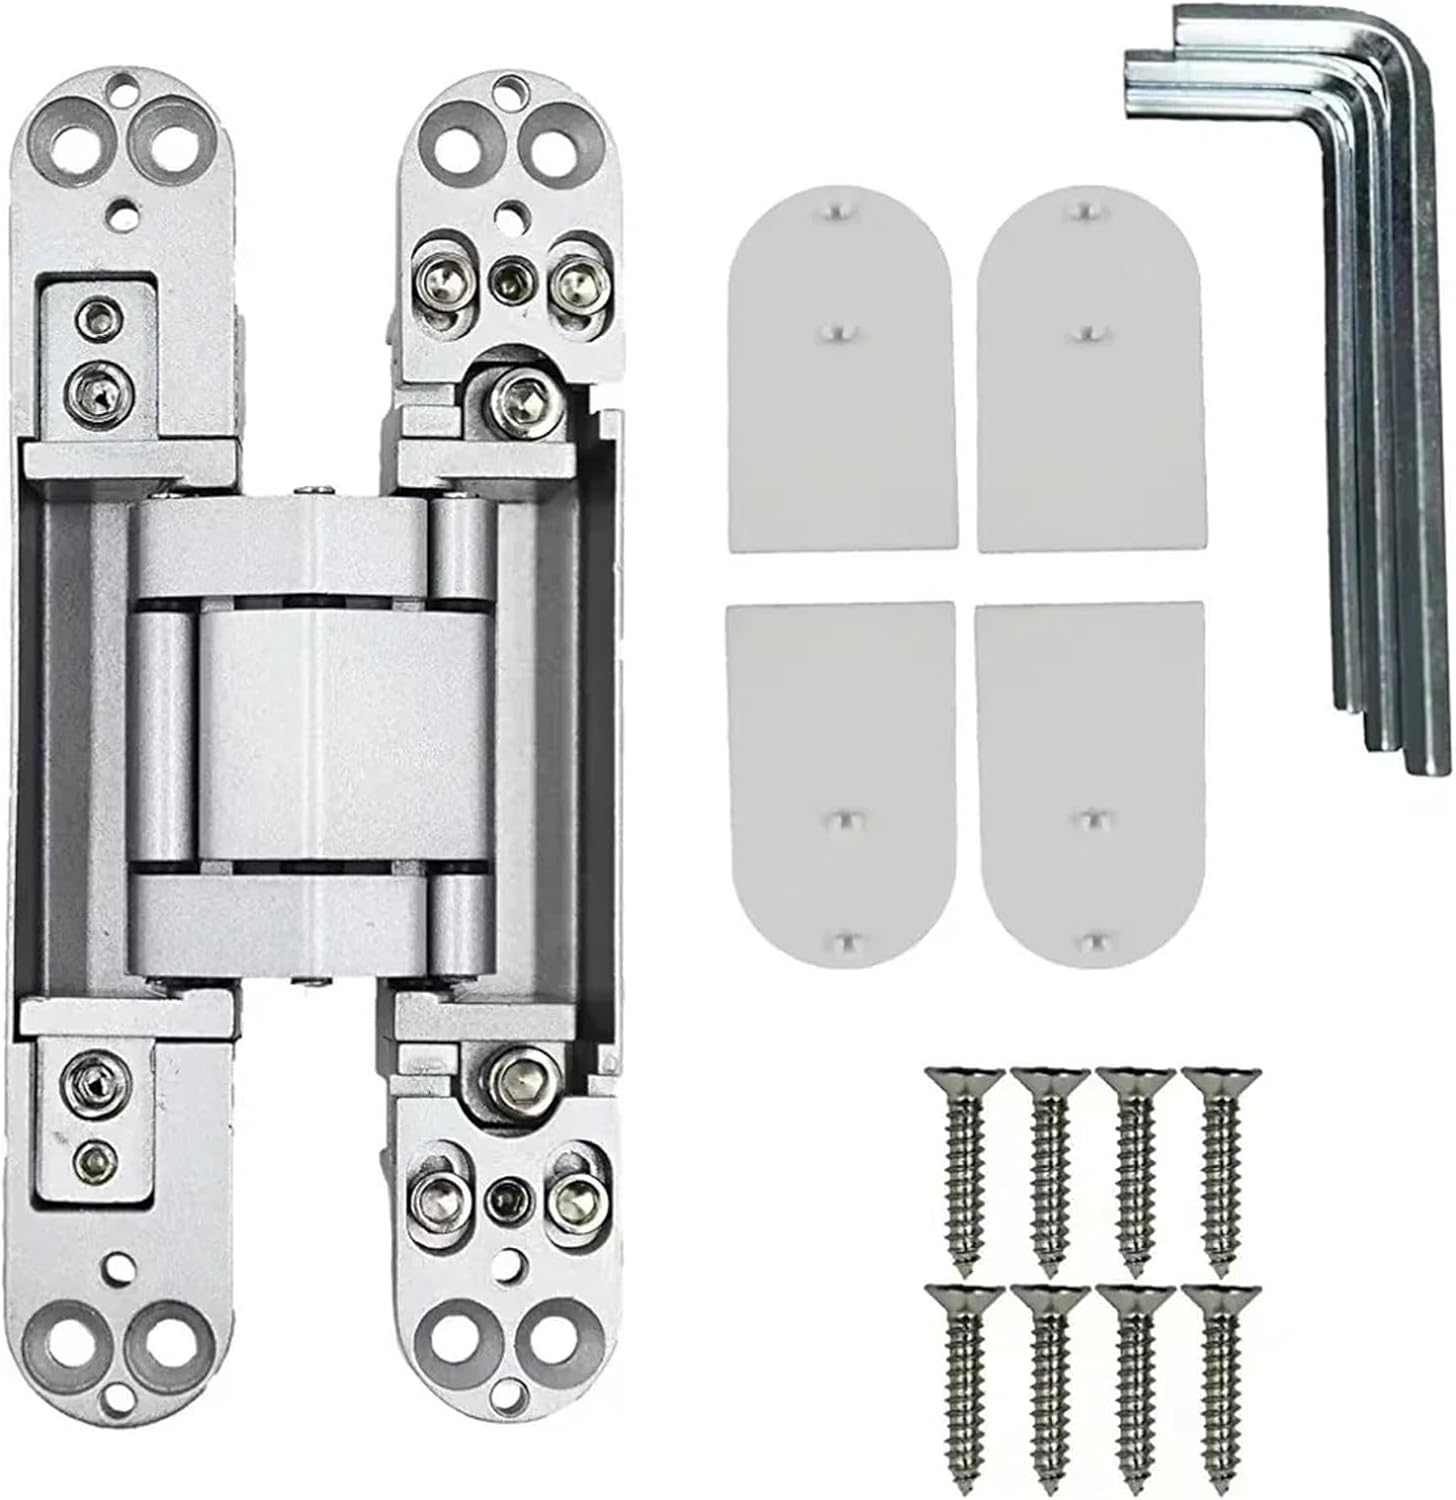
Figure 1: Included components for the G80 hidden hinge.
4. Specifications
| Model | G80 |
| Color | Black |
| Material | Zinc Alloy |
| Opening Angle | 180 Degrees |
| Adjustment | 3-Dimensional (Height, Depth, Lateral) |
| Item Weight | Approximately 3.53 ounces (100g) |
| Model Number | UAIJFWFJZ-BLACK-G80 |

Figure 2: Dimensional drawing for G40, G80, and G120 hinges. Refer to G80 for this model.
5. Setup and Installation
5.1 Tools Required
- Pencil
- Measuring Tape or Ruler
- Drill with appropriate bits (for pilot holes)
- Chisel and Mallet (for mortising) or Router with template
- Screwdriver (Phillips head)
- Level
5.2 Installation Steps
- Determine Hinge Placement: Mark the desired locations for the hinges on both the door edge and the door frame. Typically, hinges are placed 7 inches from the top and bottom of the door, with additional hinges evenly spaced for taller doors.
- Mark Mortise Areas: Place the hinge on the marked locations and carefully trace its outline onto the door edge and door frame. Ensure the hinge is flush with the surface.
- Create Mortises: Using a chisel and mallet or a router with a suitable template, carefully cut out the mortise (recessed area) for each hinge. The depth of the mortise should allow the hinge to sit perfectly flush with the surface of the door and frame when closed. Test fit the hinge frequently.
- Drill Pilot Holes: Once the mortises are cut, mark the screw hole locations through the hinge plates. Drill pilot holes using a drill bit slightly smaller than the screw diameter to prevent wood splitting.
- Attach Hinges to Door: Secure one half of each hinge into the mortises on the door edge using the provided mounting screws. Do not overtighten.
- Mount Door to Frame: Carefully position the door into the frame, aligning the remaining hinge halves with the mortises on the door frame. Have an assistant help support the door's weight.
- Secure Hinges to Frame: Attach the remaining hinge halves to the door frame using the provided mounting screws. Check that the door opens and closes smoothly.
- Perform Initial Adjustment: Before final tightening, make initial adjustments to ensure the door is plumb and level. Refer to the "Operating: 3D Adjustment" section for details.
- Install Cover Plates: Once the door is properly aligned and all screws are tightened, snap the decorative cover plates over the hinge bodies to conceal the adjustment screws and provide a finished look.
6. Operating: 3D Adjustment
The G80 hidden hinge features 3-dimensional adjustment capabilities, allowing for precise alignment of the door after installation. Use the provided Allen wrenches for these adjustments. Remove the decorative cover plates to access the adjustment screws.
- Height Adjustment: Typically, one screw on the hinge allows for vertical adjustment (up/down). Turning this screw will raise or lower the door.
- Depth Adjustment: Another screw controls the depth of the door within the frame (in/out). This helps ensure the door is flush with the frame when closed.
- Lateral Adjustment: A third screw provides lateral adjustment (left/right), allowing you to fine-tune the gap between the door and the frame.
Make small adjustments to one screw at a time, then test the door's movement and alignment. Repeat until the desired fit is achieved. Once adjustments are complete, replace the decorative cover plates.
7. Maintenance
- Cleaning: Wipe the visible parts of the hinge with a soft, damp cloth. Avoid abrasive cleaners or solvents that could damage the finish.
- Lubrication: If the hinge begins to squeak or operate stiffly, apply a small amount of silicone-based lubricant to the moving parts. Do not use oil-based lubricants as they can attract dust and debris.
- Periodic Check: Periodically check all mounting screws for tightness. Retighten if necessary to maintain proper door alignment and function.
8. Troubleshooting
- Door not closing properly/gaps:
- Check for proper 3D adjustment (refer to Section 6).
- Ensure all mounting screws are securely tightened.
- Verify that the mortise depth is correct and the hinge is flush.
- Hinge squeaking:
- Apply a silicone-based lubricant to the hinge's moving parts (refer to Section 7).
- Door sagging:
- Tighten all mounting screws.
- Adjust the height adjustment screw (refer to Section 6).
- Ensure the door and frame material are strong enough to support the door's weight.
9. Warranty and Support
For warranty information or technical support, please contact your retailer or the manufacturer directly. Keep your purchase receipt as proof of purchase.


