1. Introduction
This manual provides detailed instructions for the installation, operation, and maintenance of the Generic TX628 Fingerprint Time Attendance System. This device is designed to accurately record employee attendance using fingerprint recognition, RFID cards, or PINs, streamlining time management processes for businesses.
The TX628 features a color TFT screen with a graphical user interface (GUI) for ease of use, robust data storage capabilities, and multiple communication options including TCP/IP, USB, and optional WiFi.

Figure 1: Front view of the TX628 device with its main menu interface.
2. Product Features
- Color TFT Screen: Features a GUI for intuitive navigation and operation.
- Biometric Recognition: Supports 1-touch fingerprint recognition for quick user identification.
- High Capacity: Stores up to 3,200 fingerprint templates and 80,000 transaction records.
- Multiple Identification Methods: Reads fingerprints, RFID cards (125KHZ), and PINs.
- Connectivity: Built-in RS232/485, TCP/IP, and USB ports for data transfer. Optional WiFi connectivity is available.
- Voice Broadcast: Provides audio indications for successful or failed clock-ins and displays employee information on screen.
- Bell Scheduling: Integrated function for scheduling audible alerts.
- Real-time Data Export: Supports 1-touch data export to third-party applications.
- Automatic Calculation: Automatically calculates working hours, eliminating manual computation.
3. Package Contents
Verify that all items listed below are included in your package. If any items are missing or damaged, please contact your supplier.
- TX628 Time Attendance Device x 1
- Power Adapter x 1
- USB Cable x 1
- Mounting Bracket x 1
- Mounting Screws and Anchors x 1 set
- User Manual (this document) x 1
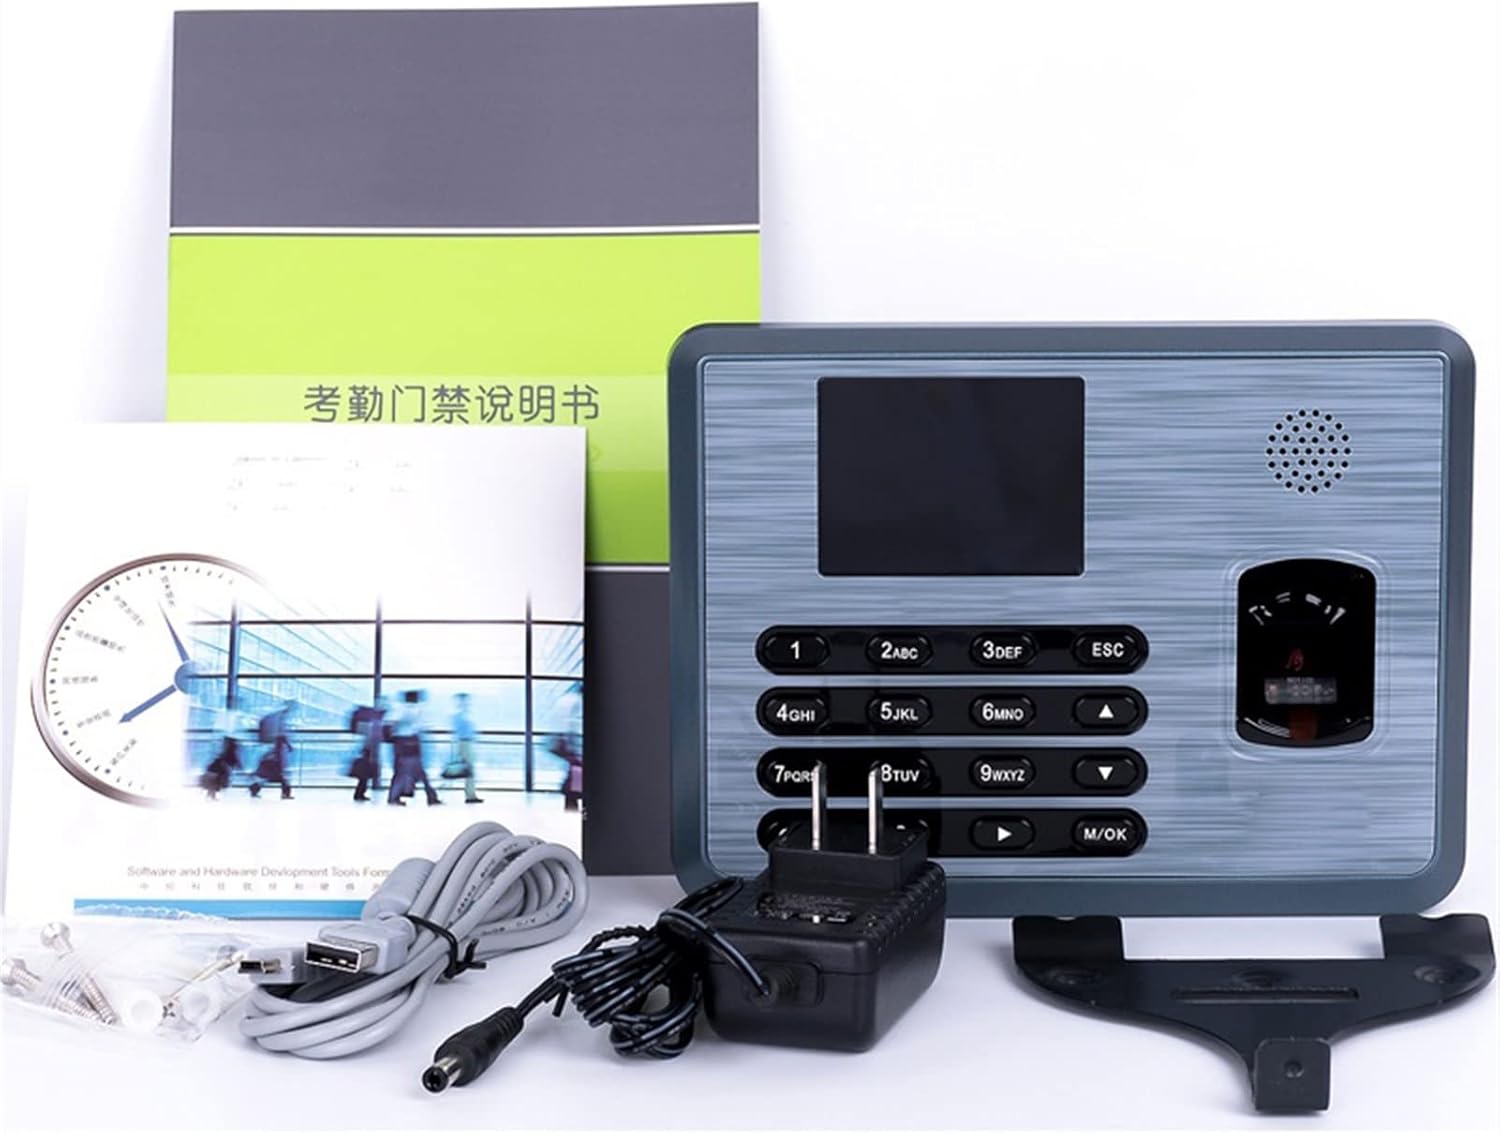
Figure 2: Typical package contents for the TX628 system.
4. Setup
4.1 Physical Installation
- Choose a Location: Select a suitable indoor location, away from direct sunlight, heat sources, and strong electromagnetic interference. Ensure the surface is flat and stable.
- Mounting: Use the provided mounting bracket as a template to mark drilling points on the wall. Drill holes, insert anchors, and secure the bracket with screws. Attach the TX628 device to the mounted bracket.
- Power Connection: Connect the power adapter to the DC 5V port on the device and plug it into a standard electrical outlet. The device will power on automatically.

Figure 3: Rear view of the TX628, indicating mounting points and connection ports.
4.2 Initial Configuration
- Access Main Menu: Press the M/OK button to access the main menu. If prompted for an administrator password, enter the default (usually 0000 or no password initially) or the one set during previous configuration.
- Set Date and Time: Navigate to System > Date/Time. Adjust the date, time, and time zone settings as required.
- Network Settings: Navigate to COMM. Configure TCP/IP settings (IP address, subnet mask, gateway) for network connectivity. If using optional WiFi, select the WiFi option and connect to your wireless network.
4.3 User Registration
Before employees can use the system, their data must be registered.
- Add New User: From the main menu, select User Mgt > New User.
- Enter User ID: Assign a unique User ID.
- Register Fingerprint: Select Fingerprint and follow the on-screen prompts to place the user's finger on the optical sensor multiple times for accurate registration.
- Register RFID Card (Optional): If using RFID cards, select Card and present the RFID card to the reader.
- Set PIN (Optional): Assign a PIN for users who may use PIN-based attendance.
- Assign User Role: Set the user's role (e.g., Administrator, General User). Administrators have access to system settings.
- Save: Confirm and save the user information.
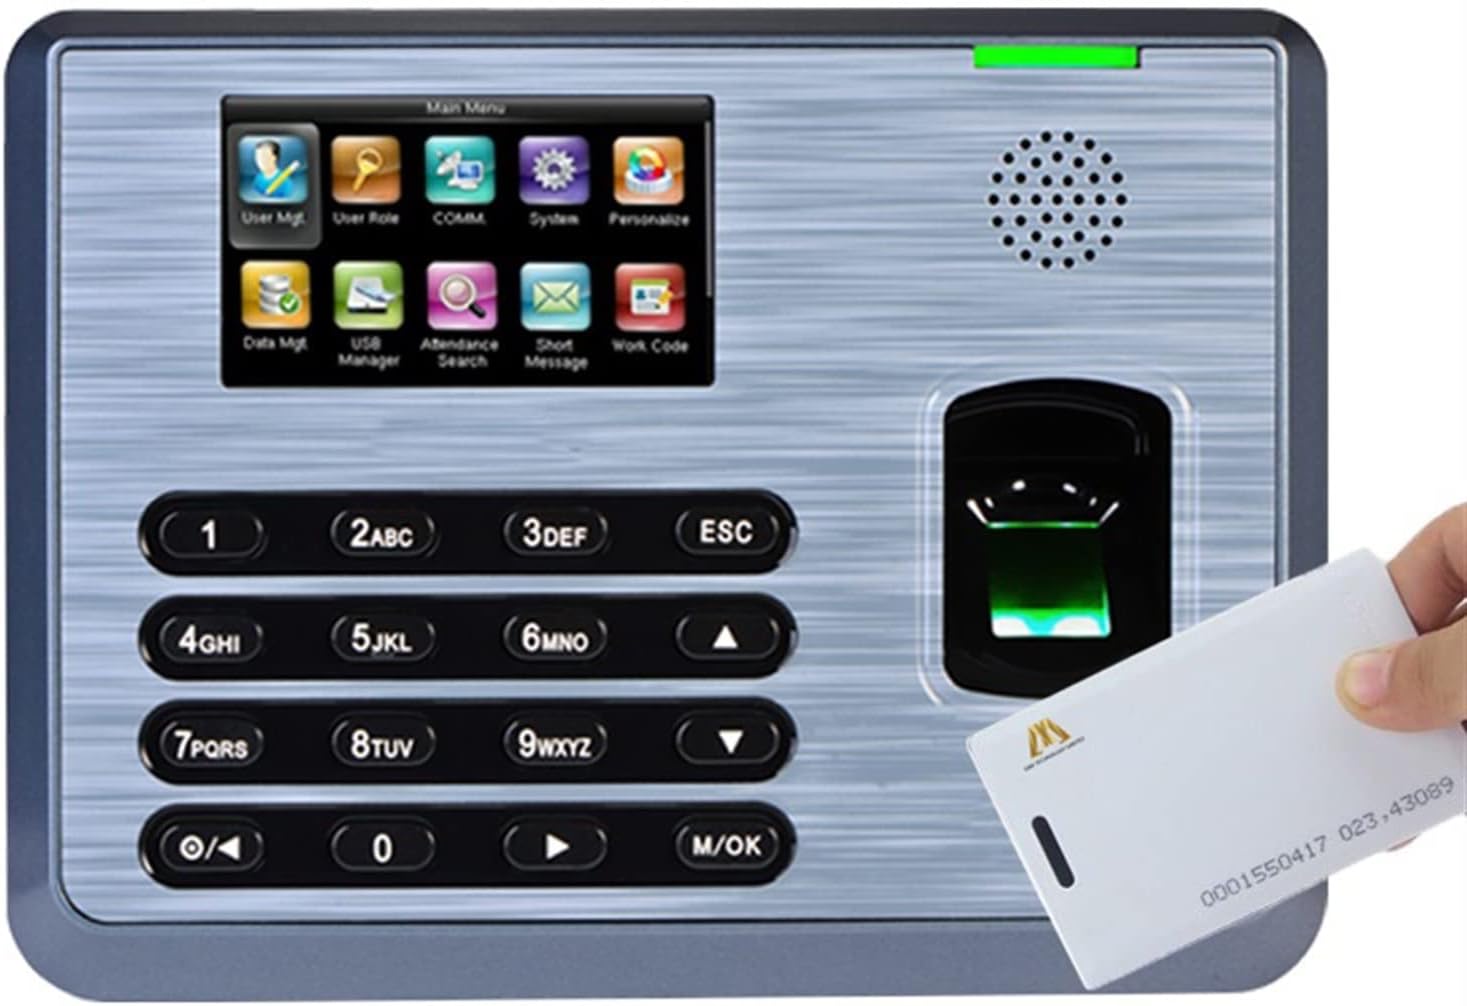
Figure 4: Registering an RFID card with the TX628 system.
5. Operating Instructions
5.1 Clocking In/Out
Employees can clock in or out using their registered fingerprint, RFID card, or PIN.
- Fingerprint: Place a registered finger firmly on the optical sensor. The device will confirm with a voice broadcast and display the user's name.
- RFID Card: Present a registered RFID card to the card reader area. The device will confirm with a voice broadcast and display the user's name.
- PIN: Enter the registered PIN using the keypad and press M/OK. The device will confirm with a voice broadcast and display the user's name.
5.2 Data Management
Attendance records can be downloaded for processing.
- USB Data Transfer: Insert a USB flash drive into the device's USB port. From the main menu, navigate to Data Mgt > Download Data. Select the desired data (e.g., attendance logs) and confirm the download.
- Network Data Transfer: If the device is connected via TCP/IP or WiFi, use the provided software (or compatible third-party software) on a connected computer to retrieve attendance data. Refer to the software's manual for specific instructions.
5.3 Bell Scheduling
To set up scheduled audible alerts:
- From the main menu, navigate to System > Bell Schedule.
- Add new bell times, specifying the hour, minute, and days of the week for the alert.
- Save the settings.
6. Maintenance
6.1 Cleaning the Fingerprint Sensor
Regular cleaning of the fingerprint sensor ensures optimal performance.
- Use a soft, lint-free cloth slightly dampened with isopropyl alcohol.
- Gently wipe the surface of the optical sensor.
- Do not use abrasive materials or harsh chemicals, as these can damage the sensor.
6.2 Data Backup
Periodically back up attendance data to an external storage device (e.g., USB flash drive) or a computer to prevent data loss.
6.3 Firmware Updates
Check the manufacturer's website for any available firmware updates. Follow the provided instructions carefully when performing updates to ensure system stability and access to new features.
7. Troubleshooting
| Problem | Possible Cause | Solution |
|---|---|---|
| Device does not power on. | No power supply; faulty adapter or cable. | Check power connection; ensure adapter is working; try a different outlet. |
| Fingerprint not recognized. | Finger is dirty, wet, or injured; sensor is dirty; fingerprint not properly registered. | Clean finger and sensor; try a different finger; re-register fingerprint if necessary. |
| RFID card not detected. | Card not registered; card is damaged; incorrect card type. | Ensure card is registered; try a different card; verify card compatibility (125KHZ). |
| Network connection failure. | Incorrect IP settings; cable issue; router problem. | Verify TCP/IP settings; check Ethernet cable; restart router/switch. |
| Data export fails via USB. | USB drive not formatted correctly; drive is full; drive is faulty. | Ensure USB drive is FAT32 formatted; use a different USB drive. |
8. Specifications
| Feature | Specification |
|---|---|
| Fingerprint Capacity | 3200 templates |
| Card Capacity | 10000 |
| Transaction Capacity | 80,000 |
| Hardware Platform | ZEM510 |
| Sensor | Optical Sensor |
| Algorithm Version | Finger v10.0 |
| Communication | RS232/485, TCP/IP |
| Optional Functions | ID/IC/HID, Webserver, Printer, 9-digit User ID, WiFi |
| Display | 3-inch TFT Screen |
| Power Supply | 5V DC 2A |
| Operating Temperature | 0°C - 45°C (32°F - 113°F) |
| Operating Humidity | 20% - 80% (non-condensing) |
| Product Dimensions | 1"W x 1"H (approximate, as per product data) |
| Item Weight | 1000 Grams (2.2 pounds) |
| Material | Metal |
9. Warranty and Support
For warranty information, technical support, or service inquiries, please refer to the documentation provided with your purchase or contact the seller directly. Keep your purchase receipt as proof of purchase for warranty claims.


