Introduction
Thank you for choosing the LIKIMIO 8-Drawer Dresser. This manual provides detailed instructions for assembly, operation, maintenance, and troubleshooting to ensure safe and proper use of your new furniture. Please read all instructions carefully before beginning assembly and retain this manual for future reference.
Safety Information
- Anti-Tip Device: Always install the included anti-tip device to prevent serious injury from furniture tip-over. Secure the dresser to a wall stud using the provided hardware.
- Weight Limits: Do not exceed the maximum weight capacity for the dresser top or individual drawers. Overloading can cause instability and damage.
- Children Safety: Keep small parts and packaging materials away from children during assembly. Do not allow children to climb on or play with the dresser.
- Placement: Place the dresser on a level, stable surface. Uneven surfaces can affect stability and drawer operation.
- Electrical Safety (Charging Station): Ensure the charging station is connected to a properly grounded electrical outlet. Do not overload the outlets. Disconnect power during cleaning or if any damage is observed.
- Assembly: Assemble the product according to the instructions. Do not use power tools unless specifically instructed, as overtightening screws can cause damage.
Package Contents
Before assembly, verify that all parts and hardware are present. If any items are missing or damaged, please contact customer support.
- Dresser panels (top, bottom, sides, back)
- Drawer components (fronts, sides, backs, bottoms)
- Drawer slides and runners
- Charging station unit
- Storage bag
- Handles/knobs
- Assembly hardware (screws, dowels, cam locks, etc.)
- Anti-tip kit
- Assembly tools (e.g., Allen wrench)
Assembly Instructions (Setup)
It is recommended to assemble this dresser with two people. Clear a spacious area and lay out all components on a soft, clean surface to prevent scratches.
- Prepare Components: Identify all panels and hardware using the provided labels.
- Assemble the Main Frame: Attach the side panels to the bottom panel using the designated hardware. Ensure all connections are secure.
- Install Back Panel: Secure the back panel to the main frame.
- Attach Top Panel: Fasten the top panel to the assembled frame.
- Install Drawer Slides: Attach the drawer slides to the interior side panels of the dresser frame according to the markings.
- Assemble Drawers: Construct each drawer by attaching the sides, back, and bottom to the drawer front. Insert the drawer runners.
- Attach Handles: Secure the handles to each drawer front.
- Insert Drawers: Carefully slide each assembled drawer into its corresponding slot on the dresser frame.
- Install Charging Station: Integrate the charging station into the designated cutout on the top panel. Ensure it is flush and secure.
- Attach Storage Bag: Secure the storage bag to the side of the dresser as shown in the diagrams.
- Install Anti-Tip Kit: Secure the dresser to a wall stud using the anti-tip hardware provided. This step is critical for safety.

Image: Overall dimensions and individual drawer sizes for assembly planning.
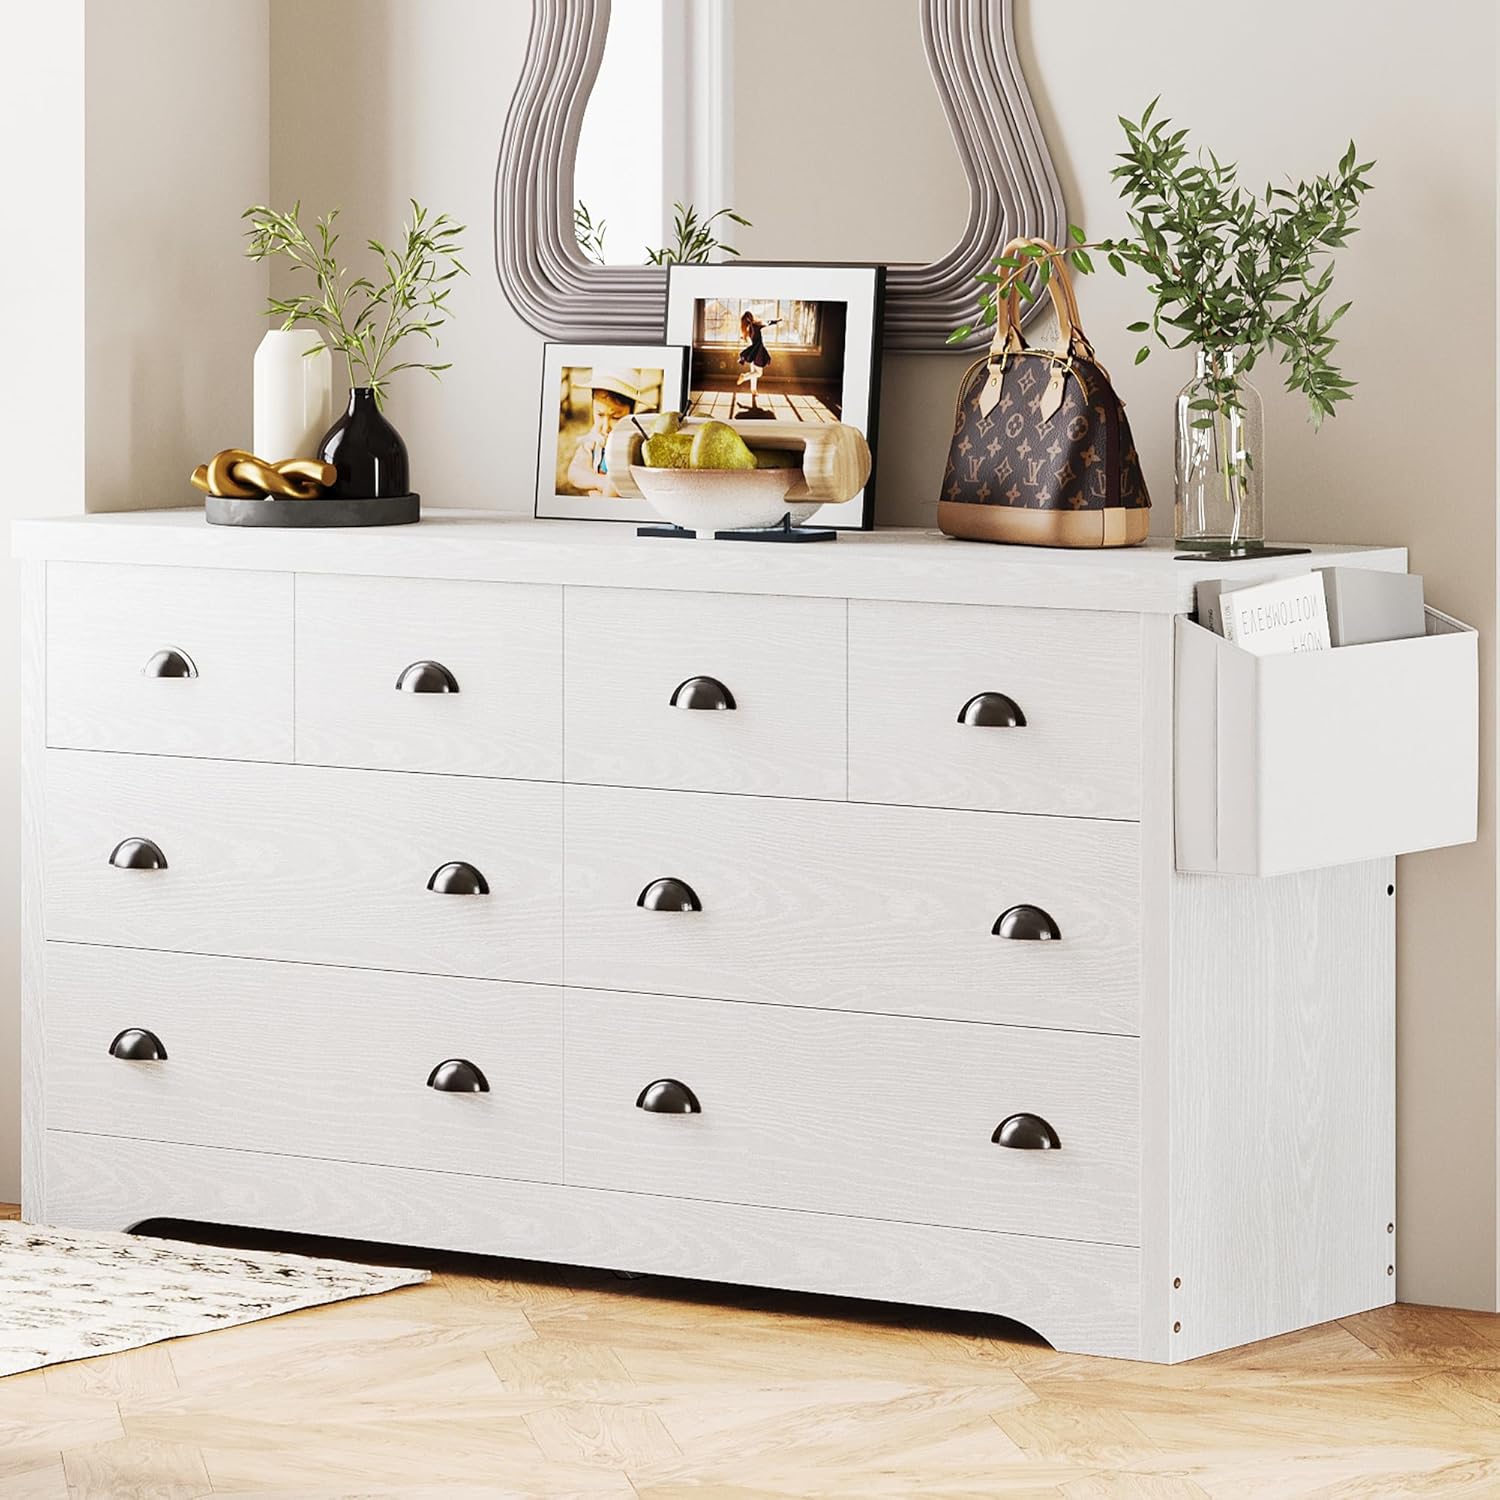
Image: Assembled dresser in a typical room environment.
Operating Instructions
Drawer Usage
- Opening/Closing: Gently pull or push the drawer handles to open and close. Avoid forcing drawers.
- Weight Distribution: Distribute items evenly within drawers to prevent strain on the slides.
- Drawer Capacity: The dresser features eight drawers, including four extra-wide drawers for larger items and four standard drawers. Refer to the specifications for approximate internal dimensions.
Charging Station
- Power Connection: Plug the charging station's power cord into a standard wall outlet.
- Using Outlets: The integrated charging station includes standard AC outlets and USB ports. Plug in electronic devices for charging.
- Overload Protection: Do not exceed the maximum power rating of the charging station.
Storage Bag
- Access: The side-mounted storage bag provides convenient access for smaller items like books, magazines, or remote controls.
- Capacity: Do not overload the storage bag to maintain its shape and attachment integrity.

Image: Internal drawer capacity and charging station location.

Image: Detail of the charging station with AC and USB ports.

Image: Detail of the attached storage bag.

Image: Dresser functioning as a TV stand.
Maintenance
- Cleaning: Wipe surfaces with a soft, damp cloth. Avoid harsh chemicals or abrasive cleaners that can damage the finish.
- Spills: Clean spills immediately to prevent staining or damage to the wood.
- Hardware Check: Periodically check all screws and fasteners to ensure they are tight. Retighten as necessary.
- Drawer Slides: If drawers become stiff, a small amount of silicone lubricant can be applied to the slides.
Troubleshooting
- Drawers not closing smoothly:
- Check if the drawer slides are properly aligned and free of obstructions.
- Ensure the drawer is not overloaded or unbalanced.
- Verify all assembly hardware for the drawer and slides is securely tightened.
- Dresser feels wobbly:
- Ensure the dresser is on a level surface. Adjust if necessary.
- Check all frame assembly hardware for tightness.
- Confirm the anti-tip device is correctly installed and secured to the wall.
- Charging station not working:
- Verify the power cord is securely plugged into a functional wall outlet.
- Check if the wall outlet itself is receiving power (test with another device).
- Ensure the device being charged is functioning correctly.
- Do not exceed the maximum load capacity of the charging station.
Specifications
| Feature | Detail |
|---|---|
| Brand | LIKIMIO |
| Model Name | HK-DCD-03 |
| Product Dimensions (D x W x H) | 15.8"D x 59.1"W x 31.5"H (40cm D x 150cm W x 80cm H) |
| Color | White |
| Material | Engineered Wood |
| Number of Drawers | 8 |
| Item Weight | 110 Pounds (50 kg) |
| Assembly Required | Yes |
| Special Features | Integrated Charging Station (AC outlets, USB ports), Side Storage Bag |
Warranty and Support
For warranty information, missing parts, or technical assistance, please contact LIKIMIO customer support. Refer to your purchase documentation for specific warranty terms and contact details. You can typically find support information on the manufacturer's official website or through the retailer where the product was purchased.
Online Support: Visit the LIKIMIO Store on Amazon: LIKIMIO Store