1. Introduction
This manual provides essential instructions for the safe and effective use of your BBRKIN Biometric Pistol Safe, Model PS01F. Please read this manual thoroughly before operating the safe and retain it for future reference. Proper installation and operation are crucial for ensuring the security of your stored items.
2. Safety Information
- Always store firearms unloaded and separate from ammunition.
- Keep the safe locked at all times when not in use.
- Do not store the backup keys inside the safe. Keep them in a secure, separate location.
- Ensure the safe is mounted or secured properly to prevent unauthorized removal.
- Keep children and unauthorized individuals away from the safe.
- Do not attempt to force the safe open if it malfunctions. Refer to the troubleshooting section or contact support.
3. Package Contents
Verify that all items are present in your package:
- BBRKIN Biometric Pistol Safe (Model PS01F)
- Backup Keys (2)
- Mounting Screws
- Security Cable
- User Manual (this document)
4. Product Overview
The BBRKIN Biometric Pistol Safe offers multiple access methods and robust construction for secure storage.

Image 1: BBRKIN Biometric Pistol Safe with lid open, displaying a handgun and the control panel.
Key Features:
- Biometric Fingerprint Access: Quick and secure access using registered fingerprints.
- Digital Keypad Access: Programmable 4-8 digit PIN code for reliable entry.
- Backup Key Access: Traditional key entry for emergency or alternative access.
- Rugged Construction: 18-gauge pry-resistant door and dual-layer steel housing.
- Silent Mode: Option to disable keypad beeps for discreet operation.
- Interior LED Light: Illuminates the safe's interior for visibility in low light.
- Protective Foam Padding: Interior foam protects contents from scratches and damage.
- Emergency Type-C Charging: Allows temporary power supply if batteries are depleted.
Access Methods:

Image 2: Visual representation of the three access methods: fingerprint, digital keypad, and backup keys.
Interior Features:
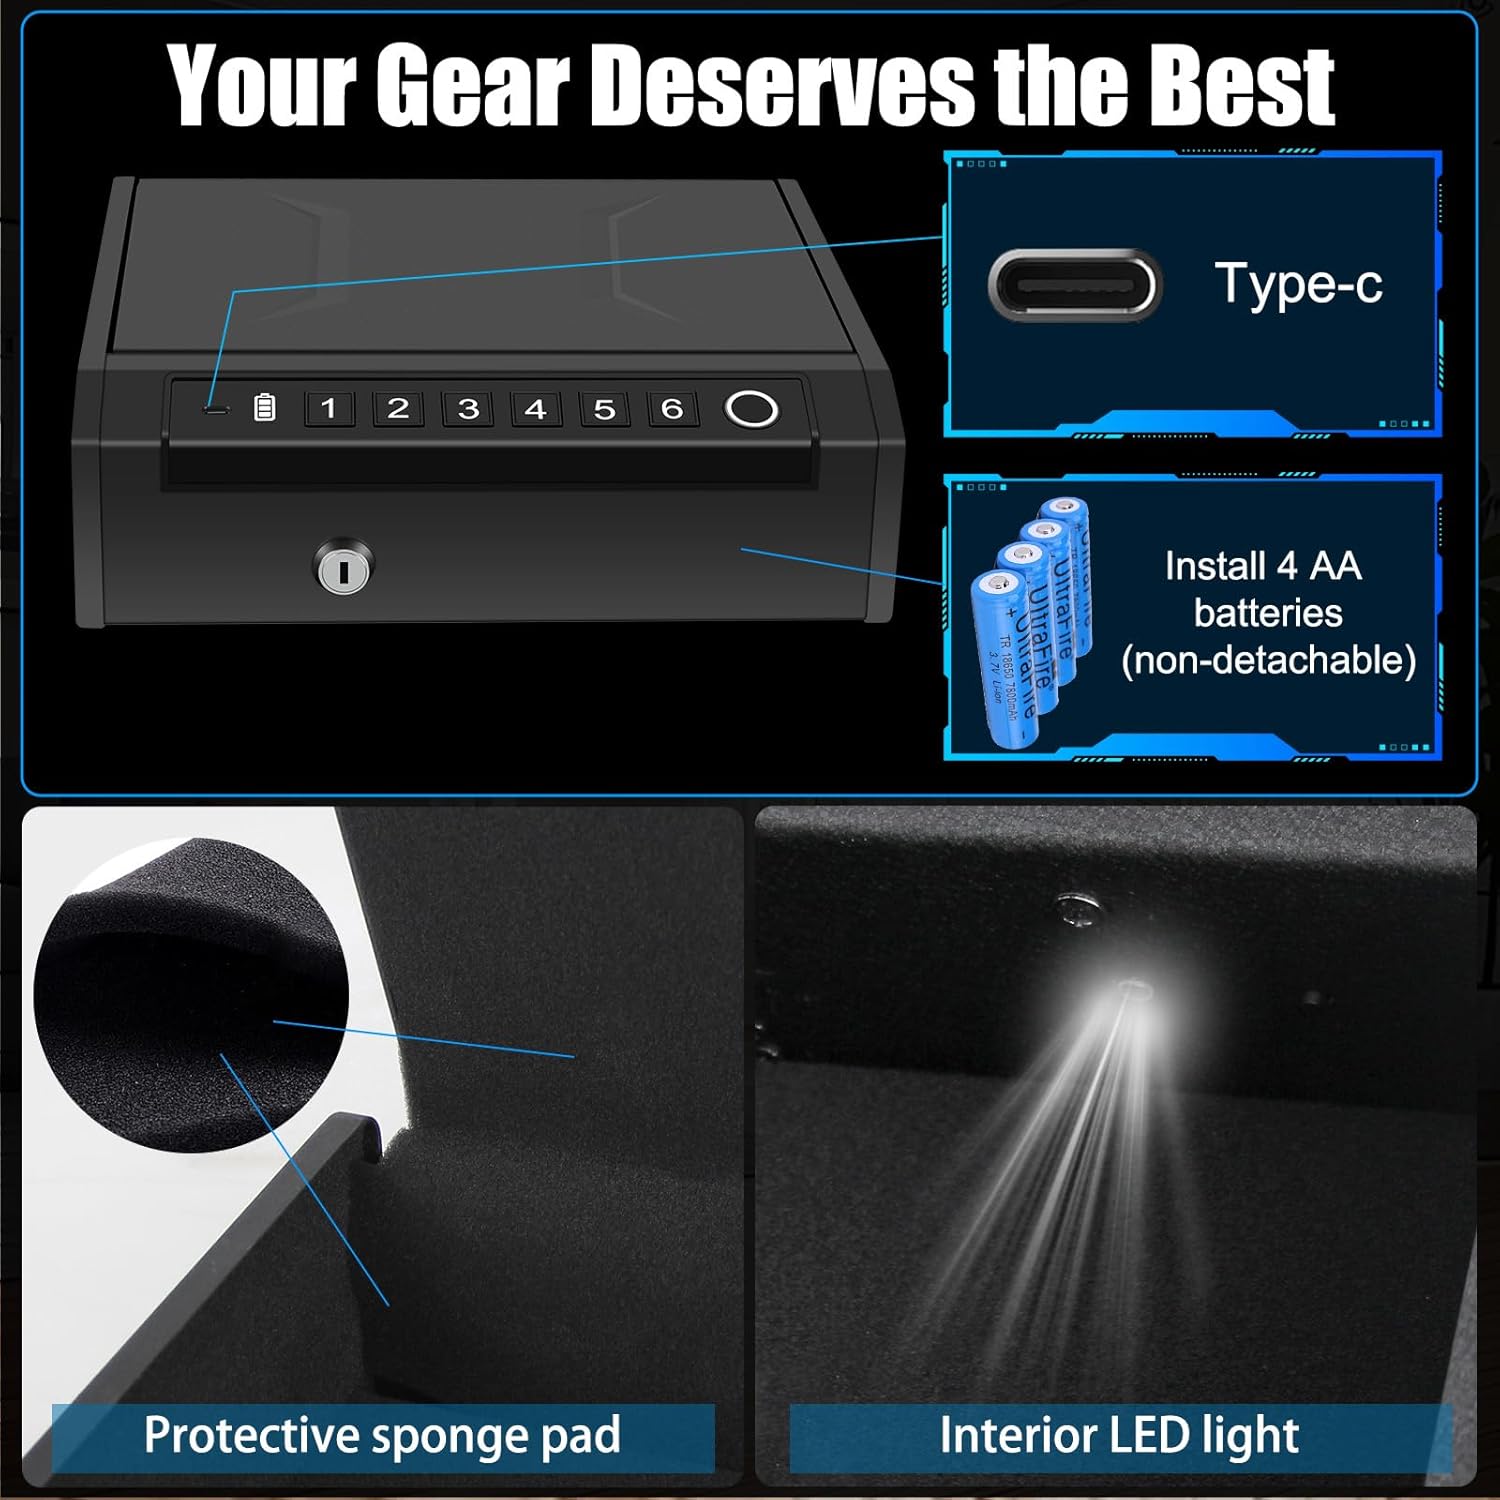
Image 3: Details of the safe's interior, highlighting the protective sponge pad and the integrated LED light.
5. Setup
5.1 Battery Installation
- Locate the battery compartment, typically on the underside of the lid or within the safe's interior.
- Insert 4 AA alkaline batteries (not included), ensuring correct polarity (+/-).
- Close the battery compartment securely. The safe will emit a beep indicating successful power-up.
5.2 Initial Code Setup
The safe comes with a default code (e.g., 1-2-3-4). It is highly recommended to change this immediately.
- Open the safe using the backup key.
- Locate the program button inside the safe (often a small red button).
- Press and hold the program button for approximately 3-5 seconds until the safe beeps.
- Enter your new 4-8 digit PIN code using the keypad (digits 1-6).
- Press the program button again to confirm. The safe will beep twice to indicate successful programming.
- Test your new code with the safe open to ensure it works correctly before closing.
5.3 Fingerprint Enrollment
The safe can store up to 100 unique fingerprints.
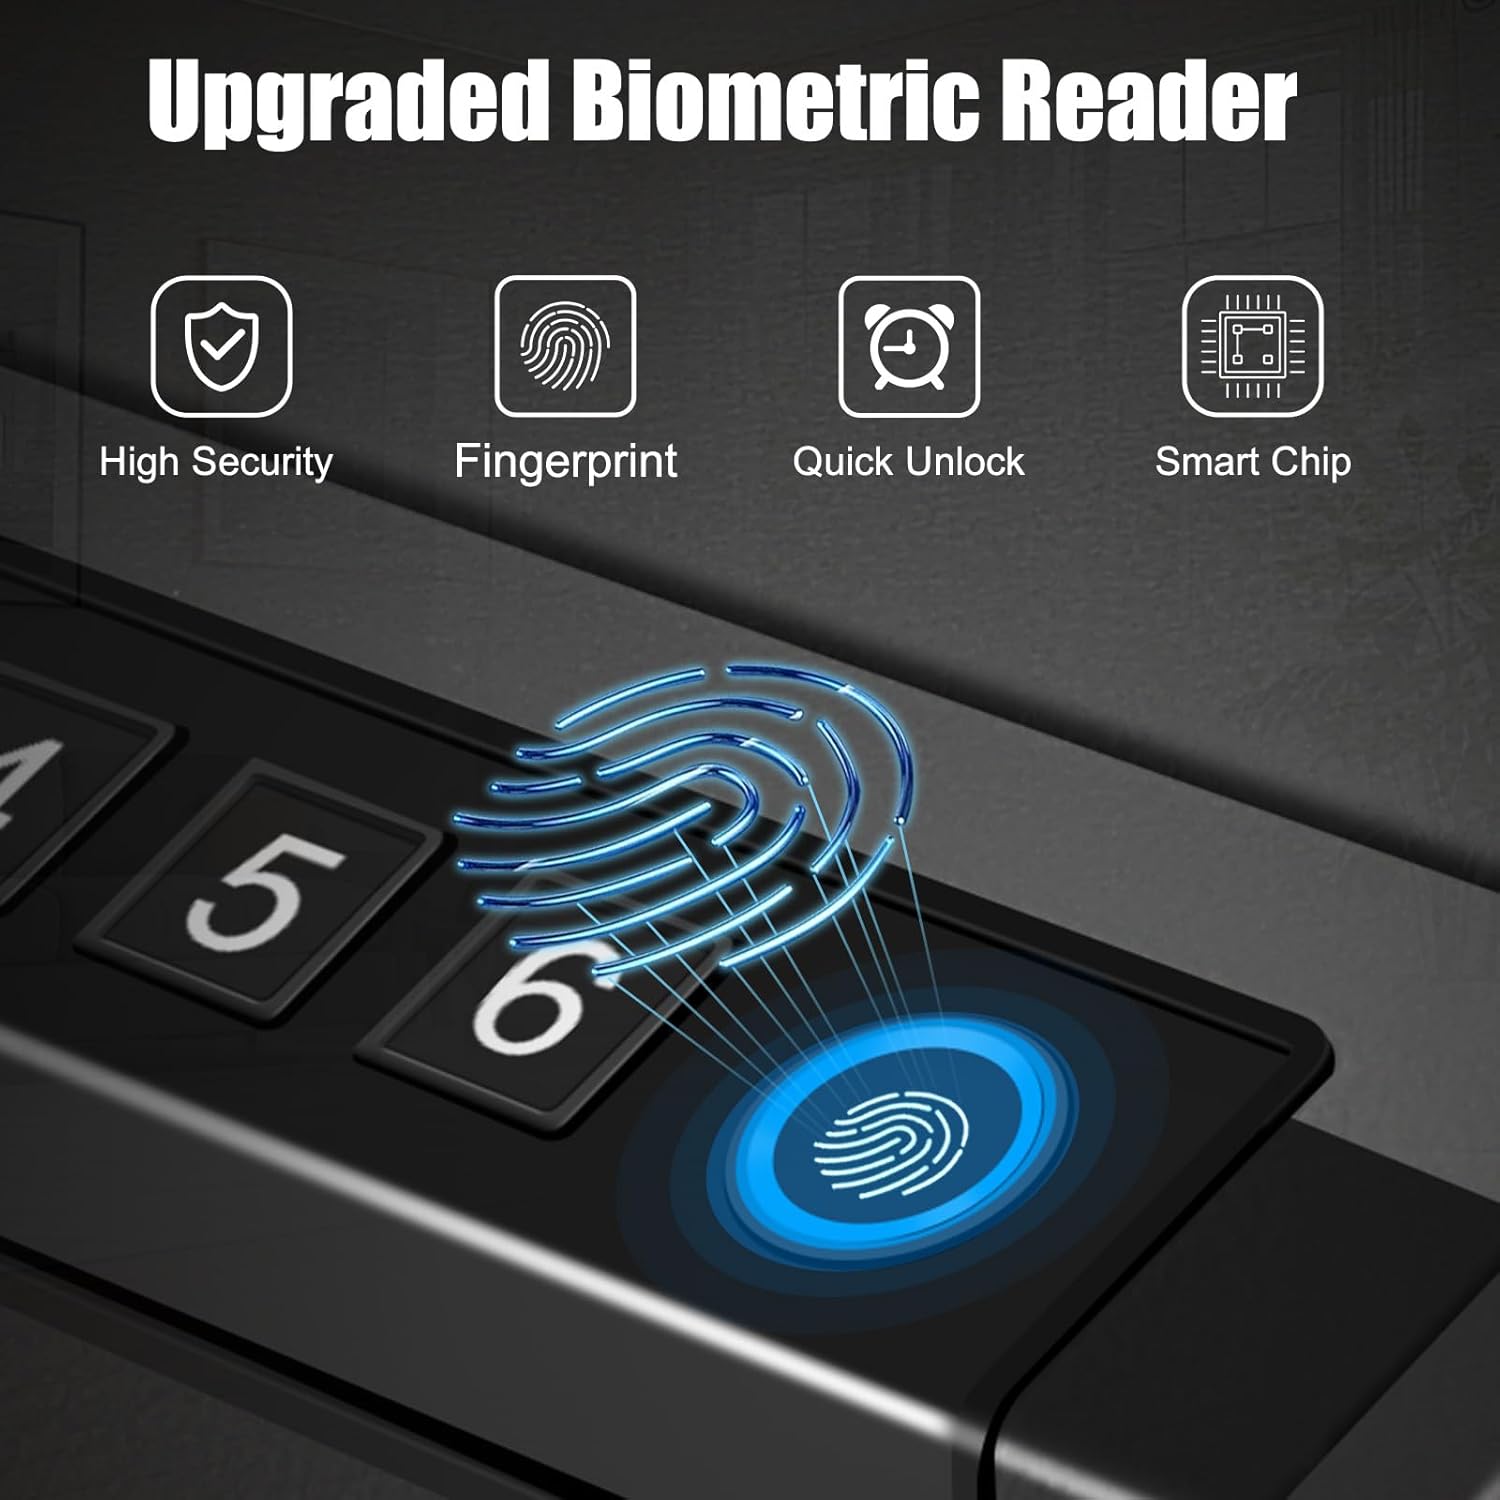
Image 4: Detail of the biometric fingerprint reader, indicating its location on the safe's control panel.
- Open the safe using the backup key or current PIN code.
- Locate the program button inside the safe.
- Press the program button once. The fingerprint scanner light will illuminate.
- Place your finger firmly on the fingerprint scanner. Lift and repeat this process several times (usually 4-5 times) from different angles until the safe beeps twice, indicating successful enrollment.
- To enroll additional fingerprints, repeat steps 3-4 for each finger.
- Test each enrolled fingerprint with the safe open to ensure it works correctly before closing.
5.4 Mounting the Safe
The safe can be freestanding or mounted for added security.
- Using Mounting Screws: The safe includes pre-drilled holes in the bottom. Use the provided mounting screws to secure the safe to a solid surface (e.g., floor, wall stud, or shelf).
- Using Security Cable: Loop the security cable around a fixed object and through the designated slot on the safe. This provides an additional layer of security against theft.
6. Operating Instructions
6.1 Opening with Fingerprint
- Place an enrolled finger firmly on the biometric scanner.
- If recognized, the safe will beep, and the lid will automatically open.
6.2 Opening with Keypad
- Enter your programmed 4-8 digit PIN code.
- If the code is correct, the safe will beep, and the lid will automatically open.
6.3 Opening with Backup Key
- Insert the backup key into the keyhole on the front of the safe.
- Turn the key clockwise to unlock the safe. The lid will then open manually or automatically depending on the spring mechanism.
6.4 Silent Mode
To enable or disable silent mode (keypad beeps):
- Press and hold the '1' button on the keypad for approximately 3 seconds.
- The safe will indicate the change (e.g., a single beep for silent mode off, no beep for silent mode on).
6.5 Emergency Power (Type-C)
If the batteries are completely depleted and you cannot open the safe via biometric or keypad access:

Image 5: The safe connected to a Type-C power source for emergency battery charging.
- Locate the Type-C port on the front of the safe.
- Connect a Type-C cable to a power source (e.g., power bank, wall adapter).
- Once temporary power is supplied, you can use your fingerprint or PIN code to open the safe.
- Replace the internal AA batteries immediately after opening.
7. Maintenance
7.1 Battery Replacement
When the battery indicator light shows low power, replace all 4 AA batteries promptly. Always use new, high-quality alkaline batteries.
7.2 Cleaning
Wipe the safe's exterior with a soft, damp cloth. Avoid abrasive cleaners or solvents that could damage the finish or electronic components. Keep the fingerprint scanner clean and dry for optimal performance.
8. Troubleshooting
- Safe does not open with fingerprint/keypad:
- Check battery level. Replace batteries if low.
- Ensure your finger is clean and dry when using the biometric scanner. Try re-enrolling your fingerprint.
- Verify the PIN code is entered correctly.
- Use the backup key for emergency access.
- Safe lid does not latch or close properly:
- This can often be resolved by replacing the batteries, even if they seem relatively new. A fresh set of batteries can reset the locking mechanism.
- Ensure no obstructions are preventing the lid from closing fully.
- Keypad is not responding:
- Check battery level.
- If multiple incorrect attempts are made, the safe may enter a lockout mode. Wait a few minutes or use the backup key.
- Alarm sounds unexpectedly:
- The safe has an audible alarm system for tampering or multiple incorrect entries. Ensure the safe is not being tampered with and that correct access methods are used.
9. Specifications
| Feature | Specification |
|---|---|
| Brand | BBRKIN |
| Model Number | PS01F |
| Product Dimensions | 10"D x 11.5"W x 3.3"H |
| Item Weight | 7.56 pounds |
| Lock Type | Biometric, Electronic Combination Lock, Backup Key |
| Material | Carbon Steel, Foam, Spring Steel |
| Capacity | 0.25 Cubic Feet |
| Mounting Type | Freestanding, Tabletop |
| Power Source | 4 AA Batteries (not included), Type-C for emergency power |
| Special Features | Alarm System, Anti-Theft, Biometric Fingerprint, Combination Lock, Silent Mode, Interior LED Light |
10. Warranty and Support
For warranty information or technical support, please refer to the contact details provided with your purchase documentation or visit the official BBRKIN website. Keep your purchase receipt as proof of purchase.
