1. Product Overview
This manual provides instructions for the assembly, operation, and maintenance of your Generic Greenhouse. Designed for hobby gardeners, this large rectangular greenhouse (236.2 in x 118.1 in x 78.7 in) offers a controlled environment for growing various plants. It features a rust-proof galvanized steel frame and a UV-resistant green polyethylene (PE) mesh fabric cover, ensuring durability and optimal light conditions.
The greenhouse includes eight ventilation windows for airflow and a matte finish that blends with outdoor spaces.
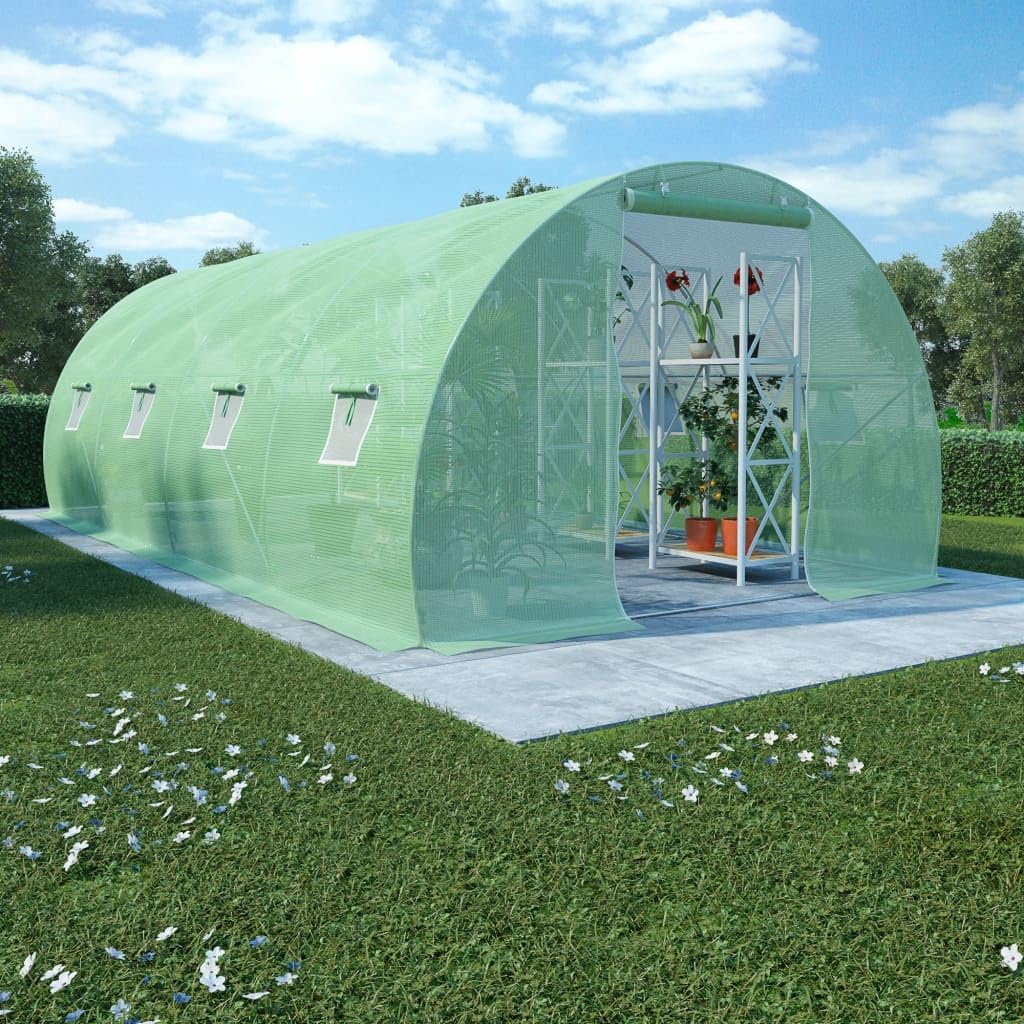
Figure 1.1: Overview of the Generic Greenhouse, highlighting key features such as the ventilation window, galvanized steel frame connection, and door buckle mechanism.
2. Safety Information
- Assembly: Always follow assembly instructions carefully. Two people are recommended for safe and efficient assembly.
- Location: Choose a level, sheltered location for the greenhouse to minimize wind exposure. Ensure adequate clearance around the structure.
- Anchoring: Securely anchor the greenhouse to the ground to prevent it from being lifted or damaged by strong winds. Additional anchoring kits may be purchased separately if needed.
- Sharp Edges: Be cautious of sharp edges on metal components during assembly. Wear protective gloves if necessary.
- Ventilation: Ensure proper ventilation to prevent overheating, especially during warm weather.
- Children and Pets: Keep children and pets away from the assembly area. Do not allow them to play unsupervised inside or around the greenhouse.
- Electrical: Do not install electrical equipment inside the greenhouse without proper waterproofing and safety precautions.
3. Package Contents
Before beginning assembly, verify that all components are present and undamaged. If any parts are missing or damaged, contact customer support.
- Galvanized Steel Frame Components
- Green PE Mesh Fabric Cover
- Connectors and Fasteners
- Ventilation Window Panels (8 units)
- Assembly Instructions Manual (this document)
4. Setup and Assembly
Assembly requires approximately 2 hours with two people. Ensure you have sufficient space and the necessary tools (e.g., gloves, step ladder, measuring tape).
4.1. Frame Assembly
- Unpack all galvanized steel frame components and lay them out.
- Identify the base rails and connect them to form the rectangular base of the greenhouse.
- Assemble the arch sections by connecting the curved poles. Refer to the included diagrams for correct orientation.
- Attach the assembled arch sections to the base rails using the provided connectors and fasteners. Ensure all connections are secure.
- Install the horizontal support bars between the arch sections to provide structural rigidity.

Figure 4.1: Detail of a galvanized steel frame connection, illustrating how poles are joined.
4.2. Cover Installation
- Carefully unfold the green PE mesh fabric cover.
- Drape the cover over the assembled frame, ensuring it is centered and evenly distributed.
- Secure the cover to the frame using the integrated ties, clips, or fasteners. Start from one end and work your way around, pulling the cover taut to minimize wrinkles.
- Ensure the base of the cover is properly extended to allow for anchoring.
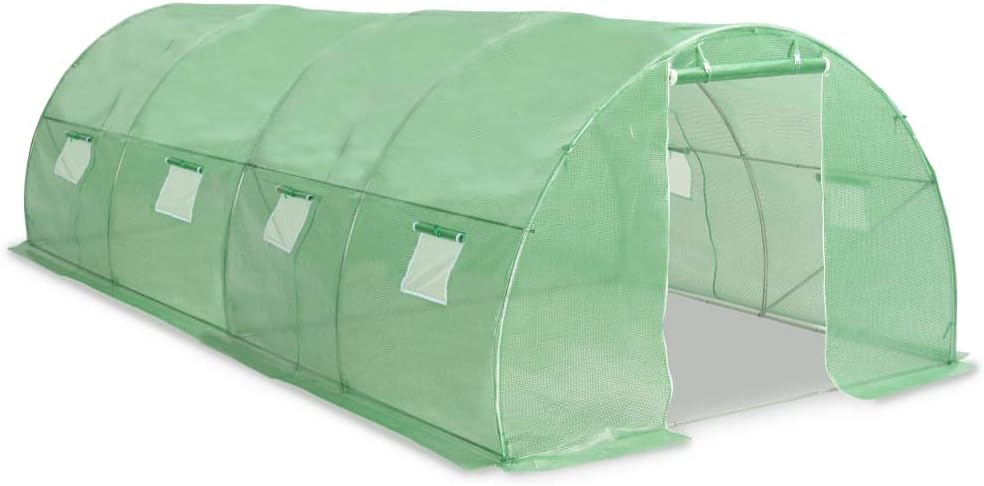
Figure 4.2: The greenhouse with its green PE mesh cover fully installed and the front door closed.
4.3. Door and Window Setup
- Locate the zippered door opening at one end of the greenhouse.
- The door can be rolled up and secured using the provided buckles or ties for easy access and additional ventilation.
- Identify the eight ventilation windows along the sides of the greenhouse. These windows typically feature mesh screens and can be rolled up and secured to allow airflow.

Figure 4.3: Detail showing the door panel rolled up and fastened with a buckle for open access or ventilation.

Figure 4.4: Detail of a ventilation window, featuring a mesh screen for insect protection and airflow.
4.4. Anchoring
Once the greenhouse is fully assembled, it is crucial to anchor it securely to the ground. Use ground stakes, weights, or other appropriate anchoring methods suitable for your soil type and local weather conditions. Proper anchoring prevents wind damage.
5. Operating Instructions
5.1. Ventilation Management
- The greenhouse is equipped with eight ventilation windows. Open these windows during warm periods to allow air circulation and prevent excessive heat buildup.
- Close windows during cooler temperatures or strong winds to maintain warmth and protect plants.
- The front door can also be rolled up and secured for additional airflow.
5.2. Light and UV Protection
The green PE mesh fabric cover is UV-resistant, protecting your plants from harmful sun rays while allowing sufficient light for growth. Monitor plant health and adjust shading if necessary, though the cover is designed for optimal light transmission.
5.3. Plant Care
Regularly monitor the temperature and humidity inside the greenhouse. Adjust ventilation and watering schedules according to the specific needs of your plants and local climate conditions.
6. Maintenance
- Cleaning: Periodically clean the PE mesh cover with mild soap and water to remove dirt and debris, ensuring maximum light penetration. Avoid harsh chemicals or abrasive cleaners.
- Frame Inspection: Regularly inspect the galvanized steel frame for any signs of rust, damage, or loose connections. Tighten fasteners as needed.
- Cover Inspection: Check the cover for tears, punctures, or wear. Repair small damages promptly with appropriate repair kits to extend the cover's lifespan.
- Anchoring Check: Verify that the greenhouse remains securely anchored, especially after strong winds or heavy rainfall.
- Winter Care: In areas with heavy snowfall, it is recommended to remove snow accumulation from the roof to prevent structural damage. Consider disassembling and storing the greenhouse cover during harsh winter months for prolonged durability.
7. Troubleshooting
| Problem | Possible Cause | Solution |
|---|---|---|
| Greenhouse overheating | Insufficient ventilation; high ambient temperature. | Open all ventilation windows and the door. Consider additional shading if temperatures remain high. |
| Poor plant growth | Inadequate light; improper temperature/humidity; pest infestation. | Ensure cover is clean for maximum light. Adjust ventilation. Check for pests and treat as necessary. |
| Water pooling inside | Improper cover tension; condensation. | Ensure cover is taut and properly secured. Increase ventilation to reduce condensation. |
| Greenhouse unstable in wind | Insufficient anchoring; strong winds. | Reinforce anchoring with additional stakes or weights. Consider relocating to a more sheltered spot. |
8. Specifications
- Model: B0F92HW93P
- Dimensions (W x L x H): 300 x 600 x 200 cm (118.1 x 236.2 x 78.7 inches)
- Color: Green
- Shape: Rectangular
- Frame Material: Galvanized Steel
- Cover Material: Green PE (Polyethylene) Mesh Fabric, UV-resistant
- Ventilation: 8 Windows
- Weight: 27.56 kg (Note: Original product data listed 2756 kg, which has been corrected to 27.56 kg based on typical greenhouse weights and other product information.)
- Assembly Required: Yes
- Recommended Number of People for Assembly: 2
- SKU: 45536
- EAN: 8718475723417
9. Warranty and Support
For warranty information or technical support, please refer to the retailer's policy or contact the manufacturer directly. Keep your purchase receipt as proof of purchase.