1. Product Overview
The KAADAS R6-5 Smart Lock (Model GQ93) is an advanced digital door lock designed for enhanced security and convenience. It offers multiple access methods, including Face ID, fingerprint recognition, password entry, RFID card, and traditional mechanical key. Constructed with an aluminum body, this lock is suitable for door thicknesses ranging from 45mm to 110mm and features a rechargeable Li-ION battery for reliable operation.

Image 1.1: Front and back view of the KAADAS R6-5 Smart Lock, showing the exterior keypad and interior locking mechanism.
2. Key Features
- Multiple Unlocking Methods: Supports Face ID, Fingerprint, Password, RFID Card, and Mechanical Key for versatile access.
- Rechargeable Battery: Equipped with a Li-ION rechargeable battery for sustained power.
- Durable Construction: Features a robust aluminum body for enhanced security and longevity.
- Wide Door Compatibility: Designed for door thicknesses between 45mm and 110mm.
3. Setup and Installation
Proper installation is crucial for the optimal performance of your KAADAS R6-5 Smart Lock. It is recommended to have the lock installed by a qualified professional. The following steps provide a general overview of the installation process.
3.1. Pre-Installation Check
- Verify door thickness is within 45-110mm.
- Ensure all components are present as listed in the packaging.
- Confirm the door frame is clear and prepared for the strike plate.
3.2. Installation Steps (General)
- Prepare the Door: Drill necessary holes according to the provided template.
- Install Mortise/Rim Lock Body: Secure the main lock mechanism into the door edge.
- Install Exterior Panel: Mount the exterior keypad unit, ensuring cables are routed correctly.
- Install Interior Panel: Connect the interior panel to the exterior panel's cables and secure it to the door.
- Install Strike Plate: Attach the strike plate to the door frame, aligning it with the lock bolt.
- Insert Batteries: Install the rechargeable Li-ION battery into the designated compartment.
- Initial Setup: Follow the on-screen prompts or voice guidance for initial programming, including setting the master password.

Image 3.1: Exterior view of the KAADAS R6-5 Smart Lock installed on a wooden door, showing the sleek design.

Image 3.2: Interior view of the KAADAS R6-5 Smart Lock installed on a wooden door, showing the manual turn knob and battery compartment.
4. Operating Instructions
The KAADAS R6-5 Smart Lock offers multiple convenient ways to unlock your door.
4.1. Unlocking with Face ID
- Approach the lock. The Face ID sensor will activate.
- Position your face within the recognition area.
- Upon successful recognition, the lock will disengage.
4.2. Unlocking with Fingerprint
- Place your registered finger flat on the fingerprint sensor.
- Hold until the lock confirms recognition and disengages.
4.3. Unlocking with Password
- Touch the keypad to activate it.
- Enter your registered password followed by the '#' key.
- The lock will disengage if the password is correct.
4.4. Unlocking with RFID Card
- Place your registered RFID card against the card reader area on the exterior panel.
- The lock will disengage upon successful card recognition.
4.5. Unlocking with Mechanical Key
- Insert the mechanical key into the emergency keyhole.
- Turn the key to unlock the door. This method is typically used for emergencies or when the battery is depleted.
4.6. Locking the Door
- Automatic Locking: The lock is designed to automatically lock after a set period once the door is closed.
- Manual Locking: From the exterior, touch the keypad or press the '#' key. From the interior, use the manual turn knob.
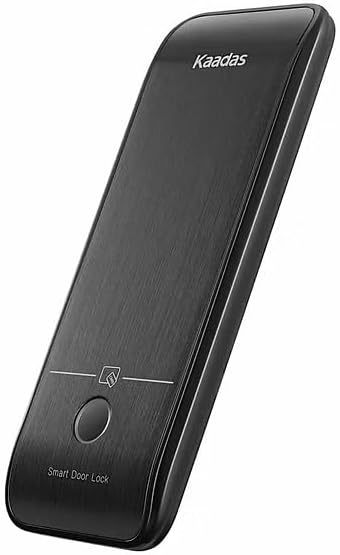
Image 4.1: Close-up of the KAADAS R6-5 Smart Lock's exterior keypad, highlighting the numerical input and fingerprint sensor for access.
5. Maintenance
Regular maintenance ensures the longevity and optimal performance of your smart lock.
- Battery Management: The lock uses a rechargeable Li-ION battery. Recharge the battery when the low battery indicator appears. Avoid completely draining the battery.
- Cleaning: Wipe the lock's exterior surfaces with a soft, dry cloth. Avoid using abrasive cleaners, solvents, or harsh chemicals, as these can damage the finish and electronic components.
- Sensor Care: Keep the fingerprint sensor and Face ID camera lens clean and free of dust or smudges for accurate recognition.
- Mechanical Parts: Periodically check the screws and mounting for tightness. Do not lubricate the internal lock mechanism unless specifically instructed by the manufacturer.
6. Troubleshooting
If you encounter issues with your KAADAS R6-5 Smart Lock, refer to the following common problems and solutions:
| Problem | Possible Cause | Solution |
|---|---|---|
| Lock does not respond. | Low or depleted battery. | Recharge the Li-ION battery. Use the emergency mechanical key if completely drained. |
| Fingerprint/Face ID not recognized. | Sensor/camera is dirty; unregistered fingerprint/face; improper placement. | Clean the sensor/camera. Ensure your fingerprint/face is registered. Try repositioning your finger/face correctly. |
| Password not accepted. | Incorrect password entered; keypad not active. | Ensure the keypad is active before entering the password. Verify the correct password. |
| Lock is jammed or difficult to operate. | Misalignment during installation; debris in the latch mechanism. | Check for obstructions around the latch and strike plate. If misalignment is suspected, consult a professional for adjustment. |
7. Specifications
| Feature | Detail |
|---|---|
| Model Number | GQ93 |
| Unlocking Methods | Face ID, Fingerprint, Password, Key, RFID Card |
| Material | Aluminum |
| Color | Black |
| Door Thickness Compatibility | 45-110mm |
| Battery Type | Rechargeable Li-ION |
| Item Weight | 10 Kilograms |
| Product Dimensions | 43.5 x 7.5 x 6.5 cm |
| Manufacturer | Gouqiang |
| Lock Type | Rim Lock |
8. Warranty and Support
For warranty information and technical support, please refer to the documentation provided with your purchase or contact the retailer/manufacturer directly. Keep your proof of purchase for warranty claims.