1. Introduction
This user manual provides detailed instructions for the installation, operation, and maintenance of your LAMTTO 10.25 Inch Wireless CarPlay Android Auto Display. Please read this manual thoroughly before using the product to ensure proper functionality and safety. Keep this manual for future reference.
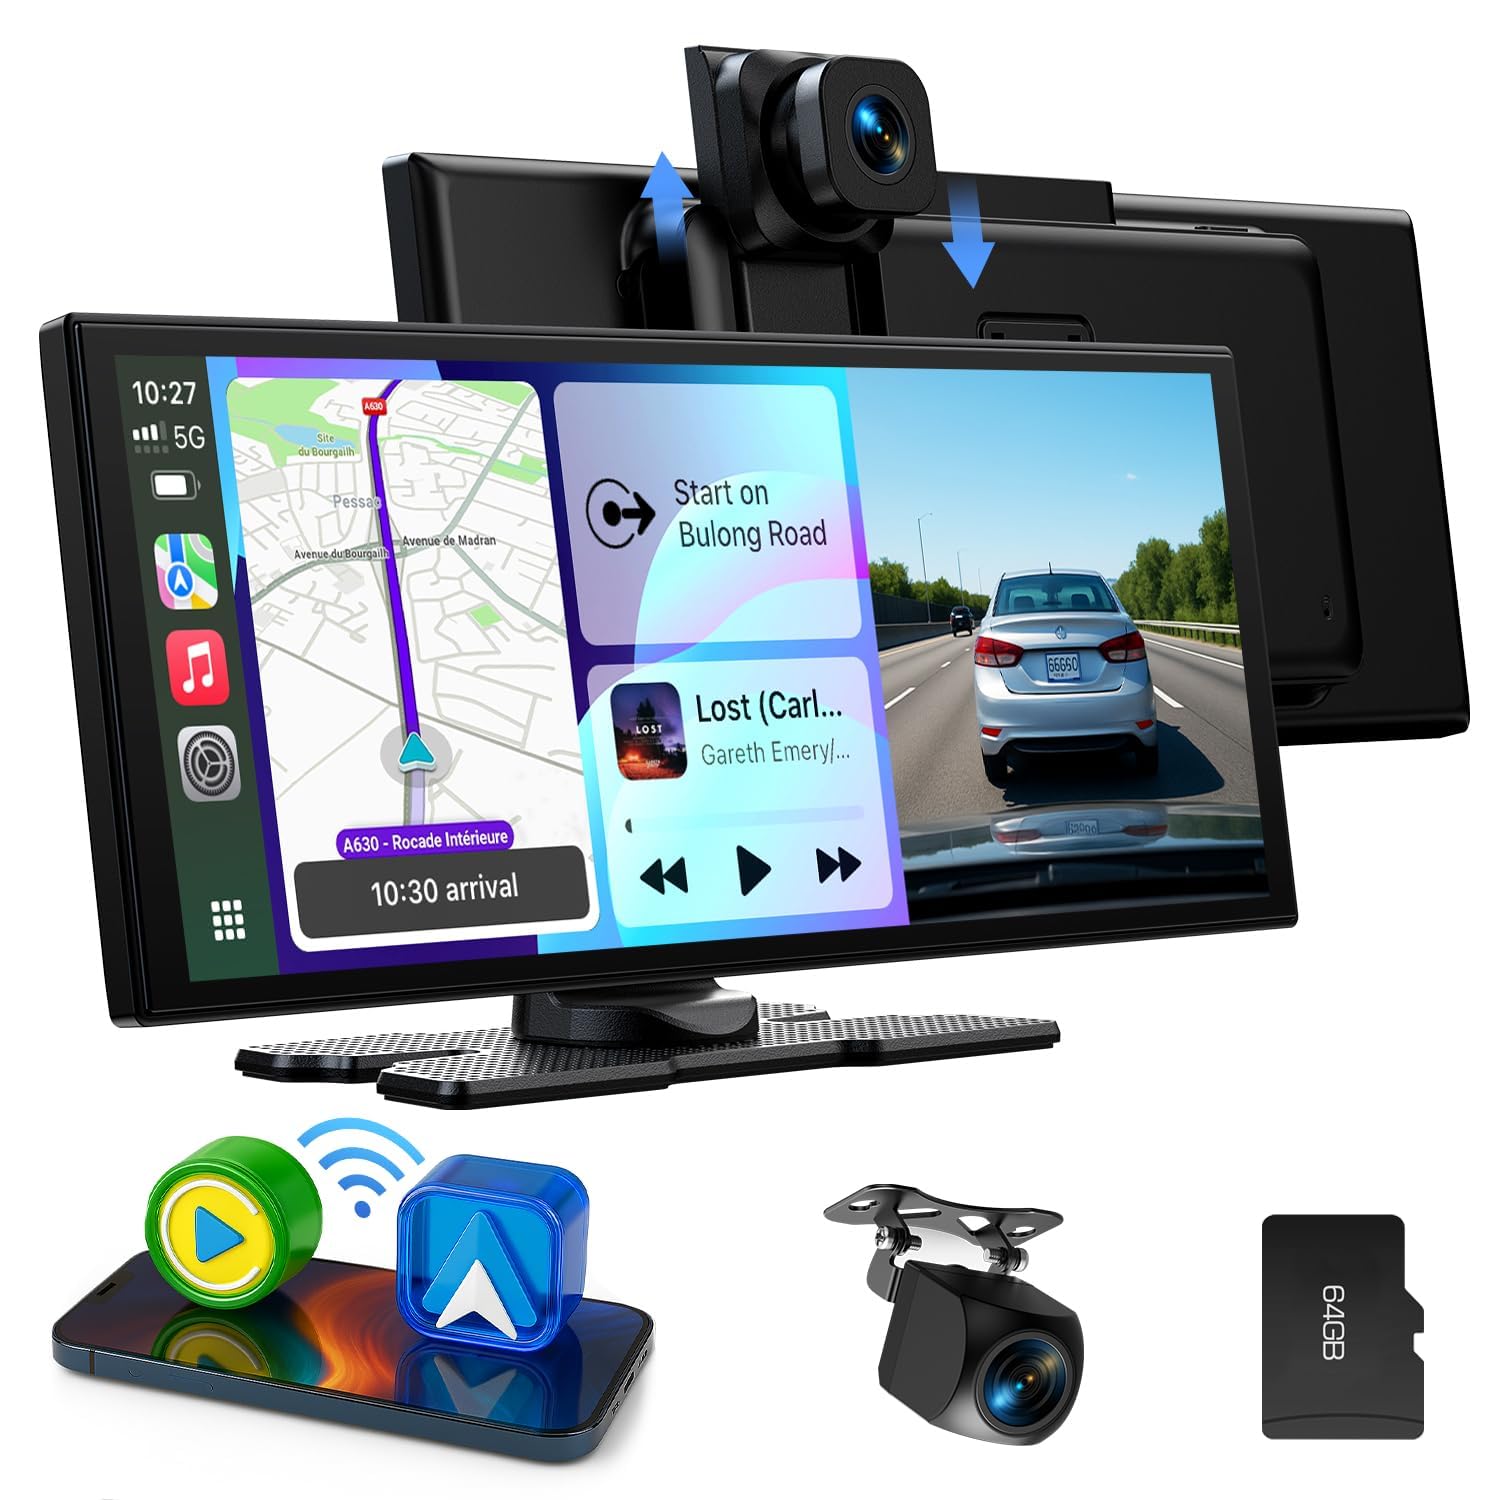
The LAMTTO 10.25 Inch Wireless CarPlay Android Auto Display.
2. Product Overview
Key Features
- 10.25-inch In-Cell Touchscreen: Large, high-resolution IPS display for clear navigation and easy operation.
- Wireless CarPlay & Android Auto: Seamless smartphone integration for navigation, music, calls, and messages.
- Integrated Dashcam System: Features a 2.5K front camera and a 1080P rear camera for comprehensive recording.
- Voice Assistant Support: Control functions via Siri or Google Assistant for hands-free operation.
- AirPlay & Android Cast: Stream content from your smartphone to the display.
- Multiple Audio Output Options: Built-in speakers, Bluetooth connection to vehicle, FM transmission, and AUX cable.
- Adjustable Front Camera: Vertical adjustment to suit various vehicle types.
- Compact Design: Slim profile (26.3 x 10.4 cm) to avoid obstructing driving view.
- Wide Vehicle Compatibility: Suitable for cars, trucks, caravans, vans, trailers, and motorhomes (12-24V).

Overview of the display's key features.
Package Contents
Verify that all items are present in the package:
- 10.25 Inch CarPlay Display
- 1080P Rear Camera
- Adhesive Mount
- Suction Cup Mount
- AUX Cable
- Type-C Car Cigarette Lighter Power Cable
- User Manual
- Assembly Tools
- 64GB TF Card
- 3M Adhesive Tape

Wiring diagram and contents of the package.
3. Setup and Installation
Mounting Options
The display offers two mounting options: a suction cup mount for the windshield and an adhesive mount for the dashboard. Choose the option that best suits your vehicle and provides optimal visibility without obstructing your view.
- Suction Cup Mount: Attach the suction cup to a clean, smooth area of your windshield. Ensure it is securely fastened.
- Adhesive Mount: Clean the dashboard surface thoroughly. Apply the 3M adhesive tape to the base of the mount and firmly press it onto the desired location on your dashboard. Allow sufficient time for the adhesive to bond before attaching the display.

Installation methods: suction cup mount and adhesive mount.
Wiring Connections
- Power Connection: Connect the Type-C car cigarette lighter power cable to the display and plug the other end into your vehicle's 12V-24V cigarette lighter socket.
- Rear Camera: Connect the rear camera cable to the designated port on the display. Ensure the red wire of the rear camera is connected to the positive pole of your vehicle's reverse light for automatic display when reversing.
- AUX Cable (Optional): If you prefer audio output through your vehicle's AUX input, connect the provided AUX cable from the display to your car's AUX port.
- SD Card: Insert the provided 64GB TF card into the SD card slot on the display for dashcam recording.
Initial Power On
Once all connections are made, start your vehicle. The display should power on automatically. Follow any on-screen prompts for initial setup, such as language selection.
4. Operating Instructions
4.1 Wireless CarPlay Connection
- On the display, tap the 'CarPlay' icon.
- On your iPhone, activate Wi-Fi and Bluetooth.
- Search for the display's Bluetooth name (e.g., 'T86 xxxx') in your iPhone's Bluetooth settings and connect.
- Confirm the connection on both devices. CarPlay will then launch on the display.

Steps for wireless CarPlay connection.
4.2 Wireless Android Auto Connection
- On the display, tap the 'Android Auto' icon.
- On your Android phone, activate Wi-Fi and Bluetooth.
- Search for the display's Bluetooth name (e.g., 'T86 xxxx') in your phone's Bluetooth settings and connect.
- Confirm the connection on both devices. Android Auto will then launch on the display.

Steps for wireless Android Auto connection.
4.3 Dashcam Operation (Front & Rear Cameras)
The integrated dashcam system records continuously when the device is powered on. The front camera records in 2.5K resolution, and the rear camera records in 1080P.
- Loop Recording: The system automatically overwrites the oldest footage when the SD card is full. The included 64GB TF card provides ample storage.
- Adjustable Front Camera: The front camera can be adjusted vertically to optimize the recording angle for your vehicle.
- Rear Camera Display: When reversing, the display automatically switches to the rear camera view, providing parking assistance lines.

Dual camera recording functionality.

Front camera recording details.

Rear camera functionality for reversing assistance.
4.4 Audio Output Options
The display offers four methods for audio output:
- Built-in Speakers: Audio is played directly through the display's internal speakers.
- Bluetooth Connection: Connect the display to your vehicle's Bluetooth system for high-quality audio through your car's speakers. This is the recommended method.
- FM Transmission: Transmit audio to your car's FM radio by tuning both devices to the same FM frequency.
- AUX Cable: Use the provided AUX cable to connect the display to your car's AUX input for a wired audio connection.

Available audio output options.
4.5 Screen Mirroring (AirPlay & Android Cast)
You can mirror your smartphone's screen to the display using AirPlay for iOS devices or Android Cast for Android devices.
AirPlay Connection (iOS only)
- On the display, tap the 'AirPlay' icon.
- Activate Wi-Fi on your iPhone. Search for the display's Wi-Fi network name (e.g., 'AIRPLAY-XXXX') and enter the password to connect.
- On your iPhone, open the Control Center and tap 'Screen Mirroring'.
- Select 'SmartScreen' to initiate screen mirroring.
- The connection is successful when your iPhone screen appears on the display.

Steps for AirPlay connection.
Android Cast Connection (Android only)
- On the display, tap the 'Android Cast' icon.
- Download the TcLink application from the App Store or by scanning the QR code provided on the display.
- Open TcLink on your phone and tap the 'Add' button.
- Go to your phone's Wi-Fi settings, activate Wi-Fi, and select the 'TcLink-XXX' network.
- Swipe down to open the Control Center (or quick settings) and tap 'Screen Cast' or 'Screen Mirroring'.
- The connection is successful when your Android phone screen appears on the display.

Steps for Android Cast connection. Download TcLink app from v.triplecam.cn/tclink
4.6 Voice Assistant
After connecting your smartphone via CarPlay or Android Auto, you can use your device's voice assistant (Siri or Google Assistant) for hands-free control of navigation, music, and calls. Activate the voice assistant through the display's interface or by using the voice command on your phone.
4.7 Split-Screen Display
The split-screen function allows you to view and operate two applications simultaneously, such as navigation and music playback. This enhances convenience and safety while driving.

Split-screen display in action.
5. Maintenance
- Cleaning: Use a soft, dry cloth to clean the display screen. For stubborn smudges, lightly dampen the cloth with water or a screen-safe cleaner. Avoid abrasive materials or harsh chemicals.
- Temperature: Avoid exposing the device to extreme temperatures, both hot and cold, as this can affect performance and lifespan.
- Cable Management: Ensure all cables are neatly routed and secured to prevent interference with driving controls and to minimize wear and tear.
- SD Card: Periodically format the SD card (e.g., monthly) to maintain optimal recording performance and prevent data corruption. Back up important footage before formatting.
6. Troubleshooting
| Problem | Possible Cause | Solution |
|---|---|---|
| Display does not power on. | No power, loose connection, faulty cigarette lighter socket. | Check power cable connection. Ensure cigarette lighter socket is functional. Try a different power source if available. |
| Wireless CarPlay/Android Auto fails to connect. | Bluetooth/Wi-Fi off on phone, incorrect pairing, phone incompatibility. | Ensure phone's Bluetooth and Wi-Fi are enabled. Re-pair the devices. Check phone compatibility (iOS 11+ / Android 11+; not compatible with some Huawei/Xiaomi models). Restart both phone and display. |
| Intermittent Bluetooth disconnection. | Interference, phone software issues, specific phone model incompatibility. | Move phone closer to the display. Ensure no other devices are interfering. Update phone's operating system. Some Samsung models (e.g., S23, S24) have reported compatibility issues; check for firmware updates for the display or contact support. |
| Dashcam not recording or rear camera not working. | SD card issue, loose camera connection, faulty camera. | Ensure SD card is inserted correctly and formatted. Check camera cable connections. Verify the red wire of the rear camera is connected to the reverse light's positive pole. Replace SD card if corrupted. |
| Screen adhesive mount detaches. | Improper installation, extreme temperatures, weak adhesive. | Ensure dashboard surface is clean and dry before applying. Allow sufficient curing time for the adhesive. Use stronger 3M adhesive if necessary. Consider using the suction cup mount as an alternative. |
| Screen difficult to see with polarized sunglasses. | Panel orientation. | This is a characteristic of some LCD panels. Adjust viewing angle or remove polarized sunglasses for better visibility. |
7. Specifications
| Feature | Specification |
|---|---|
| Brand | LAMTTO |
| Model Name | CarPlay 10.25" Display |
| Screen Size | 10.25 Inches |
| Display Type | In-Cell Capacitive Touchscreen |
| Connectivity Technology | Bluetooth, Wi-Fi |
| Front Camera Resolution | 2.5K |
| Rear Camera Resolution | 1080P |
| Memory Storage Capacity | 64 GB (TF Card Included) |
| Compatible Flash Memory Type | microSD |
| Supported Satellite Navigation System | GPS (via smartphone) |
| Vehicle Service Type | Car, Truck, Caravan, Van, Trailer, Motorhome |
| Power Input | 12-24V |
| Control Method | Touch |
| Special Features | Lane Assistant, Touchscreen |
8. Warranty and Support
The LAMTTO 10.25 Inch Wireless CarPlay Android Auto Display comes with a 12-month warranty from the date of purchase. Additionally, lifetime technical support is provided.
For any questions, issues, or technical assistance regarding installation, wiring, or operation, please contact LAMTTO customer service. Refer to the contact information provided with your product packaging or visit the official LAMTTO website for support details.