Bestier H104415SUS
Bestier 59-inch Computer Desk with 4 Drawers (Model H104415SUS) Instruction Manual
Brand: Bestier | Model: H104415SUS
Product Overview
This manual provides detailed instructions for the assembly, operation, and maintenance of your Bestier 59-inch Computer Desk with 4 Drawers. Designed for home office and studio environments, this desk features ample storage, a built-in charging station, and a user-friendly design.

Image: Front view of the assembled Bestier 59-inch Computer Desk in white with a black desktop, featuring a monitor, headphones, and other office accessories.
Safety Information
- To prevent scratching, it is recommended to place a soft blanket on the floor during assembly.
- Exercise caution when using a power drill or power screwdriver. Slow down and stop when screws are nearly tight to avoid overtightening or damaging components.
- Do not use harsh chemicals or abrasive cleaners on this item. Use a damp cloth for cleaning and wipe dry.
- When moving the desk, push, pull, or drag it carefully to prevent damage.
Parts List
Before beginning assembly, ensure all parts and hardware are present. Refer to the included instruction manual for a complete list of numbered parts and corresponding hardware.
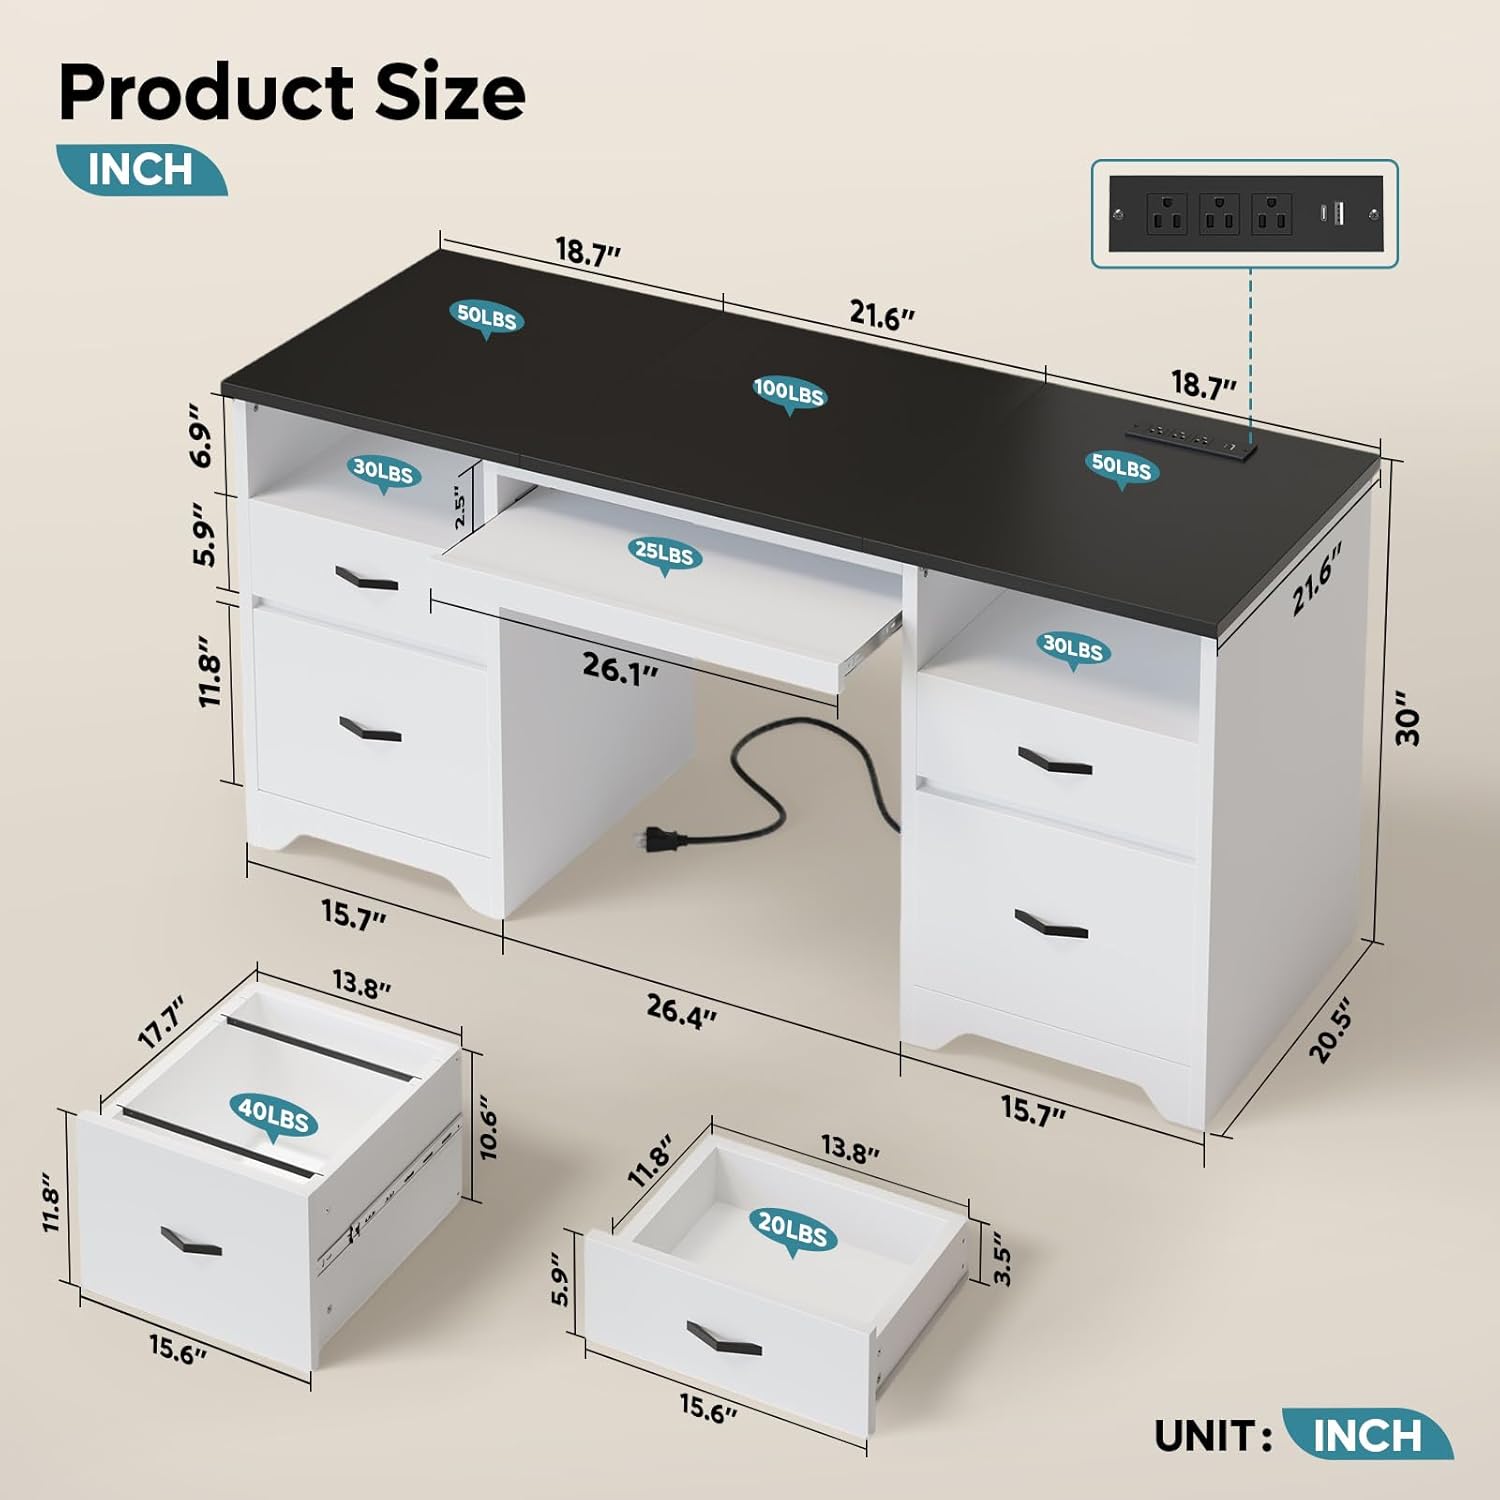
Image: All desk components and hardware laid out for inspection prior to assembly.
Included Components: Built-in Outlet, Built-in USB Port, Installation Tool, Instruction Manual, Keyboard Tray.
Setup and Assembly
Assembly typically requires 1-2 people and takes approximately 0.5-1 hour. All necessary tools are included. Follow the step-by-step instructions provided in the printed manual and the video guide below.
Assembly Video Guide
Video: Animated step-by-step guide on how to assemble the Bestier 59-inch Computer Desk with 4 Drawers. This video demonstrates the process of connecting panels, installing drawer slides, and attaching the desktop.
Key Assembly Steps:
- Prepare Workspace: Clear an open area and lay down a soft blanket to protect the desk components and your floor.
- Identify Parts: Unpack all components and verify against the parts list in the instruction manual. Numbered parts and hardware are typically labeled.
- Assemble Pedestals: Construct the two side pedestals, which house the drawers. Ensure drawer slides are correctly oriented and securely fastened.
- Attach Crossbars: Connect the pedestals using the central crossbars and the keyboard tray mechanism.
- Install Desktop: Carefully place and secure the three-panel desktop onto the assembled base.
- Assemble Drawers: Construct the four drawers, ensuring smooth drawer hinges are properly installed. Attach handles.
- Install Charging Station: Secure the built-in charging station into its designated slot on the desktop.
- Cable Management: Route the power cord for the charging station and any other device cables through the designated cable management grommets.
Operating Instructions
Built-In Charging Station
The desk includes a convenient 3-in-1 desktop charging station with 3 AC outlets, 1 USB port, and 1 Type-C port. A 4.9 ft power cord is provided to connect the station to a wall outlet.
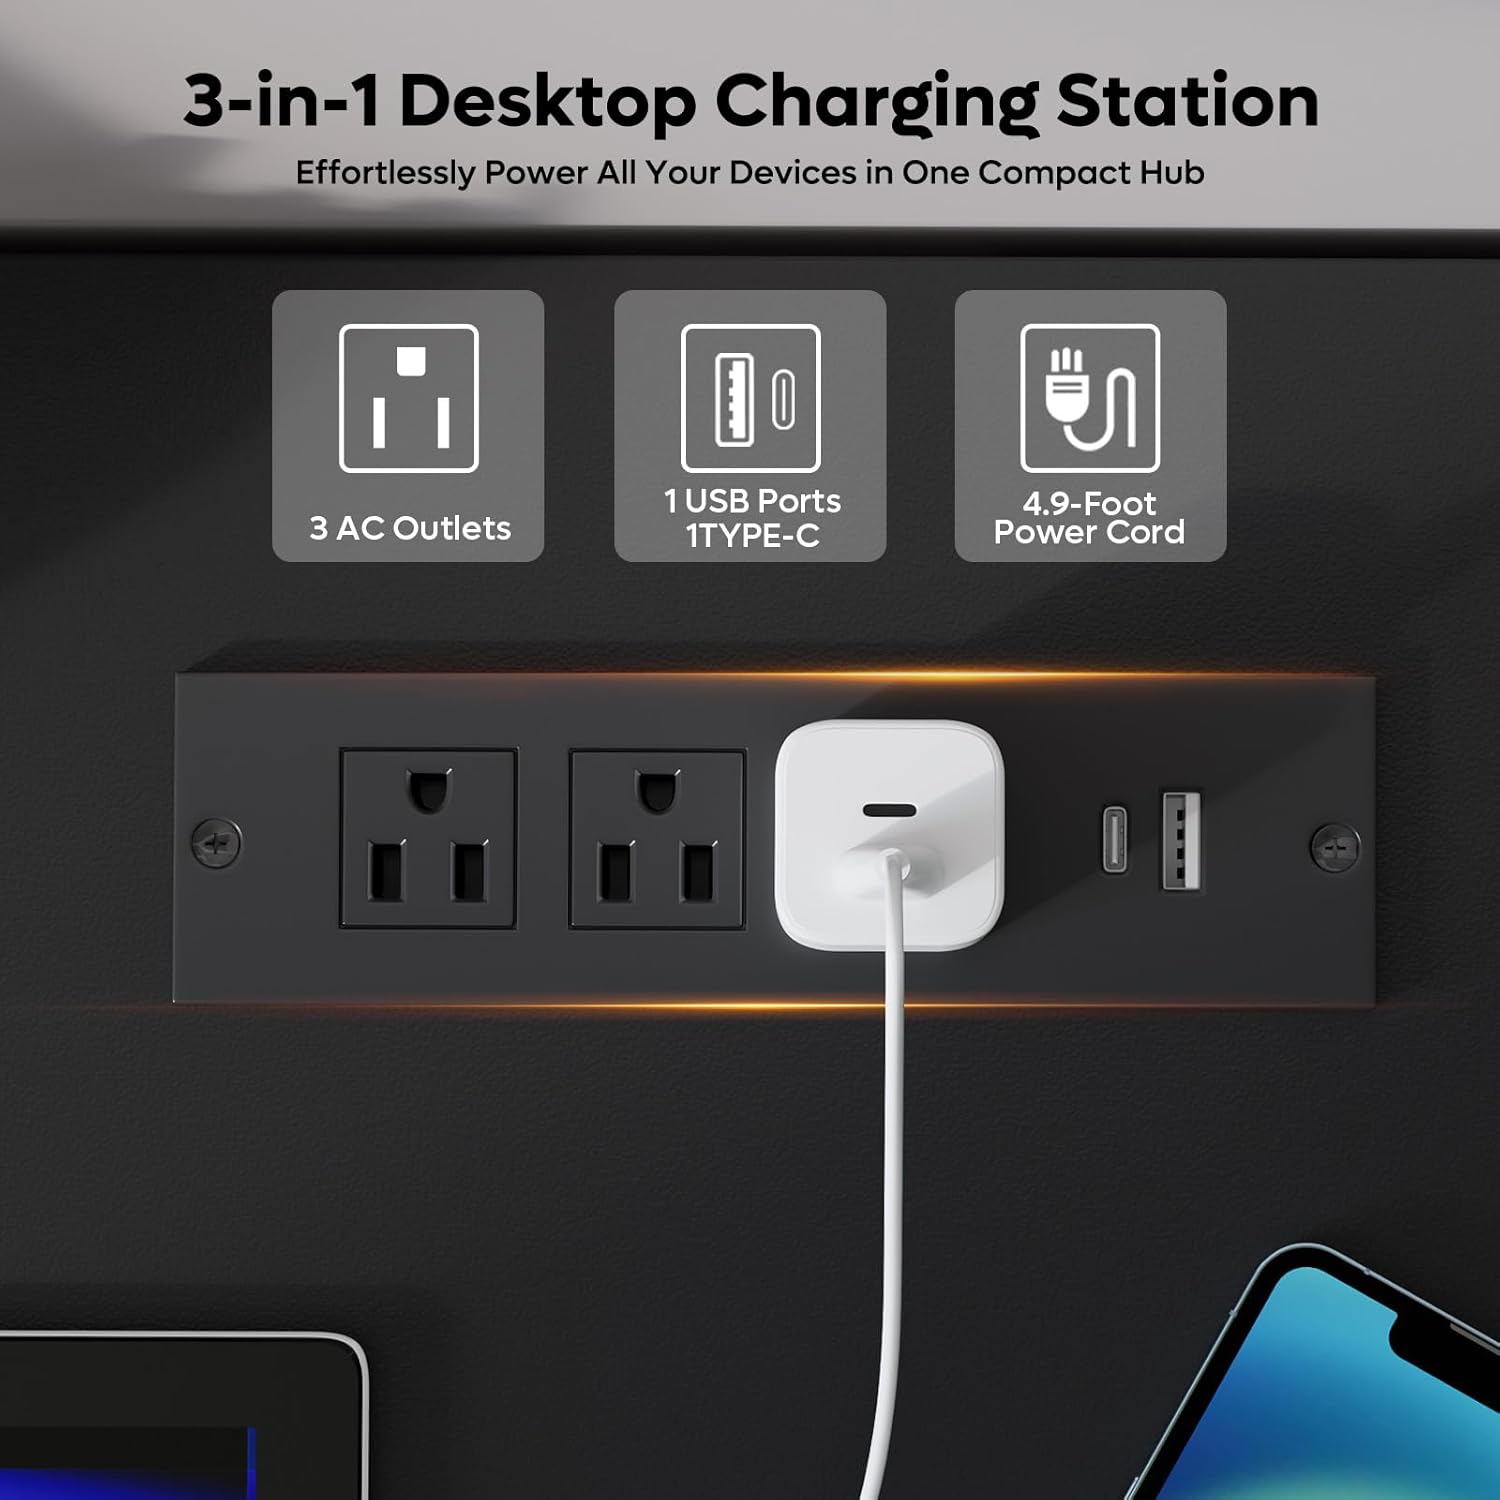
Image: Detail of the integrated charging station for electronic devices.
Keyboard Tray
The pull-out keyboard tray is designed for ergonomic typing. It slides smoothly for easy access and can be retracted when not in use to save space.

Image: The flexible keyboard tray extended for use.
Storage Drawers and File Drawers
The desk features two open storage compartments, two smaller storage drawers for office supplies, and two larger file drawers designed to accommodate letter, A4, or legal-size hanging files. The file drawers include adjustable rods for versatile organization.

Image: Overview of the desk's storage capabilities.
Cable Management
Dual cable-management grommets are integrated into the desktop to help keep your workspace tidy and free from tangled cords.
Maintenance
To maintain the appearance and longevity of your desk, follow these care instructions:
- Wipe surfaces with a damp cloth to clean.
- Immediately wipe dry with a clean, dry cloth to prevent moisture damage.
- Avoid using harsh chemicals or abrasive cleaners.
Troubleshooting
If you encounter any issues with your Bestier Computer Desk, please refer to the following common solutions:
- Wobbly Desk: Ensure all screws and fasteners are tightened. Check that the desk is placed on a level surface. Adjust leveling feet if available.
- Sticking Drawers: Verify that drawer slides are correctly installed and free of obstructions. Apply a silicone-based lubricant to the slides if necessary.
- Charging Station Not Working: Confirm the power cord is securely plugged into both the desk unit and a functional wall outlet. Check for tripped circuit breakers.
For persistent issues, please contact Bestier Customer Support.
Specifications
Detailed product dimensions and other technical specifications are provided below.
Image: Detailed dimensions of the desk and its components.
| Feature | Detail |
|---|---|
| Brand | Bestier |
| Model Number | H104415SUS |
| Product Dimensions (D x W x H) | 21.65"D x 59.06"W x 30.04"H |
| Color | White (with Black top) |
| Base Material | Engineered Wood |
| Number of Drawers | 4 |
| Special Features | Built-In USB Outlet, Corded, Keyboard Tray Included |
| Maximum Weight Recommendation (Desktop) | 200 Pounds |
| Maximum Weight Recommendation (Storage Drawers) | 20 Pounds |
| Maximum Weight Recommendation (File Drawers) | 40 Pounds |
| Item Weight | 103 Pounds |
| Required Assembly | Yes |
| Recommended Number of People for Assembly | 2 |
| Includes All Assembly Tools | Yes |
Warranty and Support
Manufacturer's Warranty
This Bestier product comes with an 18-month manufacturer's warranty.
Customer Support
For any product-related inquiries, missing parts, or assistance, please contact Bestier Customer Support. The Bestier team is committed to providing satisfying solutions.
You can find contact information on the Bestier official website or through your purchase platform.
Ask a question about this manual
Ask about setup, troubleshooting, compatibility, parts, safety, or missing instructions. Manuals+ will review the question and use this page’s manual context to help answer it.