Bytecc Quad Monitor 8K DisplayPort KVM Switch
Bytecc Quad Monitor 8K DisplayPort KVM Switch User Manual
Model: Quad Monitor 8K DisplayPort KVM Switch
Brand: Bytecc
1. Introduction
The Bytecc Quad Monitor 8K DisplayPort KVM Switch is designed to allow up to four computers to share a single set of keyboard, mouse, and four DisplayPort monitors. This device is ideal for environments requiring control over multiple systems from one workstation, supporting high-resolution video output up to 8K@60Hz and USB 3.0 connectivity for peripherals.
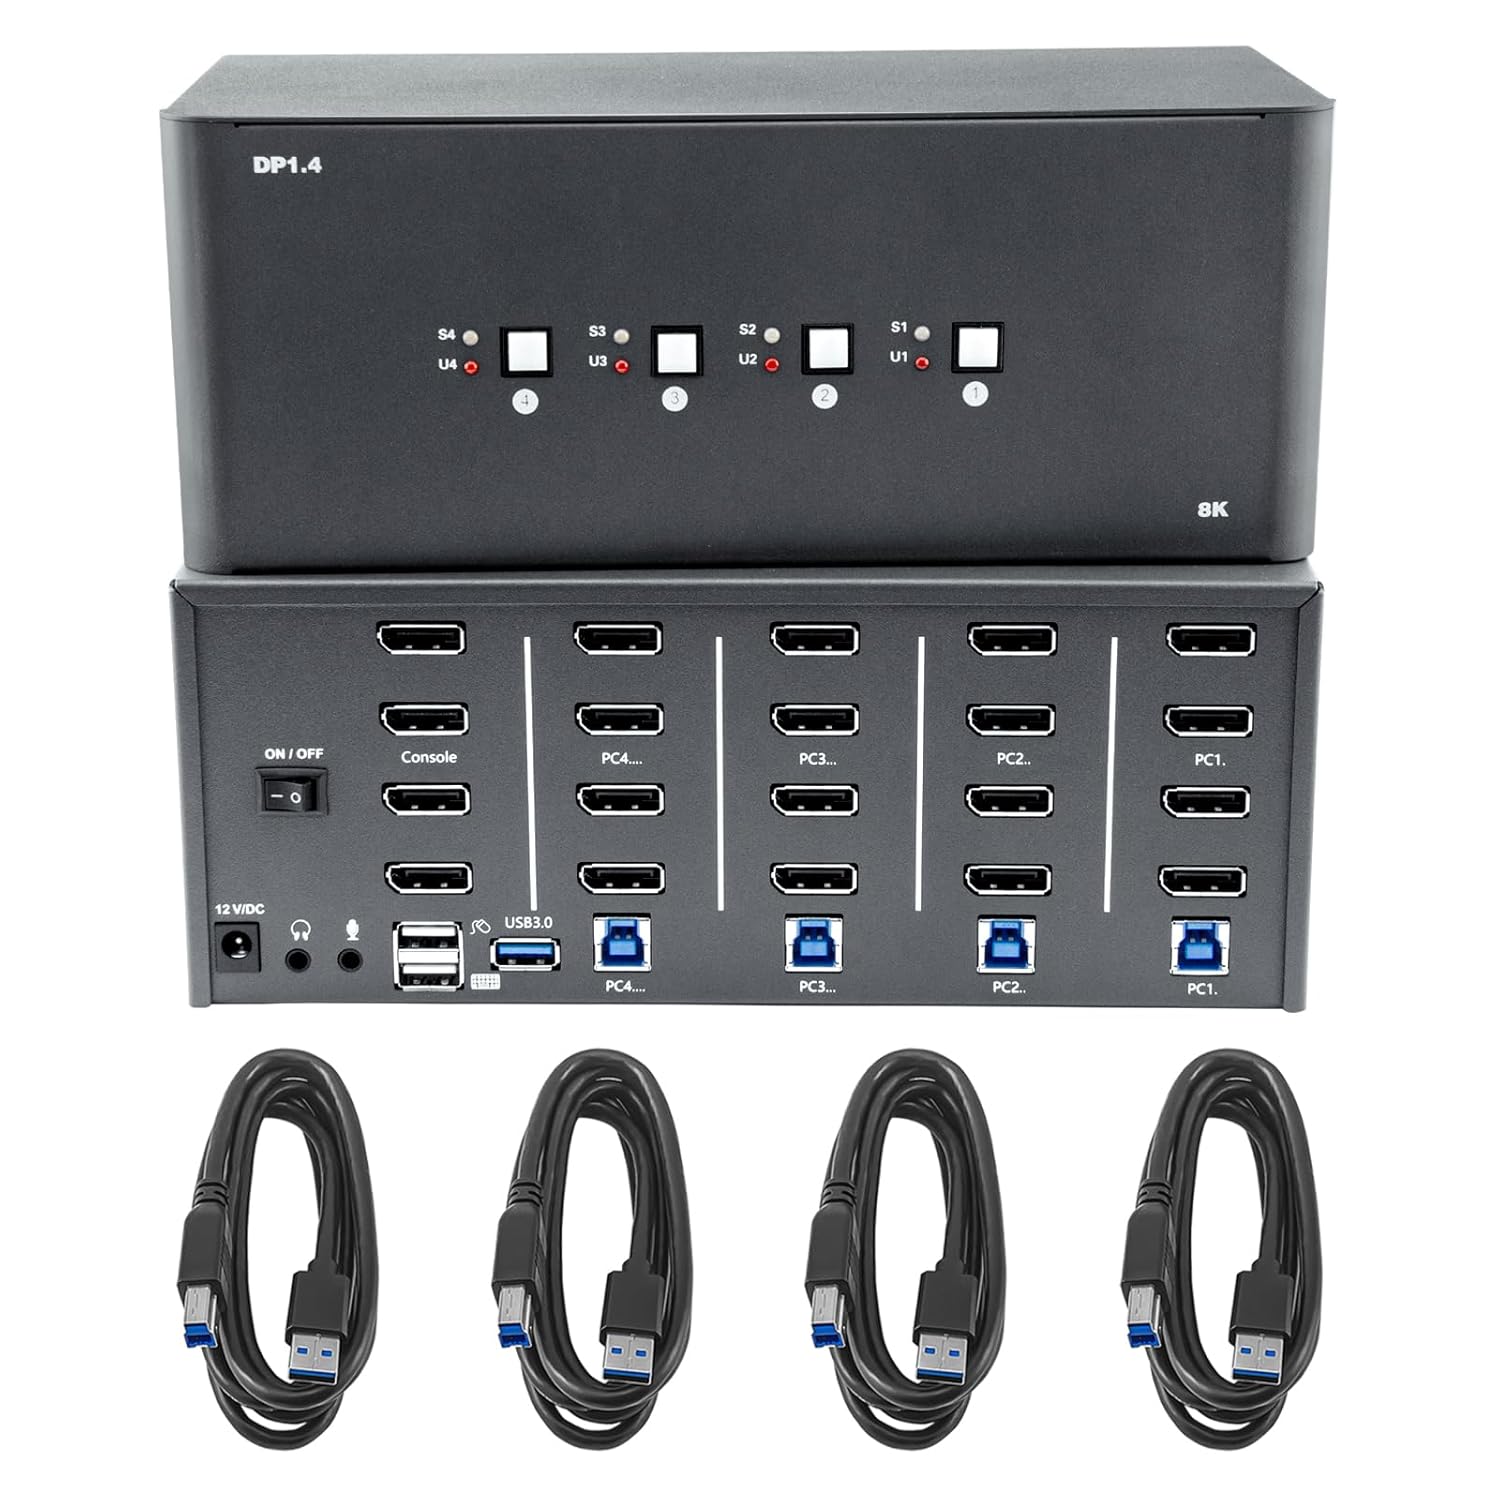
Figure 1: Bytecc Quad Monitor 8K DisplayPort KVM Switch with included USB 3.0 cables.
2. Key Features
- 4-Port DisplayPort KVM Switch: Share an HDTV or DisplayPort monitor, USB keyboard, and mouse between up to four USB/DisplayPort-enabled computers and devices.
- Flexible Switching Options: Switch between connected devices using front-panel push buttons or convenient hotkey controls, providing quick and seamless operation.
- Wide Video Resolution Support: Compatible with popular resolutions, including 8K@60Hz (4:4:4, DSC), 5K@120Hz, 4K@144Hz, 4K@120Hz, and 7680x4320@60Hz (4:2:0), delivering stunning visuals for all tasks.
- Advanced Gaming Features: Includes Variable Refresh Rate (VRR) for smooth gaming performance and High Frame Rate (HFR) support for high-dynamic videos. Display Stream Compression (DSC) enables support for higher resolutions and frame rates without compromising video quality.
- Multi-Stream Technology (MST): Expand your display capabilities with MST, allowing connections to multiple monitors for versatile applications.
3. Package Contents
Please verify that all items are present and in good condition upon opening the package:
- 1 x Bytecc Quad Monitor 8K DisplayPort KVM Switch
- 1 x Power Adapter
- 4 x USB 3.0 Cables
- 1 x User Manual (this document)

Figure 2: Contents of the KVM Switch package.
4. Product Overview
Familiarize yourself with the ports and indicators on the KVM switch.

Figure 3: Front and Rear Panel Port Layout.
Front Panel
- Input Selection Buttons (S1-S4): Press to switch to the corresponding PC input.
- USB Indicators (U1-U4): Lights up when the corresponding PC's USB is active.
- Display Indicators (D1-D4): Lights up when the corresponding PC's DisplayPort is active.
- On/Off Switch: Power toggle for the device.
- Console USB 3.0 Ports: For connecting keyboard, mouse, and other USB 3.0 peripherals.
- Audio Jacks: For connecting headphones and a microphone.
Rear Panel
- 12V DC Power Input: Connect the included power adapter.
- DP OUT Ports (Monitor A, B, C, D): Connect your four DisplayPort monitors here.
- DP IN + USB 3.0 Ports (PC1-PC4): Connect the DisplayPort and USB 3.0 cables from each computer to these corresponding input ports.
5. Setup and Installation
Follow these steps to set up your KVM switch:
- Power Off All Devices: Ensure all computers and monitors are powered off before making any connections.
- Connect Monitors: Connect your four DisplayPort monitors to the "DP OUT" ports on the KVM switch.
- Connect Computers (Video): For each computer (PC1-PC4), connect a DisplayPort cable from the computer's DisplayPort output to the corresponding "DP IN" port on the KVM switch. Ensure you connect to the correct PC input (e.g., PC1 to PC1 input).
- Connect Computers (USB): For each computer (PC1-PC4), connect one of the included USB 3.0 cables from a USB 3.0 port on your computer to the corresponding "USB 3.0" input port next to the DisplayPort input on the KVM switch.
- Connect Peripherals: Connect your USB keyboard, USB mouse, and any other USB 3.0 peripherals (e.g., USB disk, printer) to the "Console USB 3.0" ports on the front panel of the KVM switch.
- Connect Audio (Optional): If desired, connect your headphones and microphone to the respective audio jacks on the front panel.
- Connect Power: Connect the 12V DC power adapter to the KVM switch and then plug it into a power outlet.
- Power On: Turn on the KVM switch using the front panel On/Off switch. Then, power on your monitors and computers.

Figure 4: General connection diagram (Note: This KVM supports 4 monitors and 4 computers).
6. Operating Instructions
6.1 Switching Methods
The KVM switch offers two convenient ways to switch between connected computers:
- Button Switching: Simply press the corresponding input selection button (S1, S2, S3, or S4) on the front panel of the KVM switch to switch to the desired computer.
- Hotkey Switching: Use keyboard hotkeys for quick switching without reaching for the KVM unit. The default hotkey sequence is typically Scroll Lock, Scroll Lock, then the number corresponding to the PC (e.g., 1 for PC1, 2 for PC2, etc.). Refer to the full manual for advanced hotkey commands and customization.

Figure 5: Two primary methods for switching between computers.
6.2 Display Modes
The KVM switch supports various display configurations for your monitors:
- Mirror Mode: All four monitors display the same content, mirroring the primary display.
- Video Wall Mode: Content is stretched across all four monitors, creating a single large display area.
- Extended Mode: Each monitor acts as an independent display, extending your desktop workspace across all four screens.
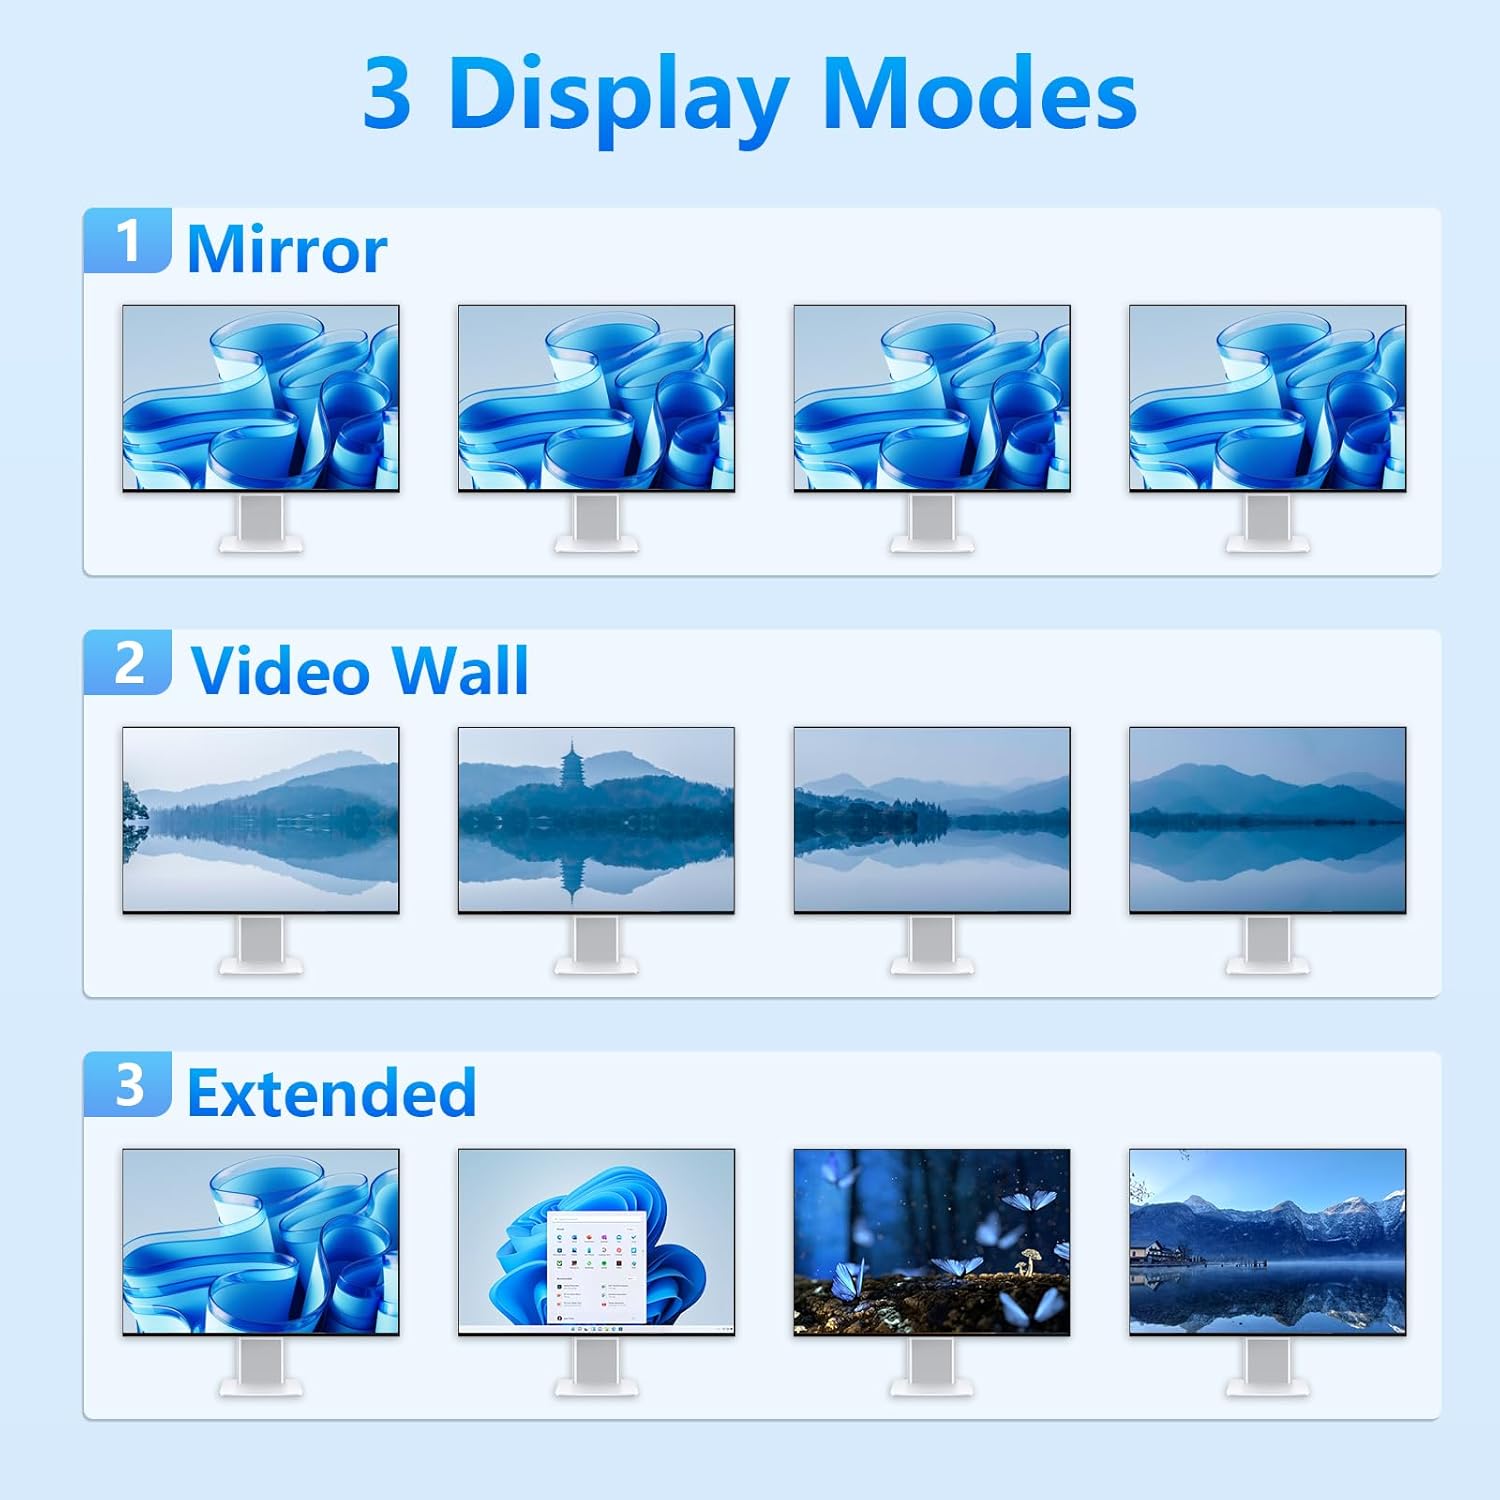
Figure 6: Examples of the three supported display modes.
7. Technical Specifications
| Feature | Specification |
|---|---|
| Model | Quad Monitor 8K DisplayPort KVM Switch |
| Input Ports | 4 x DisplayPort 1.4, 4 x USB 3.0 Type-B |
| Output Ports | 4 x DisplayPort 1.4, 3 x USB 3.0 Type-A (Console), 1 x USB 2.0 Type-A (Console), Audio Out, Mic In |
| Video Resolution | Up to 8K@60Hz (4:4:4, DSC), 5K@120Hz, 4K@144Hz, 4K@120Hz, 7680x4320@60Hz (4:2:0) |
| USB Data Rate | USB 3.0 (5Gbps) |
| Switching Methods | Front Panel Button, Hotkey |
| Power Supply | DC 12V |
| Operating Systems | Windows, macOS, Linux, DOS |

Figure 7: Supported video resolutions.
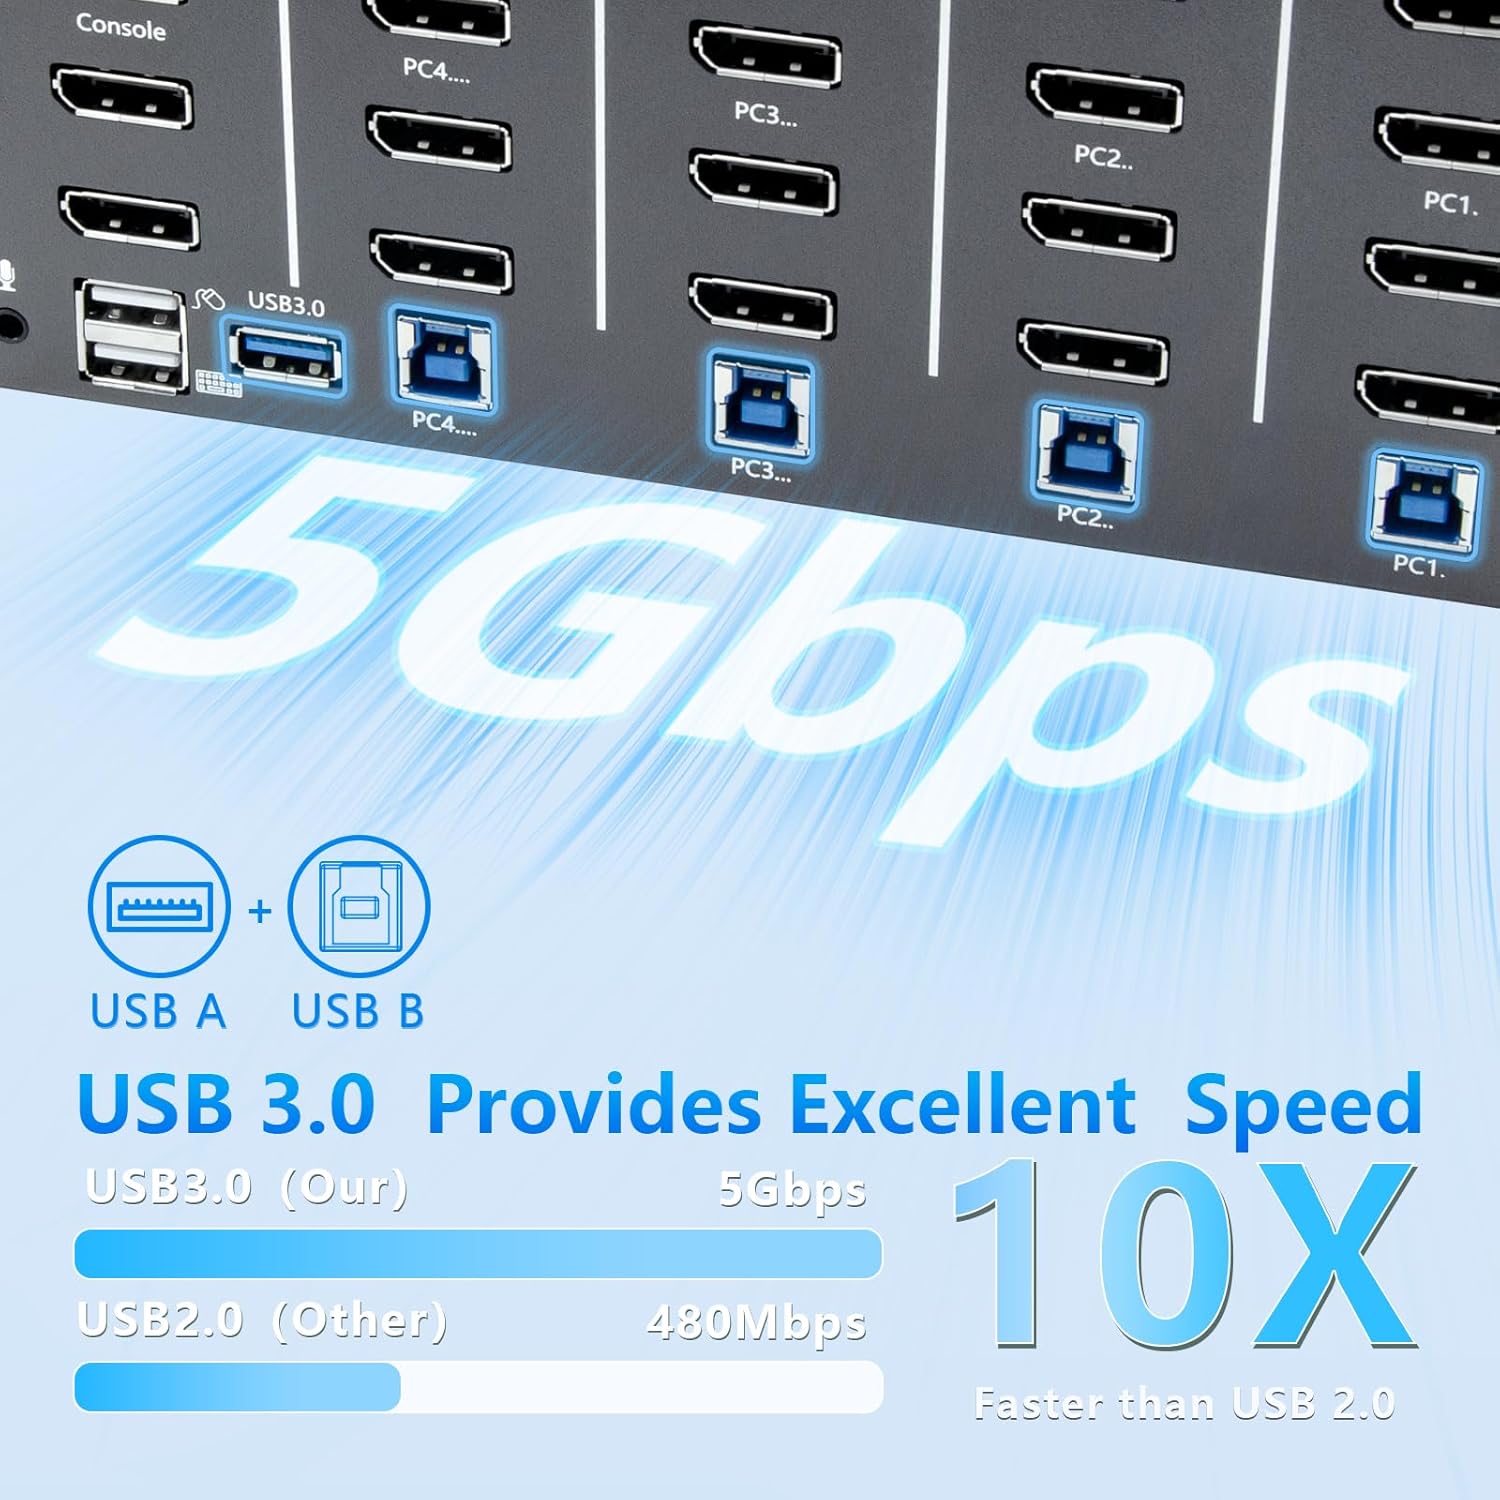
Figure 8: USB 3.0 provides 10x faster speed than USB 2.0.
8. Troubleshooting
If you encounter issues, please refer to the following common problems and solutions:
- No Display/Black Screen:
- Ensure all DisplayPort cables are securely connected to both the KVM switch and your monitors/computers.
- Verify that the KVM switch is powered on and the correct input is selected.
- Check if your monitors are set to the correct DisplayPort input.
- Try restarting the KVM switch and then the computers.
- Ensure your graphics drivers are up to date on all connected computers.
- Keyboard/Mouse Not Working:
- Ensure the USB 3.0 cables from your computers are connected to the corresponding USB 3.0 input ports on the KVM switch.
- Verify that your keyboard and mouse are connected to the dedicated console USB ports on the front of the KVM switch.
- Try connecting the keyboard/mouse directly to the computer to confirm they are functional.
- Some specialized gaming keyboards/mice may require direct connection or specific drivers; try a standard keyboard/mouse to test.
- Intermittent Connection/Flickering Display:
- Use high-quality DisplayPort 1.4 certified cables, especially for 8K resolutions.
- Reduce the resolution or refresh rate to see if the issue persists.
- Ensure there are no loose connections.
- Hotkey Not Responding:
- Ensure the keyboard is connected to the dedicated console USB port.
- Verify the hotkey sequence is correct (e.g., Scroll Lock, Scroll Lock, then number).
- Some software or operating system settings might interfere with hotkeys; try disabling any conflicting hotkey utilities.
9. Maintenance
To ensure the longevity and optimal performance of your KVM switch, follow these maintenance guidelines:
- Cleaning: Use a soft, dry cloth to clean the exterior of the KVM switch. Do not use liquid cleaners or aerosols, as they may damage the device.
- Ventilation: Ensure the KVM switch is placed in a well-ventilated area to prevent overheating. Do not block any ventilation openings.
- Storage: When not in use for extended periods, store the KVM switch in a cool, dry place away from direct sunlight and extreme temperatures.
- Cable Management: Keep cables organized and untangled to prevent damage to the ports or cables themselves. Avoid sharp bends in cables.
10. Warranty and Support
Bytecc products are designed for reliability and performance. For warranty information, technical support, or service inquiries, please refer to the warranty card included with your product or visit the official Bytecc website. Please have your product model and purchase information ready when contacting support.
For the latest drivers, firmware updates, and additional support resources, please visit the Bytecc support page.
Ask a question about this manual
Ask about setup, troubleshooting, compatibility, parts, safety, or missing instructions. Manuals+ will review the question and use this page’s manual context to help answer it.