1. Introduction
This manual provides essential information for the installation, operation, maintenance, and troubleshooting of your FANPYY Thermal Print Head. This print head is designed for high-precision thermal printing applications and is compatible with various Gprinter models, including GP-3120TL/TN/TU, 3150TIN, ZH3080, YS-K8800, M322, S806T, GP-244/A831, and Gm-501.
Please read this manual thoroughly before installation and use to ensure proper function and longevity of the product.
2. Safety Information
- Always disconnect power to the printer before installing or replacing the print head.
- Handle the print head with care. Avoid touching the thermal elements directly, as static electricity or oils from your skin can damage them.
- Do not attempt to disassemble or modify the print head. This may void the warranty and cause damage.
- Keep the print head away from liquids and excessive dust.
- Ensure proper grounding of the printer system to prevent electrical hazards.
3. Package Contents
Verify that all items are present in the package:
- 1 x FANPYY Thermal Print Head (Model: GP-244 A831)
4. Product Overview
The FANPYY Thermal Print Head is a critical component for thermal printers, responsible for generating heat to create images and text on thermal paper. It features high precision for clear and fine line printing, suitable for various professional applications.
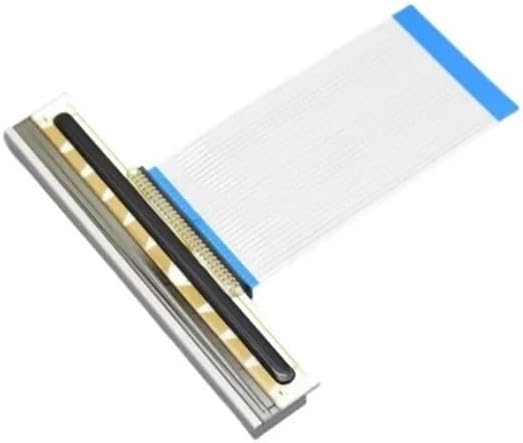
Figure 1: Top-down view of the FANPYY Thermal Print Head, showing the print element and attached ribbon cable.

Figure 2: Angled view of the print head, highlighting the connection interface for the ribbon cable.
5. Setup and Installation
This section outlines the general steps for replacing a thermal print head. Specific procedures may vary slightly depending on your printer model. Refer to your printer's service manual for detailed instructions.
- Power Off Printer: Ensure the printer is completely powered off and unplugged from the electrical outlet.
- Open Printer Cover: Open the printer's top cover or access panel to expose the print head assembly.
- Locate Old Print Head: Identify the existing print head. It is typically located near the paper path.
- Disconnect Cables: Carefully disconnect any ribbon cables or connectors attached to the old print head. Note their orientation for reinstallation.
- Remove Old Print Head: Release any latches, screws, or clips securing the old print head and gently remove it.
- Install New Print Head: Align the new FANPYY print head (GP-244 A831) into the designated slot. Ensure it sits securely.
- Connect Cables: Reconnect the ribbon cables and connectors to the new print head, ensuring they are properly seated and oriented.
- Secure Print Head: Fasten any latches, screws, or clips to secure the new print head in place.
- Close Printer Cover: Close the printer's cover or access panel.
- Power On Printer: Plug in the printer and power it on. Perform a test print to verify functionality.
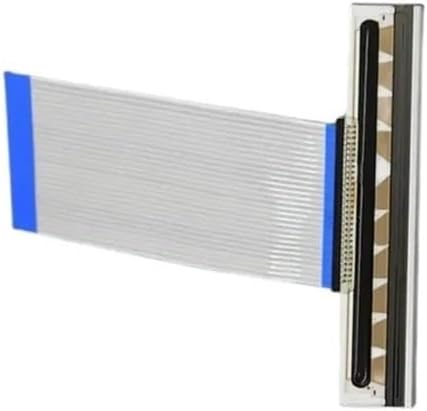
Figure 3: Side view of the print head, illustrating the flat cable connection point.
6. Operating Principles
The FANPYY Thermal Print Head operates by selectively heating small thermal elements (dots) on its surface. When thermal paper passes over these heated elements, a chemical reaction occurs on the paper's surface, causing it to darken and form the desired text or image. This process is fast, quiet, and does not require ink or toner.
Ensure that you are using compatible thermal paper for optimal print quality and to prevent premature wear of the print head.
7. Maintenance
Regular maintenance helps extend the lifespan and maintain the performance of your thermal print head.
- Cleaning: Periodically clean the print head surface with a lint-free cloth dampened with isopropyl alcohol. Ensure the print head is cool and the printer is powered off before cleaning.
- Avoid Abrasives: Never use abrasive materials or harsh chemicals to clean the print head, as this can damage the thermal elements.
- Paper Quality: Use high-quality thermal paper to minimize residue buildup and wear on the print head.
- Environmental Conditions: Operate the printer in a clean, dust-free environment with stable temperature and humidity.
8. Troubleshooting
Refer to the table below for common issues and their potential solutions.
| Problem | Possible Cause | Solution |
|---|---|---|
| Faint or incomplete print | Dirty print head, incorrect paper, low print density setting, worn print head. | Clean print head. Ensure correct thermal paper is used. Adjust print density in printer settings. If issue persists, print head may need replacement. |
| Blank pages | Thermal paper loaded incorrectly (non-thermal side facing print head), print head not connected, print head failure. | Reload paper with thermal side facing print head. Check print head cable connections. If still blank, print head may be faulty. |
| Vertical lines or gaps in print | Dust or debris on print head, damaged thermal elements. | Clean print head thoroughly. If lines persist, some thermal elements may be damaged, requiring print head replacement. |
| Printer not recognizing print head | Improper installation, loose cable connection, incompatible print head. | Reinstall print head, ensuring all connections are secure. Verify print head compatibility with your printer model. |
9. Specifications
- Product Type: Thermal Print Head
- Brand: FANPYY
- Model: GP-244 A831 (Compatible with Gprinter GP-3120TL/TN/TU, 3150TIN, ZH3080, YS-K8800, M322, S806T, Gm-501)
- Lifespan: Up to 50KM printing length (approximate, depends on usage and maintenance)
- Material: Wear-resistant materials
- Item Weight: 3.53 ounces (approx.)
- Package Dimensions: 0.39 x 0.39 x 0.39 inches (approx.)
10. Warranty and Support
FANPYY provides a 12-month warranty service for this thermal print head. This warranty covers manufacturing defects and ensures product reliability under normal use conditions.
For technical support, installation assistance, or warranty claims, please contact your retailer or FANPYY customer service. Our professional technical team is available to help resolve any issues you may encounter.