1. Introduction
Thank you for choosing the AZQQ H21 Robot Vacuum and Mop. This device is designed to provide efficient and convenient cleaning for your home, combining vacuuming, sweeping, and mopping functionalities. It features strong suction, smart navigation, and multiple control options including app and voice commands. This manual provides essential information for safe operation, setup, maintenance, and troubleshooting.

Image 1.1: The AZQQ H21 Robot Vacuum and Mop, showcasing its sleek design along with its remote control and smartphone application interface.
2. Safety Instructions
To reduce the risk of injury or damage, read these safety instructions carefully and keep them for future reference.
- This appliance can be used by children aged 8 years and above and persons with reduced physical, sensory or mental capabilities or lack of experience and knowledge if they have been given supervision or instruction concerning use of the appliance in a safe way and understand the hazards involved.
- Children should be supervised to ensure they do not play with the appliance.
- Cleaning and user maintenance shall not be made by children without supervision.
- Only use the original power adapter provided by the manufacturer.
- Do not use the robot in environments with open flames or fragile objects.
- Ensure the robot operates on stable surfaces. Avoid using it on high places without protective barriers.
- Before cleaning, remove loose cables, small objects, or anything that could entangle the brushes.
- Do not immerse the robot or its charging base in water.
- Do not use the robot to pick up large debris, liquids, or burning objects.
3. Package Contents
Verify that all components are present in the package:

Image 3.1: All components included in the AZQQ H21 Robot Vacuum and Mop package.
- H21 Robot Vacuum
- Charging Base
- Adapter
- 2-in-1 Dust & Water Bin
- Mop Board
- Mop Pad (x2)
- Remote Control (AAA Battery x2 included)
- Side Brushes (x4)
- HEPA Filters (x2)
- Cleaning Tool
- User Manual (This document)
4. Product Overview
4.1 Robot Vacuum Components
The AZQQ H21 robot vacuum is designed with a slim profile to clean under furniture effectively.

Image 4.1: The robot vacuum's low profile (2.9 inches) allows it to clean under furniture.
- Top Panel: Power button, Wi-Fi indicator.
- Front Bumper: Collision sensors.
- Side Brushes: For sweeping edges and corners.
- Main Brush: Central brush for deep cleaning.
- Wheels: Drive wheels and universal wheel.
- Dust & Water Bin: Integrated bin for both vacuumed debris and water for mopping.
- Charging Contacts: For automatic recharging.
- Drop Sensors: Prevents falling down stairs.
4.2 Key Features
- 3-in-1 Cleaning: Sweeping, vacuuming, and mopping capabilities.
- Strong Suction: Max 4000Pa suction power for effective debris removal.
- Smart Navigation: Equipped with infrared sensors for obstacle avoidance and anti-drop functionality.
- Multiple Cleaning Modes: Supports various cleaning patterns (e.g., auto, spot, edge).
- App & Voice Control: Compatible with a smartphone app (2.4 GHz Wi-Fi only), Alexa, and Google Assistant.
- Auto-Recharge: Automatically returns to the charging base when battery is low or cleaning is complete.
- Long Battery Life: Up to 120 minutes of cleaning time on a single charge.
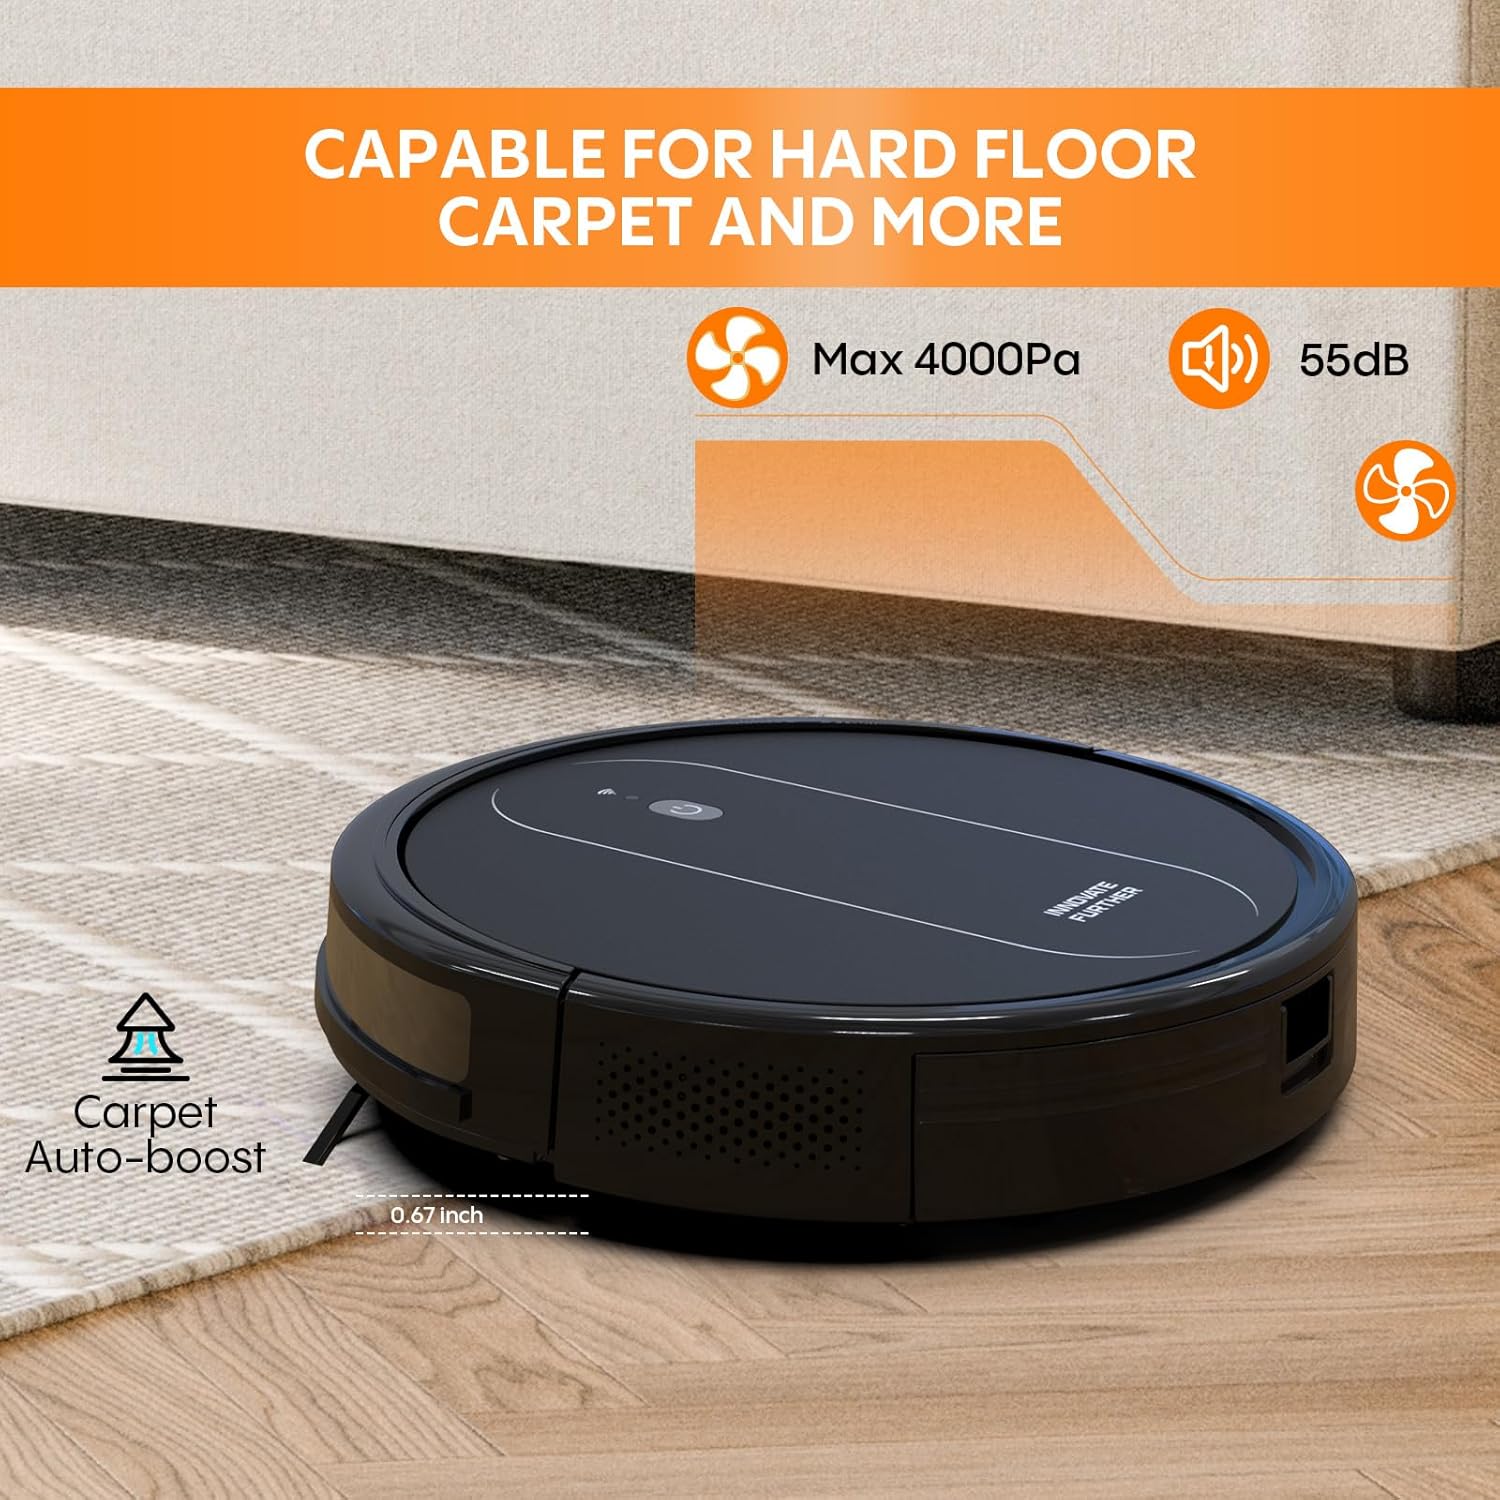
Image 4.2: The robot vacuum is capable of cleaning various floor types, including hard floors and carpets.
5. Setup
5.1 Charging Base Placement
- Place the charging base against a wall in an open, uncluttered area.
- Ensure there is at least 1 meter (3 feet) of clear space in front of the charging base and 0.5 meters (1.5 feet) on either side.
- Connect the adapter to the charging base and plug it into a power outlet.
- Ensure the power indicator on the charging base is lit.
5.2 Initial Charging
- Place the robot onto the charging base, ensuring the charging contacts align.
- The robot will emit a sound and the indicator light will flash during charging.
- Fully charge the robot before its first use (approximately 5-6 hours).
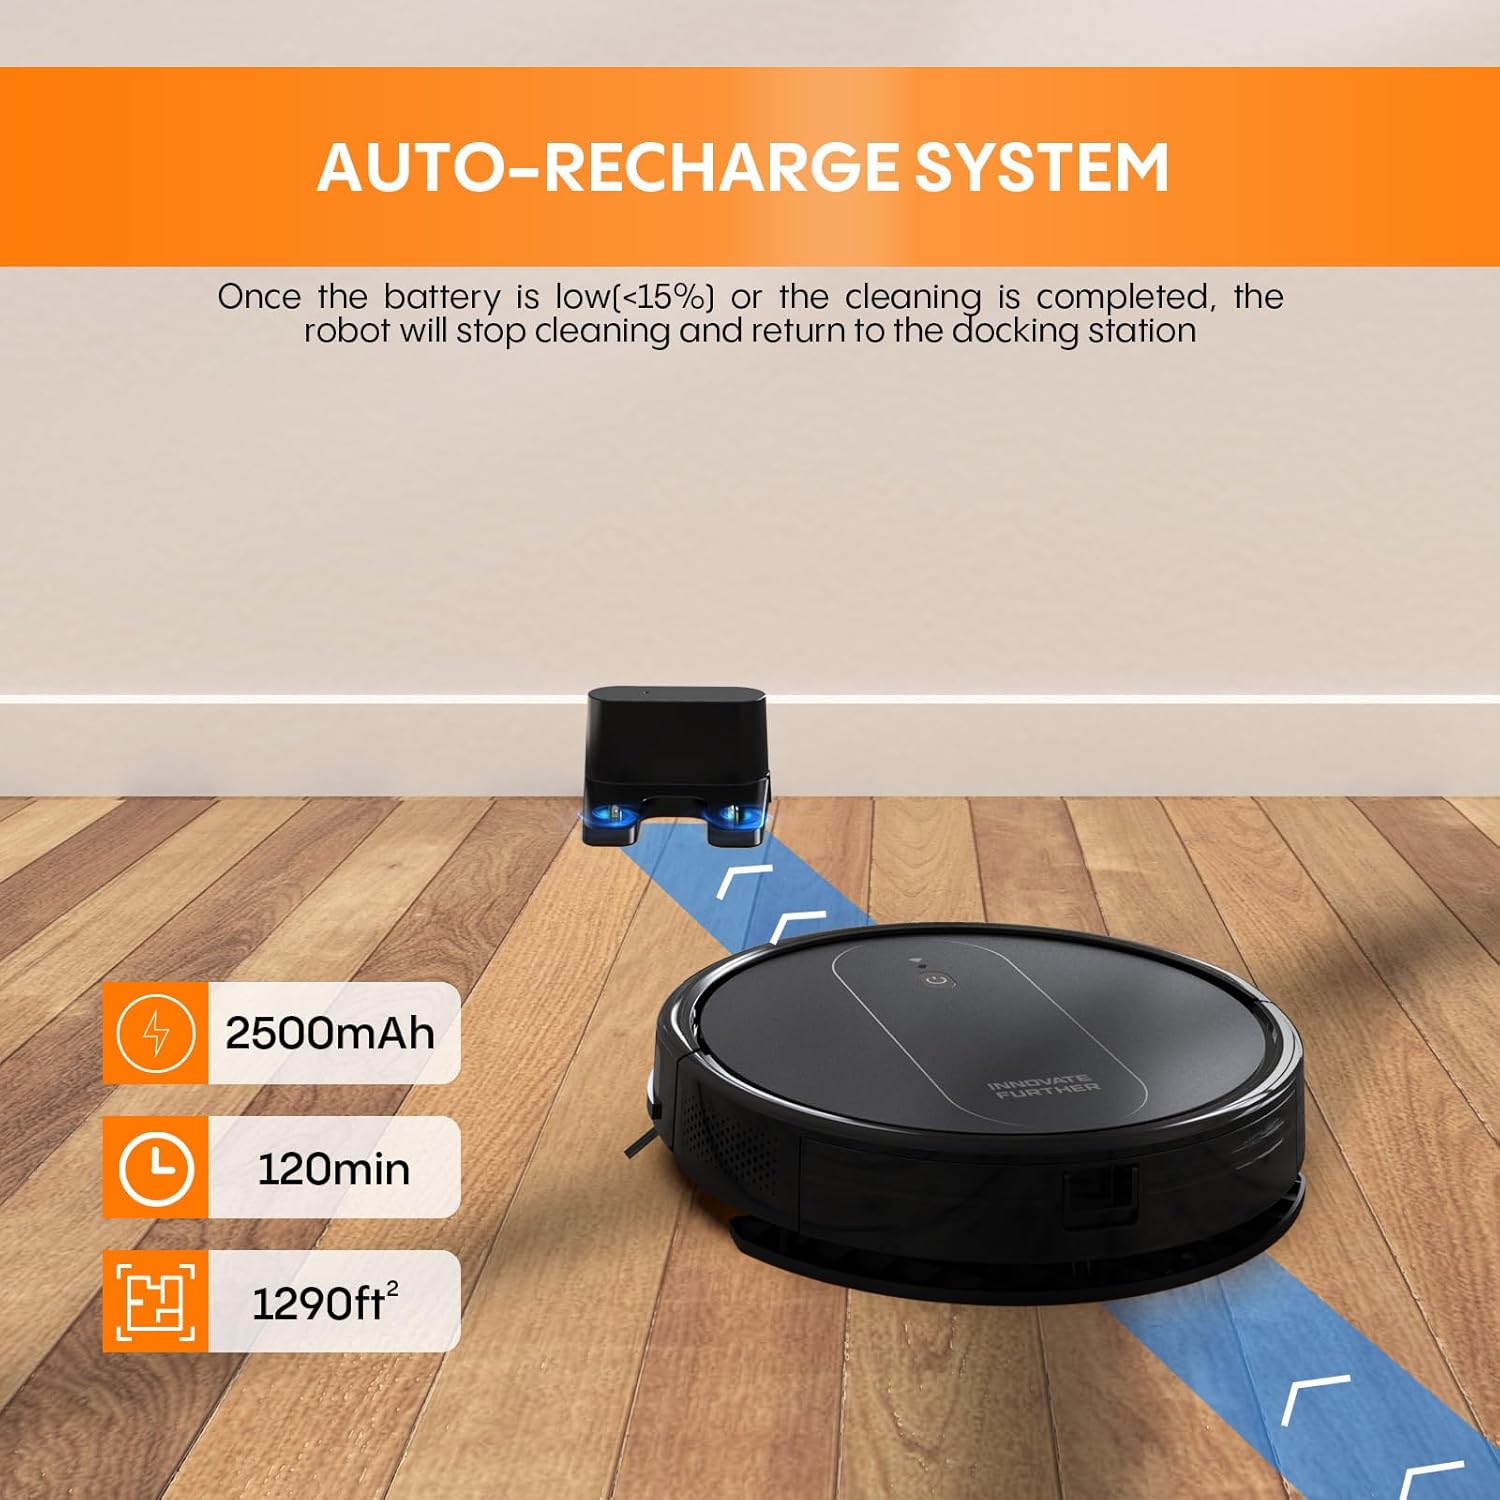
Image 5.1: The robot vacuum automatically docks for recharging.
5.3 Side Brush Installation
- Turn the robot over.
- Align the side brushes with the square posts on the bottom of the robot and press them down until they click into place.
5.4 Dust & Water Bin and Mop Pad Installation
- Open the dust & water bin cover.
- Fill the water tank with clean water. Do not overfill.
- Attach the mop pad to the mop board, then slide the mop board into the designated slot on the bottom of the dust & water bin.
- Insert the assembled dust & water bin back into the robot until it clicks securely.

Image 5.2: The 2-in-1 dustbin and water tank for combined vacuuming and mopping.
5.5 App Connection (2.4 GHz Wi-Fi Only)
- Download the companion app from your smartphone's app store.
- Register an account and follow the in-app instructions to add your device.
- Ensure your Wi-Fi network is 2.4 GHz. The robot does not support 5 GHz networks.
5.6 Voice Assistant Setup (Alexa/Google Assistant)
- Once connected to the app, open your Alexa or Google Home app.
- Enable the skill for your robot vacuum (refer to the app for the specific skill name).
- Follow the voice assistant app's instructions to link your robot vacuum account.
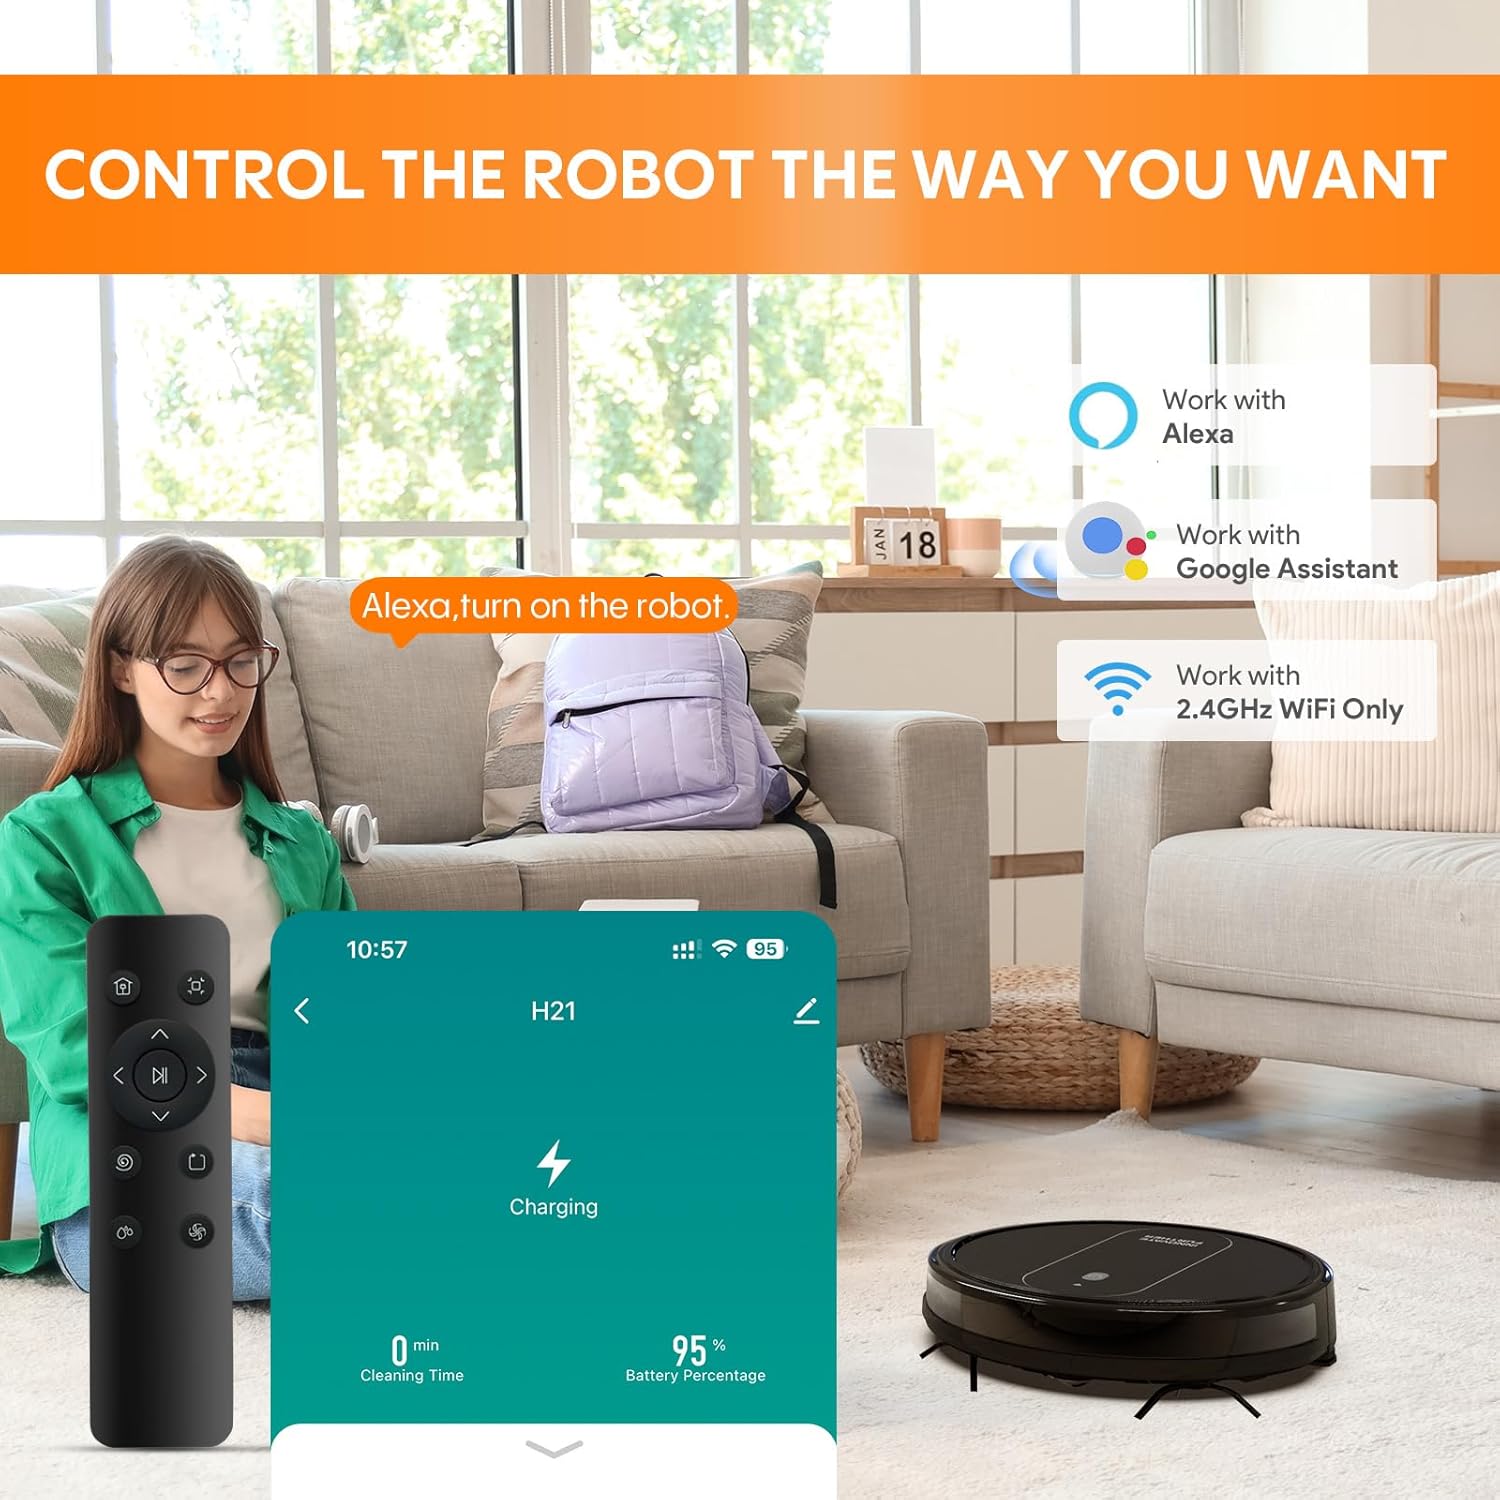
Image 5.3: Control options include remote, smartphone app, and voice commands via Alexa or Google Assistant.
6. Operating Instructions
6.1 Starting and Pausing Cleaning
- Start: Press the power button on the robot, or use the "Start" command in the app/remote.
- Pause: Press the power button again, or use the "Pause" command in the app/remote.
- Stop/Return to Base: Press and hold the power button for a few seconds, or use the "Return to Base" command in the app/remote.
6.2 Cleaning Modes
The robot offers multiple cleaning modes to suit different needs:
- Auto Cleaning: The robot intelligently navigates and cleans the entire area.
- Spot Cleaning: Focuses on a specific dirty area, cleaning in a spiral pattern.
- Edge Cleaning: Cleans along walls and furniture edges.
- Manual Control: Use the remote or app to direct the robot manually.
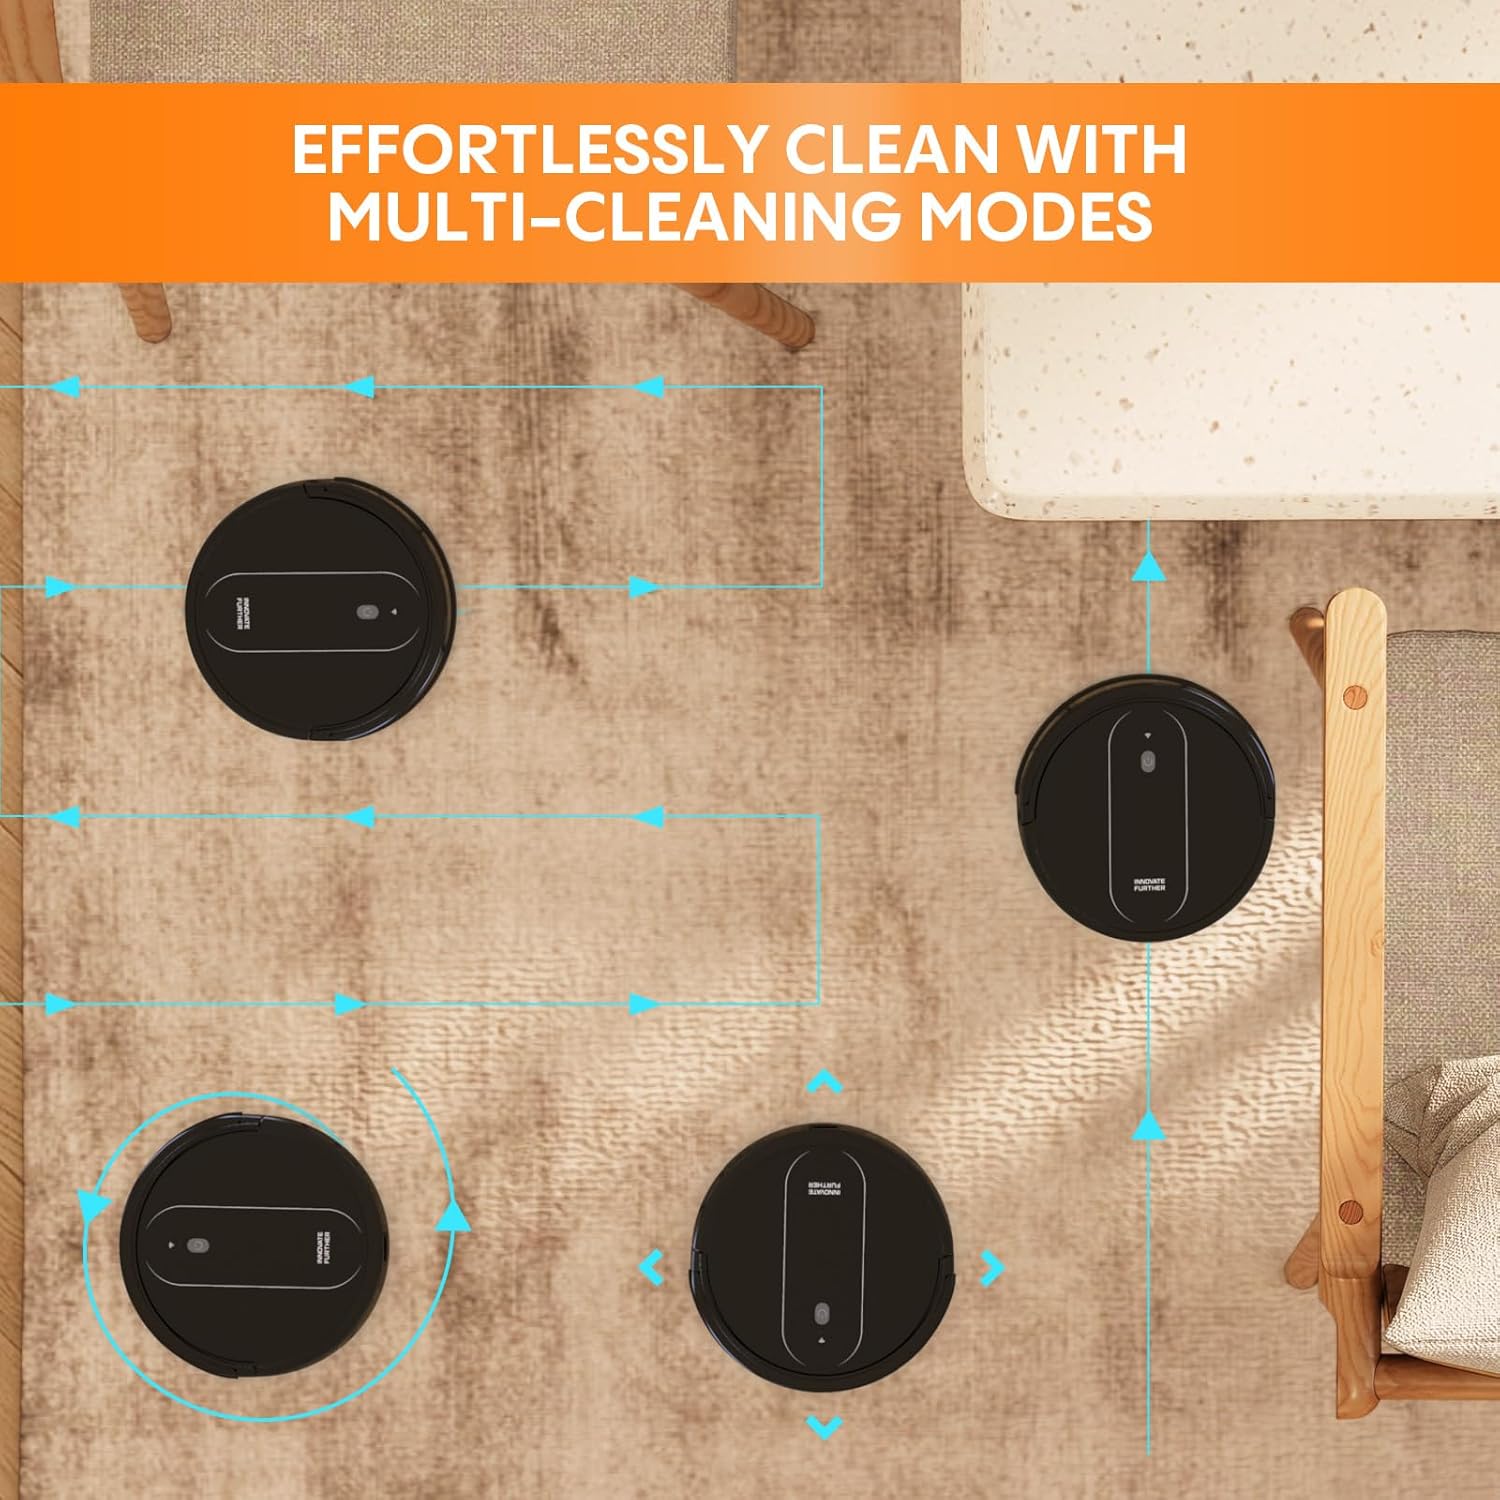
Image 6.1: The robot vacuum utilizes multiple cleaning modes for comprehensive coverage.
6.3 Scheduling Cleaning
You can set a cleaning schedule using the smartphone app:
- Open the app and navigate to the scheduling section.
- Set desired cleaning times and days.
- The robot will automatically start cleaning at the scheduled times.
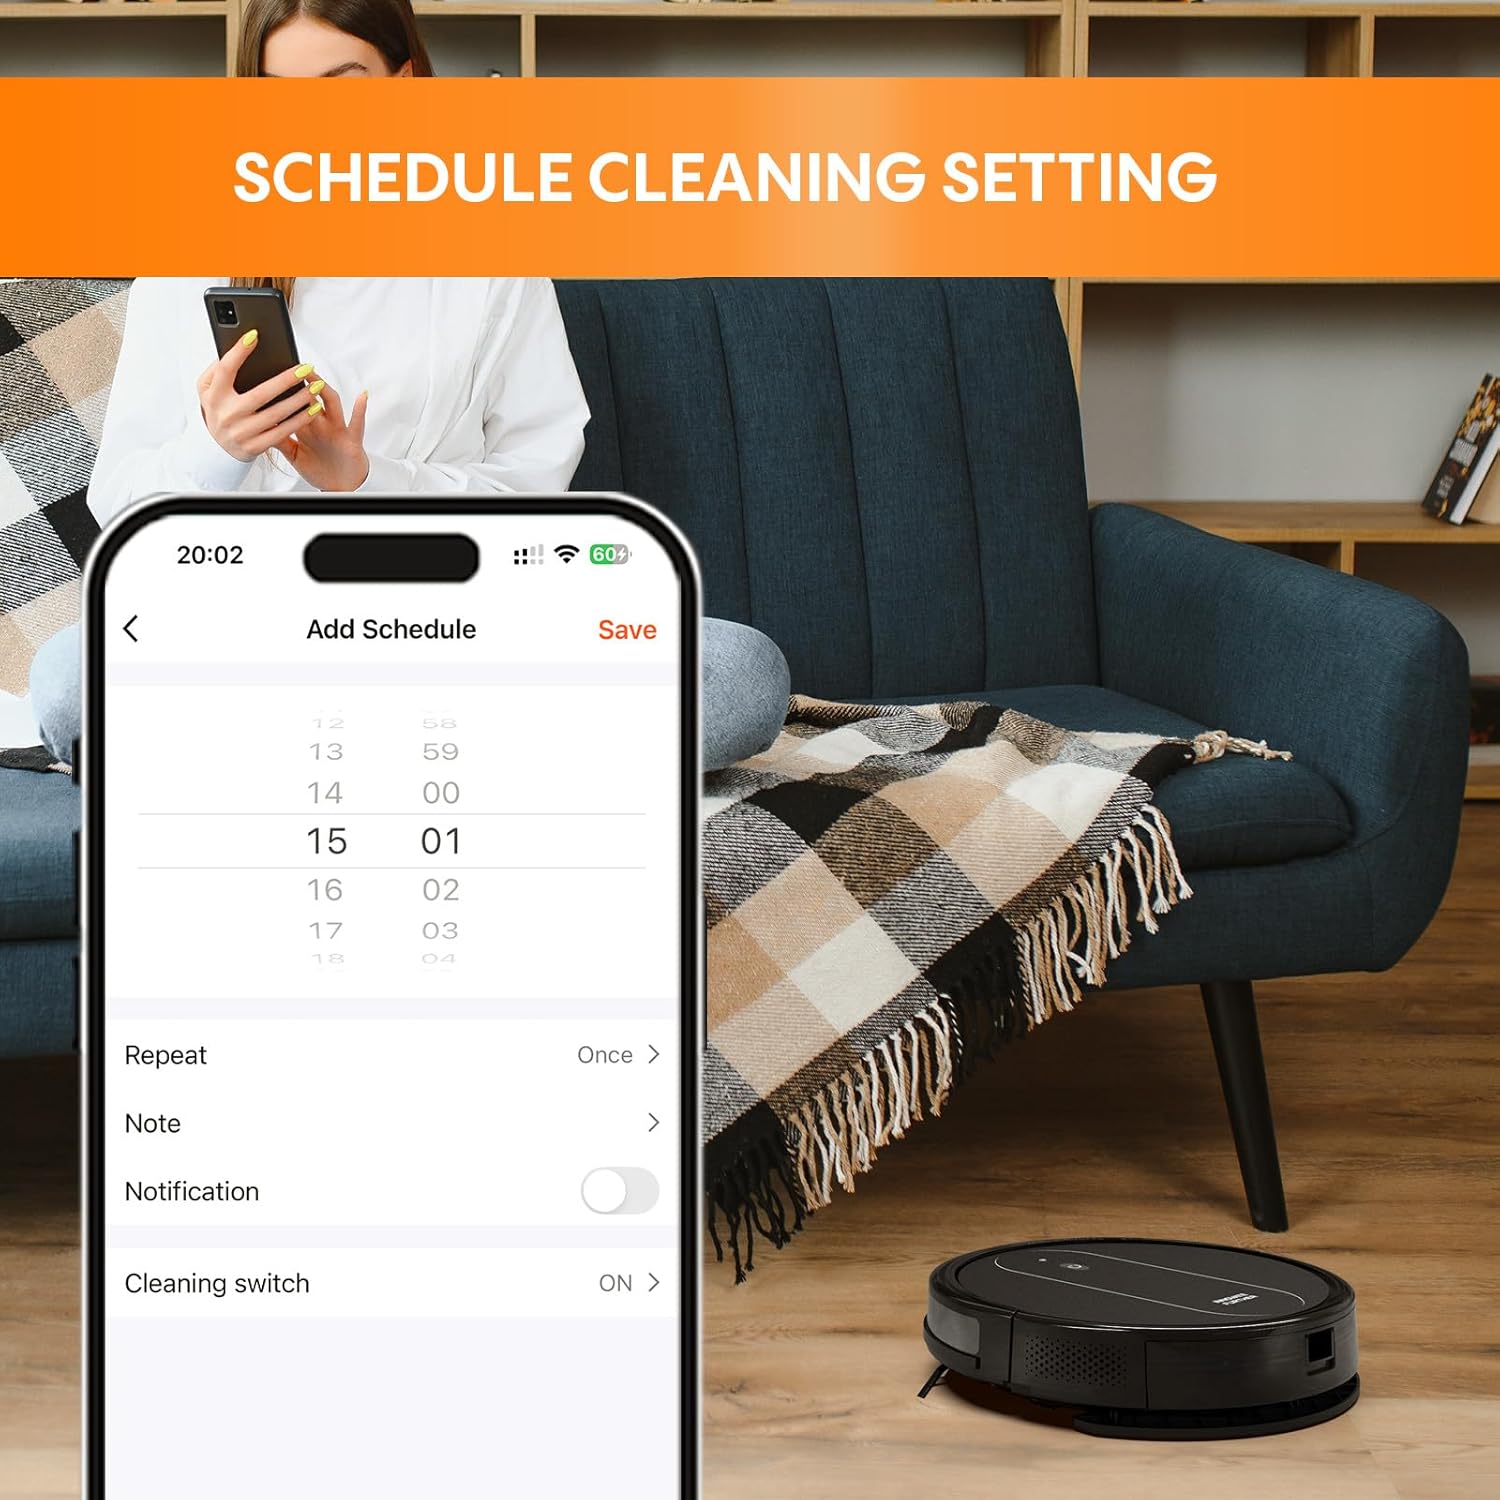
Image 6.2: The app allows users to set and manage cleaning schedules.
6.4 Mopping Function
For mopping, ensure the dust & water bin is filled with water and the mop pad is attached. The robot will vacuum and mop simultaneously.
- Do not use the mopping function on carpets or rugs.
- Remove the mop board and empty the water tank after each mopping session.
7. Maintenance
Regular maintenance ensures optimal performance and extends the lifespan of your robot vacuum.
7.1 Emptying the Dust & Water Bin
- Press the release button to remove the dust & water bin.
- Open the bin and empty debris into a trash can.
- Rinse the dustbin and water tank with clean water if necessary, and allow them to air dry completely before reinserting.
7.2 Cleaning the Filters
- Remove the HEPA filter and sponge filter from the dustbin.
- Tap the HEPA filter gently to remove dust. Do not wash the HEPA filter with water.
- Rinse the sponge filter with water and allow it to air dry completely.
- Replace filters every 3-6 months, or as needed, for best performance.
7.3 Cleaning Side Brushes
- Gently pull the side brushes off their posts.
- Remove any hair or debris wrapped around the brushes or posts.
- Reattach the brushes. Replace worn or damaged brushes.
7.4 Cleaning the Main Brush
- Remove the main brush cover and then the main brush.
- Use the provided cleaning tool to cut and remove any hair or debris tangled around the brush.
- Reinstall the main brush and its cover.
7.5 Cleaning Sensors and Charging Contacts
- Wipe the drop sensors (on the bottom of the robot) and the charging contacts (on the robot and charging base) with a clean, dry cloth.
- Keep these areas clean to ensure proper navigation and charging.
7.6 Cleaning the Mop Pad
- Remove the mop pad from the mop board.
- Hand wash or machine wash the mop pad with mild detergent.
- Allow it to air dry completely before reuse.
8. Troubleshooting
Refer to this section for common issues and their solutions.
| Problem | Possible Cause | Solution |
|---|---|---|
| Robot does not turn on. | Low battery; Power button not pressed. | Charge the robot fully; Press and hold the power button until it turns on. |
| Robot cannot charge. | Charging contacts are dirty; Charging base not powered. | Clean charging contacts on both robot and base; Ensure charging base is plugged in and powered. |
| Robot gets stuck frequently. | Obstacles on the floor; Sensors are dirty. | Clear loose cables and small objects; Clean all sensors. |
| Poor cleaning performance. | Dustbin full; Filters clogged; Brushes tangled. | Empty dustbin; Clean/replace filters; Clean main and side brushes. |
| Robot cannot connect to Wi-Fi. | Incorrect Wi-Fi band (5GHz); Incorrect password; Robot too far from router. | Ensure 2.4 GHz Wi-Fi; Re-enter password; Move robot closer to router. |
| Mopping function not working. | Water tank empty; Mop pad not attached or dirty. | Fill water tank; Attach/clean mop pad. |
9. Specifications
| Feature | Detail |
|---|---|
| Brand | AZQQ |
| Model Name | H21 |
| Product Dimensions | 12.2"L x 12.2"W x 3.14"H |
| Item Weight | 7.15 pounds |
| Color | Black |
| Power Source | Battery Powered |
| Battery Life | 120 minutes |
| Control Method | App, Remote, Voice (Alexa, Google Assistant) |
| Filter Type | Sponge, HEPA |
| Special Feature | 2-in-1 vacuuming while mopping, 4000 Pa strong suction, APP & Alexa voice control, 6 cleaning modes, Upgraded anti-entanglement roller brush. |
10. Warranty and Support
AZQQ provides a 24-month worry-free brand warranty for this product.
If you encounter any issues or have questions regarding the use of your AZQQ H21 Robot Vacuum and Mop, please contact our customer support team through Amazon. Our team is available to assist you with troubleshooting, parts replacement, and general inquiries.
For the quickest resolution, please have your product model (H21) and purchase details ready when contacting support.