
Important Safety Information
WARNING: Failure to follow these instructions may result in serious injury or damage to the product.
- Always ensure all components are securely fastened before each use.
- Verify that the bench legs are stable and the suction cups are firmly attached to the tub surface.
- Do not exceed the maximum weight capacity of 500 lbs.
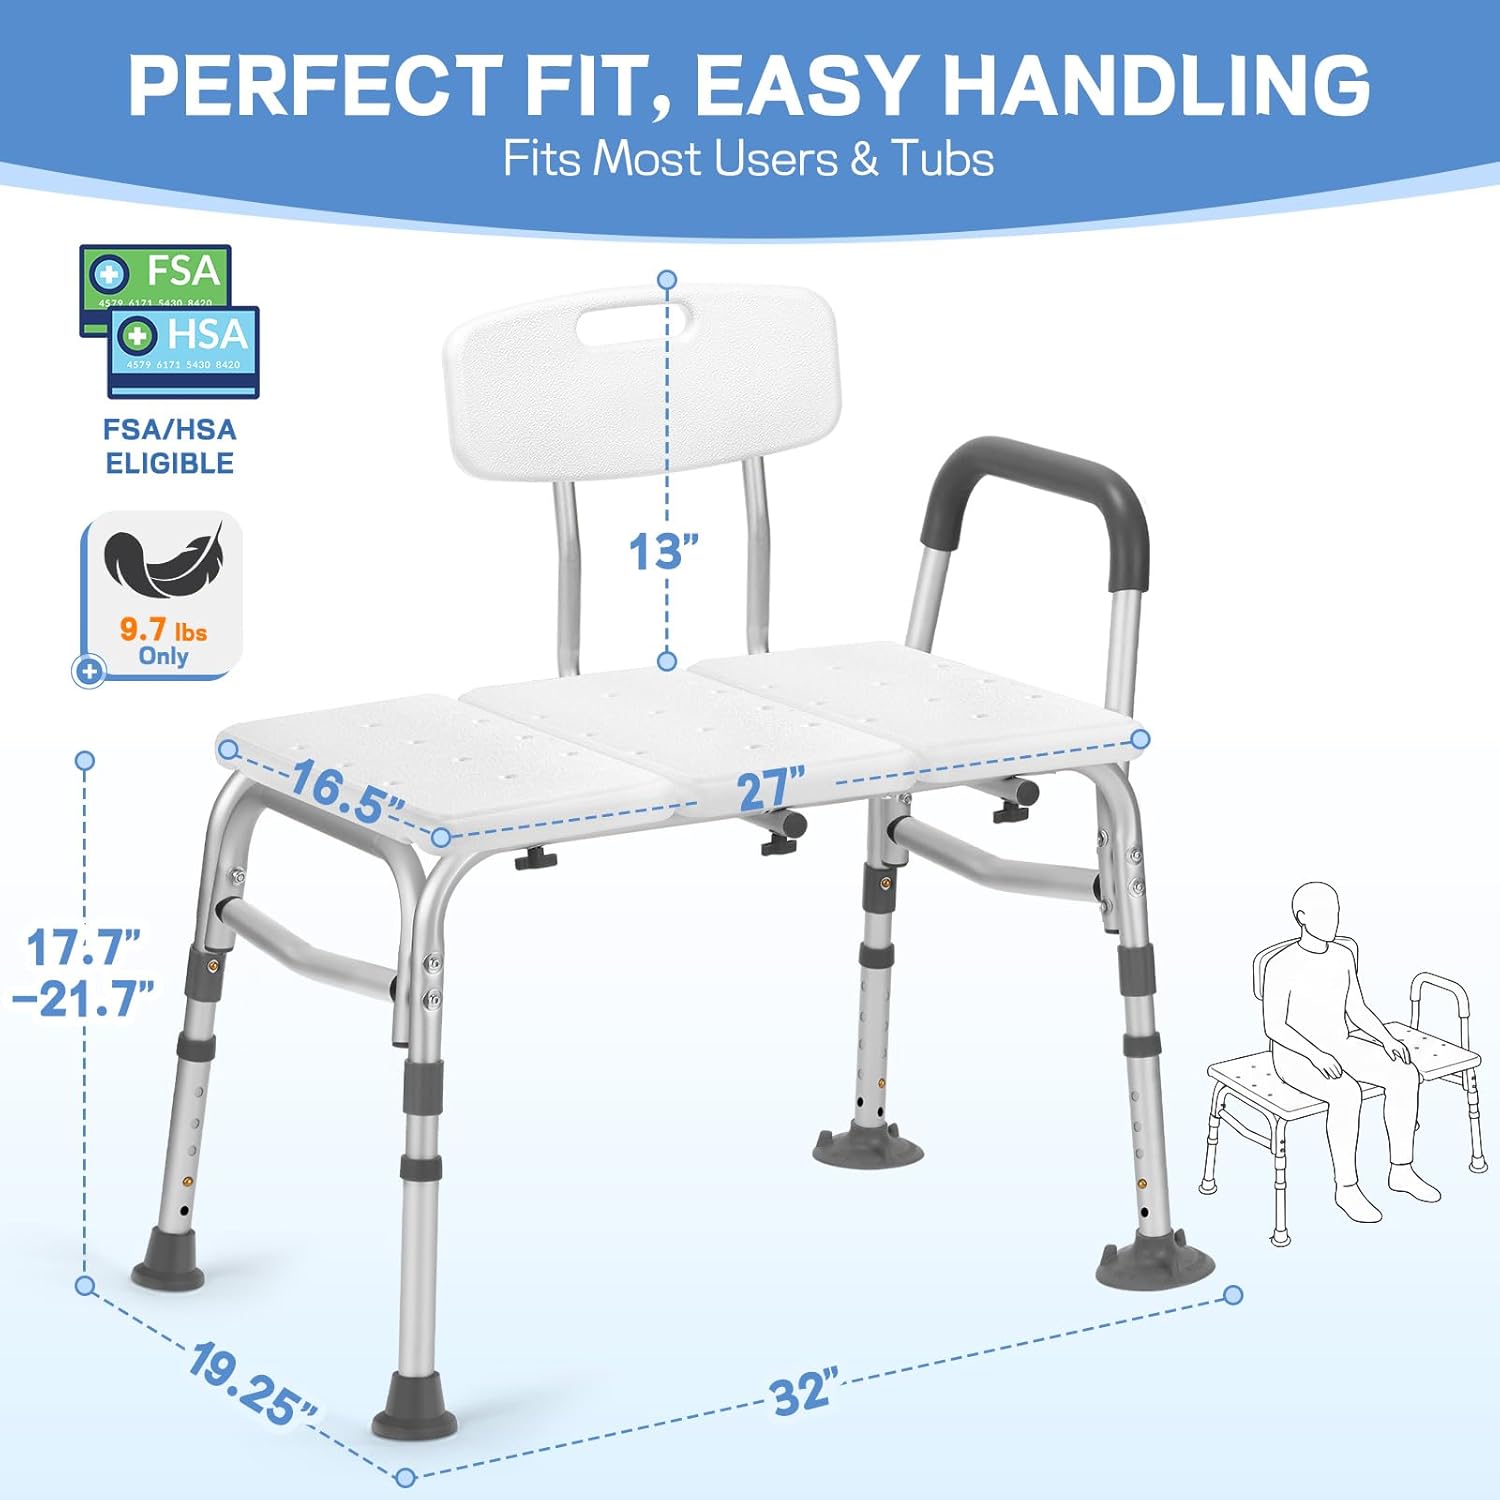
- Measure your bathroom space carefully to ensure proper fit and clearance (requires 32-inch total width clearance from interior tub wall to exterior floor legs).
- Ensure the tub exterior wall height is compatible (up to 19.75 inches).
- Use caution when transferring to and from the bench. Seek assistance if needed.
- Keep the bench clean and free of soap residue to prevent slipping.
Product Overview
The TABEKE Tub Transfer Bench is designed to provide a safe and stable seating solution for individuals requiring assistance with bathing. Its adjustable height, reversible backrest, and robust construction ensure comfort and security.

Parts List
Please ensure all parts are present before beginning assembly:
- Seat Panels (3 sections)
- Backrest (1)
- Armrest (1)
- Leg Tubes (6, with 10-level height adjustment)
- Cross Tubes for Backrest (2)
- Suction Cups (2, for inner tub legs)
- Non-slip Rubber Tips (4, for outer legs)
- Knobs/Bolts for assembly
- Shower Head Clamp (1)
Assembly Instructions
The TABEKE Tub Transfer Bench is designed for tool-free assembly. Follow these steps for quick and easy setup:
- Connect Seat Panels: Align and connect the three seat panels. Ensure they click securely into place.
- Attach Leg Tubes: Insert the six leg tubes into the designated slots on the underside of the seat panels. Ensure the push buttons fully pop out of the holes for secure locking. Two legs will have suction cups for placement inside the tub, and four will have non-slip rubber tips for outside the tub.
- Install Backrest Cross Tubes: Insert the two backrest cross tubes into the appropriate holes on the underside of the seat panels. Secure them with the provided bolts.
- Attach Backrest: Slide the backrest onto the backrest cross tubes. Ensure the push buttons engage securely.
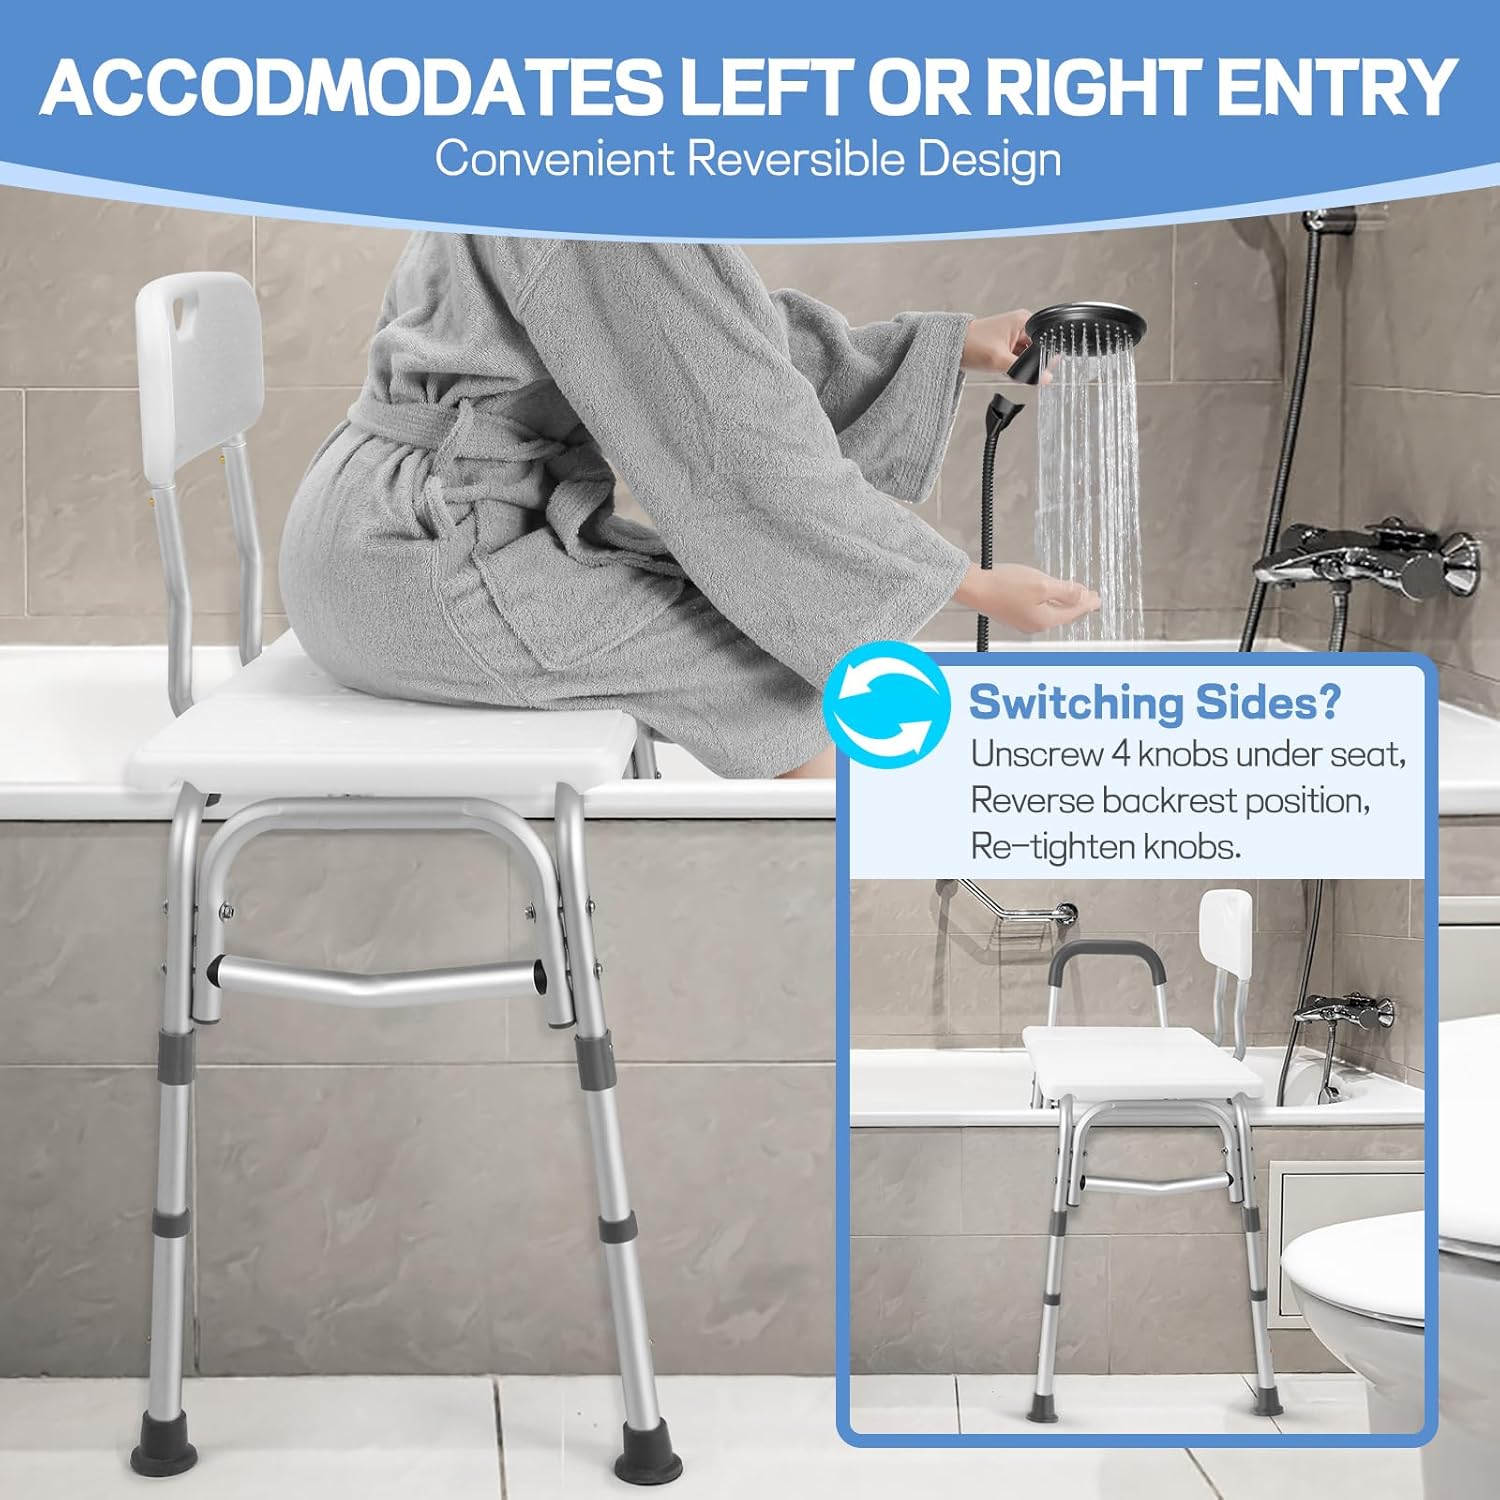
- Install Armrest: Insert the armrest into the designated slot on the side of the bench. Ensure it clicks into place. The armrest is reversible for left or right entry.
- Adjust Height: Press the detent buttons on each leg and slide the inner leg tube to adjust the height. Ensure all legs are set to the same position and the buttons snap into place.

Assembly Videos:
Video 1: Detailed assembly instructions for the TABEKE Tub Transfer Bench.
Video 2: Installation guide for the Drseats BathTub Shower Bench, similar to TABEKE assembly.
Video 3: Visual guide on how to install a tub transfer bench.
Operating Instructions
Using your TABEKE Tub Transfer Bench safely and effectively:
- Positioning: Place the bench with two legs inside the tub (suction cups) and two legs outside (rubber tips). Ensure the bench is stable and does not wobble.
- Transferring: Sit on the outer part of the bench. Use the armrest for support as you carefully swing your legs over the tub rim. Scoot across the seat until you are comfortably positioned inside the tub.
- Height Adjustment: The bench features 10 distinct height settings. Adjust the height to match your specific bathtub and personal comfort level. Ensure all legs are adjusted evenly.
- Reversible Backrest: The backrest can be reversed to accommodate left or right entry into the tub. To reverse, unscrew the 4 knobs under the seat, reverse the backrest position, and re-tighten the knobs.

Usage Videos:
Video 4: Instructions on how to reverse the backrest for left or right tub entry.
Video 5: Demonstration of customers using the TABEKE Tub Transfer Bench for bathing.
Video 6: Another view of customers utilizing the TABEKE Tub Transfer Bench.
Maintenance
To ensure the longevity and hygiene of your TABEKE Tub Transfer Bench:
- Clean the bench regularly with mild soap and water.
- Rinse thoroughly after cleaning to remove all soap residue.
- Inspect the rubber tips and suction cups periodically for wear and tear. Replace if damaged.
- Ensure all bolts and connections remain tight.
Troubleshooting
If you encounter any issues with your tub transfer bench, consider the following:
- Bench is wobbly: Ensure all leg height adjustment buttons are fully engaged and set to the same level. Check that the suction cups are firmly pressed onto a clean, dry tub surface.
- Difficulty with assembly: Refer to the assembly instructions and videos provided. Ensure all parts are correctly oriented and push buttons are fully engaged.
- Backrest not reversing: Ensure the 4 knobs under the seat are fully unscrewed before attempting to reverse the backrest. Re-tighten securely after adjustment.
Specifications
| Feature | Specification |
|---|---|
| Brand | TABEKE |
| Model Number | TBK-TB |
| Material | Aluminum, HD Foam, High Density Polyethylene (HDPE), Rubber |
| Maximum Weight Recommendation | 500 Pounds |
| Item Weight | 12.25 pounds (5.57 Kilograms) |
| Height Adjustment Levels | 10 levels (17.75 to 22 inches) |
| Minimum Height | 19.25 Inches |
| Compatible Tub Exterior Wall Height | Up to 19.75 inches |
| Required Clearance | 32-inch total width from interior tub wall to exterior floor legs |

Warranty and Support
TABEKE stands behind its products. We offer free replacement parts, including suction cups, tips, bolts, and more. Our dedicated customer support team is available 24/7 to answer your questions and ensure your satisfaction.
For assistance, please contact TABEKE customer support through your purchase platform or visit the official TABEKE store.