1. Introduction
Thank you for choosing the lamfurart 150PSI Portable Tire Inflator Air Compressor. This compact and versatile device is designed to provide convenient and efficient inflation for a variety of items, including car tires, motorcycle tires, bicycle tires, and sports balls. Featuring a digital tire pressure gauge, automatic shut-off, and multiple inflation modes, it ensures precise and safe inflation. This manual provides essential information for proper setup, operation, maintenance, and troubleshooting to ensure optimal performance and longevity of your device.
2. Package Contents
Please check the box for the following items:
- Portable Tire Inflator Unit
- Air Hose with Presta Valve Adapter
- 4 Nozzles (for cars, bicycles, kayaks, balls/swimming rings)
- USB-C Charging Cable
- Storage Bag
- User Manual

Image: The lamfurart portable tire inflator shown with its complete set of accessories, including the air hose, multiple inflation nozzles, a USB-C charging cable, and a convenient storage bag.
3. Product Overview
The lamfurart portable tire inflator features a compact design with an intuitive digital display and control panel. It includes a dual-screen digital display for real-time tire pressure and target pressure, along with buttons for power, mode selection, and pressure adjustment.
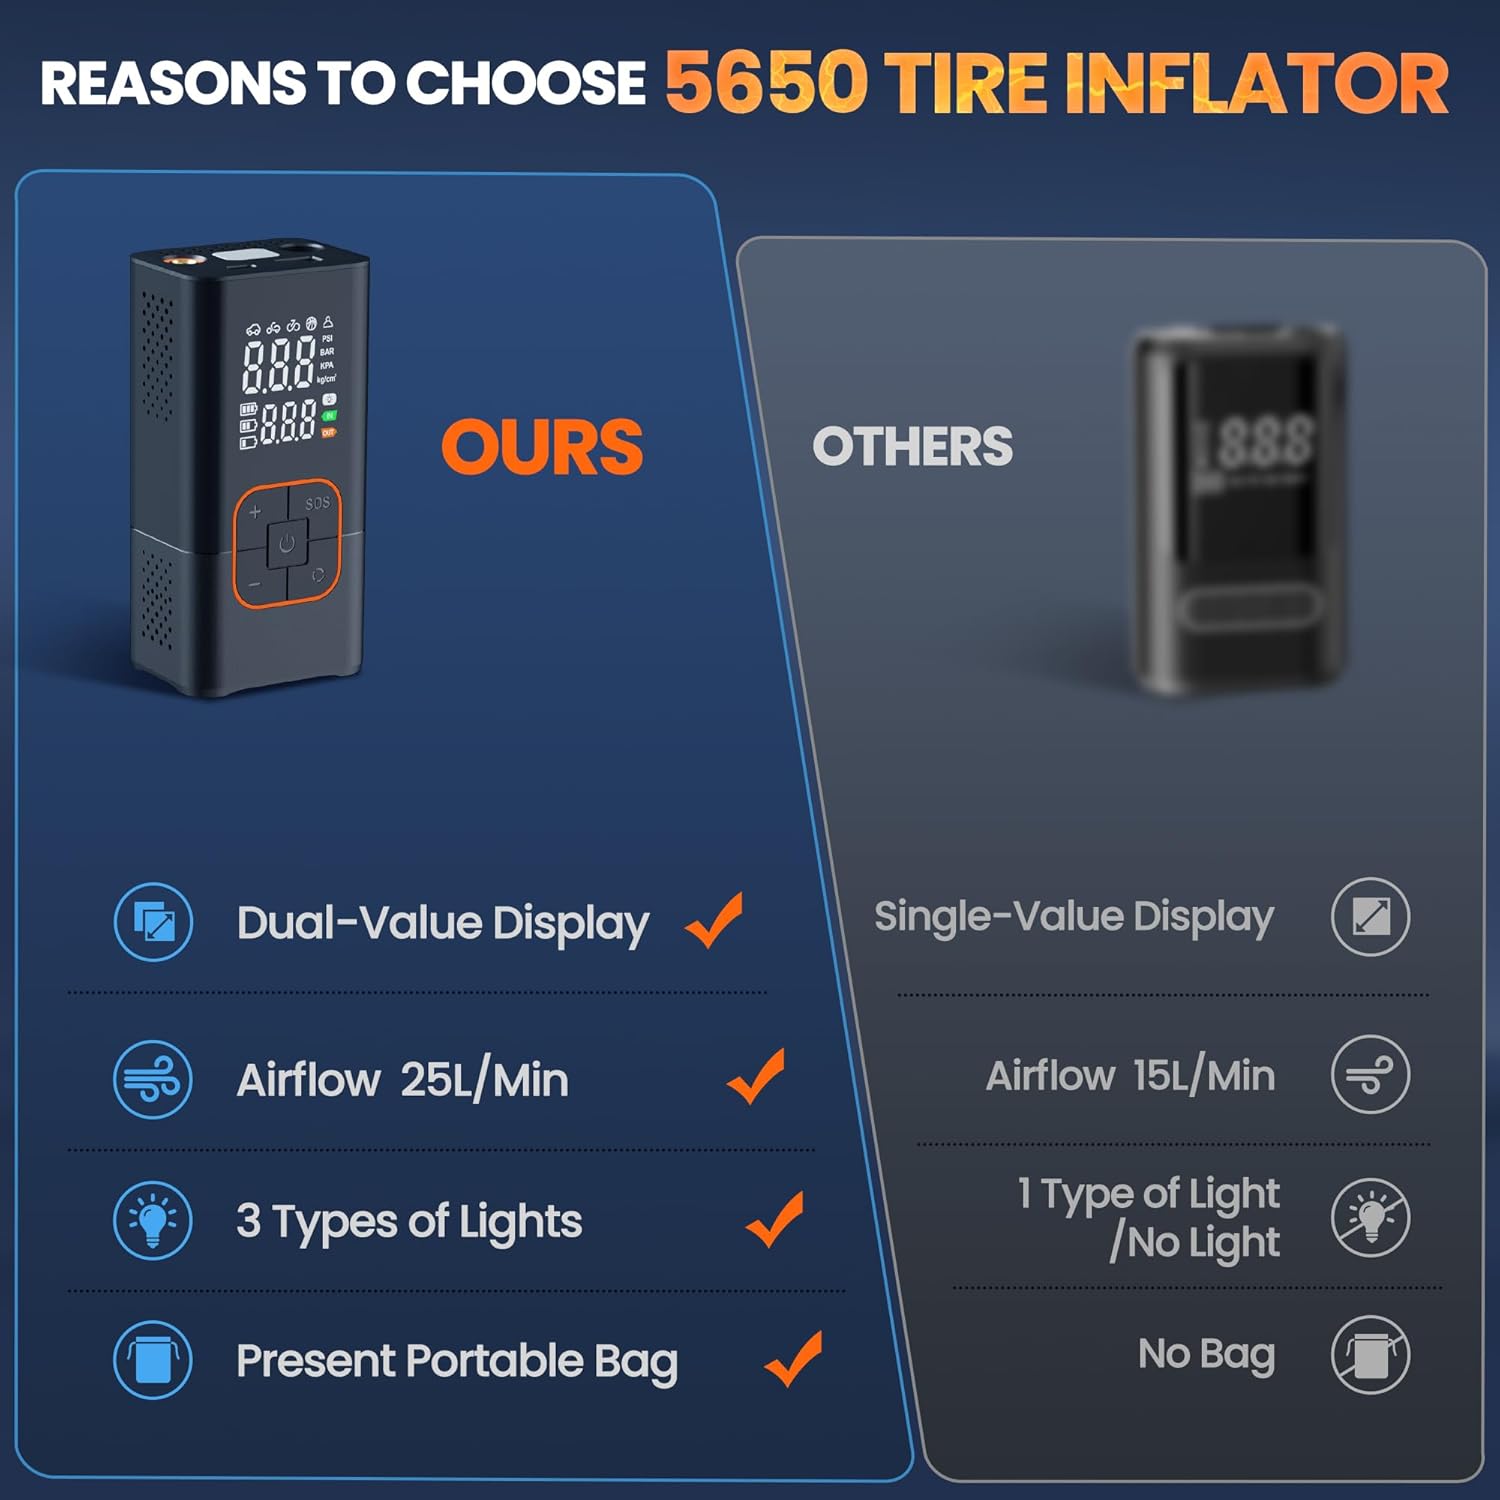
Image: A detailed view of the tire inflator's digital display, which shows both the current tire pressure and the user-set target pressure simultaneously.

Image: The control panel of the inflator, highlighting the power button, SOS emergency light button, pressure adjustment buttons (+/-), and the mode selection button.
4. Setup
- Charge the Device: Before first use, fully charge the tire inflator using the provided USB-C cable. Connect the USB-A end to a power adapter (not included) and the USB-C end to the inflator's charging port. The battery indicator on the display will show charging progress.
- Connect the Air Hose: Rotate the air hose head to connect it securely to the inflation port on the top of the device.
- Select Appropriate Nozzle: Choose the correct nozzle for the item you wish to inflate. The device comes with various nozzles for different applications:
- Car Nozzle: Standard screw-on adapter for car and motorcycle tires.
- Bicycle Nozzle: For bicycle tires.
- Ball Needle: For sports balls.
- Wide Nozzle: For inflatable toys, swimming rings, etc.
- Attach Nozzle to Air Hose: Securely attach the selected nozzle to the free end of the air hose.

Image: A user demonstrating how to connect the flexible air hose to the top port of the portable tire inflator, ensuring a secure fit before use.

Image: A visual guide illustrating the simple three-step process for operating the inflator: connecting the hose, setting the desired pressure or mode, and initiating inflation.
Setup Video:
Video: This video provides an unboxing and test of the lamfurart portable air pump, demonstrating its powerful performance and ease of initial setup.
5. Operating Instructions
5.1 Powering On/Off
Press and hold the power button (⏻) for a few seconds to turn the device on or off.
5.2 Selecting Inflation Mode
The inflator offers 4 preset inflation modes and 1 customizable mode. Press the mode button (⟳) to cycle through the following modes:
- Car Mode: Default pressure for car tires (e.g., 2.5 BAR).
- Motorcycle Mode: Default pressure for motorcycle tires (e.g., 2.5 BAR).
- Bicycle Mode: Default pressure for bicycle tires (e.g., 40 PSI).
- Ball Mode: Default pressure for sports balls (e.g., 8 PSI).
- Custom Mode: Allows you to set a desired pressure between 3-150 PSI. The device can save your last custom setting.
Long-press the mode button (⟳) to switch between pressure units (PSI, Bar, kPa, kg/cm²).

Image: The inflator's display showcasing its multi-functional capabilities with icons for car, motorcycle, bicycle, and ball modes, indicating its wide range of applications.
5.3 Setting Target Pressure
Once a mode is selected, use the plus (+) and minus (-) buttons to adjust the target pressure. The digital display will show both the current pressure and your set target pressure.
5.4 Starting and Stopping Inflation
After setting the target pressure, press the power button (⏻) to start inflation. The device will automatically stop once the target pressure is reached, preventing over-inflation. You can manually stop inflation at any time by pressing the power button again.
5.5 Emergency Light Function
The inflator is equipped with 3 lighting modes for enhanced visibility and safety:
- Flashlight: Press the SOS button once for a steady light.
- SOS Mode: Press the SOS button a second time for a flashing SOS signal.
- Strobe Light: Press the SOS button a third time for a rapid strobe light.
Press the SOS button a fourth time to turn off the light.
5.6 Power Bank Function
The device features USB-C and USB input/output ports, allowing it to serve as an emergency power source for charging your phone or other electronic devices.

Image: The portable air pump demonstrating its capability to act as a mobile power bank, charging a smartphone via its USB output port.
Operation Videos:
Video: This video showcases the lamfurart portable air pump, highlighting its user-friendly design and various applications for different inflation needs.
Video: A demonstration of the multi-functional capabilities of the mini air pump, showing its adaptability for various inflation tasks.
Video: This video highlights the compact and portable nature of the Super Mini Portable Air Pump 5650, showcasing its convenience for on-the-go use.
6. Maintenance
- Cleaning: Wipe the device with a soft, dry cloth. Do not use harsh chemicals or abrasive cleaners.
- Storage: Store the inflator in a cool, dry place away from direct sunlight and extreme temperatures. Ensure the air hose and nozzles are properly stored in the provided bag to prevent loss or damage.
- Battery Care: To prolong battery life, charge the device at least once every three months if not in regular use. Avoid fully discharging the battery for extended periods.
7. Troubleshooting
- Device Not Turning On: Ensure the battery is charged. If the battery is low, connect the device to a power source using the USB-C cable.
- No Air Output: Check if the air hose is securely connected to both the inflator and the tire/inflatable. Ensure the correct nozzle is attached and that the power button has been pressed to start inflation.
- Inaccurate Pressure Reading: Ensure the air hose is properly sealed to the valve stem. If the issue persists, recalibrate the device by turning it off and on again.
- Slow Inflation: Verify that the selected mode and target pressure are appropriate for the item being inflated. Ensure the battery has sufficient charge.
- Overheating: If the device feels excessively hot during prolonged use, turn it off and allow it to cool down before resuming operation.
8. Specifications
| Feature | Specification |
|---|---|
| Brand | lamfurart |
| Model Number | 5650-5 |
| Power Source | Battery Powered |
| Battery Type | Lithium-ion (1 AAA battery included) |
| Voltage | 7.4 Volts |
| Maximum Pressure | 150 PSI (Custom Mode) / 36 PSI (Default Car Mode) |
| Air Flow Capacity | 25 Liters Per Minute |
| Item Weight | 1.17 pounds |
| Package Dimensions | 5.83 x 3.19 x 2.91 inches |
| Special Features | Compact, Cordless, Easy to use, Portable, 4+N Inflation Modes, Digital Display, Emergency Light, Power Bank Function |
9. Warranty and Support
This lamfurart product comes with a 6-month warranty from the date of purchase. For any product inquiries, technical support, or warranty claims, please contact lamfurart customer service. We are committed to providing prompt assistance and will endeavor to reply within 24 hours.
Return Policy: A 30-day unconditional return guarantee is offered.
Lifetime Support: Lifetime customer and technical support is available for this product.