1. Introduction
This manual provides essential instructions for the safe and efficient installation, operation, and maintenance of the CHKYTAP NLQ4-250A/4P Dual Power Automatic Transfer Switch (ATS) 200A. Please read this manual thoroughly before attempting any installation or operation to ensure proper function and to prevent potential hazards.
2. Product Overview
The CHKYTAP NLQ4-250A/4P is a dual power automatic transfer switch designed to seamlessly switch between two power sources, typically a main power supply and a backup generator or alternative supply. This ensures continuous power to critical loads in the event of a primary power failure. This specific variant is rated for 200A and features a 4-pole configuration.

Figure 2.1: Front view of the CHKYTAP NLQ4-250A/4P Automatic Transfer Switch, showing the main body, current rating (250A label, though this variant is 200A), and control panel with selector switch and indicator lights.
3. Safety Information
WARNING: Electrical shock hazard. Installation and servicing must be performed by qualified personnel only. Failure to follow these instructions may result in serious injury or death.
- Always disconnect all power sources before installing or servicing the ATS.
- Ensure proper grounding of the equipment.
- Verify that the voltage and current ratings of the ATS match your application requirements. The rated voltage range for this device is above 50V and below 440V.
- Do not operate the ATS if it appears damaged.
- Adhere to all local and national electrical codes.
4. Installation (Setup)
The NLQ4-250A/4P ATS is designed for a "two in and one out" configuration, meaning it accepts two incoming power sources and provides one outgoing power supply to the load. Professional installation is highly recommended.
4.1 Mounting
- Select a suitable mounting location that is dry, well-ventilated, and free from excessive vibration or extreme temperatures.
- Ensure adequate clearance around the ATS for wiring and ventilation.
- Securely mount the ATS using appropriate fasteners to a stable surface.

Figure 4.1: Angled view of the ATS, highlighting the robust terminals for power connections and the overall compact design.
4.2 Wiring
Refer to the wiring diagram provided with your specific unit for detailed connection instructions. General steps include:
- Connect the primary power source (e.g., utility grid) to the designated input terminals.
- Connect the secondary power source (e.g., generator) to its designated input terminals.
- Connect the load (circuits to be powered) to the output terminals.
- Ensure all connections are tight and secure.
- Connect the control wiring as per the diagram for automatic operation and status indication.
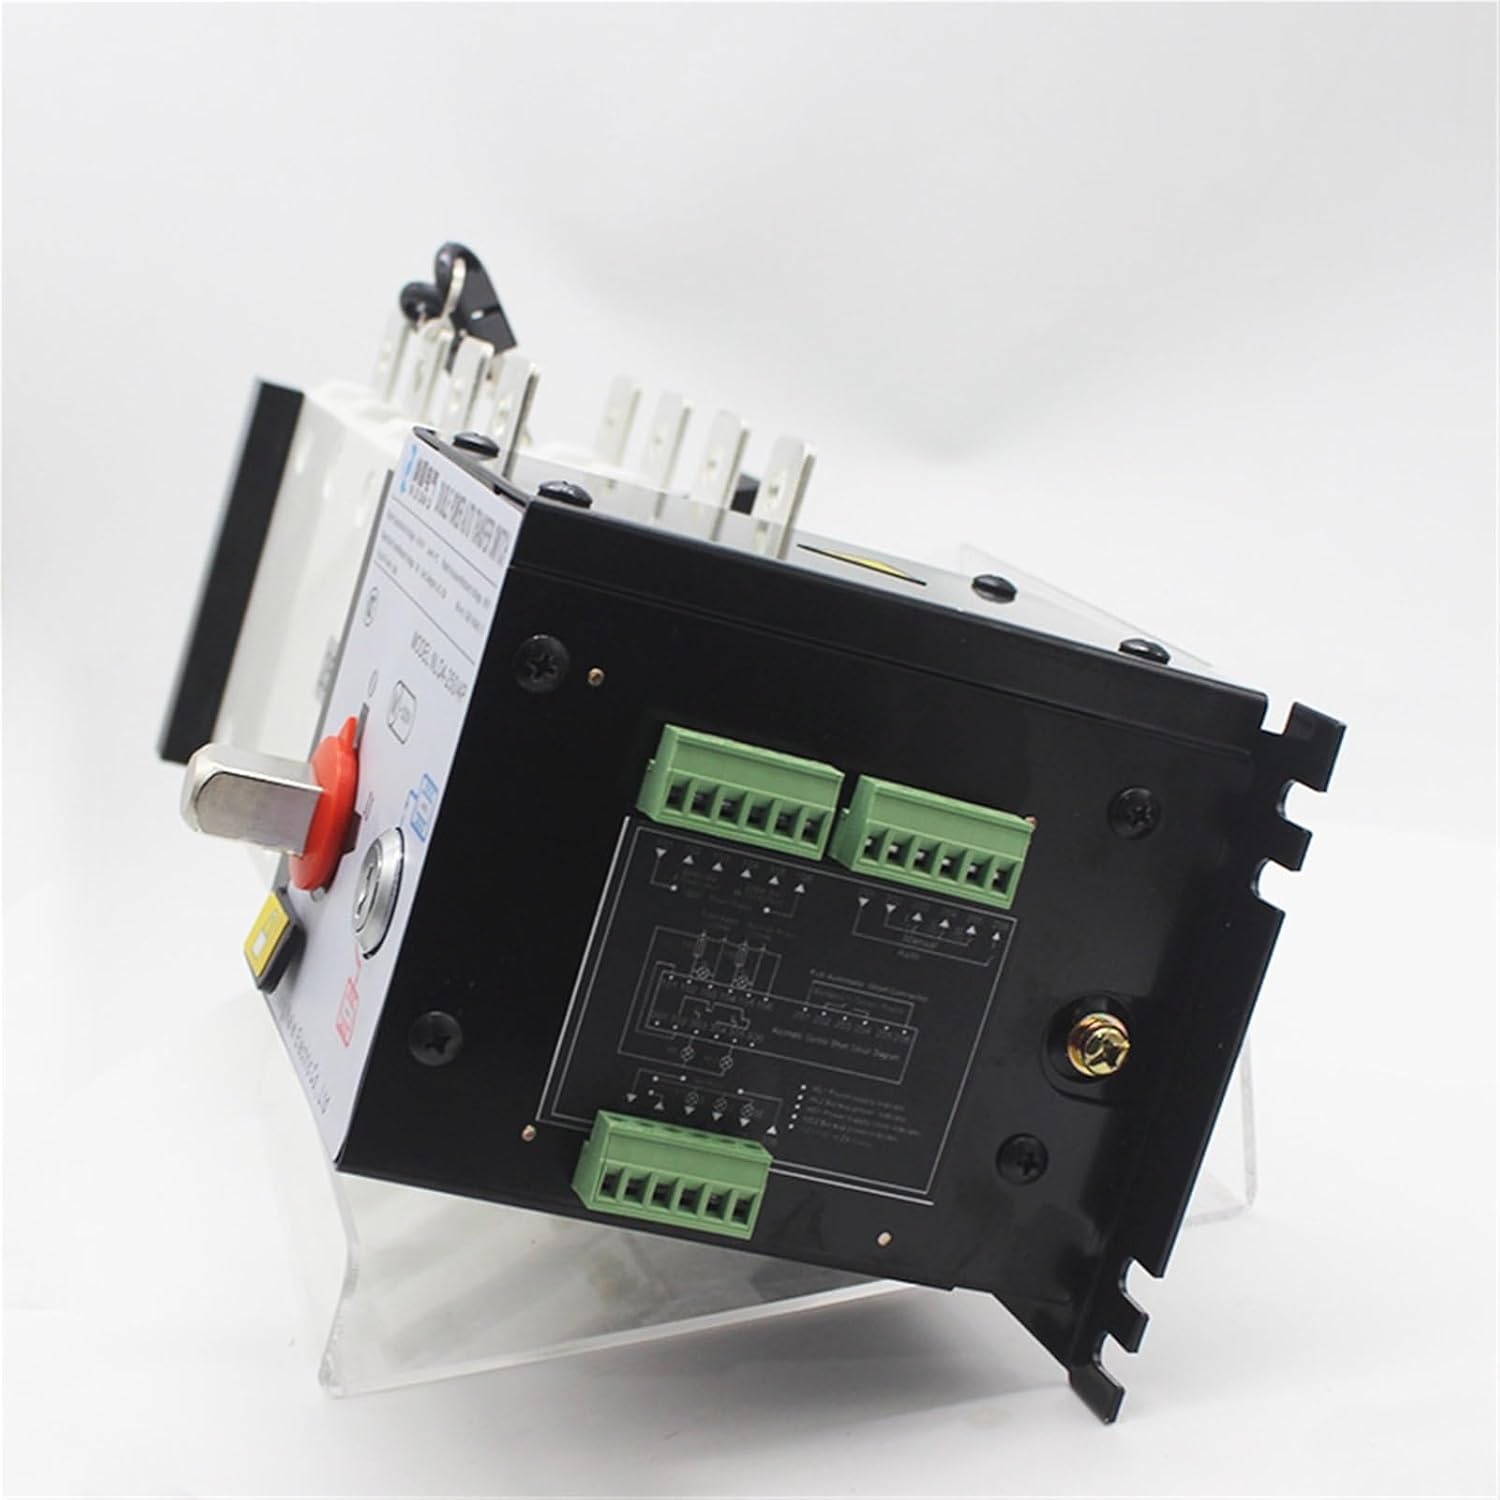
Figure 4.2: Rear view of the ATS, showing the control wiring terminals and a simplified wiring diagram label on the unit itself, crucial for correct installation.

Figure 4.3: Top-down view of the ATS, illustrating the main power terminals and the protective cover, emphasizing the robust construction.
5. Operation
The NLQ4-250A/4P ATS offers both automatic and manual operation modes.
5.1 Mode Selection
Use the selector switch on the front panel to choose the desired operating mode:
- AUTO: In this mode, the ATS will automatically transfer the load between the primary and secondary power sources based on their availability and pre-set parameters.
- MANUAL (I or II): This mode allows for manual switching between power source I and power source II using the lever. This is typically used for testing or maintenance. Ensure the key is inserted and turned to unlock the manual operation lever.
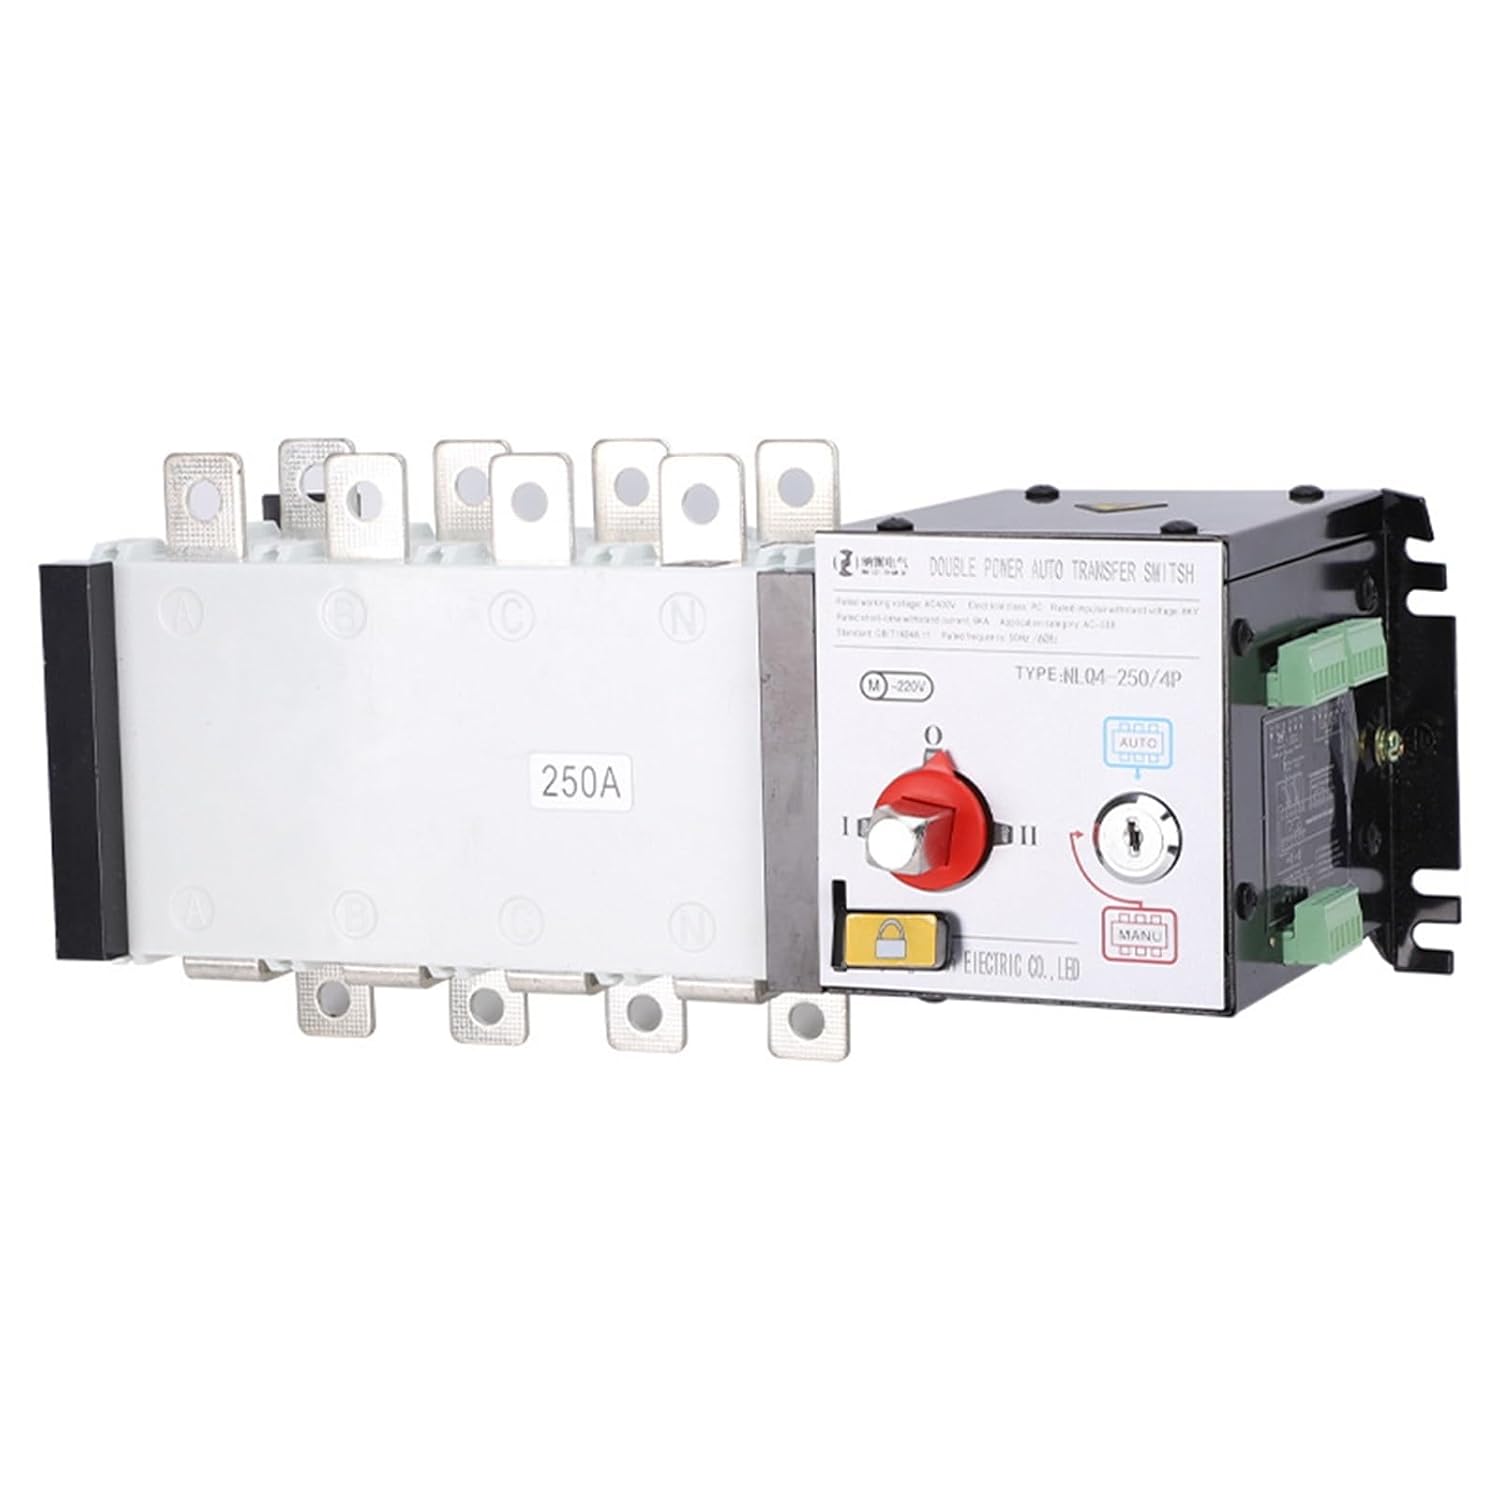
Figure 5.1: Close-up of the ATS control panel, showing the AUTO/MANUAL selector switch, indicator lights for power source status, and the key lock for manual override.
5.2 Indicator Lights
The front panel includes indicator lights to show the status of each power source and which source is currently supplying the load. Consult the specific labeling on your unit for exact indications.
6. Maintenance
Regular maintenance ensures the longevity and reliable operation of your ATS. Always disconnect all power before performing any maintenance.
- Periodic Inspection: Visually inspect the ATS and its connections for any signs of wear, damage, or loose wiring.
- Cleaning: Keep the unit clean and free from dust and debris. Use a dry, soft cloth for cleaning. Do not use liquid cleaners.
- Terminal Check: Periodically check all terminal connections for tightness.
- Functional Test: Conduct periodic functional tests (e.g., monthly or quarterly) to ensure the automatic transfer mechanism operates correctly. This should be done by qualified personnel.
7. Troubleshooting
If you encounter issues with your ATS, consider the following common troubleshooting steps. For complex problems, contact qualified service personnel.
- No Power Transfer:
- Check if both primary and secondary power sources are active and within acceptable voltage ranges.
- Ensure the ATS is in "AUTO" mode for automatic transfer.
- Verify control wiring connections.
- Indicator Lights Not Functioning:
- Check power supply to the control circuit.
- Inspect for loose connections or damaged wiring.
- Unusual Noises or Odors:
- Immediately disconnect all power sources.
- Do not attempt to operate the unit. Contact qualified service personnel.
8. Specifications
| Feature | Specification |
|---|---|
| Model | NLQ4-250A/4P (200A Variant) |
| Brand | CHKYTAP |
| Rated Current | 200A |
| Poles | 4P |
| Rated Voltage Range | Above 50V and below 440V |
| Configuration | Two in and one out |
| Manufacturer | CHKYTAP |
| ASIN | B0F8PPLQWH |
9. Warranty and Support
Warranty information for the CHKYTAP NLQ4-250A/4P Automatic Transfer Switch is typically provided at the point of purchase or directly by the manufacturer. Please retain your proof of purchase for warranty claims.
For technical support, service, or further inquiries, please contact CHKYTAP customer service or your authorized dealer. Contact details are usually available on the manufacturer's official website or product packaging.
10. Official Product Videos
No official product videos from the seller were provided in the product data for this model.


