
Introduction
Thank you for purchasing the Generic Stainless Steel Gas Patio Heater. This manual provides important information for the safe assembly, operation, and maintenance of your patio heater. Please read this manual thoroughly before assembly or operation. Keep these instructions for future reference.
Important Safety Information
WARNING: For outdoor use only. Improper installation, adjustment, alteration, service, or maintenance can cause injury or property damage. Read the installation, operating, and maintenance instructions thoroughly before installing or servicing this equipment.
- Always operate the heater on a level, non-combustible surface.
- Maintain adequate clearance from combustible materials: 24 inches from sides, 24 inches from rear, 36 inches from top.
- Do not store or use gasoline or other flammable vapors and liquids in the vicinity of this or any other appliance.
- Never leave the heater unattended while in operation.
- Keep children and pets away from the heater.
- Ensure proper ventilation. Do not use in enclosed spaces.
- Check for gas leaks using a soapy water solution, never an open flame.
Package Contents
Before assembly, ensure all parts are present and undamaged. If any parts are missing or damaged, do not attempt to assemble the heater. Contact customer service for assistance.
- Reflector Assembly
- Burner Assembly
- Post Assembly
- Base Assembly
- Wheel Kit
- Hardware Pack (bolts, nuts, washers)
- Regulator and Hose Assembly
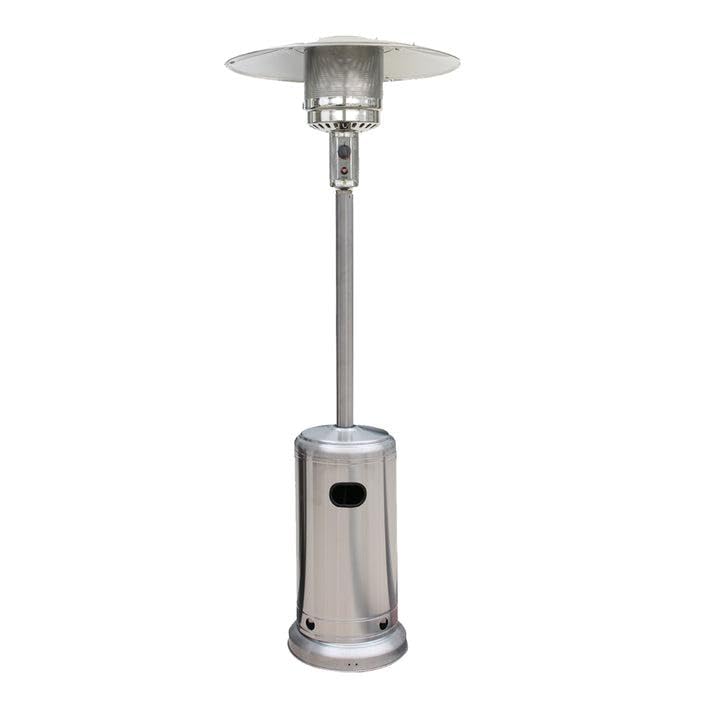
Image: An exploded view diagram showing all components of the Stainless Steel Gas Patio Heater, including the base, post, burner, reflector, and gas hose with regulator. Each part is labeled for easy identification during assembly.
Setup and Assembly
Follow these steps carefully for safe and correct assembly.
Step 1: Assemble the Base
- Place the Base Assembly on a flat surface.
- Attach the Wheel Kit to the designated holes on the base using the provided bolts and nuts. Tighten securely.
Step 2: Attach the Post to the Base
- Align the Post Assembly with the center hole on the Base Assembly.
- Secure the post to the base using the long bolts and washers from the hardware pack. Ensure the post is stable and upright.
Step 3: Install the Burner Assembly
- Carefully place the Burner Assembly onto the top of the Post Assembly.
- Secure it with the short bolts and nuts provided. Do not overtighten.
Step 4: Attach the Reflector
- Assemble the Reflector sections if necessary, following the instructions in the hardware pack.
- Mount the Reflector Assembly onto the top of the Burner Assembly using the reflector studs and wing nuts.
Step 5: Connect the Gas Supply
- Ensure the heater control knob is in the "OFF" position.
- Connect the Regulator and Hose Assembly to the gas inlet on the Burner Assembly. Tighten by hand, then use a wrench for a final snug fit.
- Connect the other end of the Regulator and Hose Assembly to a standard 20 lb. propane cylinder (not included). Turn the cylinder valve clockwise to tighten.
- Perform a leak test as described in the "Operating Instructions" section before first use.
Operating Instructions
Leak Test Procedure
Perform this test before initial use and after every gas cylinder change.
- Mix a solution of equal parts liquid dish soap and water.
- Ensure the heater control knob is "OFF" and the propane cylinder valve is "OFF".
- Apply the soap solution to all gas connections (regulator to hose, hose to burner inlet, cylinder to regulator).
- Slowly open the propane cylinder valve.
- If bubbles appear, there is a leak. Close the cylinder valve immediately and re-tighten connections. Repeat the test. If leaks persist, do not use the heater and contact customer service.
- If no bubbles appear, the connections are secure. Close the cylinder valve before proceeding to ignition.
Igniting the Heater
- Ensure the heater is on a stable, level surface and clear of combustibles.
- Open the valve on the propane cylinder fully.
- Push and turn the control knob to the "LOW" position.
- Press and hold the igniter button repeatedly until the burner ignites. You should hear a clicking sound and see a flame.
- Once ignited, continue to hold the control knob in for 10-15 seconds to allow the thermocouple to heat up.
- Release the control knob. If the flame goes out, repeat steps 3-6.
- Adjust the heat output by turning the control knob between "LOW" and "HIGH" as desired.
Shutting Down the Heater
- Turn the control knob to the "OFF" position.
- Close the valve on the propane cylinder completely.
- Allow the heater to cool down completely before moving or storing.
Maintenance
Regular maintenance ensures safe and efficient operation of your patio heater.
- Cleaning: Clean the exterior surfaces with a soft, damp cloth. Do not use abrasive cleaners or solvents.
- Reflector: Keep the reflector clean to maximize heat output. Wipe with a soft cloth when cool.
- Burner: Periodically inspect the burner for spider webs or insect nests, which can obstruct gas flow. Clean with a soft brush if necessary.
- Hose and Regulator: Inspect the gas hose and regulator for cuts, abrasions, or excessive wear before each use. Replace immediately if damaged.
- Storage: When not in use for extended periods, disconnect the propane cylinder and store it outdoors in a well-ventilated area. Cover the heater with a weather-resistant cover and store in a dry, protected location.
Troubleshooting
| Problem | Possible Cause | Solution |
|---|---|---|
| Heater will not ignite. | No gas flow; igniter not sparking; air in gas line; low gas pressure. | Check propane cylinder valve; check igniter electrode for damage; purge air by repeating ignition steps; check for sufficient gas in cylinder. |
| Flame goes out after releasing control knob. | Thermocouple not heating sufficiently; faulty thermocouple. | Hold control knob longer (15-20 seconds); ensure thermocouple is in flame path; contact service if issue persists. |
| Low flame or inconsistent heat. | Low gas in cylinder; regulator issue; clogged burner. | Replace or refill propane cylinder; check regulator for damage; clean burner ports. |
| Gas odor detected. | Gas leak. | IMMEDIATELY turn off gas supply at cylinder. Perform leak test. Do not operate if leak is found. |
Specifications
- Model: B0F8PKDCX4
- Fuel Type: Propane Gas
- Heat Output: Typically 40,000 BTU/hr (BTU per hour)
- Ignition Type: Piezoelectric
- Construction Material: Stainless Steel
- Mounting Type: Floor Mount
- Dimensions (Approx.): Height: 87 inches, Reflector Diameter: 32 inches, Base Diameter: 18 inches
- Safety Features: Tilt switch auto shut-off, Flame failure device
Warranty and Customer Support
This Generic Stainless Steel Gas Patio Heater is covered by a limited manufacturer's warranty. Please refer to the warranty card included with your purchase for specific terms and conditions. For technical assistance, replacement parts, or warranty claims, please contact our customer support team.
Customer Support:
- Website: www.example.com/support
- Email: support@example.com
- Phone: 1-800-XXX-XXXX (Monday - Friday, 9 AM - 5 PM EST)
Note: Contact information provided is for illustrative purposes only. Please refer to your product packaging or included documentation for actual support details.