1. Introduction
This manual provides detailed instructions for the installation, operation, and maintenance of your DMMRUTXB 4.3-inch Dual Lens Rearview Mirror Dash Cam. This device is designed to record both front and rear views of your vehicle, enhancing driving safety and providing evidence in case of incidents. Please read this manual thoroughly before using the product to ensure proper function and longevity.
2. Package Contents
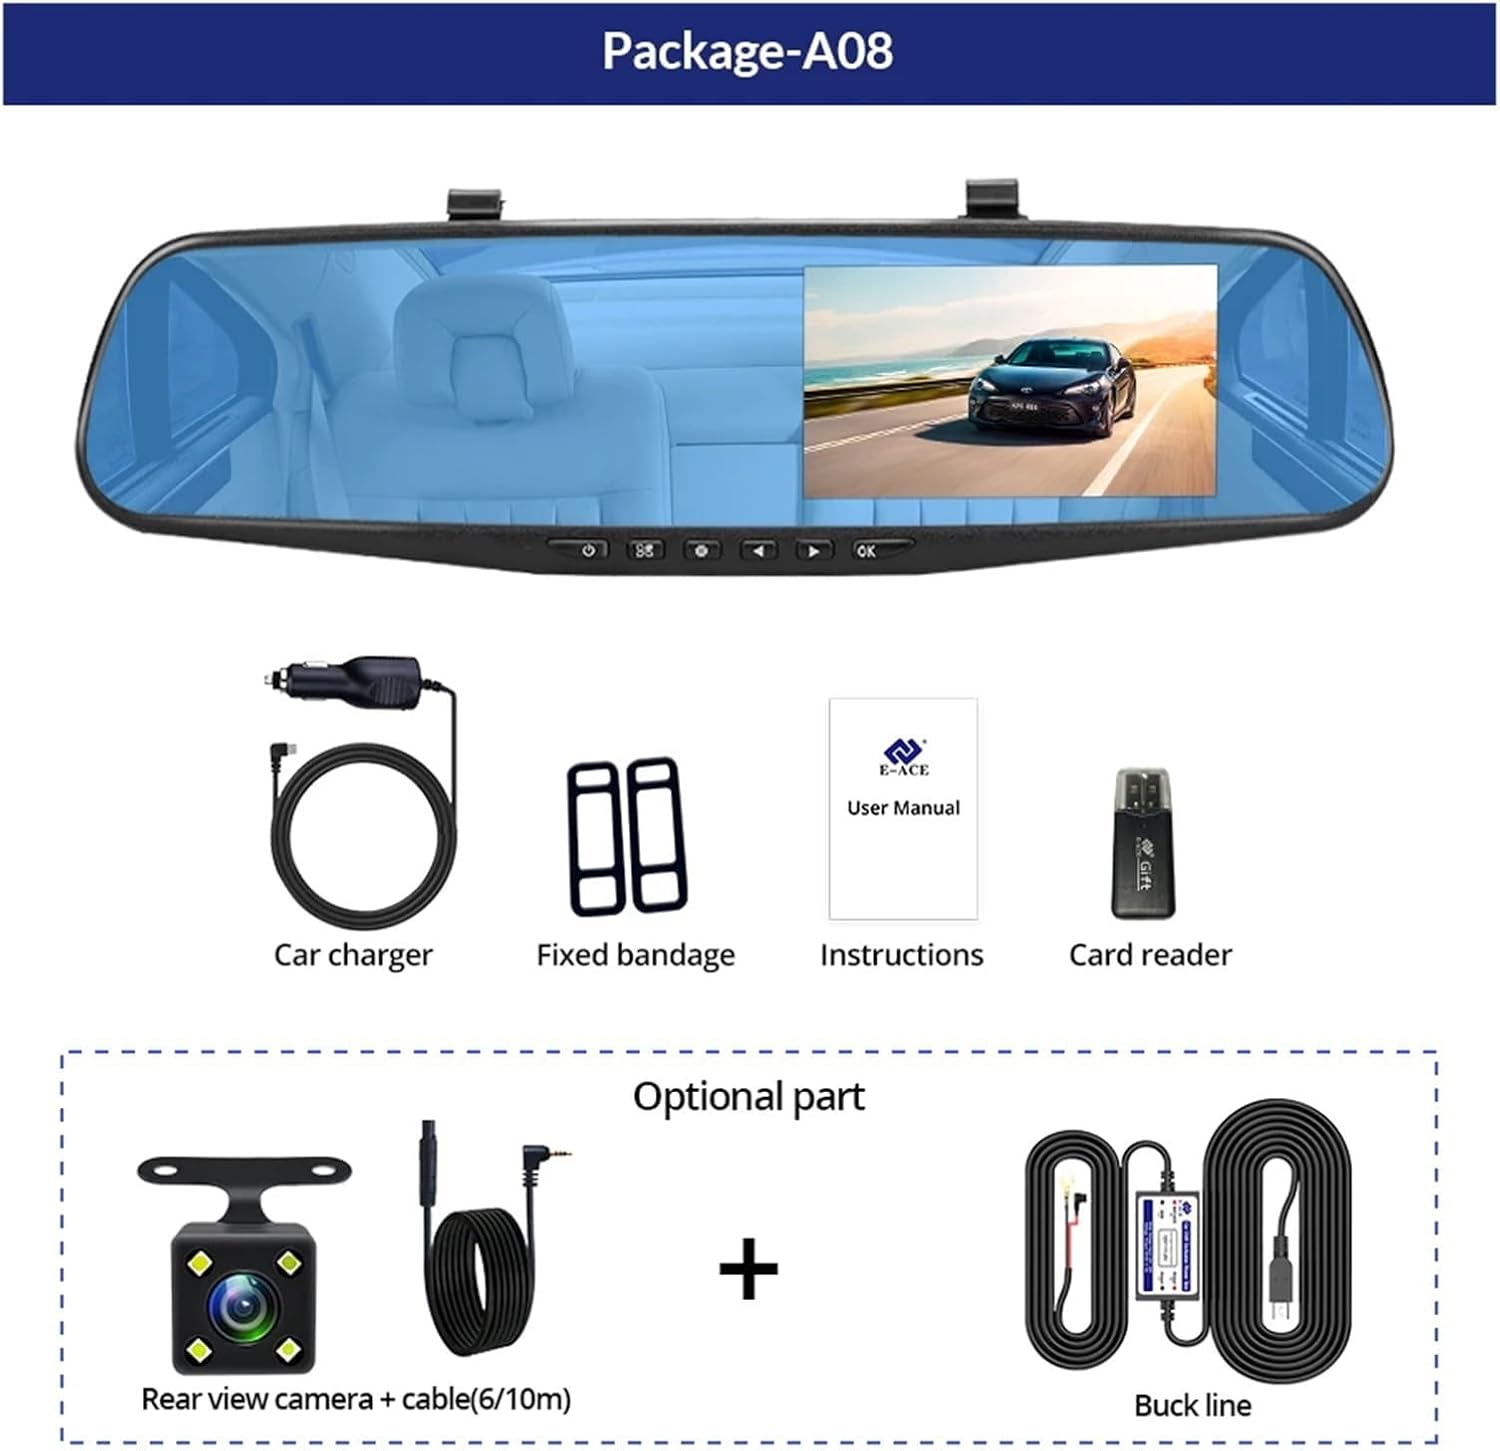
Image: Contents of the DMMRUTXB Dash Cam package, including the main unit, car charger, fixed bandages, user manual, and card reader. Optional rear view camera and buck line are also shown.
Please verify that all items listed below are present in your package:
- DMMRUTXB Rearview Mirror Dash Cam Unit
- Car Charger
- Fixed Bandages (for mounting)
- User Manual (this document)
- Card Reader
- Optional: Rear View Camera with Cable (6M/10M)
- Optional: Buck Line (for parking monitoring)
3. Product Overview
3.1 Components and Controls

Image: Front and top view of the DMMRUTXB Dash Cam, illustrating its dimensions (approximately 27cm wide, 8cm high) and the location of its buttons and ports.
- ON/OFF Button
- Menu Button
- Mode Button
- UP Button (Navigation)
- Down Button (Navigation)
- OK Button (Confirm/Record)
- TF Card Slot (MicroSD)
- AV-IN Port (for Rear Camera)
- USB Port (Power/Data)
- Reset Button
- Microphone
3.2 Key Features

Image: Icons representing key features of the DMMRUTXB Dash Cam, including automatic power on/off, G-Sensor, cycle recording, screen off recording, parking monitoring, playback on computer, 170-degree wide angle, motion detection, 4.3-inch screen, and reverse image display.
- 4.3-inch High-Definition Display
- Dual Lens Recording (Front and Rear)
- Full HD 1920*1080P Front Recording
- Wide Dynamic Range (WDR) and High Dynamic Range (HDR)
- Automatic Power On/Off
- G-Sensor for Emergency Recording
- Loop Recording
- Screen Off Recording Option
- Parking Monitoring (requires optional buck line)
- 170-Degree Wide Angle Front Lens
- Motion Detection
- Night Vision Technology
4. Setup
4.1 Mounting the Dash Cam

Image: Examples of the DMMRUTXB Dash Cam mounted over a vehicle's existing rearview mirror, showing both blue and white mirror variants in an installed context.
- Ensure your vehicle's engine is off.
- Place the DMMRUTXB Dash Cam over your existing rearview mirror.
- Use the provided fixed bandages to securely attach the dash cam to your mirror. Ensure it is centered and stable.
- Adjust the front camera lens to ensure it captures the road ahead clearly.
4.2 Installing the Rear Camera (Optional)
- Connect the rear camera cable to the AV-IN port on the main dash cam unit.
- Route the cable neatly along the vehicle's headliner and pillars to the rear of the vehicle.
- Mount the rear camera on the rear windshield or near the license plate using the adhesive pad or screws. Ensure it has a clear view of the rear.
- If connecting to reverse lights for parking assistance, consult a professional for wiring the red wire of the rear camera cable to your vehicle's reverse light power supply.
4.3 Power Connection
- Insert a high-speed MicroSD card (Class 10 or higher, up to 32GB recommended) into the TF Card Slot. Format the card in the device settings before first use.
- Connect the car charger to the USB port on the dash cam.
- Plug the other end of the car charger into your vehicle's cigarette lighter socket.
- Start your vehicle. The dash cam should power on automatically and begin recording.
5. Operating Instructions
5.1 Power On/Off
- Automatic: The device powers on and off automatically with your vehicle's ignition.
- Manual: Press and hold the ON/OFF button to manually power the device on or off.
5.2 Menu Navigation
- Press the Menu button to enter the settings menu.
- Use the UP and Down buttons to navigate through menu options.
- Press the OK button to confirm a selection.
- Press the Menu button again to exit the menu.
5.3 Recording Modes
- Loop Recording: The dash cam continuously records video in segments (e.g., 1, 3, or 5 minutes). When the memory card is full, it automatically overwrites the oldest unlocked footage. Adjust segment length in the settings.
- G-Sensor (Emergency Recording): In the event of a sudden impact or collision, the built-in G-sensor detects the event and automatically locks the current video file, preventing it from being overwritten by loop recording. Adjust sensitivity in settings.
- Motion Detection: When enabled, the dash cam will automatically start recording if it detects movement in front of the vehicle while parked. This feature requires a continuous power supply (e.g., via an optional buck line).
5.4 Display Modes
Press the Mode button to switch between different display views:
- Front Camera View Only
- Rear Camera View Only
- Picture-in-Picture (Front main, Rear sub-window)
- Picture-in-Picture (Rear main, Front sub-window)
5.5 Parking Monitoring
With the optional buck line installed, the dash cam can monitor your vehicle while parked. If an impact is detected, the device will automatically power on and record a short video, then power off. This protects your vehicle even when the engine is off.
6. Maintenance
- Cleaning: Use a soft, dry cloth to clean the lens and screen. Avoid using abrasive cleaners or solvents.
- Temperature: Do not expose the device to extreme temperatures (above 60°C or below -10°C) for extended periods.
- MicroSD Card: Format the MicroSD card regularly (e.g., once a month) to ensure optimal performance and prevent data corruption. Back up important files before formatting.
- Firmware: Check the manufacturer's website periodically for firmware updates to improve performance and add new features.
7. Troubleshooting
| Issue | Possible Solution |
|---|---|
| Device does not power on. | Check the car charger connection. Ensure the vehicle's cigarette lighter socket is functioning. Press the Reset button. |
| Recording stops unexpectedly. | Ensure the MicroSD card is Class 10 or higher. Format the MicroSD card. Replace the MicroSD card if issues persist. |
| Video footage is blurry. | Clean the camera lens. Ensure the protective film has been removed from the lens. |
| G-Sensor is too sensitive/not sensitive enough. | Adjust the G-Sensor sensitivity setting in the menu. |
| Rear camera not displaying. | Check the connection of the rear camera cable to the main unit. Ensure the cable is not damaged. |
8. Specifications
| Feature | Detail |
|---|---|
| Model Name | DMMRUTXB |
| Display Size | 4.3 Inches |
| Front Camera Resolution | FHD 1920*1080P |
| Lens Angle | 170 Degrees (Front) |
| Storage | MicroSD Card (Class 10+, up to 32GB) |
| Features | Loop Recording, G-Sensor, Motion Detection, Parking Monitoring, Night Vision, WDR/HDR |
| Power Interface | USB |
| Item Weight | 1.76 ounces (50 Grams) |
| Package Dimensions | 0.39 x 0.39 x 0.39 inches |
9. Warranty and Support
This DMMRUTXB product comes with a standard manufacturer's warranty. For specific warranty terms and conditions, please refer to the warranty card included in your package or contact DMMRUTXB customer support.
For technical assistance, troubleshooting, or any product-related inquiries, please contact DMMRUTXB customer support through the contact information provided on the product packaging or the official DMMRUTXB website.