Jortan Tech JORTAN6
JORTAN 6 WiFi Smart Security Camera Instruction Manual
Model: JORTAN6
1. Introduction
This manual provides comprehensive instructions for the installation, operation, and maintenance of your JORTAN 6 WiFi Smart Security Camera. This device features a dual-lens system, automatic tracking, AI-powered detection, and flexible storage options to enhance your security monitoring. Please read this manual thoroughly before using the product to ensure proper function and safety.
2. Safety Information
- Ensure the power supply matches the camera's requirements to prevent damage.
- Do not attempt to disassemble or modify the camera. This may void the warranty and cause damage.
- Keep the camera away from extreme temperatures, humidity, and direct sunlight.
- Install the camera securely to prevent it from falling.
- Avoid placing the camera in areas where it could be easily tampered with.
- Dispose of electronic waste responsibly according to local regulations.
3. Package Contents
Please check the package contents upon unboxing. If any items are missing or damaged, contact customer support.
- JORTAN 6 Smart Security Camera
- Power Adapter
- Mounting Screws and Wall Plugs
- User Manual (this document)
- (Optional) Remote Control (if included with your specific model)
4. Product Overview
The JORTAN 6 camera features a unique dual-lens design for comprehensive surveillance.
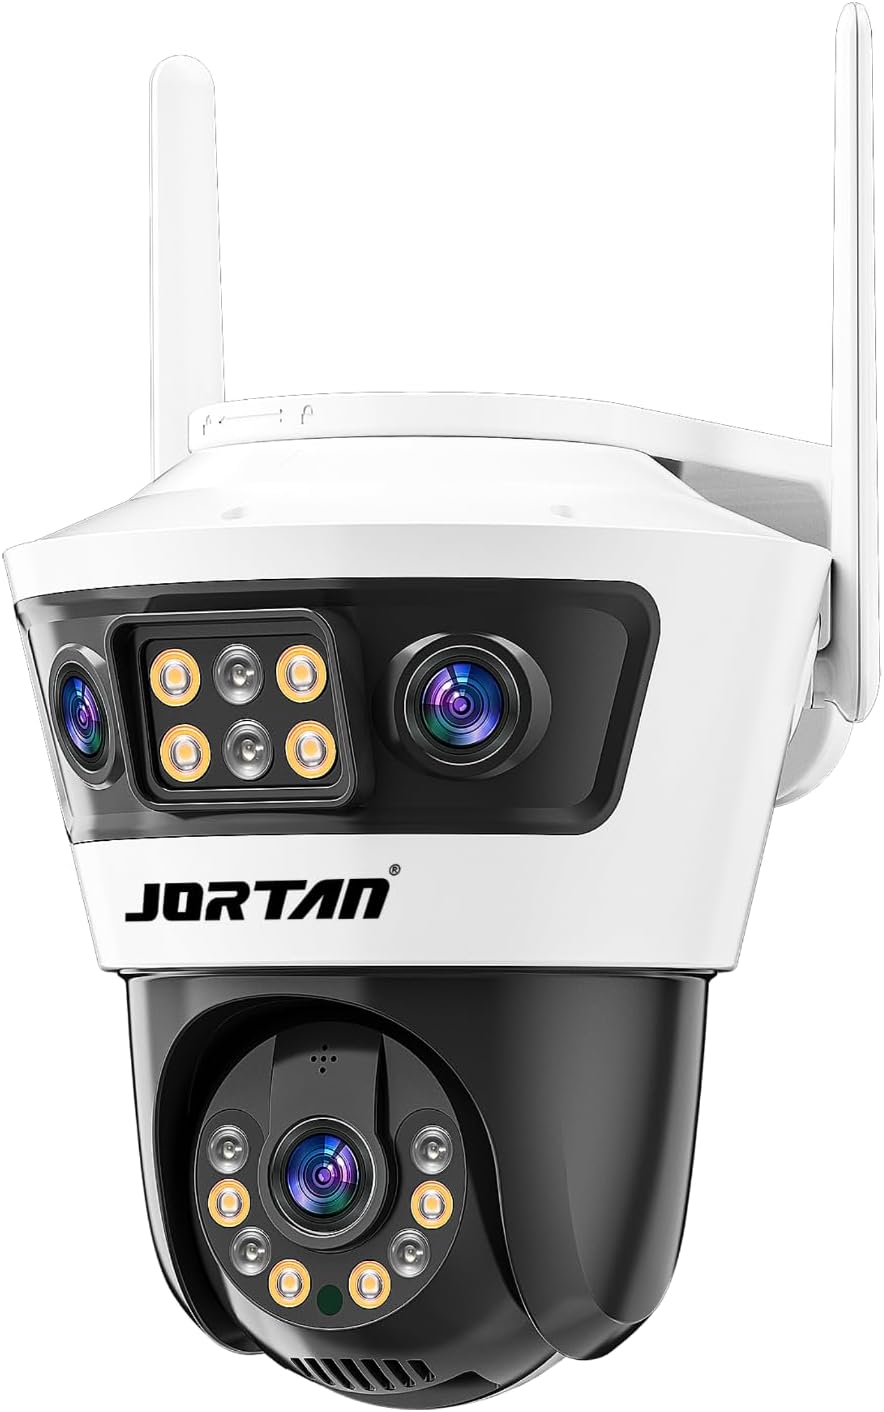
Image 4.1: Front view of the JORTAN 6 Smart Security Camera, showing the dual lens system, IR LEDs, and white LEDs.

Image 4.2: Overview highlighting the 4K 8MP resolution and dual-objective lens system of the camera.
Key Components:
- Upper Lens: Wide-angle lens for panoramic view.
- Lower Lens: Zoom lens for detailed capture and auto-tracking.
- Infrared (IR) LEDs: For black and white night vision.
- White LEDs: For full-color night vision and deterrence.
- Microphone: For audio input.
- Speaker: For two-way audio output.
- Antennas: For WiFi connectivity.
- Reset Button: Used for resetting the camera (usually located under a cover or near the SD card slot).
- SD Card Slot: For local storage (MicroSD card not included).
5. Setup
5.1 Physical Installation
The JORTAN 6 camera is designed for both indoor and outdoor use, featuring IP66 weather resistance.
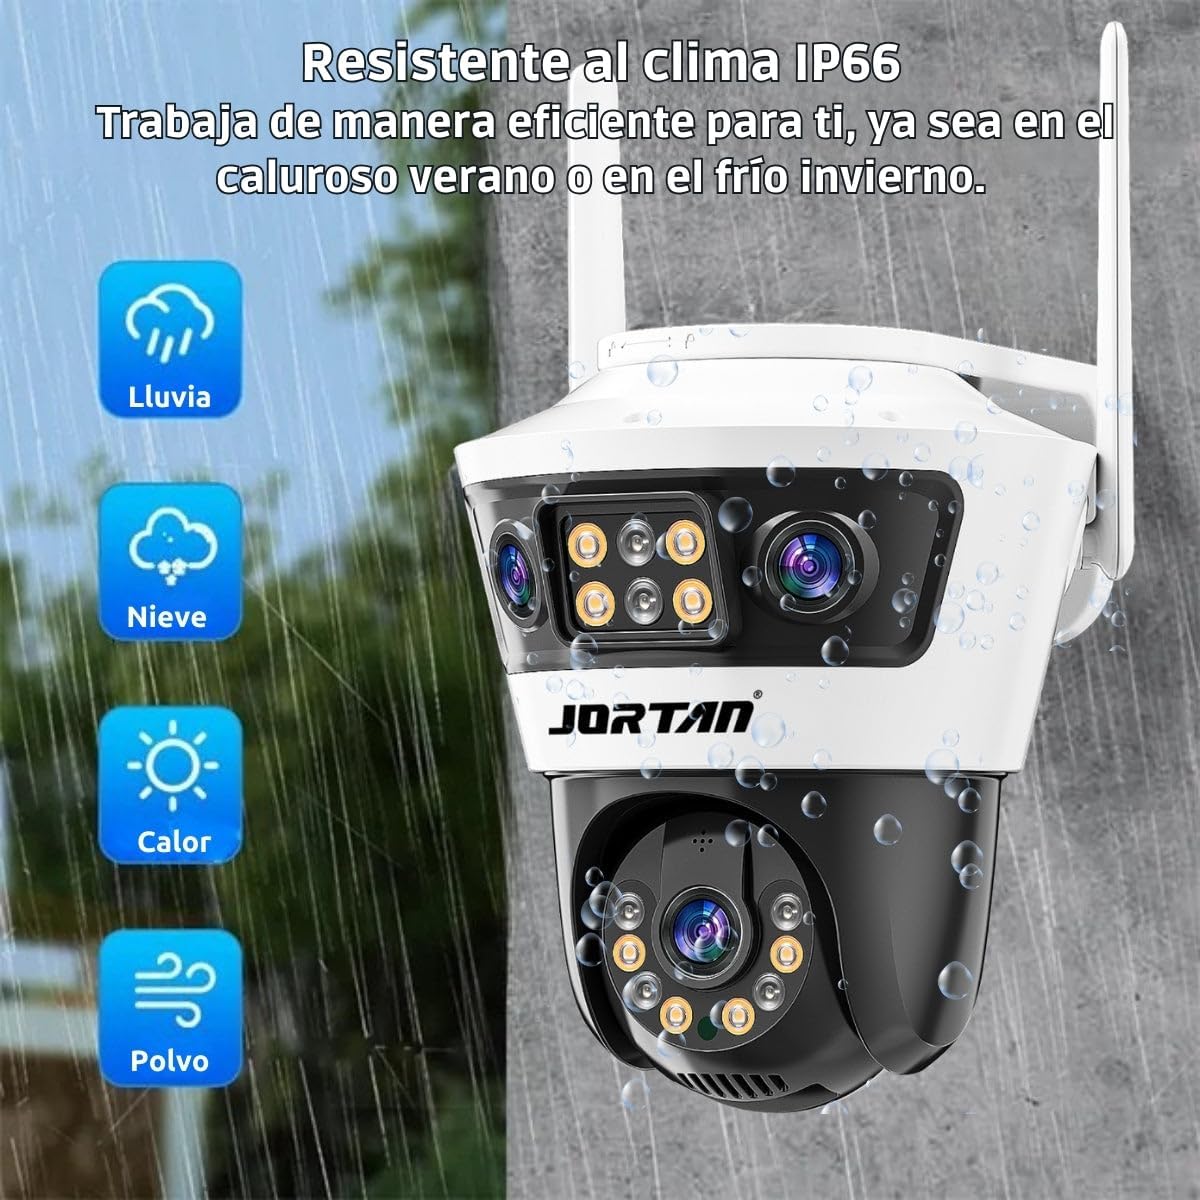
Image 5.1: The camera demonstrating its IP66 weather resistance, suitable for various environmental conditions including rain, snow, heat, and dust.
- Choose a Location: Select a suitable location that provides the desired viewing angle and is within range of your WiFi network. Ensure the power outlet is accessible.
- Mounting:
- Use the provided mounting template (if available) to mark drill holes on the wall or ceiling.
- Drill holes and insert wall plugs.
- Secure the camera's mounting bracket with the screws.
- Attach the camera to the bracket.
- Power Connection: Connect the power adapter to the camera and plug it into a power outlet. The camera will power on and initiate its self-test.
5.2 App Installation and Account Creation
- Download the App: Search for the recommended security camera app (e.g., "Jortan Smart" or similar, check packaging for QR code) on your mobile device's app store (iOS or Android).
- Register Account: Open the app and follow the on-screen instructions to register a new account using your email or phone number.
5.3 Network Connection (WiFi)
- Add Device: In the app, tap "Add Device" or the "+" icon.
- Select Camera Type: Choose your camera model or select "Smart Camera" / "WiFi Camera".
- Reset Camera: If prompted, press and hold the camera's reset button for 5-10 seconds until you hear a prompt or see an indicator light change.
- Connect to WiFi: Enter your 2.4GHz WiFi network name and password. (Note: 5GHz WiFi is generally not supported by security cameras).
- Scan QR Code: The app will generate a QR code. Hold your phone's screen in front of the camera lens (approx. 15-20 cm) until the camera confirms successful scanning.
- Connection Complete: Once connected, the camera will appear in your app's device list. You can then rename it and begin configuration.
6. Operating Instructions
6.1 Live View and Pan/Tilt Control
Access the live feed from your camera through the mobile app. You can remotely control the camera's pan (horizontal) and tilt (vertical) movements.

Image 6.1: Illustrates the remote control functionality via the mobile app, allowing users to adjust the camera's viewing angle (Pan 350°, Tilt 90°).
6.2 Recording and Storage
The camera supports dual storage options: cloud storage and local MicroSD card storage.
- MicroSD Card: Insert a MicroSD card (up to 128GB, Class 10 recommended) into the designated slot. The camera will automatically begin recording based on your settings (e.g., continuous, motion-triggered).
- Cloud Storage: Subscribe to the cloud storage service through the app for secure, off-site storage of your recordings. This ensures data protection even if the camera is damaged or stolen.
6.3 Motion Detection and AI Features
The camera integrates AI-based recognition for enhanced detection and reduced false alarms.
- Auto Tracking: When motion is detected, the camera can automatically track the moving object within its field of view.
- AI Recognition: Configure the camera to identify specific objects such as human figures, pets, or vehicles, optimizing alerts and focusing on relevant events.
- Alerts: Receive instant notifications on your mobile device when motion or specific AI-detected events occur.
6.4 Two-Way Audio
Utilize the built-in microphone and speaker for two-way communication.

Image 6.2: Depicts the two-way audio feature, allowing communication with individuals near the camera, such as instructing a delivery person.
To use: In the live view interface of the app, tap the microphone icon to speak and the speaker icon to listen.
6.5 Night Vision and Dual Light Modes
The camera offers multiple night vision modes for optimal visibility in low-light conditions.
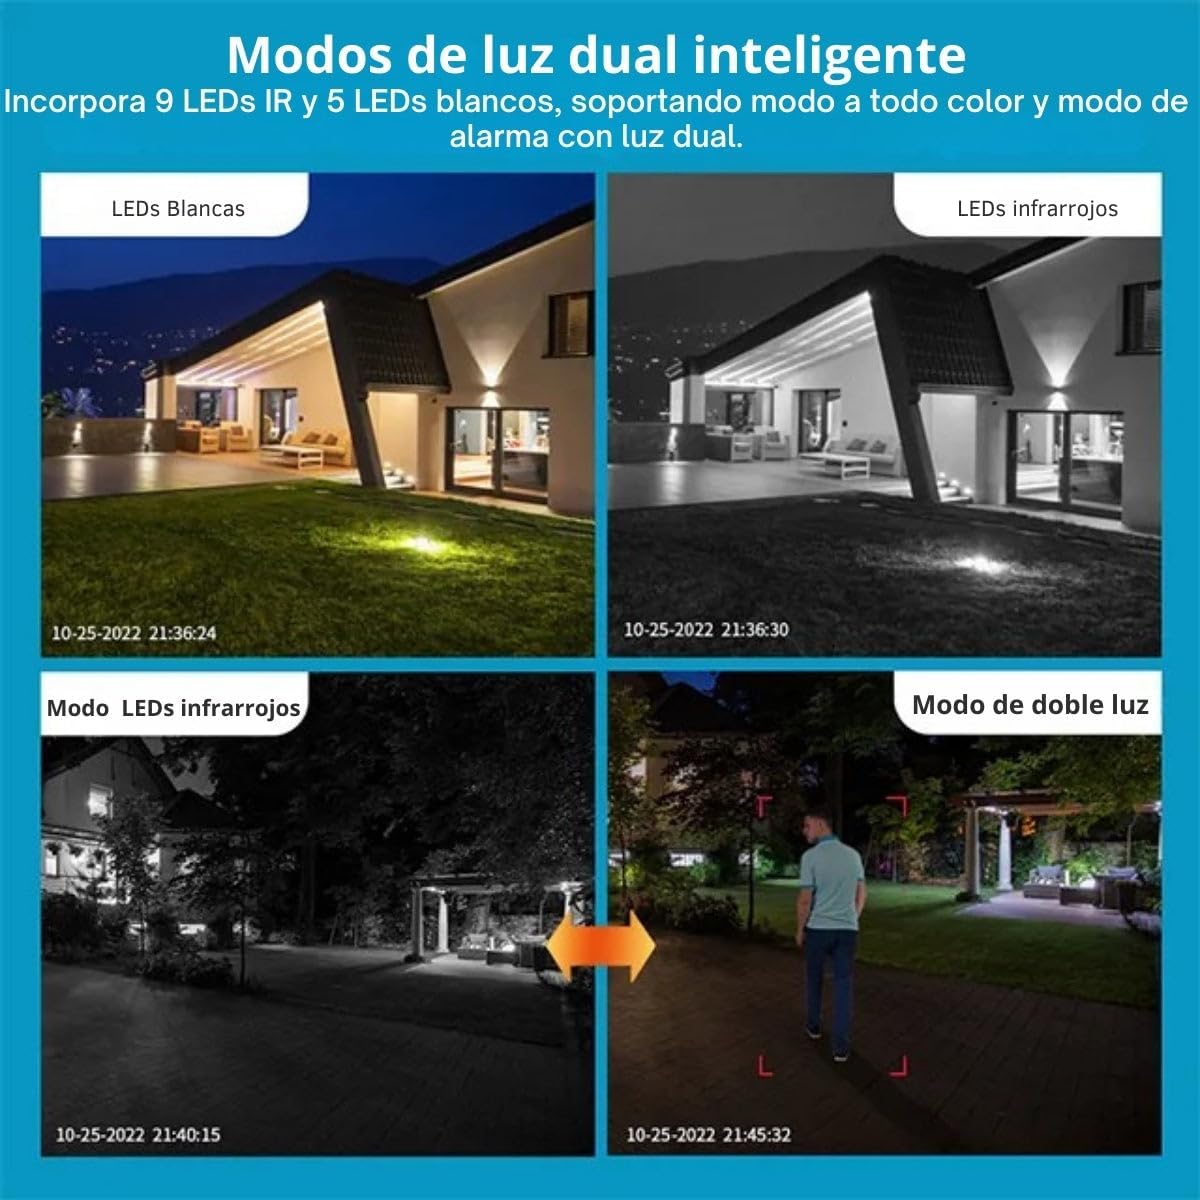
Image 6.3: Illustrates the camera's smart dual light modes, including white LEDs for color night vision, infrared LEDs for black and white night vision, and a combined dual light mode.
- Infrared Mode: Uses IR LEDs for clear black and white video in complete darkness.
- Full-Color Mode: Activates white LEDs to provide full-color video at night, often triggered by motion.
- Smart Dual Light Mode: The camera operates in IR mode by default and switches to full-color mode with white LEDs upon detecting motion, acting as a deterrent.
6.6 Remote Control (Optional)
If your package includes a remote control, use it to manage certain camera functions, such as light modes and brightness.

Image 6.4: A diagram illustrating the functions of an optional remote control, including buttons for adjusting brightness, selecting light modes, and a reset function.
- ON/OFF: Power on/off the monitor (if applicable).
- Brightness Control: Adjust brightness levels (e.g., 50%, 100%).
- Light Modes: Switch between constant illumination, radar mode (motion-activated), or timed modes.
- Reset Button: For initial use or WiFi changes, press and hold for over 5 seconds.
7. Maintenance
- Cleaning: Gently wipe the camera lens and body with a soft, dry cloth. Do not use harsh chemicals or abrasive materials.
- Firmware Updates: Regularly check the mobile app for available firmware updates. Keeping your camera's firmware updated ensures optimal performance and security.
- Storage Management: Periodically review your recorded footage. If using a MicroSD card, ensure it has sufficient space or is set to overwrite old footage. Manage cloud storage subscriptions as needed.
- Network Stability: Ensure your WiFi network is stable and strong in the camera's location for uninterrupted operation.
8. Troubleshooting
| Problem | Possible Cause | Solution |
|---|---|---|
| Camera not powering on. | No power, faulty adapter, loose connection. | Check power outlet, ensure adapter is securely connected, try a different outlet. |
| Unable to connect to WiFi. | Incorrect WiFi password, 5GHz network, camera too far from router, incorrect reset. | Verify WiFi password, ensure you're using a 2.4GHz network, move camera closer to router, perform a factory reset and try again. |
| No recording or missing footage. | No MicroSD card, full SD card, cloud subscription expired, incorrect recording settings. | Insert/replace MicroSD card, check cloud subscription status, verify recording settings in the app. |
| Poor image quality. | Dirty lens, poor lighting, network bandwidth issues. | Clean the lens, ensure adequate lighting, check your internet speed. |
| False alarms from motion detection. | Sensitivity too high, environmental factors (e.g., moving branches, insects). | Adjust motion detection sensitivity in the app, utilize AI detection features to filter out irrelevant motion. |
9. Specifications
Technical specifications for the JORTAN 6 Smart Security Camera.

Image 9.1: Visual comparison demonstrating the clarity difference between 2K 4MP and 4K 8MP resolutions, highlighting the superior detail of 4K.
| Feature | Detail |
|---|---|
| Model Number | JORTAN6 |
| Brand | Jortan Tech |
| Wireless Communication Technology | WiFi (2.4GHz) |
| Installation Type | Indoor/Outdoor |
| Material | Plastic |
| Dimensions | 17.7 x 16.5 x 15.5 cm |
| Weight | 900 g |
| Special Features | Weatherproof (IP66), Auto Tracking, AI Detection, Dual Lens, Two-Way Audio, Night Vision |
| Recommended Uses | Outdoor Security |
| Compatible Devices | iOS, Android |
| Power Source | Corded Electric |
| Number of Channels | 2 (referring to dual lens system) |
10. Warranty and Support
For warranty information and technical support, please refer to the product packaging or contact Jortan Tech customer service directly.
- Customer Service: Visit the official Jortan Tech website or refer to the contact details provided with your purchase.
- Online Resources: Check for FAQs, video tutorials, and updated manuals on the manufacturer's support page.
Related Documents - JORTAN6
 |
XootGo Sports Tracking Gimbal User Manual - Setup, Features, and Specifications Comprehensive user manual for the XootGo Sports Tracking Gimbal, covering setup, operation, features like auto tracking and live streaming, specifications, and troubleshooting. Includes remote controller guide. |
 |
XbotGo Sports Tracking Gimbal User Manual - Comprehensive Guide Official user manual for the XbotGo Sports Tracking Gimbal. Learn how to set up, use, and maintain your gimbal for professional-grade video stabilization and auto-tracking. Includes specifications, features, and troubleshooting. |
 |
ATOTO A5 User Manual: Comprehensive Guide to Car Multimedia System Features Detailed user manual for the ATOTO A5 car multimedia system, covering Bluetooth, CarPlay, Android Auto, Mirroring, Navigation, Radio, Camera Input, AUX, DSP, Network, FOTA, TrackHU, DAB+, SWC, Fast Boot, Split Screen, Image Scan, Settings, and Specifications. |
 |
XbotGo FAQ - Intelligent Sports Tracking Gimbal System Frequently Asked Questions about XbotGo, an intelligent AI-powered tracking gimbal system for smartphones. Learn about its features, setup, troubleshooting, and live streaming capabilities for sports events. |
 |
WAVLINK AC1200 Dual Band WiFi Router Quick Start Guide A quick start guide for the WAVLINK AC1200 Dual Band WiFi Router, covering setup, configuration, and troubleshooting. |
 |
TECH CONTROLLERS EU-WiFi X User Manual: Installation, Setup, and Operation Guide Comprehensive user manual for the TECH CONTROLLERS EU-WiFi X module. Covers installation, internet connection, emodul.eu app control, zone management, software updates, and technical specifications. Learn how to optimize your heating system. |
Ask a question about this manual
Ask about setup, troubleshooting, compatibility, parts, safety, or missing instructions. Manuals+ will review the question and use this page’s manual context to help answer it.