1. Introduction
This manual provides essential information for the proper installation, operation, and maintenance of your new Generic Carburetor. This carburetor is designed as a direct replacement for BS-498298 and is compatible with various equipment from MTD, Troy-Bilt, White Outdoor, Cub Cadet, and Electrolux. Please read this manual thoroughly before attempting any installation or maintenance procedures.
2. Safety Information
Always prioritize safety when working with engine components and fuel. Failure to follow these safety guidelines may result in serious injury or damage to equipment.
- Disconnect Power: Before beginning any work, ensure the engine is off and cool. Disconnect the spark plug wire to prevent accidental starting.
- Fuel Handling: Work in a well-ventilated area. Keep open flames, sparks, and smoking materials away from fuel. Use an approved container for fuel storage.
- Personal Protective Equipment: Wear safety glasses, gloves, and appropriate clothing to protect against fuel, oil, and sharp edges.
- Hot Surfaces: Engine components can remain hot for an extended period after operation. Allow the engine to cool completely before handling.
- Proper Tools: Use the correct tools for each task to prevent damage to fasteners and components.
3. Package Contents
Carefully unpack the box and verify that all items are present and undamaged. If any parts are missing or damaged, contact your seller immediately.
- 1 x Generic Carburetor (BS-498298 Replacement)
- 2 x Gaskets (as pictured)
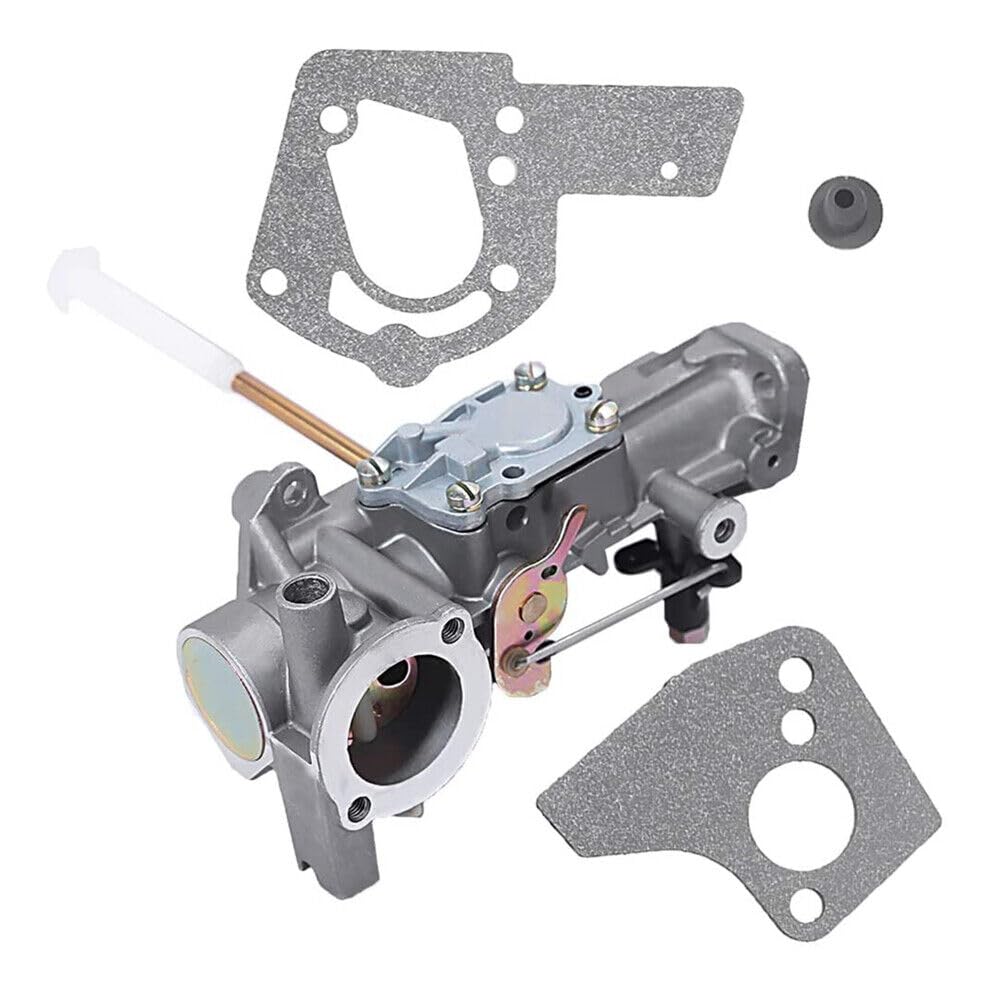
Figure 3.1: Included carburetor and gaskets. The image shows the carburetor from a top-down perspective, highlighting the fuel inlet, adjustment screws, and the two distinct gasket shapes.
4. Setup and Installation
This section outlines the general steps for replacing your old carburetor with the new Generic Carburetor. Specific procedures may vary slightly depending on your equipment model. Refer to your equipment's service manual for detailed instructions if available.
- Preparation: Ensure the engine is cool and the fuel tank is empty or the fuel line is clamped. Disconnect the spark plug wire. Gather necessary tools (wrenches, screwdrivers, pliers, fuel-resistant rags).
- Remove Air Filter Assembly: Locate and remove the air filter housing and air filter. This will expose the carburetor.
- Disconnect Linkages and Fuel Line: Carefully disconnect the throttle and choke linkages from the old carburetor. Use pliers to remove the fuel line clamp and detach the fuel line. Be prepared for residual fuel to spill.
- Remove Old Carburetor: Unbolt the old carburetor from the engine manifold. Note the orientation of any spacers or additional gaskets.
- Install New Gaskets: Clean the mounting surfaces on both the engine manifold and the air filter housing. Place the new gaskets in their correct positions. Ensure they are seated properly to prevent air leaks.
- Mount New Carburetor: Carefully position the new Generic Carburetor onto the engine manifold, aligning it with the bolt holes and gaskets. Secure it with the original bolts, tightening them evenly.
- Reconnect Linkages and Fuel Line: Reattach the throttle and choke linkages to the new carburetor. Ensure they move freely and operate correctly. Reconnect the fuel line and secure it with the clamp.
- Reinstall Air Filter Assembly: Replace the air filter and its housing.
- Final Checks: Double-check all connections, ensuring they are tight and secure. Look for any signs of fuel leaks.

Figure 4.1: Angled view of the carburetor, illustrating the various ports and mounting flanges. This perspective helps in identifying the fuel inlet and throttle linkage points during installation.

Figure 4.2: Side profile of the carburetor, showing the float bowl assembly and the main jet area. This view is useful for understanding the internal components and potential adjustment points.
5. Operating Instructions (After Installation)
After installing the new carburetor, follow these general steps to start your equipment:
- Refill Fuel: Add fresh, clean fuel to the tank.
- Prime (if applicable): If your equipment has a primer bulb, press it several times until fuel is visible.
- Choke: Set the choke to the 'Full Choke' position for cold starts.
- Start Engine: Reconnect the spark plug wire. Attempt to start the engine according to your equipment's manufacturer instructions.
- Adjust Choke: As the engine warms up, gradually move the choke to the 'Run' position.
- Idle Adjustment: If the engine idles too high or too low, a slight adjustment to the idle screw on the carburetor may be necessary. Consult your equipment's manual for specific idle speed recommendations.
6. Maintenance
Regular maintenance helps ensure the longevity and optimal performance of your carburetor.
- Fuel Quality: Always use fresh, clean fuel. Stale or contaminated fuel is a primary cause of carburetor issues. Consider using a fuel stabilizer, especially during storage.
- Air Filter: Regularly inspect and clean or replace the air filter. A clogged air filter can restrict airflow and affect carburetor performance.
- Cleaning: If the carburetor becomes dirty or clogged, it may require cleaning. This typically involves disassembling the carburetor, cleaning jets and passages with carburetor cleaner, and replacing gaskets. This procedure should only be performed by individuals with mechanical experience.
- Storage: Before long-term storage, run the engine until it runs out of fuel, or drain the fuel system to prevent fuel degradation and gumming in the carburetor.
7. Troubleshooting
If you encounter issues after installing the new carburetor, consider the following common problems and solutions:
| Problem | Possible Cause | Solution |
|---|---|---|
| Engine won't start | No fuel, clogged fuel filter, incorrect choke setting, spark plug issue, air leak | Check fuel level, replace fuel filter, adjust choke, check spark plug, inspect gaskets for proper seal. |
| Engine runs rough/stalls | Dirty carburetor, air leak, incorrect idle adjustment, old fuel | Clean carburetor, check gaskets, adjust idle screw, use fresh fuel. |
| Loss of power | Clogged air filter, fuel restriction, carburetor issue | Clean/replace air filter, check fuel lines, inspect carburetor for blockages. |
| Fuel leaks | Loose connections, damaged fuel line, faulty float bowl gasket | Tighten connections, replace fuel line, inspect/replace float bowl gasket. |
If troubleshooting steps do not resolve the issue, it is recommended to consult a qualified service technician or contact your seller for further assistance.
8. Specifications
- Product Type: Aftermarket Carburetor
- Brand: Generic
- Replacement For: BS-498298
- Compatibility: MTD, Troy-Bilt, White Outdoor, Cub Cadet, Electrolux equipment (verify specific model fitment)
- Material: Durable metal alloy construction
9. Warranty and Support
This Generic Carburetor is an aftermarket replacement part. For any questions regarding installation, performance, or warranty claims, please contact the seller directly through your purchase platform. Keep your purchase receipt as proof of purchase.