1. Introduction
The Phonetone F40-OL Cell Phone Signal Booster is designed to enhance 2G, 3G, 4G, and 5G cellular signals within your home, office, or basement. It supports all major US carriers, including Verizon, AT&T, and T-Mobile, by amplifying signals across frequency bands 2, 4, 5, 12, 13, 17, and 25. This manual provides detailed instructions for installation, operation, and maintenance to ensure optimal performance and a reliable cellular connection.
2. Package Contents
Verify that all items listed below are included in your package:
- 1 x F40-OL Signal Booster (with built-in indoor antenna)
- 1 x Outdoor Antenna
- 2 x Low Loss Coaxial Cables (e.g., 49ft 4D-FB Cable, 16ft 4D-FB Cable)
- 1 x Window Entry Cable
- 1 x Power Supply Adapter
- 1 x User Manual (this document)
- 1 x Cable Management Tie
- 1 x Waterproof Clay

Figure 2.1: Contents of the Phonetone F40-OL Signal Booster package. This image displays the main booster unit, an outdoor antenna, two coaxial cables of different lengths, a window entry cable, a power adapter, cable management ties, and waterproof clay.
3. Product Overview
The Phonetone F40-OL signal booster features an innovative design with a built-in indoor antenna and a user-friendly touchable LCD screen for real-time monitoring and control.
3.1 Key Features
- Universal Carrier Compatibility: Supports 2G, 3G, 4G, and 5G signals across bands 2, 4, 5, 12, 13, 17, and 25 for all major US carriers.
- Touchable LCD Screen: Displays real-time signal strength, working status, and allows for gain adjustments.
- Built-in Indoor Antenna: Eliminates the need for a separate indoor antenna, simplifying installation and maintaining home aesthetics.
- High Gain: 65~70dB gain effectively boosts weak signals.
- Multi-User Support: Capable of supporting multiple users and devices simultaneously.
- FCC Approved: Certified for quality and safety.
3.2 Component Identification
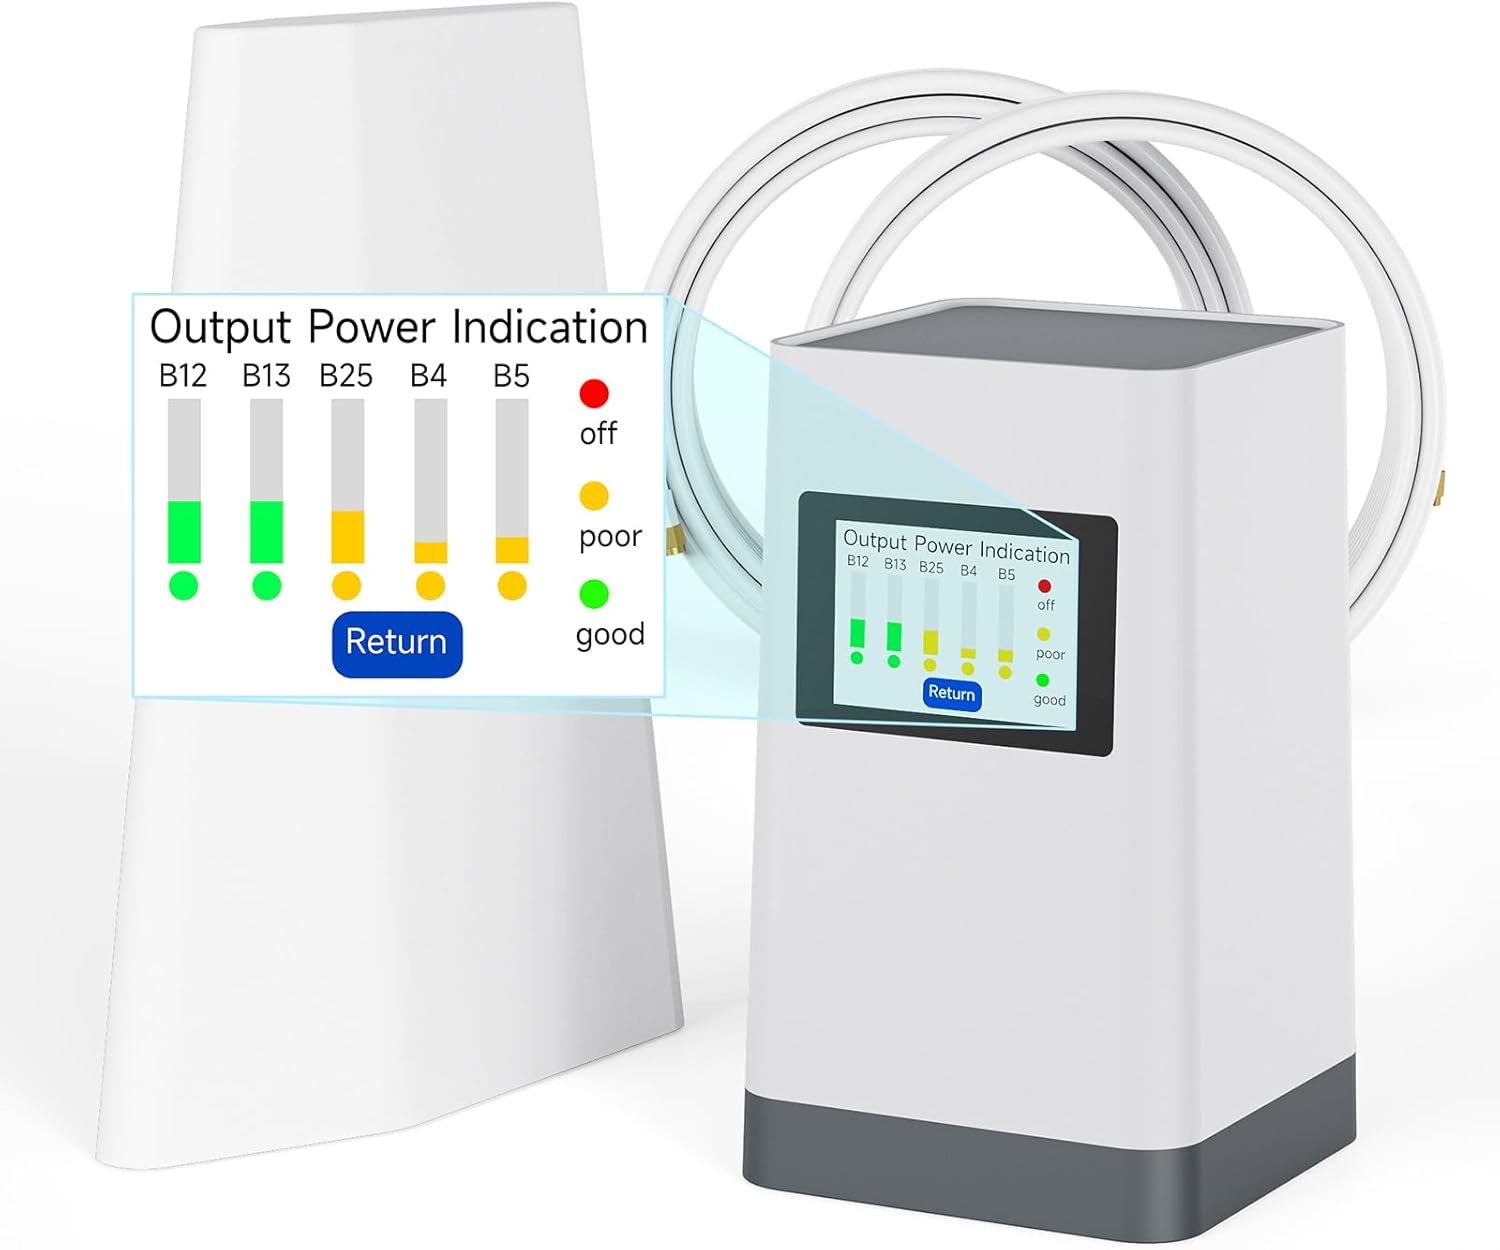
Figure 3.1: The Phonetone F40-OL Signal Booster unit, highlighting its integrated LCD screen which displays output power indication for various frequency bands (B12, B13, B25, B4, B5).
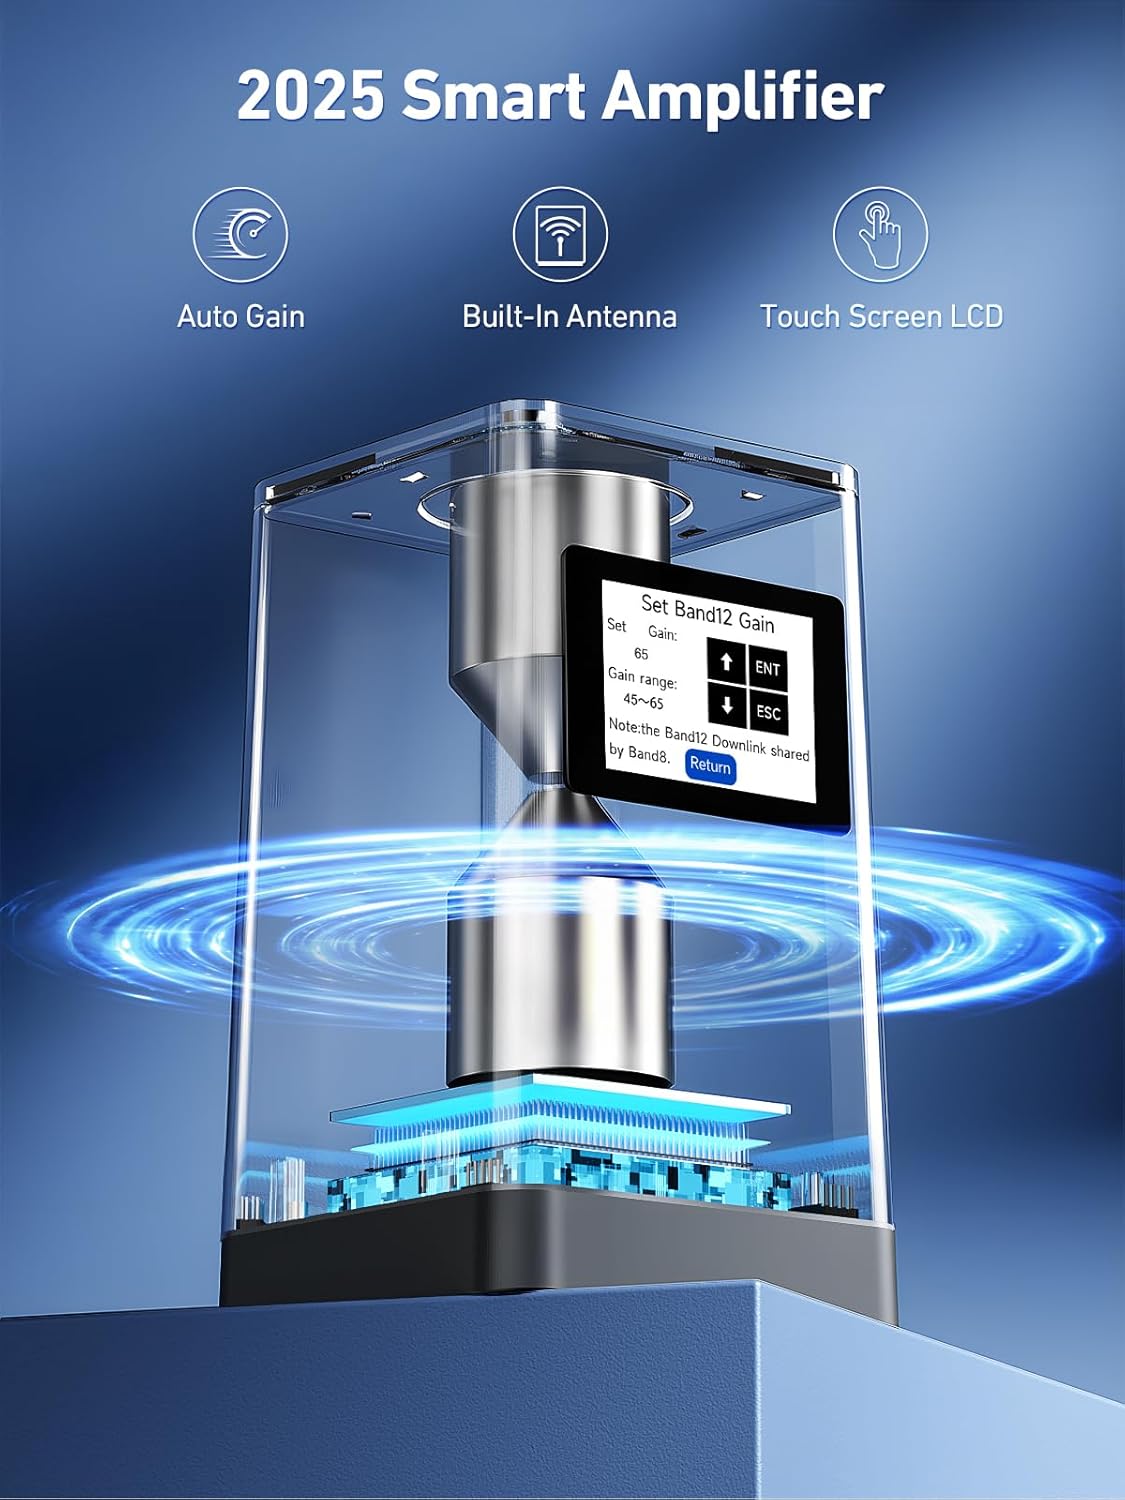
Figure 3.2: An internal view of the F40-OL Smart Amplifier, showcasing its auto gain, built-in antenna, and touch screen LCD capabilities. The screen displays options for setting Band 12 Gain.
4. Setup and Installation
Proper installation is crucial for optimal performance. Follow these steps carefully.
4.1 Pre-Installation Check: Verify Band Compatibility
Before installation, confirm that your carrier uses the frequency bands supported by this booster (Bands 2, 4, 5, 12, 13, 17, 25). You can check this using your smartphone:
- For iPhone: Dial *3001#12345#*, then navigate to "Serving Cell Info" and check "Band Info".
- For Android: Download a network cell info app (e.g., "Network Cell Info Lite") and check the "Band" information.

Figure 4.1: Instructions for checking your phone's serving band information on both iPhone and Android devices to ensure compatibility with the signal booster.
4.2 Installation Steps
- Mount the Outdoor Antenna: Install the outdoor antenna in a location where it can receive the strongest possible signal from the nearest cell tower. This is typically on the roof or an exterior wall, facing the tower. Ensure it is securely mounted and pointed correctly.
- Route the Outdoor Cable: Connect one end of the longer coaxial cable to the outdoor antenna. Route the cable into your home, ensuring it is protected from weather and physical damage. Use the window entry cable if drilling is not desired.
- Position the F40 Booster: Place the F40 Booster in the central area of your desired coverage zone indoors. The built-in indoor antenna will broadcast the boosted signal from this location.
- Connect Cables to Booster:
- Connect the outdoor cable to the "OUTDOOR" port on the booster.
- (Optional) If adding a second indoor antenna for larger coverage, connect it to the "INDOOR" port.
- Connect Power: Plug the power supply into the booster's power port and then into a wall outlet. Turn on the booster using the switch.

Figure 4.2: An overview diagram illustrating the typical installation process for the Phonetone F40-OL signal booster, showing the outdoor antenna, cabling, booster unit, and power supply connections. Key components are numbered for easy identification.

Figure 4.3: A simplified diagram showing the signal flow: the outdoor antenna receives signals, and the indoor booster amplifies and broadcasts them within the home.
5. Operation
Once powered on, the F40-OL booster's LCD screen provides real-time feedback and allows for adjustments.
5.1 LCD Screen Interface
The touchable LCD screen displays critical information about the booster's operation:
- Band Number: Indicates the active frequency bands (e.g., 12, 13, 25, 4, 5).
- Gain: Shows the current gain setting for each band.
- Pout (Band Output Power): Displays the output power of each band.
- RSSI (Received Signal Strength Indication): Indicates the strength of the signal received by the outdoor antenna.
- Power Indication: Provides a visual representation of signal quality (off, poor, good) for each band.

Figure 5.1: Close-up of the F40-OL's touchscreen LCD, displaying "Device Information" including Band Number, Gain, Band Output Power (Pout), and Received Signal Strength (RSSI) for various bands. It also shows "Power Indication" and "Return" buttons.
5.2 Adjusting Gain
The LCD screen allows you to adjust the gain settings for individual frequency bands to optimize performance based on your signal environment. This can help prevent oscillation or maximize coverage.
- From the main menu, select "Set Gain".
- Choose the specific band you wish to adjust (e.g., Band 12).
- Use the up/down arrows on the screen to increase or decrease the gain.
- Confirm your selection by pressing "ENT" or "Return" to exit.

Figure 5.2: The F40-OL's LCD screen interface, showing the "Select Function" menu with options like "Device Information", "Set Gain", "Alarm Status", "Set Sleep Threshold", and "Factory Default". It also illustrates the process of adjusting gain for a specific band, such as Band 12.
6. Troubleshooting
If you experience issues with your signal booster, refer to the following common problems and solutions:
| Problem | Possible Cause | Solution |
|---|---|---|
| No Signal Improvement |
|
|
| Fluctuating Signal |
|
|
| LCD Screen Not Displaying |
|
|
7. Maintenance
The Phonetone F40-OL signal booster requires minimal maintenance to ensure long-term performance.
- Keep Clean: Regularly wipe the booster unit and LCD screen with a soft, dry cloth. Avoid using harsh chemicals or abrasive cleaners.
- Cable Integrity: Periodically inspect all coaxial cables for signs of wear, damage, or loose connections. Ensure outdoor cables are properly sealed and protected from weather.
- Antenna Position: Verify that the outdoor antenna remains securely mounted and correctly oriented, especially after strong winds or storms.
- Ventilation: Ensure the booster unit has adequate ventilation and is not covered, to prevent overheating.
8. Specifications
| Feature | Detail |
|---|---|
| Model Number | F40-OL |
| Supported Frequency Bands | 2, 4, 5, 12, 13, 17, 25 |
| Supported Technologies | 2G, 3G, 4G LTE, 5G |
| Gain | 65~70dB |
| Special Features | Automatic Gain Control, Directional Antenna (outdoor), Manual Gain Control, Touchable LCD Screen |
| Compatible Devices | Cellular devices from Verizon, AT&T, T-Mobile, Sprint, and other US carriers |
| Power Input | DC 5V/2A |
| Package Dimensions | 14.13 x 10.59 x 7.17 inches |
| Item Weight | 6.65 pounds |
| Manufacturer | Phonetone Ltd. |
9. Warranty and Support
Phonetone provides comprehensive support and warranty for your signal booster:
- 30-Day Money-Back Guarantee: If you are not satisfied with your purchase, you may return it within 30 days for a full refund.
- 3-Month Replacement Policy: In case of product defects, a replacement will be provided within 3 months of purchase.
- Up to 3-Year Manufacturer Warranty: The device is covered by a manufacturer's warranty for up to 3 years, ensuring long-term reliability.
- FCC Certified: This device complies with FCC regulations, ensuring safe and reliable operation.

Figure 9.1: Image showing the FCC approval label on the back of the Phonetone F40-OL signal booster, indicating its product name, model (AN-CPAL70), FCC ID (YYOF40PH-US59), and power input specifications. The serial number shown is S/N:2025043000014.
For technical assistance or warranty claims, please contact Phonetone customer support through their official channels.