1. Product Overview
This manual provides essential information for the installation, operation, and maintenance of the Circular Metric Connector M8 D-Code 4pin. This connector is designed for robust industrial applications, ensuring reliable data and power transmission.
Key Features:
- Number of Contacts: 4
- Contact Thread Size: M8
- Termination Style: Crimp
- Coding: D Coded
- Current Rating: 4 A
- Voltage Rating: 60 V
- IP Rating: IP67 (Dust tight and protected against immersion in water up to 1 meter for 30 minutes)
- Contact Gender: Pin (Male)
- Contact Plating: Gold
- Housing Material: Polyamide (PA)
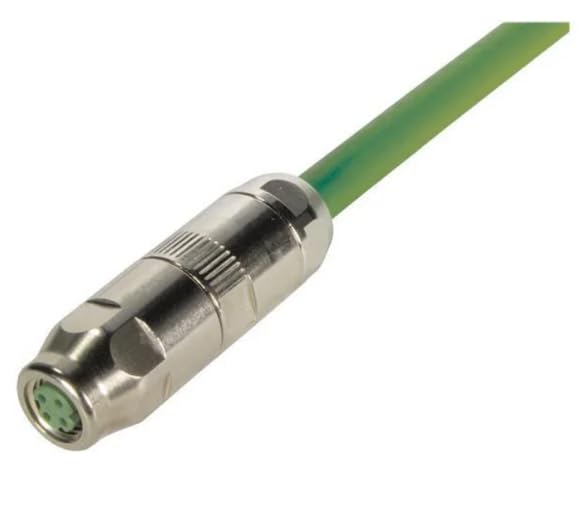
Image 1.1: Front view of the Circular Metric Connector M8 D-Code 4pin, showing the metallic housing and the green cable extending from the rear. The 4-pin male contact face is visible at the front.
2. Setup and Installation
Proper installation is crucial for the optimal performance and longevity of the connector. Follow these steps carefully.
2.1. Pre-Installation Checklist
- Ensure power is disconnected from the system before installation.
- Verify that the cable diameter (6.2-6.8mm) and wire gauge (AWG26-22 / 0.14-0.34mm2) are compatible with the connector.
- Gather necessary tools: wire strippers, crimping tool, torque wrench (if specified for mating).
2.2. Wiring Instructions (Crimp Termination)
- Carefully strip the outer jacket of the cable to the recommended length, exposing the individual wires.
- Strip the insulation from each individual wire, exposing the conductor.
- Insert the exposed conductor into the appropriate crimp contact. Ensure the wire is fully seated.
- Using a suitable crimping tool, crimp the contact securely onto the wire. Verify the crimp is firm and provides good electrical contact.
- Insert the crimped contacts into the designated cavities of the connector insert, ensuring correct pin assignment (D-coded). Listen for a click to confirm proper seating.
- Assemble the connector housing components, ensuring the cable gland is tightened to provide strain relief and maintain the IP67 rating.
2.3. Mating the Connector
- Align the D-coding key of the male connector with the corresponding slot on the female receptacle.
- Push the connectors together firmly until they are fully seated.
- Rotate the coupling nut clockwise until it is hand-tight. For applications requiring specific torque, use a torque wrench according to industry standards for M8 connectors to ensure a secure and sealed connection.
3. Operating Instructions
Once installed, the connector operates passively as a reliable electrical and data conduit. No specific operational steps are required beyond ensuring a secure connection.
- Ensure the connector is fully mated and the coupling nut is tightened before applying power or data signals.
- Avoid excessive bending or pulling on the cable near the connector to prevent strain on the crimp terminations.
- Do not attempt to disconnect the connector under load (while power is applied) to prevent arcing and potential damage.
4. Maintenance
The M8 D-Code connector is designed for low maintenance. Regular inspections can help ensure continued reliable performance.
- Visual Inspection: Periodically inspect the connector for any signs of physical damage, corrosion, or wear. Check the cable jacket near the connector for cracks or abrasions.
- Cleaning: If necessary, clean the exterior of the connector with a soft, dry cloth. For stubborn dirt, a slightly damp cloth with mild detergent can be used, ensuring the connector is completely dry before re-mating or applying power. Do not use abrasive cleaners or solvents.
- Connection Integrity: Ensure the coupling nut remains securely tightened. Re-tighten if any looseness is detected.
- Environmental Protection: While rated IP67, avoid prolonged exposure to harsh chemicals or extreme temperatures beyond the specified operating range to maximize lifespan.
5. Troubleshooting
This section addresses common issues that may arise with the connector.
| Problem | Possible Cause | Solution |
|---|---|---|
| No signal/power transmission | Loose connection; Improper crimp; Damaged cable/connector; Incorrect wiring. | Ensure connector is fully mated and tightened. Inspect crimp connections for integrity. Check cable for damage. Verify wiring against pinout diagram. |
| Intermittent connection | Vibration causing looseness; Partial crimp failure; Contamination on contacts. | Re-tighten coupling nut. Re-crimp or replace faulty contacts. Clean contacts if visible contamination is present. |
| Difficulty mating/unmating | Misalignment of D-coding; Damaged threads; Debris in coupling nut. | Ensure correct alignment before pushing. Inspect threads for damage. Clean any debris from the coupling mechanism. Do not force. |
| Water ingress (if applicable) | Improperly tightened coupling nut; Damaged O-rings/seals; Cable not properly sealed by gland. | Ensure coupling nut is fully tightened. Inspect and replace damaged seals. Verify cable gland is properly secured. |
If issues persist after attempting these solutions, contact a qualified technician or the manufacturer for further assistance.
6. Specifications
| Attribute | Value |
|---|---|
| Model Number | 21021852405 |
| Number of Contacts | 4 |
| Contact Thread Size | M8 |
| Termination Style | Crimp |
| Coding | D Coded |
| Current Rating | 4 A |
| Voltage Rating | 60 V |
| IP Rating | IP67 |
| Contact Gender | Pin (Male) |
| Contact Plating | Gold |
| Housing Material | Polyamide (PA) |
| Compatible Cable AWG | AWG26-22 |
| Compatible Cable Diameter | 6.2-6.8mm |
| Manufacturer | HARTING |
| Item Weight | 6.99 Pounds |
7. Warranty and Support
Specific warranty information for this product is not provided in the available data. Please refer to the manufacturer's official website or contact your point of purchase for detailed warranty terms and conditions.
For technical support or further inquiries, please contact the manufacturer, HARTING, or the seller, Neutron USA.

