
1. Introduction and Safety Information
Thank you for choosing the Arulvmrn 43" Makeup Vanity Desk. This manual provides essential instructions for the safe assembly, operation, and maintenance of your new vanity desk. Please read all instructions carefully before beginning assembly and retain this manual for future reference.
Important Safety Warnings:
- This product requires self-assembly. Follow the instructions precisely to prevent injury or damage to the product.
- The vanity includes electrical components (LED mirror lights and power strip). Ensure proper handling and do not attempt to repair or modify electrical parts yourself.
- Always unplug the vanity from the power source before cleaning or performing any maintenance.
- Keep small parts and packaging materials away from children to avoid choking hazards.
- Place the vanity on a flat, stable surface to prevent tipping.
- Exercise caution with the tempered glass tabletop, as it can be fragile if subjected to sharp impacts.

Image 1.1: Arulvmrn 43-inch Black Makeup Vanity Desk.
2. Package Contents
Before assembly, verify that all components are present and undamaged. Refer to the detailed parts list provided in your assembly instruction booklet. If any parts are missing or damaged, please contact customer support immediately.
3. Assembly Instructions
Assembly of the Arulvmrn Makeup Vanity Desk requires time and patience. It is recommended to have two people for certain steps. Follow the step-by-step diagrams and instructions provided in the separate assembly manual included with your product. Ensure all screws and fasteners are securely tightened before use.
Key Assembly Considerations:
- Organize Parts: Lay out all numbered parts and hardware before starting.
- Drawer Slides: Ensure drawer slides are installed correctly for smooth operation.
- Mirror Attachment: Securely attach the mirror unit to the main desk structure.
- Electrical Connections: Carefully connect the LED mirror lights and power strip according to the instructions.

Image 3.1: Product dimensions for planning placement.
4. Operating Instructions
4.1 LED Mirror Lights
The vanity mirror features integrated LED lighting with adjustable settings:
- Color Modes: Tap the touch switch button on the mirror to cycle through three different light color modes: Cool Light, Warm Light, and Warm Yellow Light.
- Brightness Adjustment: Press and hold the touch switch button to adjust the brightness level for each light color.
- Power Indicator Light: In the off mode, long-press the switch button to turn off the power indicator light.

Image 4.1: LED mirror light functions.
4.2 Built-in Power Strip
The vanity desk is equipped with a convenient built-in power strip for your electronic devices:
- Outlets: Includes two standard AC plug sockets (125V/12A).
- USB Ports: Features one USB-A port (5V/2A output) and one Type-C port (PD20W output) for charging phones, tablets, and other compatible devices.
- Power Cord: The power strip is connected via a 4.9-foot (approximately 1.5 meters) power cord.

Image 4.2: Embedded charging station details.
4.3 Storage Features
The vanity desk offers extensive storage solutions:
- 9 Drawers: Utilize the nine spacious drawers for organized storage of makeup, skincare products, and accessories.
- 8 Storage Shelves: The mirror unit features eight open shelves for displaying items or keeping frequently used products within easy reach.
- Tempered Glass Top: The central desktop area features a tempered glass top, allowing visibility into a dedicated storage tray beneath for quick access to items.

Image 4.3: Overview of storage capacity.
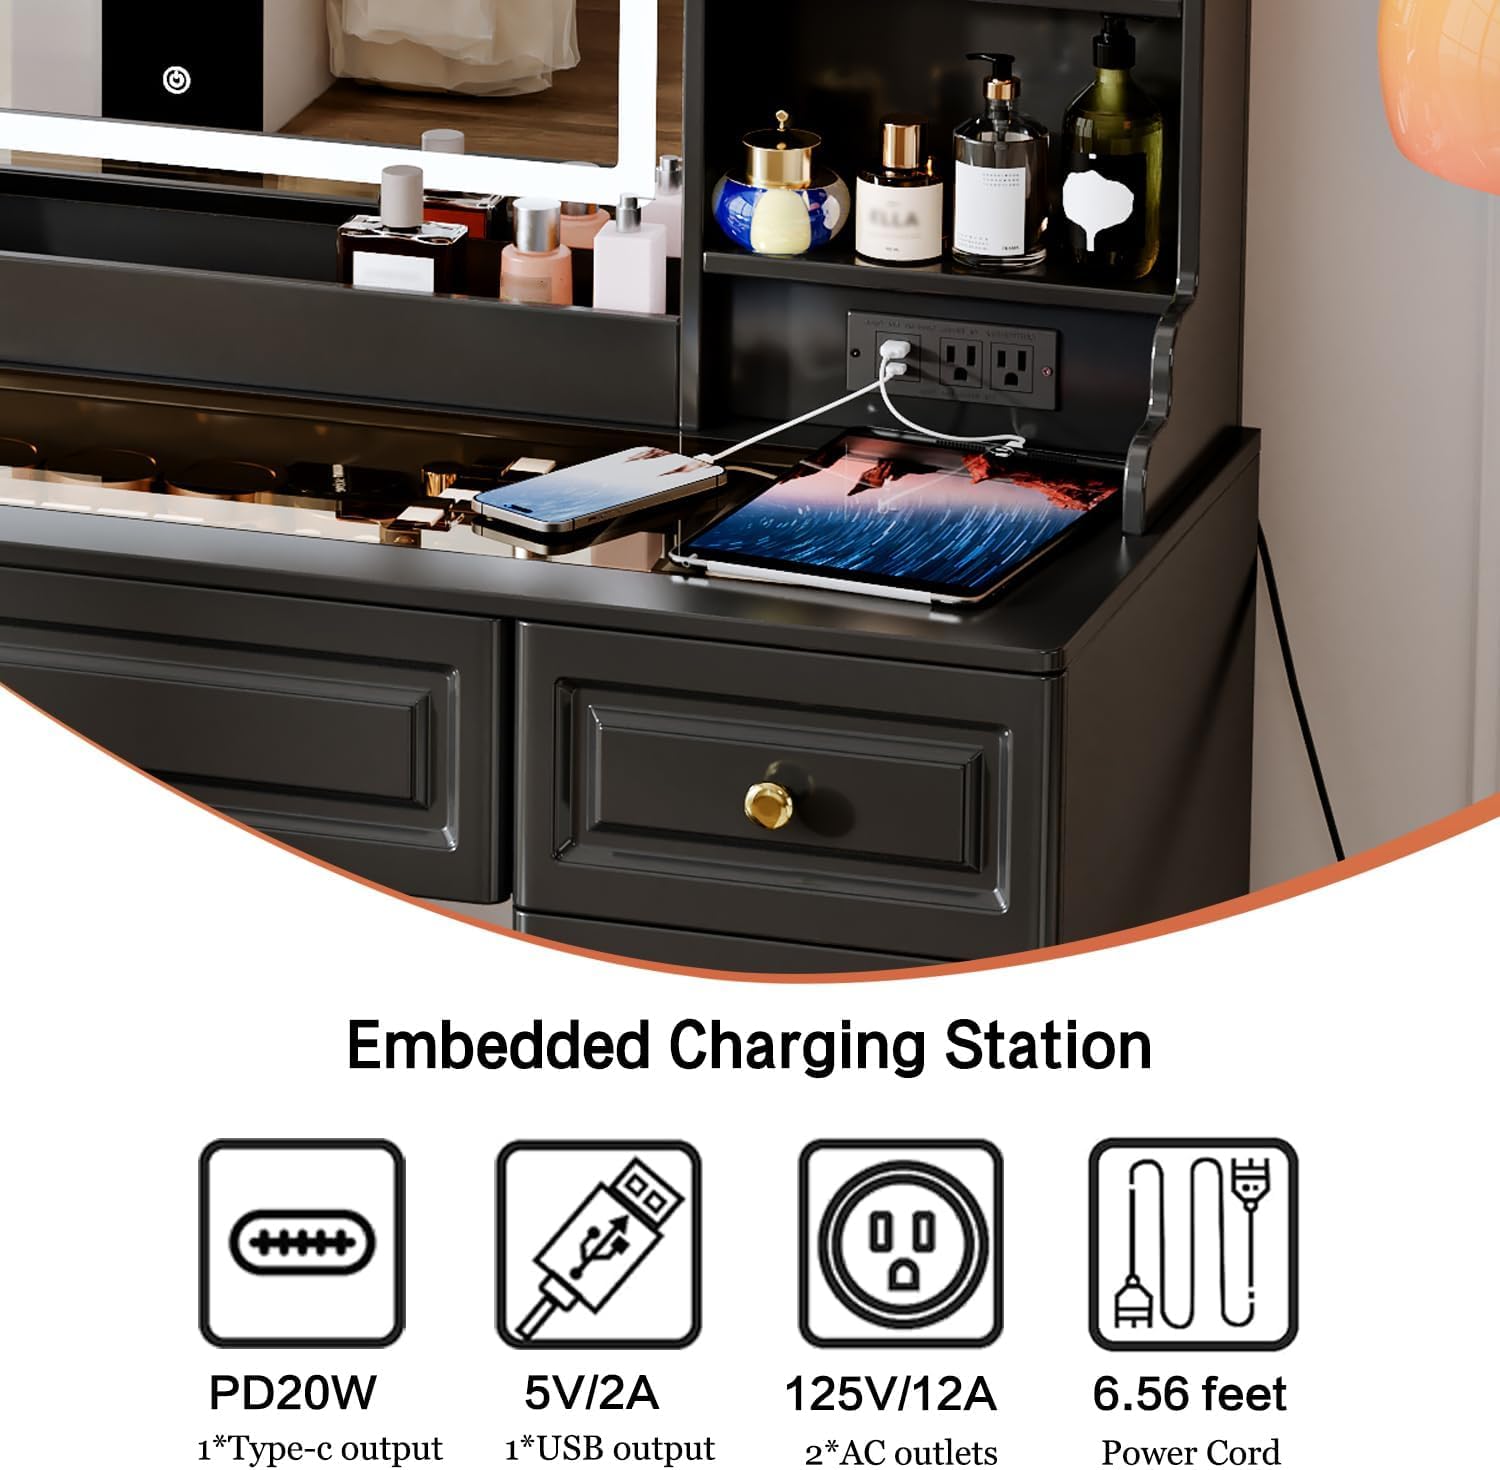
Image 4.4: Tempered glass tabletop detail.
4.4 Product Overview Video
Video 4.1: An overview of the Arulvmrn Makeup Vanity Desk, highlighting its features and storage capabilities.
5. Maintenance and Care
Proper care will extend the life and appearance of your vanity desk.
- Cleaning Surfaces: Wipe all surfaces with a soft, damp cloth. Avoid abrasive cleaners or harsh chemicals that may damage the glossy film finish or glass.
- Glass Top: For the tempered glass top, use a glass cleaner and a lint-free cloth.
- Electrical Components: Ensure the vanity is unplugged before cleaning any electrical parts. Do not spray liquids directly onto the mirror or power strip.
- Drawer Slides: Periodically check drawer slides for smooth operation. If needed, a small amount of silicone lubricant can be applied.
- Tighten Fasteners: Occasionally check and tighten all screws and fasteners to maintain stability.

Image 5.1: MDF Board with Glossy Film Finish.
6. Troubleshooting
If you encounter issues with your vanity desk, refer to the following common problems and solutions:
| Problem | Possible Cause | Solution |
|---|---|---|
| LED mirror lights not working. | Not plugged in; loose connection; power outage; light mode/brightness too low. | Ensure the vanity is plugged into a working outlet. Check all electrical connections. Tap the switch button to change modes or press and hold to increase brightness. |
| Power strip not providing power. | Not plugged in; device not compatible; power strip overload. | Verify the vanity is plugged in. Check if the device requires more power than the strip provides. Avoid overloading the power strip with too many high-power devices. |
| Drawers are stiff or do not slide smoothly. | Incorrect assembly of drawer slides; debris in slides; loose fasteners. | Review assembly instructions for correct drawer slide installation. Clean any debris from the slides. Tighten all fasteners on the drawer and frame. |
| Vanity feels unstable. | Loose fasteners; uneven floor. | Check and tighten all screws and bolts. Ensure the vanity is placed on a level surface. |
7. Product Specifications
| Feature | Detail |
|---|---|
| Brand | Arulvmrn |
| Model Number | 508 |
| Color | Black |
| Product Dimensions (D x W x H) | 15.75" x 43.31" x 57.48" |
| Item Weight | 52 pounds |
| Frame Material | Engineered Wood |
| Furniture Finish | Glossy Film Finish |
| Assembly Required | Yes |
| Drawers | 9 |
| Storage Shelves | 8 |
| Mirror Lighting | LED with 3 color modes and adjustable brightness |
| Power Strip | 2 AC outlets, 1 USB-A port, 1 Type-C port |
8. Warranty and Customer Support
Arulvmrn is committed to providing excellent after-sales service. While specific warranty details are typically provided with your purchase documentation, we are here to assist with any product problems or concerns you may have.
If you require assistance, have questions about assembly, or need to report missing/damaged parts, please contact our customer support team through the retailer where you purchased the product or visit the official Arulvmrn store page for contact information.
Please have your model number (508) and purchase details ready when contacting support.