1. Introduction
This manual provides essential information for the safe and efficient installation, operation, and maintenance of the Speroni 1810100 Model KPM 50 Volumetric Water Pump. Please read these instructions carefully before using the pump and retain this manual for future reference.
The Speroni KPM 50 is a volumetric water pump designed to offer high pressure with relatively low power consumption. It is suitable for domestic fittings, increasing system pressure in aqueducts, and automatic water distribution with small autoclave tanks or hydrosphere units. This pump is intended for use with clean, non-aggressive liquids only, free from sand or other solid impurities.
2. Safety Information
WARNING: Failure to follow these safety instructions could result in electric shock, fire, serious injury, or death.
- Always disconnect the pump from the power supply before performing any installation, maintenance, or repair work.
- Ensure the electrical supply matches the pump's voltage requirements (110-220V, 60Hz, Single Phase).
- The pump must be properly grounded to prevent electric shock.
- Do not operate the pump with damaged electrical cables or plugs.
- Protect the pump from freezing temperatures. Freezing water can cause severe damage.
- Do not pump flammable, explosive, or corrosive liquids. This pump is designed for clean water only.
- Ensure adequate ventilation around the pump to prevent overheating.
- Keep children and unauthorized personnel away from the operating pump.
- Wear appropriate personal protective equipment (PPE) during installation and maintenance.
3. Product Features
- Offers high pressure in relation to comparatively low power consumption.
- Features particularly steady operating curves.
- Suitable for domestic fittings and increasing system pressure in aqueducts.
- Ideal for automatic water distribution by small autoclave tanks or hydrosphere units.
- Designed for use with clean water or non-aggressive liquids only, without sand or other solid impurities.
- Equipped with a Two-Pole induction motor (n = 3450 min-1).
- Total suction lift up to 7 meters.
4. Technical Specifications
| Model Number | KPM 50 |
| OEM Part Number | 1810100 |
| Voltage | 110-220V |
| Ampere | 2.9A |
| Phase | Single Phase |
| Nominal Power | 0.5HP / 0.37kW |
| Frequency | 60Hz |
| Motor Type | Two-Pole Induction Motor (3450 min-1) |
| Performance | 9 Gallons/minute / 125 feet (head) |
| Insulation Class | Class F |
| Protection Rating | IP 44 |
| Pump Body Material | Cast Iron |
| Motor Support Material | Cast Iron |
| Impeller Material | Brass |
| Shaft with Rotor Material | Stainless Steel AISI 304 |
| Mechanical Seal | Ceramic/Graphite/NBR |
| Weight | 6.1 kg |
| Total Suction Lift | Up to 7 meters |
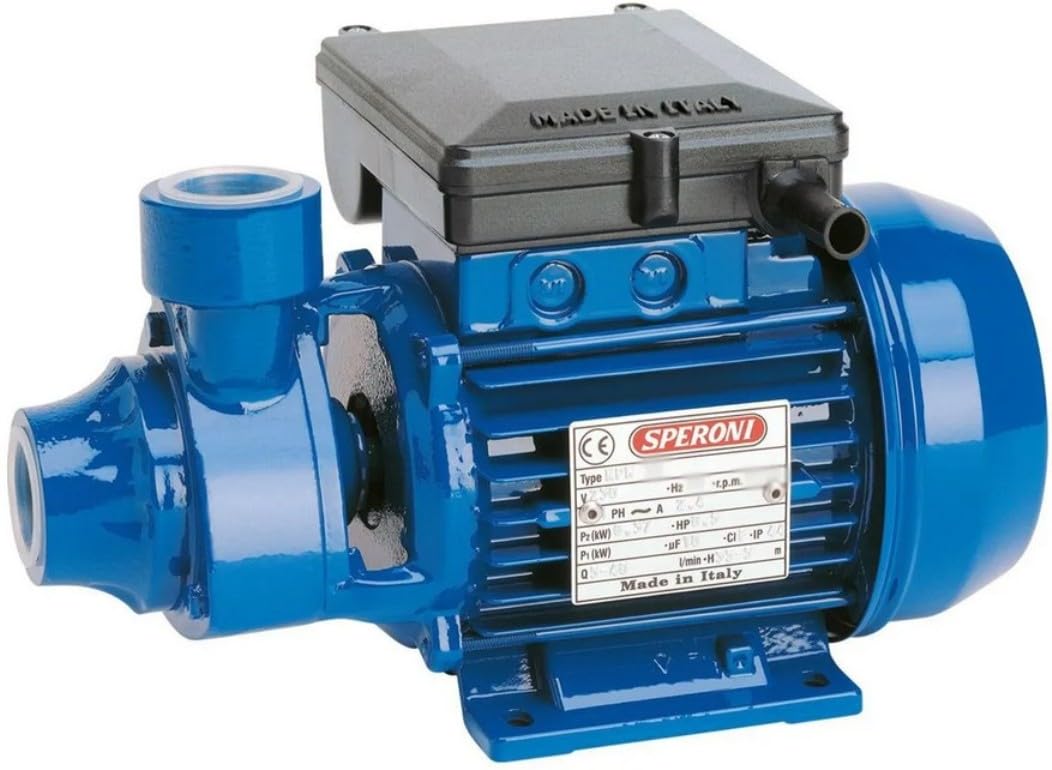
Image 1: Speroni KPM 50 Volumetric Water Pump. This image shows the compact design of the pump, highlighting its cast iron body and motor housing. The inlet and outlet ports are visible, along with the electrical connection box.
5. Setup and Installation
5.1. Location
- Install the pump in a dry, well-ventilated area, protected from direct sunlight, rain, and freezing temperatures.
- Ensure the pump is placed on a stable, level surface to minimize vibration.
- Allow sufficient space around the pump for ventilation and maintenance access.
- The total suction lift should not exceed 7 meters. Position the pump as close as possible to the water source.
5.2. Plumbing Connections
- Use appropriate pipe fittings and sealants to ensure watertight connections.
- The suction pipe should be as short and straight as possible, with a diameter equal to or greater than the pump's inlet.
- Install a foot valve with a strainer at the end of the suction pipe in the water source to prevent debris from entering the pump and to maintain prime.
- Install a gate valve on both the suction and discharge sides of the pump for isolation during maintenance.
- Ensure all connections are free from air leaks, especially on the suction side, as this can prevent the pump from priming.
5.3. Electrical Connection
- All electrical work must be performed by a qualified electrician and comply with local electrical codes.
- Verify that the power supply voltage (110-220V) and frequency (60Hz) match the pump's requirements.
- Connect the pump to a dedicated circuit protected by a properly sized circuit breaker or fuse.
- Ensure the pump is correctly grounded. The ground wire must be securely connected to the pump's grounding terminal and to an earth ground.
- Protect electrical connections from moisture.
6. Operating Instructions
6.1. Priming the Pump
Before the first start-up, or if the pump has run dry, it must be primed:
- Ensure the power supply is disconnected.
- Open the priming plug located on the top of the pump body (if present, otherwise fill through the discharge port).
- Slowly fill the pump body completely with clean water until it overflows.
- Replace and tighten the priming plug.
- Open the discharge valve fully.
6.2. Starting the Pump
- Ensure the pump is properly primed.
- Ensure all valves are in the correct position (suction valve open, discharge valve open).
- Connect the pump to the power supply. The pump should start immediately.
- Monitor the pump for any unusual noises or vibrations. If any occur, disconnect power immediately and investigate.
- Allow the pump to run for a few minutes to ensure stable operation and check for leaks.
6.3. Stopping the Pump
- Close the discharge valve.
- Disconnect the pump from the power supply.
7. Maintenance
Regular maintenance ensures the longevity and efficient operation of your pump.
7.1. Routine Checks
- Daily: Check for any visible leaks around connections. Listen for unusual noises or vibrations.
- Weekly: Inspect the suction strainer for blockages. Clean if necessary.
- Monthly: Check electrical connections for tightness and signs of corrosion. Ensure the pump is securely mounted.
7.2. Winterization
If the pump is exposed to freezing temperatures, it must be drained to prevent damage:
- Disconnect the pump from the power supply.
- Open the drain plug on the pump body (if present) and disconnect the suction and discharge pipes to allow all water to drain out.
- Store the pump in a warm, dry place if possible.
7.3. Cleaning
Keep the exterior of the pump clean and free from dust and debris to ensure proper motor cooling.
8. Troubleshooting
Before attempting any repairs, always disconnect the pump from the power supply.
| Problem | Possible Cause | Solution |
|---|---|---|
| Pump does not start. | No power supply. Blown fuse/tripped breaker. Motor overload. Seized impeller. | Check power connection. Reset breaker/replace fuse. Allow motor to cool, check for blockages. Inspect and clear impeller. |
| Pump runs but delivers no water or low pressure. | Pump not primed. Air leak in suction line. Suction line blocked. Foot valve clogged. Impeller damaged. Discharge valve closed. | Prime the pump. Check all suction connections for leaks. Clear obstruction. Clean foot valve strainer. Inspect/replace impeller. Open discharge valve. |
| Pump is noisy or vibrates excessively. | Air in pump/suction line. Loose mounting. Bearing wear. Debris in impeller. | Prime pump, check for suction leaks. Tighten mounting bolts. Contact qualified service personnel. Clear debris from impeller. |
| Pump leaks. | Loose pipe connections. Damaged mechanical seal. Cracked pump housing. | Tighten connections. Replace mechanical seal. Contact qualified service personnel. |
9. Warranty and Support
For specific warranty information, please refer to the documentation provided at the time of purchase or contact your retailer. Generally, products are covered against manufacturing defects for a limited period from the date of purchase.
For technical support, spare parts, or service inquiries, please contact the vendor or manufacturer directly. Ensure you have your product model number (KPM 50) and OEM part number (1810100) available when contacting support.