1. Introduction
The Smartgen HGM420 is an advanced automatic engine control module designed to monitor and protect your genset. It provides comprehensive control functions, including automatic start/stop, data measurement, alarm protection, and remote control capabilities. This manual provides essential information for the proper installation, operation, and maintenance of your HGM420 controller.
2. Safety Information
Please read and understand all safety instructions before installing or operating the HGM420 controller. Failure to follow these instructions may result in personal injury, equipment damage, or property loss.
- Electrical Hazard: Ensure all power sources are disconnected before performing any wiring or maintenance. Only qualified personnel should perform electrical work.
- Proper Grounding: Always ensure the controller and genset are properly grounded to prevent electrical shock.
- Environmental Conditions: Do not expose the controller to excessive moisture, dust, or extreme temperatures.
- Authorized Service: Do not attempt to repair the controller yourself. Refer all servicing to authorized personnel.
3. Product Overview
3.1 Front Panel
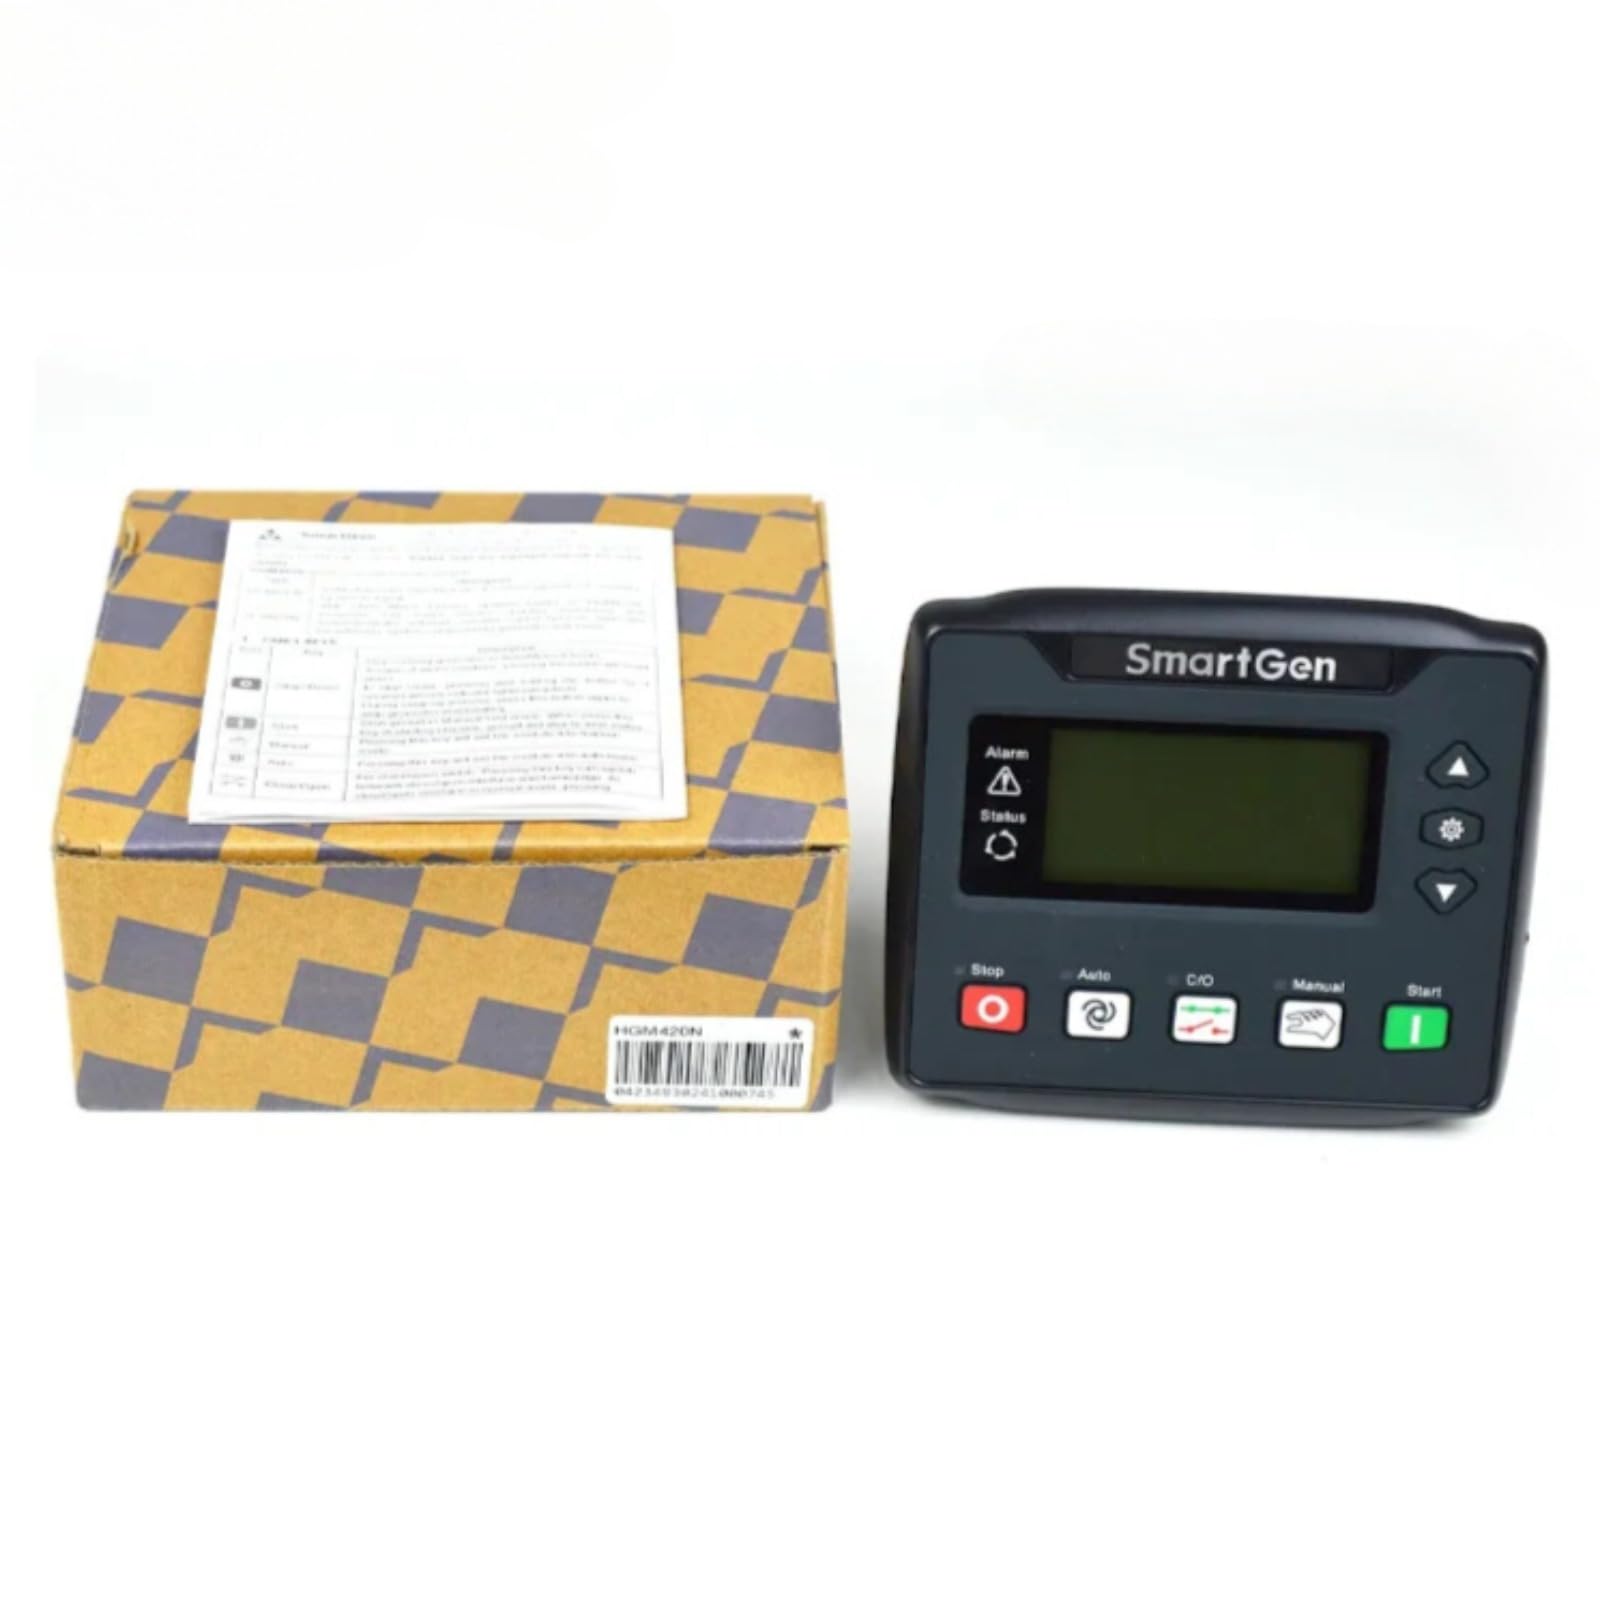
The front panel of the HGM420 controller features a clear LCD display for real-time monitoring of genset parameters and status. It includes several push buttons for operational control and navigation through menus. Key buttons include Stop, Auto, C/O (Close/Open), Manual, and Start, along with navigation arrows and a settings button.
3.2 Rear Connections

The rear of the HGM420 controller provides various terminal blocks for connecting to the genset, sensors, actuators, and power supply. These connections include inputs for generator AC voltage, current, engine parameters, and outputs for fuel, start, and other control signals. Refer to the wiring diagram for detailed connection instructions.
4. Setup and Installation
Proper installation is crucial for the reliable operation of the HGM420 controller. Ensure all connections are secure and correctly wired according to the provided diagrams.
- Mounting: Mount the controller in a suitable enclosure, ensuring adequate ventilation and protection from environmental elements.
- Power Supply: Connect the DC power supply to the designated terminals. Observe correct polarity.
- Engine Connections: Connect the engine's start, fuel, and other control signals to the corresponding output terminals.
- Sensor Inputs: Connect engine sensors (e.g., oil pressure, water temperature, speed) to their respective input terminals.
- Generator AC Inputs: Connect the generator's AC voltage and current transformers (CTs) to the appropriate input terminals.
- Grounding: Ensure the controller chassis is properly grounded.
5. Operating Instructions
The HGM420 controller offers several operating modes to suit different application requirements.
- Stop Mode: Press the Stop button. In this mode, the genset is stopped, and the controller will not initiate a start sequence.
- Auto Mode: Press the Auto button. The controller will automatically start and stop the genset based on external signals (e.g., remote start signal, mains failure).
- Manual Mode: Press the Manual button. In this mode, the genset can be started and stopped manually using the Start and Stop buttons.
- Start Button: Press the Start button to manually initiate a genset start sequence (typically used in Manual mode).
- Navigation Buttons: Use the Up, Down, and Settings buttons to navigate through the display menus and adjust parameters.
6. Maintenance
Regular maintenance ensures the longevity and reliable performance of your HGM420 controller.
- Cleaning: Keep the controller clean and free from dust and debris. Use a soft, dry cloth for cleaning. Do not use abrasive cleaners or solvents.
- Connection Checks: Periodically inspect all wiring connections for tightness and signs of corrosion.
- Firmware Updates: Check the manufacturer's website for any available firmware updates.
- Battery Check: Ensure the genset's starting battery is in good condition and properly charged, as this affects controller operation.
7. Troubleshooting
This section provides solutions to common issues you might encounter with the HGM420 controller.
| Problem | Possible Cause | Solution |
|---|---|---|
| Controller does not power on | No DC power supply; Blown fuse; Incorrect wiring | Check DC power source and connections; Replace fuse; Verify wiring according to diagram. |
| Genset fails to start | Low battery voltage; Fuel supply issue; Engine fault; Incorrect operating mode | Check battery and charging system; Verify fuel level and supply; Check engine for faults; Ensure controller is in Auto or Manual mode. |
| Alarm displayed | Engine fault (e.g., low oil pressure, high temperature); Sensor malfunction | Identify the specific alarm code on the display; Check corresponding engine parameter or sensor; Consult genset manual for engine-specific faults. |
| Incorrect readings on display | Sensor wiring issue; Incorrect parameter settings; Faulty sensor | Verify sensor connections; Check controller settings for sensor types and calibration; Replace faulty sensor if necessary. |
8. Specifications
Technical specifications for the Smartgen HGM420 Genset Generator Controller.
| Feature | Detail |
|---|---|
| Part Number | HGM420 |
| Package Dimensions | 7.09 x 5.91 x 3.94 inches |
| Item Weight | 1.76 pounds |
| Manufacturer | Auto Engineering |
| Batteries required | No (for controller operation, genset battery required) |
| Included Components | 1 x HGM420 Controller |
| UPC | 704543614587 |
9. Warranty and Support
This product is covered by a standard manufacturer's warranty against defects in materials and workmanship. For specific warranty terms, please refer to the documentation provided with your purchase or contact your vendor. For technical support, installation assistance, or troubleshooting beyond this manual, please contact Auto Engineering customer service or your authorized distributor.