MRCFBLKR V4.2.7
MRCFBLKR Creality Ender 3 V2 Motherboard V4.2.7 Instruction Manual
Silent Upgraded High Performance Mainboard with TMC2225 Driver
Introduction
This manual provides essential information for the installation, operation, and maintenance of your MRCFBLKR V4.2.7 Silent Mainboard. This high-performance motherboard is designed to enhance your 3D printing experience with silent operation and advanced features, primarily compatible with Creality Ender 3 V2 3D printers.
Product Overview
The MRCFBLKR V4.2.7 Mainboard is an upgraded 32-bit silent motherboard featuring TMC2225 stepper motor drivers and pre-installed Marlin 2.0.1 firmware. It is engineered for quiet operation and improved printing precision.
- High Performance: V4.2.7 mainboard for enhanced reliability and precision.
- Silent Operation: Equipped with TMC2225 drivers for reduced noise during printing.
- Pre-installed Firmware: Comes with Marlin 2.0.1 firmware and bootloader.
- Easy Firmware Updates: Supports firmware updates via SD card.
- Thermal Runaway Protection: Optimized circuit design includes thermal runaway protection.
- Input Voltage: Supports 24V input voltage.

Figure 1: MRCFBLKR V4.2.7 Silent Mainboard with its packaging.
Specifications
| Feature | Detail |
|---|---|
| Mainboard Version | V4.2.7 |
| Input Voltage | 24V |
| Output Voltage | 12V |
| Firmware Version | V0.0.6/V1.0.6 (based on Marlin 2.0.1) |
| Motor Driver | TMC2225 |
| Bootloader | Pre-installed |
| Connectivity | USB Port, SD Card Slot |
| Approximate Dimensions | 155 x 115 x 45 mm |
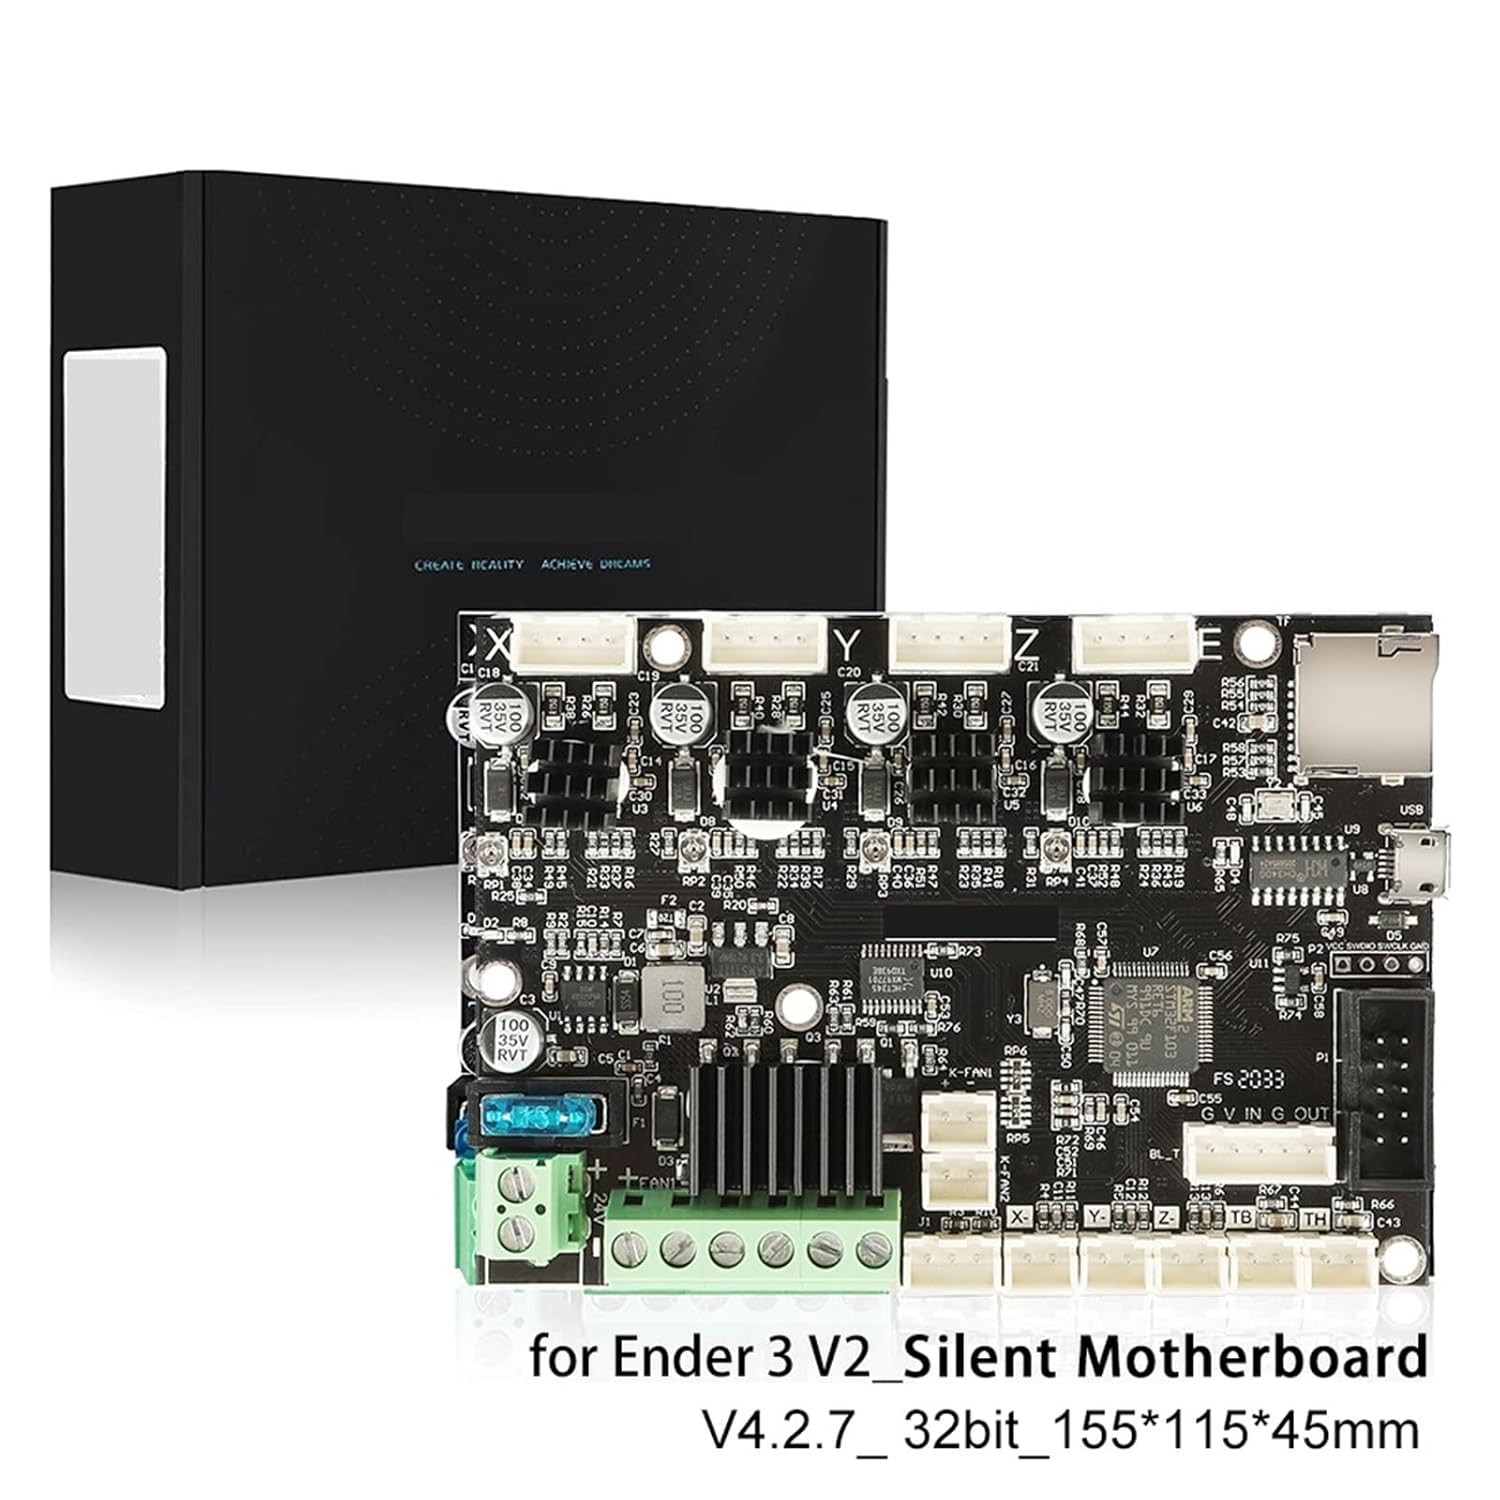
Figure 2: MRCFBLKR V4.2.7 Silent Mainboard showing its model number and approximate dimensions.
Compatibility
This mainboard is compatible with the following Creality 3D printer models:
- Creality Ender 3 V2 (Plug and Play)
- Creality Ender 3 Pro (Requires firmware update)
- Creality Ender 3 (Requires firmware update)
- Creality Ender 5 (Requires firmware update)
Note: For Ender 3, Ender 3 Pro, and Ender 5, a firmware update specific to your printer model is required after installation. Refer to the "Firmware Update" section for instructions.
Setup and Installation
The installation process involves replacing your existing mainboard with the V4.2.7 board. Ensure your printer is powered off and unplugged before beginning.
General Installation Steps:
- Power Off: Disconnect the 3D printer from the power source.
- Access Mainboard: Carefully open the control box or access panel to expose the current mainboard.
- Document Connections: Take clear photos of all existing wiring connections to the old mainboard. This is crucial for correct reassembly.
- Disconnect Wiring: Gently disconnect all wires from the old mainboard.
- Remove Old Mainboard: Unscrew and remove the old mainboard.
- Install New Mainboard: Place the MRCFBLKR V4.2.7 mainboard into position and secure it with screws.
- Reconnect Wiring: Refer to your photos and reconnect all wires to the corresponding ports on the new V4.2.7 mainboard. Pay close attention to motor ports (X, Y, Z, E), power supply, hot bed, nozzle, display, and fan connections.
- Close Panel: Securely close the control box or access panel.
- Initial Power On: Connect the power cord and turn on the printer.
For Ender 3 V2, the board is generally plug-and-play. For other compatible models, proceed to the firmware update section.

Figure 3: Mainboard port diagram illustrating connections for USB, TF card, motor ports, display, auto-leveling, processor, filament detector, nozzle, hot bed, and power supply.
Firmware Update
A firmware update is necessary for Ender 3, Ender 3 Pro, and Ender 5 models to ensure proper functionality with the V4.2.7 mainboard. The board comes with a bootloader pre-installed.
Firmware Update Procedure:
- Obtain Firmware: Download the correct firmware file for your specific 3D printer model (e.g., Ender 3 Pro, Ender 5) from the official Creality website. Ensure it is compatible with the V4.2.7 board.
- Prepare SD Card: Format an SD card (preferably 8GB or less) to FAT32. Ensure there are no other files on the SD card.
- Copy Firmware: Copy only the downloaded firmware file (usually a .bin file) to the root directory of the formatted SD card.
- Power Off Printer: Turn off your 3D printer and unplug the power cord.
- Insert SD Card: Insert the SD card containing the firmware into the mainboard's SD card slot.
- Power On Printer: Reconnect the power cord and turn on the printer.
- Wait for Update: The printer will automatically detect and flash the new firmware. This process typically takes about 10 seconds. The screen may remain blank or show a loading indicator during this time.
- Remove SD Card: Once the update is complete (the screen should display the normal interface), turn off the printer, remove the SD card, and then power it back on.
Important: Do not interrupt the power supply during the firmware update process. If you encounter issues, consult the official Creality support resources or community forums for further assistance.
Operating Considerations
Once installed and with the correct firmware, the V4.2.7 mainboard operates as the central control unit for your 3D printer. Its primary function is to interpret G-code commands and control the various components of the printer, such as stepper motors, heaters, and sensors.
- Silent Operation: The TMC2225 drivers significantly reduce motor noise, providing a quieter printing environment.
- Thermal Runaway Protection: The optimized circuit includes thermal runaway protection, a critical safety feature that monitors temperatures and shuts down heaters if abnormal readings are detected.
- USB Connectivity: The USB port allows for connection to a computer for direct control or for use with OctoPrint setups.
Care and Maintenance
To ensure the longevity and optimal performance of your mainboard, follow these general care guidelines:
- Keep Dry: Avoid exposing the mainboard to moisture or liquids.
- Dust Free: Periodically clean any accumulated dust from the mainboard and its components using compressed air or a soft brush. Ensure the printer is powered off and unplugged before cleaning.
- Proper Ventilation: Ensure the printer's control box has adequate ventilation to prevent overheating of the mainboard components.
- Handle with Care: When handling the mainboard, avoid touching the electronic components directly. Use anti-static precautions if possible.
Troubleshooting
Common Issues and Solutions:
- Printer Beeps and Screen is Blank After Power On:
This often indicates a firmware issue or incorrect wiring. First, ensure all wiring connections are correct and secure, referring to your installation photos. Second, perform a firmware update specific to your printer model as described in the "Firmware Update" section. Ensure the SD card is properly formatted and contains only the correct firmware file.
- Motors Not Moving or Moving Incorrectly:
Check all motor connections (X, Y, Z, E) to ensure they are securely plugged into the correct ports on the mainboard. Verify that the correct firmware for your printer model has been installed.
- Printer Not Heating (Hotend or Bed):
Inspect the wiring for the hotend and hot bed. Ensure they are securely connected to the mainboard. This could also be related to a firmware issue if the thermal sensors are not being read correctly.
If issues persist, consult the official Creality support resources or community forums for further assistance.
Warranty and Support
Specific warranty information for the MRCFBLKR V4.2.7 Silent Mainboard is not provided in the product details. For warranty claims or technical support, please contact the seller or manufacturer directly through your purchase platform.
For general troubleshooting and firmware resources related to Creality 3D printers, please visit the Official Creality Website.
Ask a question about this manual
Ask about setup, troubleshooting, compatibility, parts, safety, or missing instructions. Manuals+ will review the question and use this page’s manual context to help answer it.