zonveer A20
zonveer Folding Electric Bike Model A20 User Manual
Model: A20 | Brand: zonveer
1. Introduction
Welcome to the user manual for your new zonveer A20 Folding Electric Bike. This manual provides essential information for the safe assembly, operation, maintenance, and troubleshooting of your electric bicycle. Please read this manual thoroughly before your first ride to ensure optimal performance and safety.
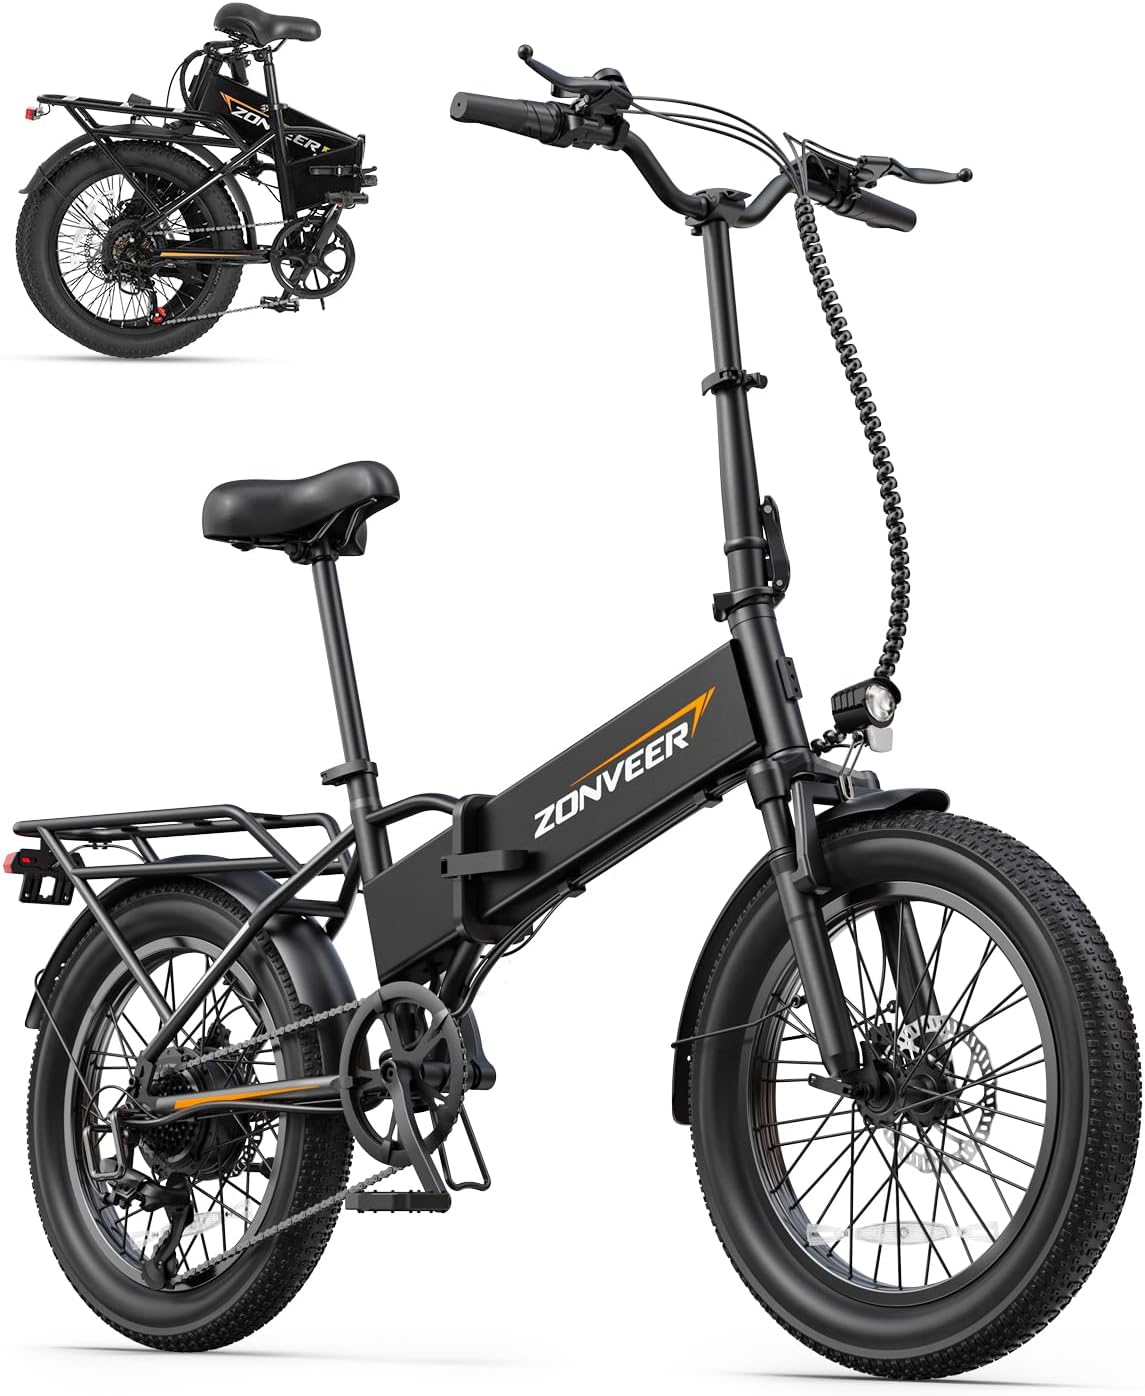
Figure 1: The zonveer A20 Folding Electric Bike in its unfolded state, showcasing its design and components.
2. Safety Information
Your safety is paramount. Always adhere to the following guidelines:
- Always wear a certified helmet when riding.
- Obey all local traffic laws and regulations.
- Perform a pre-ride inspection before each use, checking brakes, tire pressure, and battery level.
- Do not ride under the influence of alcohol or drugs.
- Avoid riding in adverse weather conditions, such as heavy rain or snow.
- Ensure the battery is securely locked in place before riding.
- Do not modify the electric bike's components, especially the motor or battery system.
- Keep hands and feet clear of moving parts.
- Familiarize yourself with the braking system and practice emergency stops in a safe area.

Figure 2: Integrated headlight and taillight for enhanced visibility and safety during rides.
3. Package Contents
Upon unpacking, please verify that all items are present:
- zonveer A20 Folding Electric Bike (90% pre-assembled)
- 48V 10.4AH Removable Lithium Battery (pre-installed or separate)
- Battery Charger
- User Manual (this document)
- Assembly Tools (basic wrench set, Allen keys)
- Cargo Rack (pre-installed or separate)
- Fenders (pre-installed or separate)
4. Setup and Assembly
The zonveer A20 electric bike arrives 90% pre-assembled. The remaining assembly steps typically include attaching the front wheel, handlebars, pedals, and seat post. For detailed visual guidance, please refer to the official installation video available on the product page.
- Unpacking: Carefully remove the bike and all components from the packaging.
- Unfolding the Frame: Locate the folding mechanism on the frame, typically near the center. Release the safety latch and unfold the frame until it locks into place. Secure the latch.
- Handlebar Installation: Insert the handlebar stem into the fork tube and tighten the quick-release lever or bolts. Adjust the handlebar height and angle for comfort.
- Seat Post Installation: Insert the seat post into the frame's seat tube. Adjust the seat height to allow for a slight bend in your knee when the pedal is at its lowest point. Secure with the quick-release lever.
- Pedal Attachment: Identify the left (L) and right (R) pedals. The left pedal tightens counter-clockwise, and the right pedal tightens clockwise. Ensure they are securely fastened.
- Front Wheel Installation: If not pre-installed, attach the front wheel to the front fork, ensuring the disc brake rotor aligns correctly with the caliper. Tighten the axle nuts or quick-release skewer.
- Battery Installation/Charging: If the battery is separate, slide it into its compartment until it clicks securely. Charge the battery fully before first use. Refer to the "Battery Charging" section for details.
- Pre-Ride Check: Before your first ride, double-check all bolts, quick releases, and connections for tightness. Ensure brakes are functional and tires are inflated to the recommended pressure.
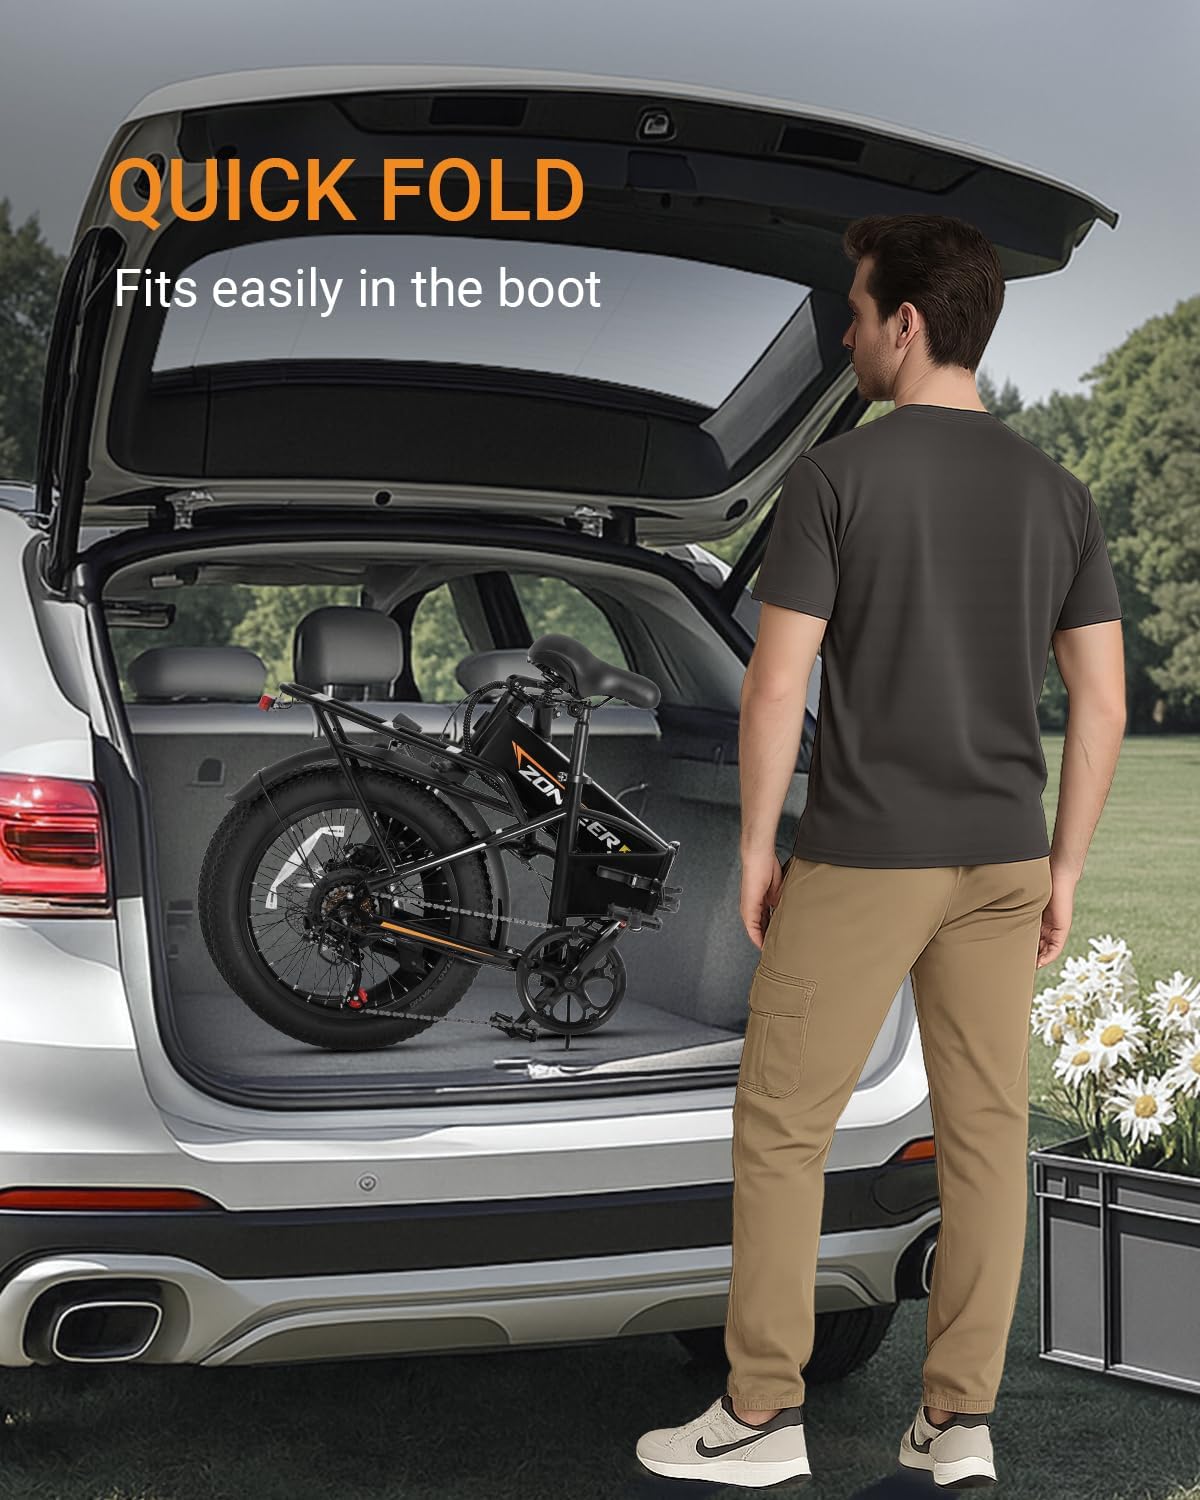
Figure 3: The zonveer A20 electric bike in its folded configuration, demonstrating its compact size for transport or storage.
5. Operating Instructions
5.1. Powering On/Off
To power on the bike, press and hold the power button on the LCD display. To power off, repeat the process.
5.2. LCD Display Functions
The intelligent LCD display provides real-time information:
- Battery Indicator: Shows current battery charge level.
- Speed: Displays current riding speed.
- Pedal Assist Levels (PAS): Indicates the selected assist level (0-3).
- Mileage: Tracks total distance traveled.
- Headlight Indicator: Shows if the headlight is on.

Figure 4: Close-up of the intelligent LCD display, providing essential riding data at a glance.
5.3. Riding Modes
The zonveer A20 offers three distinct riding modes:
- Pure Electric Mode: Engages the motor without pedal input. Use the throttle for acceleration.
- Pedal Assist Mode (PAS): The motor provides assistance as you pedal. Adjust the assist level (1-3) using the display controls. Higher levels provide more assistance.
- Classic Bike Mode: The motor is off, and the bike operates like a traditional bicycle, relying solely on pedal power.
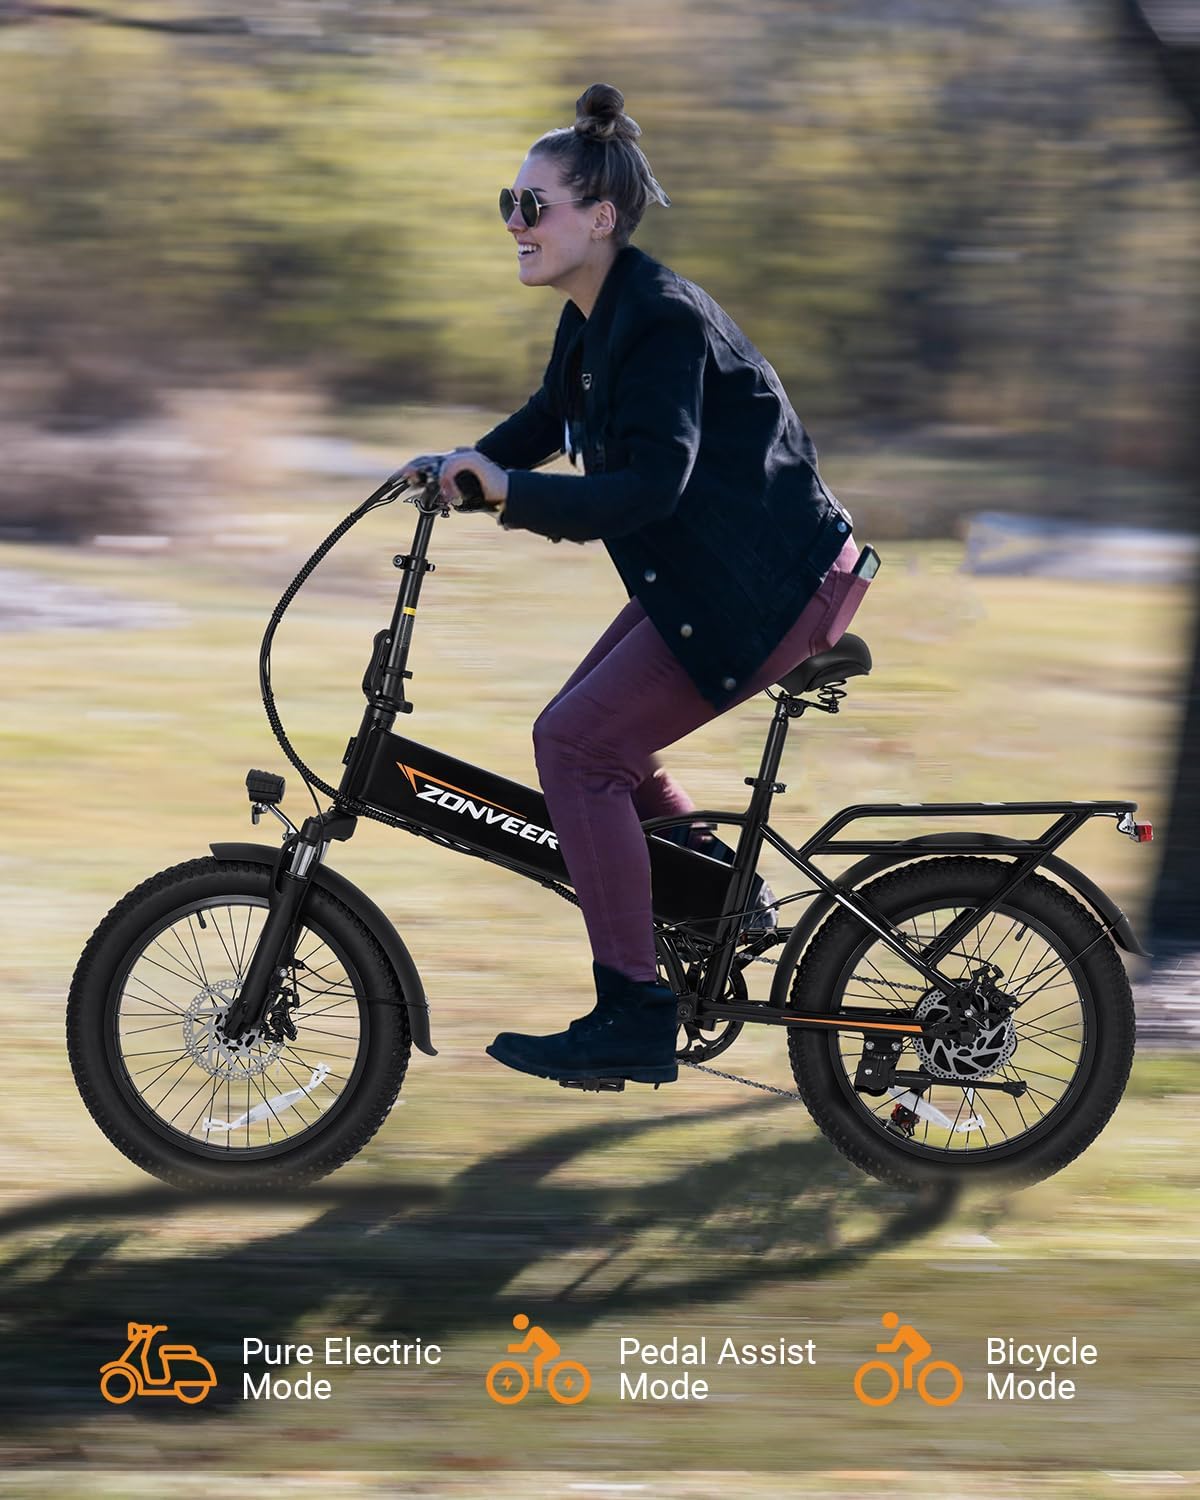
Figure 5: Visual representation of the three riding modes: Pure Electric, Pedal Assist, and Classic Bicycle Mode.
5.4. Shifting Gears
The bike is equipped with a 7-speed transmission system. Use the shifter on the handlebars to change gears, allowing you to adapt to various terrains and optimize pedaling efficiency.

Figure 6: The 7-speed transmission system, designed for smooth and precise gear changes.
5.5. Battery Charging
To charge the 48V 10.4AH removable battery:
- Ensure the bike is powered off.
- The battery can be charged while installed on the bike or removed.
- Connect the charger to the battery's charging port, then plug the charger into a standard wall outlet.
- The charger indicator light will typically turn red during charging and green when fully charged.
- Charging time may vary, but a full charge typically takes several hours.
- Do not leave the battery charging unattended for extended periods.
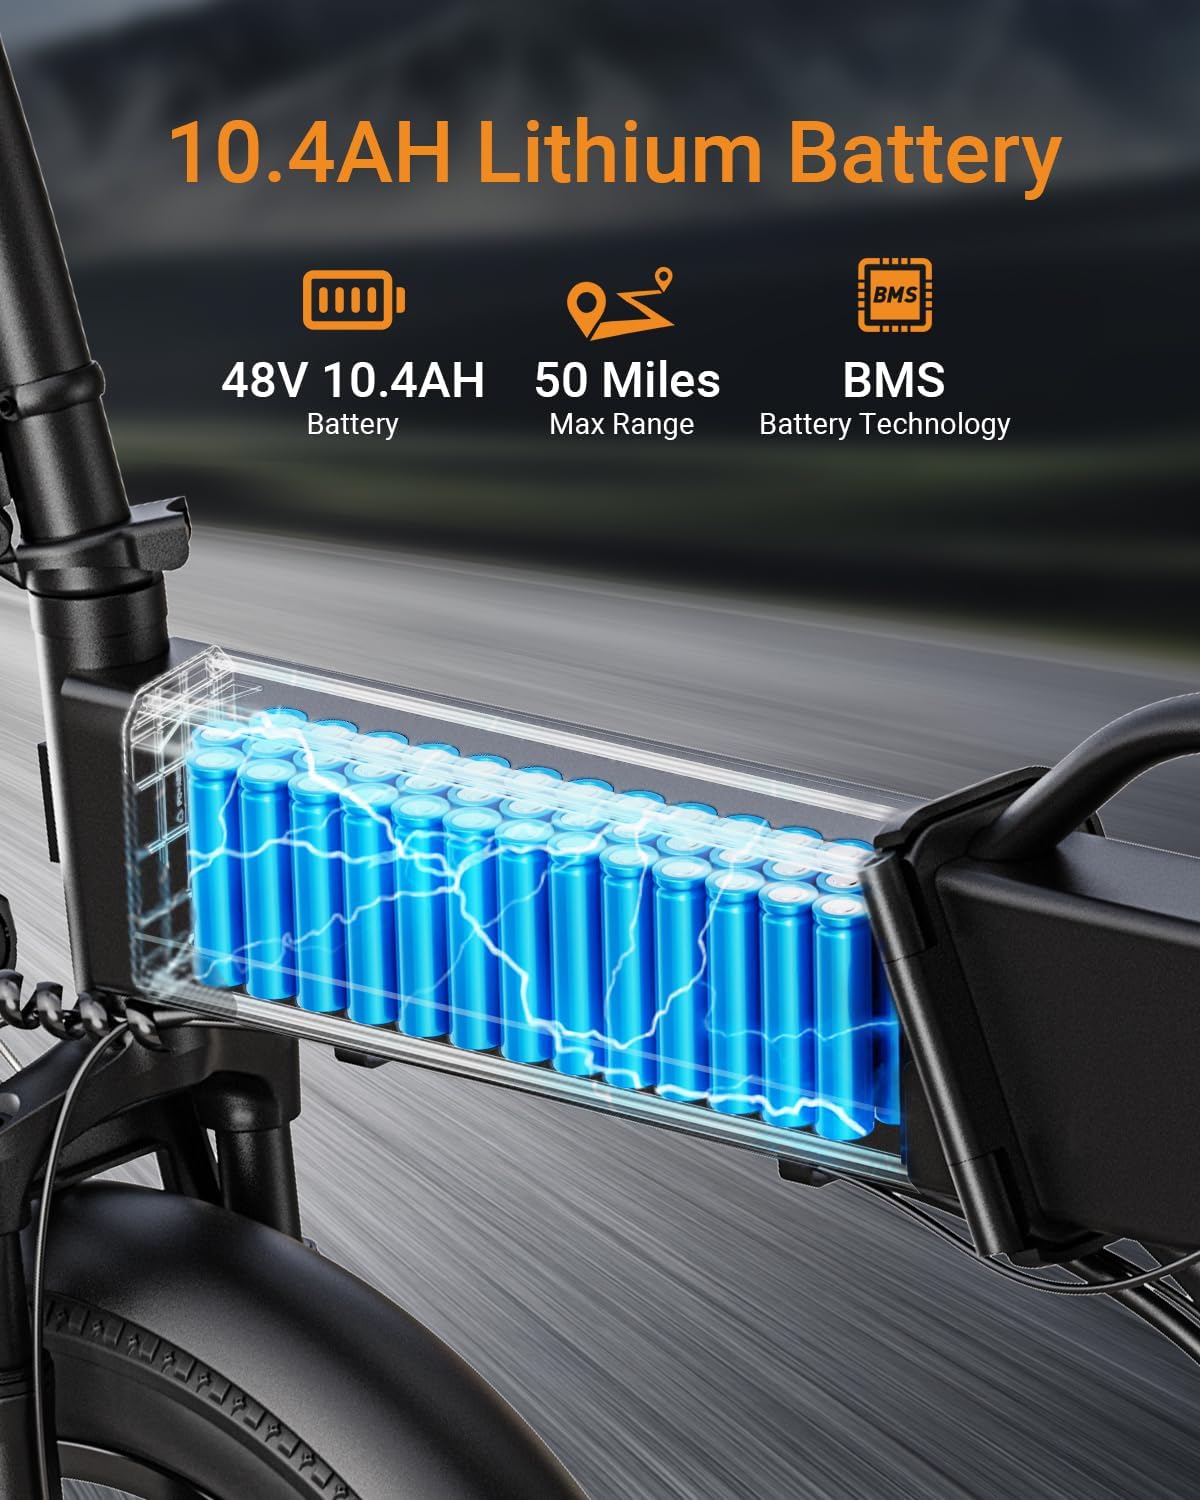
Figure 7: The 48V 10.4AH removable lithium battery, providing power for extended rides.
6. Maintenance
Regular maintenance ensures the longevity and safe operation of your electric bike.
- Cleaning: Clean the bike regularly with a damp cloth. Avoid high-pressure washing directly on electrical components.
- Tires: Check tire pressure before each ride. The 20"x3.0" fat tires require specific pressure, usually indicated on the tire sidewall. Inspect for wear and punctures.
- Brakes: Regularly check brake pads for wear and ensure brake levers provide firm, responsive stopping power. Adjust as needed.
- Chain: Keep the chain clean and lubricated to ensure smooth shifting and prevent rust.
- Battery Care: Store the battery in a cool, dry place. If storing for extended periods, charge it to 50-70% every few months.
- Fasteners: Periodically check all bolts and nuts for tightness, especially after the first few rides.

Figure 8: The durable 20"x3.0" fat tire, designed for various terrains and enhanced stability.
7. Troubleshooting
This section addresses common issues you might encounter.
| Problem | Possible Cause | Solution |
|---|---|---|
| Bike does not power on. | Battery low or not connected; power button not pressed correctly. | Charge battery; ensure battery is fully inserted and locked; press power button firmly. |
| Motor not assisting. | PAS level set to 0; battery low; brake levers engaged. | Increase PAS level; charge battery; ensure brake levers are fully released. |
| Brakes feel weak. | Worn brake pads; loose brake cable; air in hydraulic system (if applicable). | Inspect and replace brake pads; adjust brake cable tension; consult a professional for hydraulic brake issues. |
| Unusual noises during riding. | Loose components; dry chain; rubbing fenders. | Check all fasteners; lubricate chain; adjust fenders. |
If you encounter issues not listed here or require further assistance, please contact zonveer customer support.
8. Specifications
| Feature | Detail |
|---|---|
| Model Name | A20 |
| Bike Type | Folding Electric Commuting Bike |
| Motor | 750W (Peak 1200W) High-Speed Brushless Motor |
| Battery | 48V 10.4AH Removable Lithium Battery |
| Max Speed | Up to 28 MPH |
| Max Range | Up to 50+ Miles (Pedal Assist Mode) |
| Riding Modes | Pure Electric, Pedal Assist (3 Levels), Classic Bike |
| Transmission | 7-Speed |
| Wheel Size | 20 Inches |
| Tires | 20" x 3.0" Fat Tires (Puncture-resistant) |
| Frame Material | Alloy Steel / Aluminum |
| Suspension Type | Dual (Front Fork Spring Shock Absorbers) |
| Brake Style | Dual Disc Brake |
| Special Features | Foldable, Fenders, Headlight, Rechargeable, Cargo Rack |
| Bicycle Weight | 66 lbs |
| Max Load Capacity | 265 lbs |
| Recommended Height | 5'4" - 6'1" |

Figure 9: Key dimensions, weight, and load capacity specifications for the zonveer A20 electric bike.
9. Warranty and Support
zonveer provides a 1-year manufacturer's warranty covering the motor, battery, charger, controller, switches, and handles. This warranty covers defects in materials and workmanship under normal use.
For warranty claims, technical support, or any questions regarding your zonveer A20 electric bike, please contact customer service. Keep your original packaging for a period after purchase in case a return is necessary.
Contact Information: Refer to your purchase documentation or the official zonveer website for the most current customer support contact details.
Related Documents - A20
 |
AOSTIRMOTOR A20 Electric Bike Manual and Maintenance Guide Comprehensive guide for the AOSTIRMOTOR A20 electric bike, covering display functions, controller and motor maintenance, FAQs, installation, folding, and safety notices. Features 500W motor and 36V 13Ah battery. |
 |
ADO E-BIKE User Manual Comprehensive user manual for ADO E-BIKE electric bicycles, covering safety, operation, maintenance, and troubleshooting. |
 |
ADO A20 Air/Lite Electric Bike Quick Installation Guide Comprehensive guide for setting up your ADO A20 Air/Lite electric bike, covering accessory installation, frame assembly, and basic operation of the control panel. Includes detailed steps and visual descriptions. |
 |
Potensic A20 Mini Drone Operations Guide Comprehensive operations guide for the Potensic A20 mini drone, covering setup, flight controls, functions, troubleshooting, and safety precautions. |
 |
ADO A20 AIR Folding Electric Bike User Manual Comprehensive user manual for the ADO A20 AIR folding electric bike, covering safety precautions, adjustment methods, battery installation, and app usage. |
 |
ADO EBIKE User Manual Book This user manual book provides comprehensive information on the ADO EBIKE, including safety precautions, operating instructions, maintenance procedures, and troubleshooting guides for various models like A16, A20, and A20F. |
Ask a question about this manual
Ask about setup, troubleshooting, compatibility, parts, safety, or missing instructions. Manuals+ will review the question and use this page’s manual context to help answer it.