
Introduction
This manual provides detailed instructions for the installation, operation, and maintenance of your KOUENOM P12 12-inch 4K Mirror Dash Cam. This device integrates a front 4K dash camera, a rear 1080P backup camera, and smart features like CarPlay and Android Auto, designed to enhance your driving safety and convenience.
Safety Information
- Ensure the device is securely mounted and does not obstruct your view or interfere with vehicle controls.
- Do not attempt to operate the device or adjust settings while driving.
- Use only the provided power cables and accessories to prevent damage or fire.
- Keep the device away from extreme temperatures and direct sunlight for prolonged periods.
- Consult a professional for installation if you are unsure about any steps.
What's in the Box
- 1x 4K Mirror Dash Cam
- 1x Waterproof 1080p Rear Camera
- 1x 64GB SD Card (pre-installed)
- 1x Charging Cable
- 1x Rear Camera Cable (18ft/550cm)
- 1x Aux Cable (4.7ft/145cm)
- 1x Installation Tool
- 1x User Manual

An image showing all components included in the product package, such as the mirror dash cam, rear camera, cables, and installation tools.
Setup and Installation
Proper installation ensures optimal performance and safety. Follow these steps carefully.
Front Camera (Mirror Dash Cam) Installation
- Mounting the Mirror Dash Cam: Securely attach the 12-inch mirror dash cam over your existing rearview mirror using the provided straps. Ensure it is centered and does not obstruct your view.
- Power Connection:
- Select an installation location on the front windshield of the car and paste the electrostatic sticker.
- Use a crowbar (installation tool) to hide the remaining wire along the gap of the front windshield, through the A-pillar, and down the door gap.
- Hide access through it under the mat car charger connected to the car's cigarette lighter port.
Rear Camera Installation
- Routing the Rear Camera Cable: Route the rear camera cable from the main unit, along the gap between the car body and the ceiling on the side of the passenger seat, and between the rear seat and the ceiling.
- Mounting the Rear Camera: Mount the waterproof 1080p rear camera near your license plate or another suitable location at the rear of your vehicle.
- Connecting to Reverse Light: Connect the red wire of the rear camera cable with the positive cable of your car's reverse light. This enables the reverse assist function.
Installation Video:
This video demonstrates the installation process for the rearview mirror camera, including routing cables and connecting the rear camera.
Operating Instructions
Power On/Off
The device will automatically power on when the vehicle starts and power off when the ignition is turned off.
Dual Camera Recording
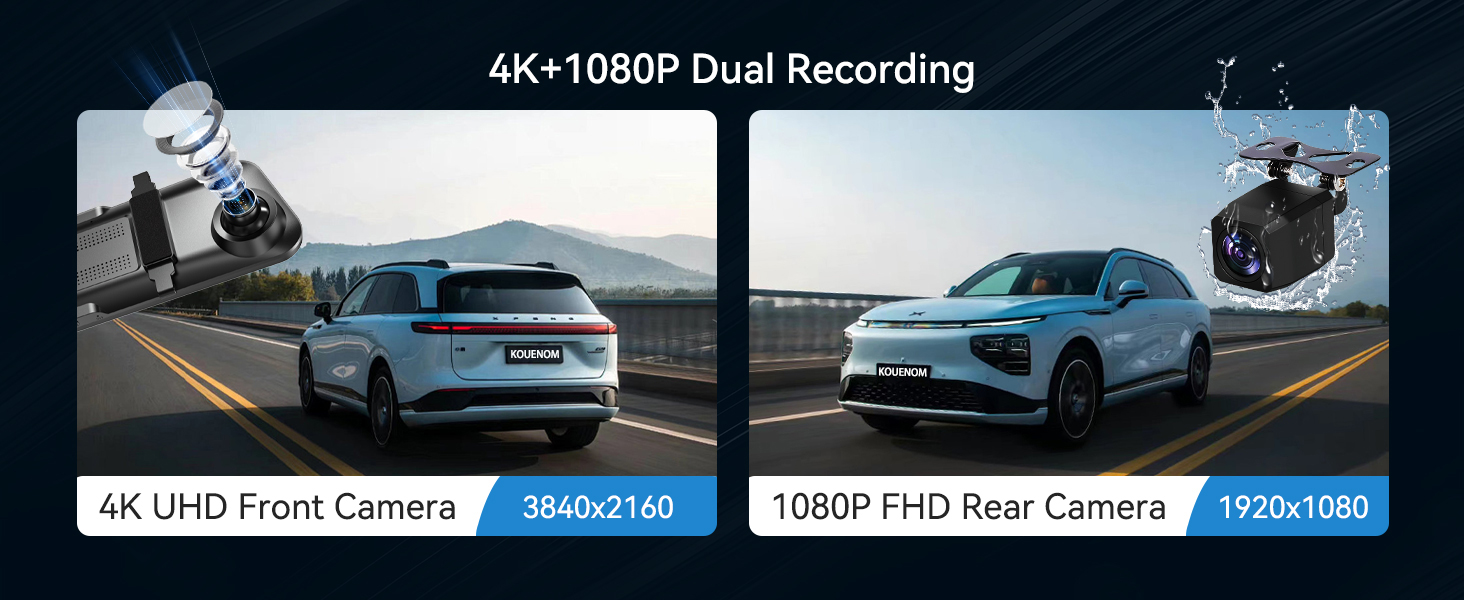
The device records simultaneously from the front 4K camera and the rear 1080P camera. The 170° front and 140° rear wide angles provide comprehensive coverage.

An illustration showing the dual camera recording capabilities, with 4K front and 1080p rear views, and wide-angle coverage.
Touch Screen Controls
The 12-inch 1920x480P integrated screen with 2.5D curved glass offers sensitive touch control.
- Adjust Screen Angle: Swipe up and down on the screen to adjust the viewing angle of the camera.
- Switch Camera Views: Swipe left and right to switch between front camera, rear camera, or split-screen views.

An image demonstrating touch screen gestures for adjusting camera angle and switching between front and rear camera views.
CarPlay and Android Auto Integration
Connect your smartphone via Bluetooth and Wi-Fi for seamless access to navigation, calls, and music.
Connecting to CarPlay:
- Turn on the CarPlay option on the P12.
- Turn on iPhone Bluetooth and search for the device name (e.g., T86PRO) and connect.
- Agree to use CarPlay.
Connecting to Android Auto:
- Turn on the Android Auto option on the P12.
- Turn on phone Bluetooth and search for the device name (e.g., T86PRO) and connect.
- Agree to use Android Auto.
A visual representation of the CarPlay and Android Auto interfaces on the mirror dash cam, showing various app icons.
Voice Control
Utilize Siri or Google Voice control for hands-free operation of phone functions, navigation, and music playback.

An image illustrating the voice control feature, showing a driver interacting with Siri or Google Assistant for navigation and calls.
Driving Assistance Features
- Loop Recording: Records continuously, overwriting older unlocked files when the memory card is full.
- G-Sensor: Detects sudden collisions and automatically locks relevant recordings as evidence.
- 24H Parking Monitor: Provides all-round security for vehicles, recording situations as evidence (requires hardwire kit, not included).
- Reverse Assist: Aids in safe parking by displaying the rear camera view with adjustable guidelines. The rear camera image can be mirror-flipped and enlarged during reversing.

An image depicting the various driving assistance features: loop recording, G-sensor, 24H parking monitor, and reverse assistance.
Audio Output Modes
The device offers four audio connection options:
- FM Transmitter: Connects to your car's audio system via FM radio frequency.
- AUX Audio Cable: Connects directly to your car's AUX input.
- Bluetooth: Connects wirelessly to your car's Bluetooth system.
- Built-in Speaker: For direct audio output from the device.

An image illustrating the four audio connection options: Bluetooth, FM transmission, AUX output, and the built-in speaker.
Brightness Adjustment
The screen brightness can be adjusted manually or set to a preset mode that automatically adjusts based on time.

An image showing the manual and preset brightness adjustment modes for the mirror dash cam screen.
Screen Saver
The screen saver can be set for 10 seconds, 30 seconds, 1 minute, or off. If the screen is not operated within the set time, it will black out automatically, continuing to record in the background. This reduces visual interference and prolongs device service life.

An image showing the screen saver feature, where the display turns off after a set period while recording continues.
Maintenance
- Cleaning: Use a soft, dry cloth to clean the screen and camera lenses. Avoid abrasive cleaners.
- Temperature: Do not expose the device to extreme temperatures (below -4°F or above 160°F) for extended periods.
- Firmware Updates: Check the manufacturer's website for any available firmware updates to ensure optimal performance.

An image illustrating the device's durability in extreme temperatures, showing it functioning in both cold (-4°F) and hot (160°F) conditions.
Troubleshooting
- Device Not Powering On: Ensure the charging cable is securely connected to the cigarette lighter port and the vehicle's ignition is on.
- "TF card is loading" message: This indicates the memory card is being read. If it persists, try reinserting the 64GB SD card or formatting it (backup important data first).
- Glitches with Connections (CarPlay/Android Auto): Ensure Bluetooth and Wi-Fi are enabled on your phone and the device. Try restarting both the device and your phone.
- No Reversing Lines Calibration Instructions: While the manual does not detail calibration, ensure the rear camera is properly aligned for accurate reverse assist.
- Battery Drain: If the device drains your car battery when parked for extended periods (e.g., over 2 weeks), consider using a hardwire kit with low-voltage protection for parking monitoring.
- Screen Less Clear: Ensure the protective film is removed from the screen and lenses are clean.
Review and Operation Videos:
This video shows the startup sequence of the mirror dash cam, including the initial boot screen and the main interface loading.
This video demonstrates the touch screen responsiveness and navigation through the device's menus and applications.
This video provides a general review of the mirror dash cam's features and functionality.
Specifications
| Feature | Detail |
|---|---|
| Product Dimensions | 0.71 x 11.85 x 2.83 inches |
| Item Weight | 2.12 pounds |
| Item Model Number | P12 |
| Connectivity Technologies | USB |
| Special Features | Loop record, Reverse assistant, G-sensor, Touch Screen, Voice Control, Built-In Speaker, Built-In Display, CarPlay, Android Auto wireless connection |
| Video Capture Resolution | Front 4K |
| Mounting Type | Rearview Mirror Mount |
| Field Of View | 140 Degrees |
| Color | Black |
| Manufacturer | KOUENOM |
Warranty and Support
The KOUENOM P12 Mirror Dash Cam comes with a 12-month warranty. KOUENOM provides dedicated customer service to assist with any questions or issues you may encounter. Please refer to the contact information provided in the packaging or on the official website for support.