JCZWJWFCX-63A
TOMZN 63A WiFi Smart Energy Meter Circuit Breaker User Manual
Model: JCZWJWFCX-63A
1. Introduction
This manual provides essential instructions for the safe and efficient installation, operation, and maintenance of your TOMZN 63A WiFi Smart Energy Meter Circuit Breaker. This device integrates energy metering, circuit breaking, and smart protection features, offering comprehensive control and monitoring of electrical circuits. Please read this manual thoroughly before use and retain it for future reference.
2. Safety Information
Always observe the following safety precautions to prevent personal injury or damage to the device:
- Installation must be performed by a qualified electrician in accordance with local electrical codes and regulations.
- Ensure the main power supply is disconnected before installation or maintenance.
- Do not operate the device with wet hands or in damp environments.
- Verify correct wiring connections to avoid short circuits or electrical hazards.
- The device is designed for indoor use unless specified otherwise for outdoor installations (e.g., solar).
- Do not attempt to repair or modify the device yourself. Contact qualified personnel for service.
3. Product Features
The TOMZN 63A WiFi Smart Energy Meter Circuit Breaker offers advanced functionalities:
- Comprehensive Protection: Prevents damage from short circuits, overloads, over-voltage, under-voltage, and leakage.
- Energy Metering: Monitors and displays real-time voltage, current, and kWh consumption.
- WiFi Connectivity: Remote control and monitoring via the TUYA smart application.
- Timer Functionality: Schedule power on/off times for connected devices.
- Durable Construction: Made with insulating, flame-retardant, and UV-resistant materials for long-term reliability.
- Secure Connections: Screw-type terminals ensure stable and secure electrical connections.
- Versatile Application: Suitable for solar inverters, charge controllers, and battery banks.
4. Product Overview
Familiarize yourself with the components of your smart energy meter circuit breaker.

Figure 1: Front View. This image displays the front of the TOMZN 63A WiFi Smart Energy Meter Circuit Breaker. It features a digital display showing voltage (V), current (mA), and energy consumption (kWh). Below the display are three control buttons: Power, Set, and Up/Down arrow, along with a WiFi indicator. The input (IN) and output (OUT) terminals are visible at the top and bottom.
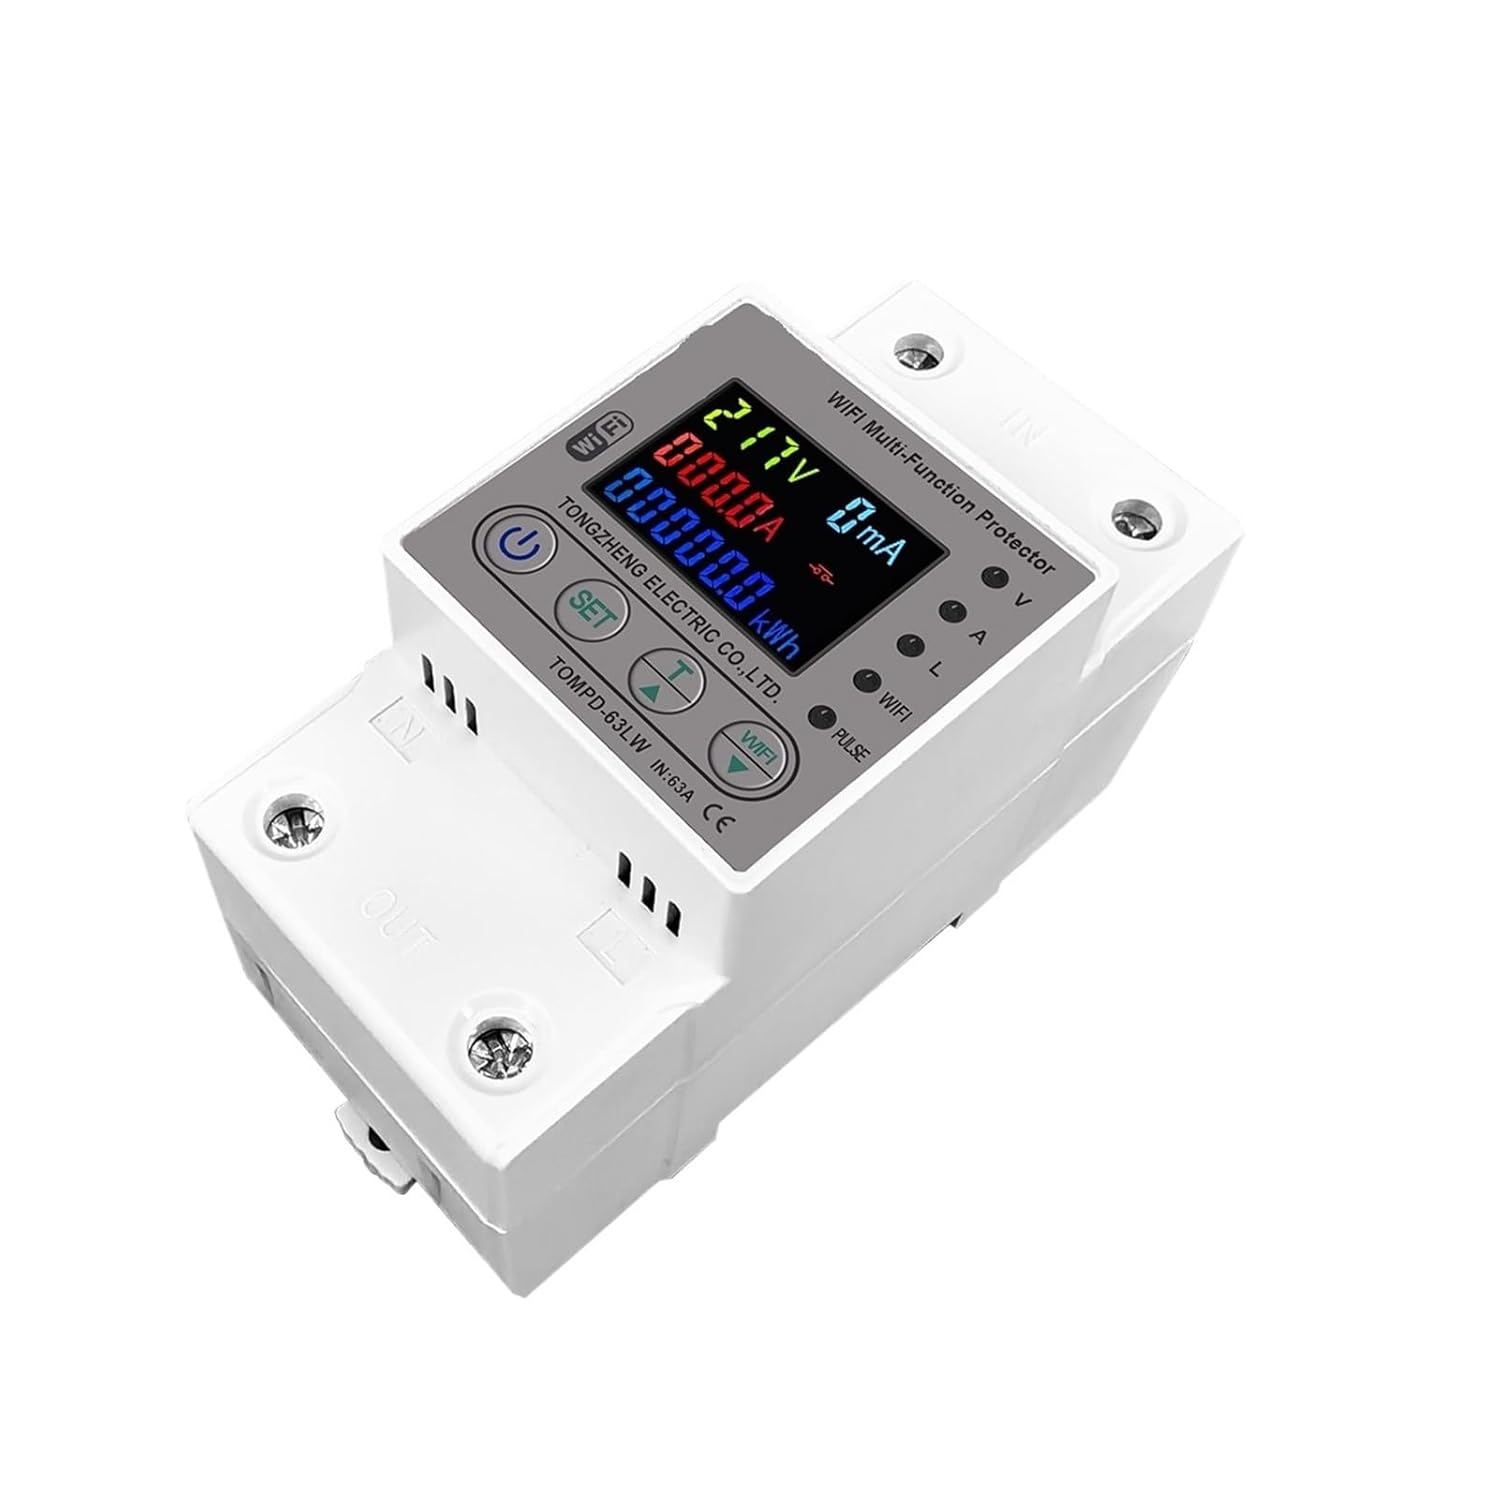
Figure 2: Angled View. This image provides an angled perspective of the device, highlighting the screw terminals for electrical connections at the top (IN) and bottom (OUT). The digital display and control buttons are clearly visible, offering a better understanding of the device's physical layout and connection points.

Figure 3: Side View. This image shows the side profile of the TOMZN 63A WiFi Smart Energy Meter Circuit Breaker. It illustrates the compact design and the mechanism for DIN rail mounting, which is typical for such electrical components, allowing for easy installation in electrical panels.
5. Setup and Installation
5.1 Mechanical Installation
- Ensure the main power supply is OFF at the circuit breaker panel.
- Mount the device onto a standard 35mm DIN rail within an electrical enclosure.
- Ensure adequate ventilation around the device.
5.2 Electrical Wiring
Connect the device according to the following steps. Refer to Figure 2 for terminal locations.
- Connect the incoming live (L) and neutral (N) wires from the power source to the "IN" terminals at the top of the device.
- Connect the outgoing live (L) and neutral (N) wires to the load (e.g., appliance, sub-panel) from the "OUT" terminals at the bottom of the device.
- Tighten all screw terminals securely to prevent loose connections and arcing.
- Double-check all wiring for correctness before restoring power.
5.3 TUYA App Pairing
- Download the "TUYA Smart" or "Smart Life" app from your smartphone's app store.
- Register or log in to your account.
- Ensure your smartphone is connected to a 2.4GHz WiFi network.
- Power on the circuit breaker. The WiFi indicator on the device should blink rapidly. If not, press and hold the "SET" button for 5-7 seconds until it blinks rapidly to enter pairing mode.
- In the app, tap "+" to add a device. Select "Electrical Engineering" > "Circuit Breaker (Wi-Fi)" or "Energy Meter (Wi-Fi)".
- Follow the on-screen instructions to connect the device to your WiFi network.
- Once successfully paired, the WiFi indicator on the device will become solid.
6. Operating Instructions
6.1 Manual Operation
- Power Button (U): Press to manually turn the circuit breaker ON or OFF.
- Display: The digital display shows real-time voltage (V), current (A), and accumulated energy consumption (kWh). Use the arrow buttons to cycle through display modes if available.
6.2 App Control and Monitoring
Through the TUYA Smart app, you can:
- Remotely turn the circuit breaker ON/OFF.
- View real-time voltage, current, power, and energy consumption data.
- Set over-current, over-voltage, under-voltage, and leakage protection thresholds.
- Configure schedules and timers for automatic operation.
- Receive alerts for abnormal conditions or trips.
6.3 Protection Functions
The device automatically trips to protect against:
- Over Current: When current exceeds the set limit.
- Over Voltage: When voltage exceeds the set limit.
- Under Voltage: When voltage drops below the set limit.
- Leakage Protection: Detects and trips on ground fault currents.
After a trip, identify and resolve the cause, then manually reset the breaker via the app or the physical power button.
7. Maintenance
- Keep the device clean and free from dust. Use a dry, soft cloth for cleaning.
- Periodically check wiring connections for tightness, especially after initial installation.
- Ensure the operating environment is within the specified temperature and humidity ranges.
- Do not use abrasive cleaners or solvents.
8. Troubleshooting
| Problem | Possible Cause | Solution |
|---|---|---|
| Device does not power on. | No incoming power; incorrect wiring. | Check main power supply. Verify wiring connections. |
| WiFi indicator not blinking/pairing fails. | Not in pairing mode; 5GHz WiFi network; weak signal. | Press and hold "SET" button to enter pairing mode. Ensure 2.4GHz WiFi. Move device closer to router. |
| Device trips frequently. | Overload, short circuit, over/under voltage, leakage. | Identify the cause of the trip (e.g., faulty appliance, wiring issue). Adjust protection thresholds in the app if appropriate. Consult an electrician. |
| Inaccurate readings. | Loose connections; device malfunction. | Check all wiring connections. If problem persists, contact support. |
9. Specifications
| Parameter | Value |
|---|---|
| Model Number | TOMPD-63LW (JCZWJWFCX-63A) |
| Rated Current | 63A |
| Rated Voltage | 220V |
| Protection Features | Over current, Over voltage, Under voltage, Leakage |
| Connectivity | WiFi (2.4GHz) |
| Smart Device | Yes (TUYA compatible) |
| Certification | CE |
| Dimensions (Approx.) | 0.39 x 0.39 x 0.39 inches (Package Dimensions) |
| Weight (Approx.) | 3.53 ounces (Package Weight) |
Ask a question about this manual
Ask about setup, troubleshooting, compatibility, parts, safety, or missing instructions. Manuals+ will review the question and use this page’s manual context to help answer it.