1. Important Safety Instructions
Please read all instructions carefully before operating the appliance. Retain this manual for future reference.
- Ensure the appliance is properly grounded.
- Do not operate the machine with a damaged power cord or plug.
- Keep ventilation openings clear of obstructions.
- Use only potable water for ice production.
- Do not store explosive substances such as aerosol cans with a flammable propellant in this appliance.
- This appliance is intended for commercial use.
2. Product Overview
The TROPOW Commercial Ice Maker Machine (Model APS-60-130) is designed for high-volume ice production, featuring a 130 lbs/24H capacity and a 30 lbs ice storage bin. It includes an auto-clean function, timer, and adjustable ice thickness settings.
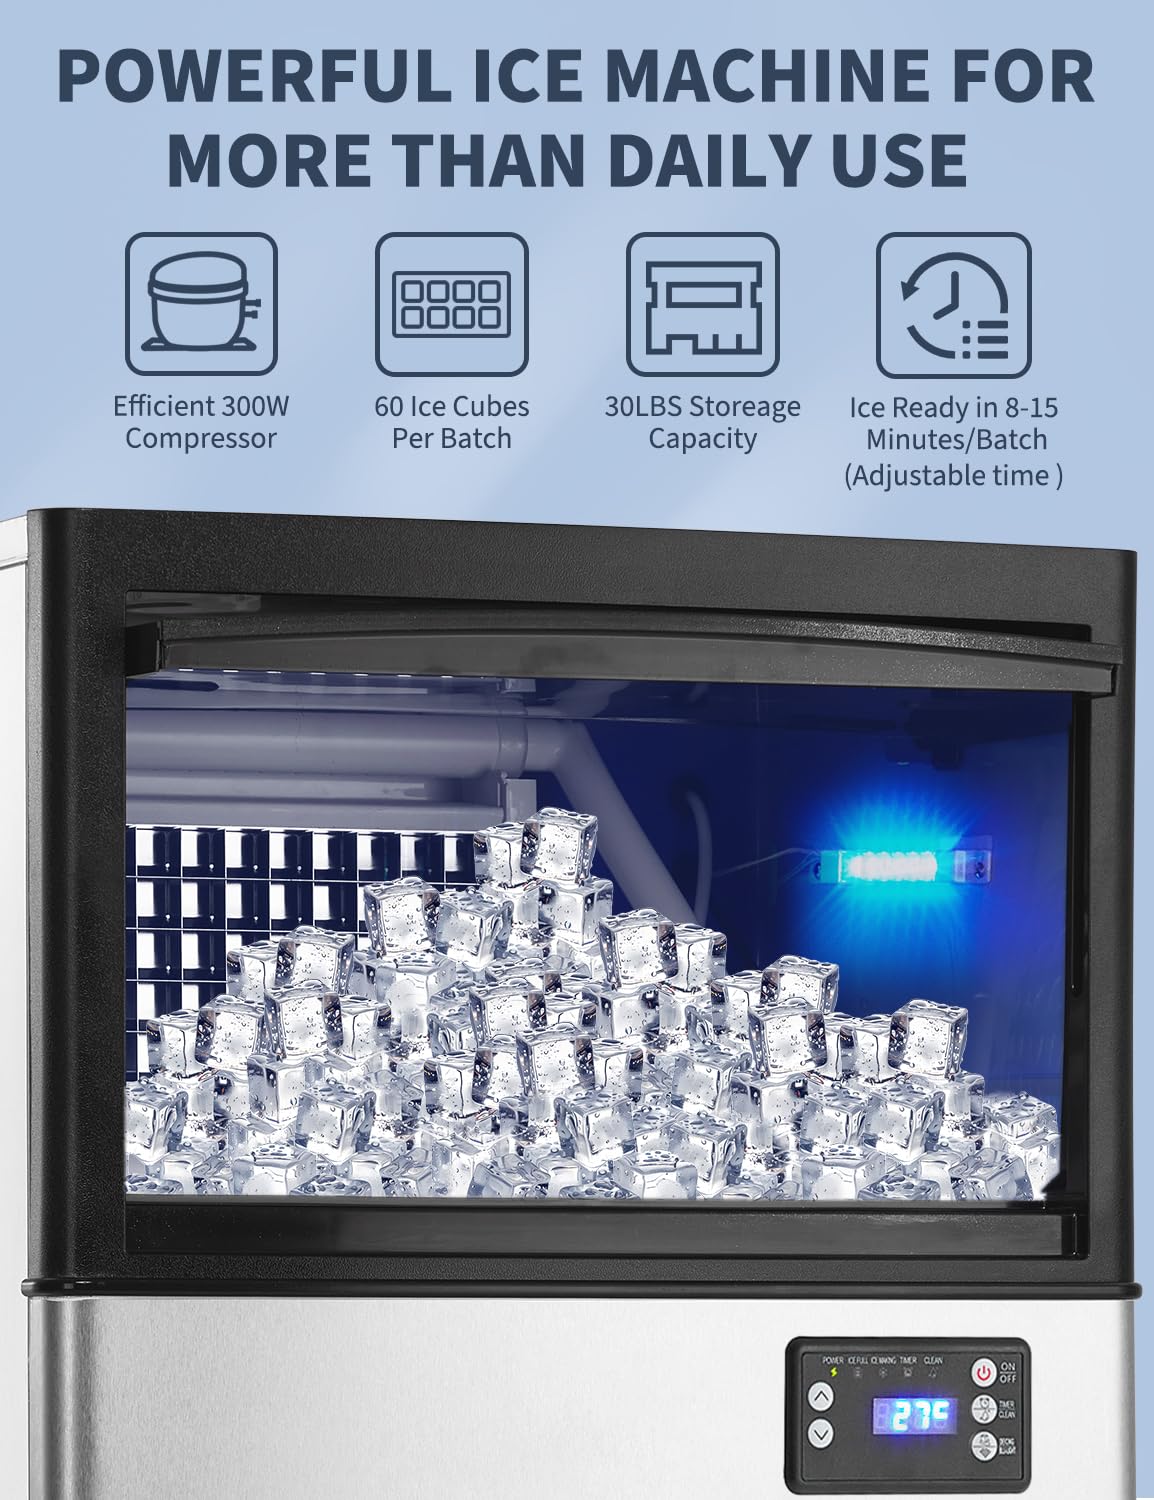
Figure 2.1: Front view of the TROPOW Commercial Ice Maker Machine.

Figure 2.2: Interior view showing ice cubes in the storage bin.
3. Setup and Installation
Proper installation is crucial for the performance and longevity of your ice maker. Refer to the video below for a visual guide.
Video 3.1: Installation and operation instructions for the ice maker.
3.1 Unpacking and Placement
- Carefully remove all packaging materials and protective films from the appliance.
- Place the ice maker on a flat, stable surface. Ensure adequate ventilation around the unit (at least 5 inches from walls).
- Adjust the leveling feet to ensure the machine is stable and level.
3.2 Water Connection
The ice maker supports two water supply methods: direct tap water connection or bottled water.

Figure 3.1: Rear connections for water inflow and drain.
- Tap Water Connection: Connect the provided filter to the water pipe and then to the machine's water inlet. Connect the filter water pipe to a potable water faucet.
- Bottled Water Connection: Connect the silicone hose to the bottled water interface on the machine and place the other end into a bottled water container.
3.3 Drain Connection
Connect the drain hose to the 'Water Outlet' on the back of the machine and ensure it leads to a suitable drain.
3.4 Power Connection
Plug the power cord into a grounded electrical outlet. Ensure the power switch on the back of the machine is in the 'ON' position.
4. Operating Instructions
The control panel allows for easy operation and monitoring of the ice maker.
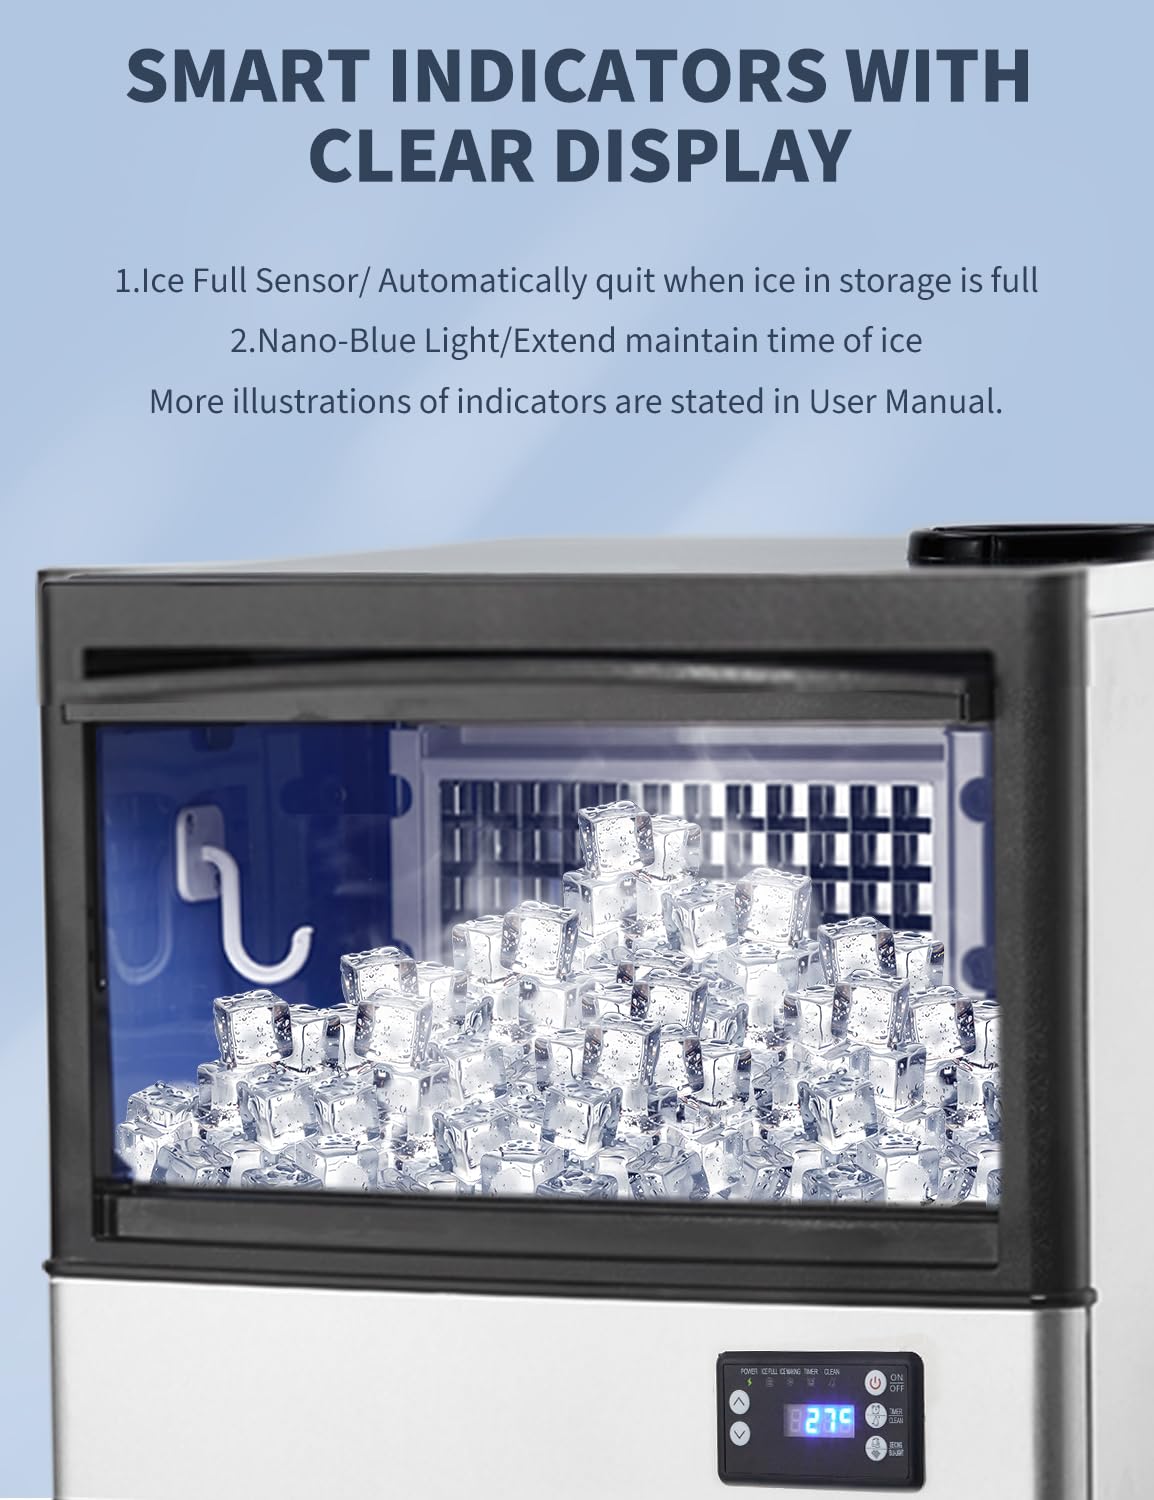
Figure 4.1: Control panel with indicators and function keys.
4.1 Control Panel Overview
- Power Indicator: Green light indicates power is on.
- Ice-making Indicator: Green light indicates ice production is active.
- Full Indicator: Red light indicates the ice bin is full.
- Reserve Indicator: Yellow light indicates the reservation function is active.
- Clean Indicator: Blue light indicates the cleaning cycle is active.
- '+' / '-' Keys: Adjust ice thickness or reservation time.
- Light/Melting Key: Short press to turn internal blue light on/off. Long press for 3 seconds to enter forced de-icing mode.
- Reserve/Clean Key: Short press to activate reservation. Long press for 3 seconds to start the automatic cleaning cycle.
- Stand-by Key (ON/OFF): Long press for 3 seconds to enter ice making mode. Short press for 1 second to shut down.
4.2 Starting Ice Production
After connecting water and power, long press the 'Stand-by' key for 3 seconds to enter ice making mode. The 'Ice-making' indicator will illuminate.
4.3 Adjusting Ice Thickness
Long press the '+' key for 3 seconds to enter the setting mode. Then, use the '+' or '-' keys to increase or decrease the ice thickness. The adjustable range is -5 to +5, with larger numbers indicating thicker ice.
4.4 Reservation Function
In standby mode (only 'Power' light on), short press the 'Reserve/Clean' key to activate the reservation function. The 'Reserve' indicator will light up. Use the '+' or '-' keys to set the desired reservation time in hours. Press the 'Stand-by' key to exit the reservation setting.
4.5 De-icing Function
Short press the 'Light/Melting' key to turn the internal blue light on or off. Long press the 'Light/Melting' key for 3 seconds to enter forced de-icing mode.
5. Maintenance
5.1 Automatic Cleaning
Long press the 'Reserve/Clean' key for 3 seconds to enter the automatic cleaning mode. The 'Clean' indicator will illuminate, and the cleaning cycle will run for approximately 10 minutes. Ensure the drain hose is properly connected during cleaning.
5.2 Regular Cleaning
- Ice Bin: Regularly clean the ice storage bin with a mild detergent and warm water. Rinse thoroughly.
- Water Lines: Periodically check and clean water lines to prevent mineral buildup.
- Exterior: Wipe the exterior with a soft, damp cloth. Do not use abrasive cleaners.
5.3 Filter Replacement
The included water filter should be replaced periodically based on water quality and usage to ensure optimal ice quality and machine performance.
6. Troubleshooting
If you encounter issues with your ice maker, refer to the following table for common problems and solutions. For error codes, consult the control panel and the video for guidance.
| Problem | Possible Cause | Solution |
|---|---|---|
| No ice production | No water supply, power off, or error code. | Check water connections, power supply, and refer to error codes on the control panel. |
| Ice melting quickly | High ambient temperature, poor ventilation, or ice bin not sealed. | Ensure proper ventilation, avoid placing in direct sunlight or hot areas. Check ice bin lid. |
| Error Code E1 | Full ice switch error. | Check if the ice bin is truly full or if the sensor is obstructed. Clean the sensor if necessary. |
| Error Code E2 | Temperature sensor error. | Contact customer support for assistance. |
| Error Code E3 | Signal sensor error. | Contact customer support for assistance. |
| Error Code E4 | Water inlet error. | Check water supply, filter, and connections. Ensure water pressure is adequate. |
7. Specifications
| Feature | Detail |
|---|---|
| Brand | TROPOW |
| Model Name | APS-60-130 |
| Product Dimensions (D x W x H) | 17.72" x 19.69" x 32.28" |
| Capacity (Ice Storage) | 30 Pounds |
| Daily Ice Output | 130 lbs/24H |
| Wattage | 300 watts |
| Item Weight | 70 Pounds |
| Voltage | 110 Volts (AC) |
| Refrigerant | R290a |
| Material Type | Stainless Steel |
| UPC | 199414890724 |
| Included Components | Commercial Ice Maker Machine, PP Cotton Filter, Silicone Hose, Pipe, Ice Bin Drainage Pipe, Ice Scoop, Nozzle |
8. Warranty and Support
For warranty information, please refer to the documentation provided with your purchase or contact the manufacturer directly. Specific warranty terms may vary.
For technical support or further assistance, please contact:
- Customer Service Phone: +1 888-968-7197 (US)