1. Introduction
Thank you for purchasing the Generic Electric Pressure Cooker. This manual provides important information for the safe and efficient operation of your new appliance. Please read this manual thoroughly before first use and keep it for future reference.
This pressure cooker is designed to significantly reduce cooking time by up to 70% compared to traditional methods, while preserving valuable nutrients and flavors. Its robust 304 stainless steel construction ensures durability and safe use.
Key Features:
- Compatible with various heat sources, including stoves and firewood.
- Convenient handle for easy and safe handling.
- Designed for efficient cooking and nutrient retention.
2. Important Safety Information
WARNING: Failure to follow these safety instructions could result in serious injury or property damage.
- Read all instructions before using the pressure cooker.
- Do not touch hot surfaces. Use handles or knobs.
- Close supervision is necessary when the pressure cooker is used near children.
- Do not place the pressure cooker in a heated oven.
- Extreme caution must be used when moving a pressure cooker containing hot liquids.
- Do not use the pressure cooker for other than its intended use.
- This appliance cooks under pressure. Improper use may result in scalding injury. Make certain unit is properly closed before operating.
- Never force open the pressure cooker. Do not open until the unit has cooled and internal pressure has been released.
- Do not fill the unit over 2/3 full. When cooking foods that expand during cooking, such as rice or dried vegetables, do not fill the unit over 1/2 full.
- Do not use this pressure cooker for deep frying with oil.
- Always check the pressure release device for clogging before use.
- Ensure the lid is properly sealed and the pressure valve is clear before heating.
3. Product Components
Familiarize yourself with the main parts of your pressure cooker:
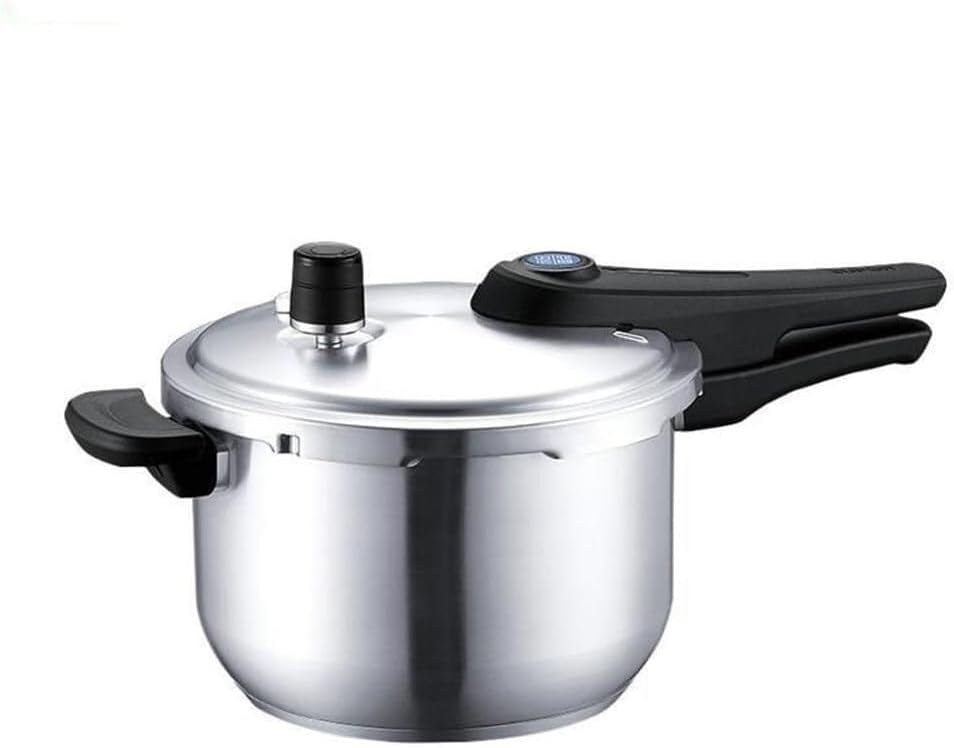
Figure 3.1: Overview of the Electric Pressure Cooker. This image shows the complete pressure cooker unit, highlighting its stainless steel body, secure lid, and ergonomic handles designed for safe and easy handling.
- Main Pot: The 22CM diameter 304 stainless steel body where food is cooked.
- Lid: The cover that seals the pot, equipped with a pressure valve and safety mechanisms.
- Pressure Valve: Regulates and releases internal pressure. (See Figure 3.2 for details)
- Main Handle: Ergonomically designed handle on the lid for opening and closing.
- Auxiliary Handle: Handle on the side of the pot for easier lifting and carrying.
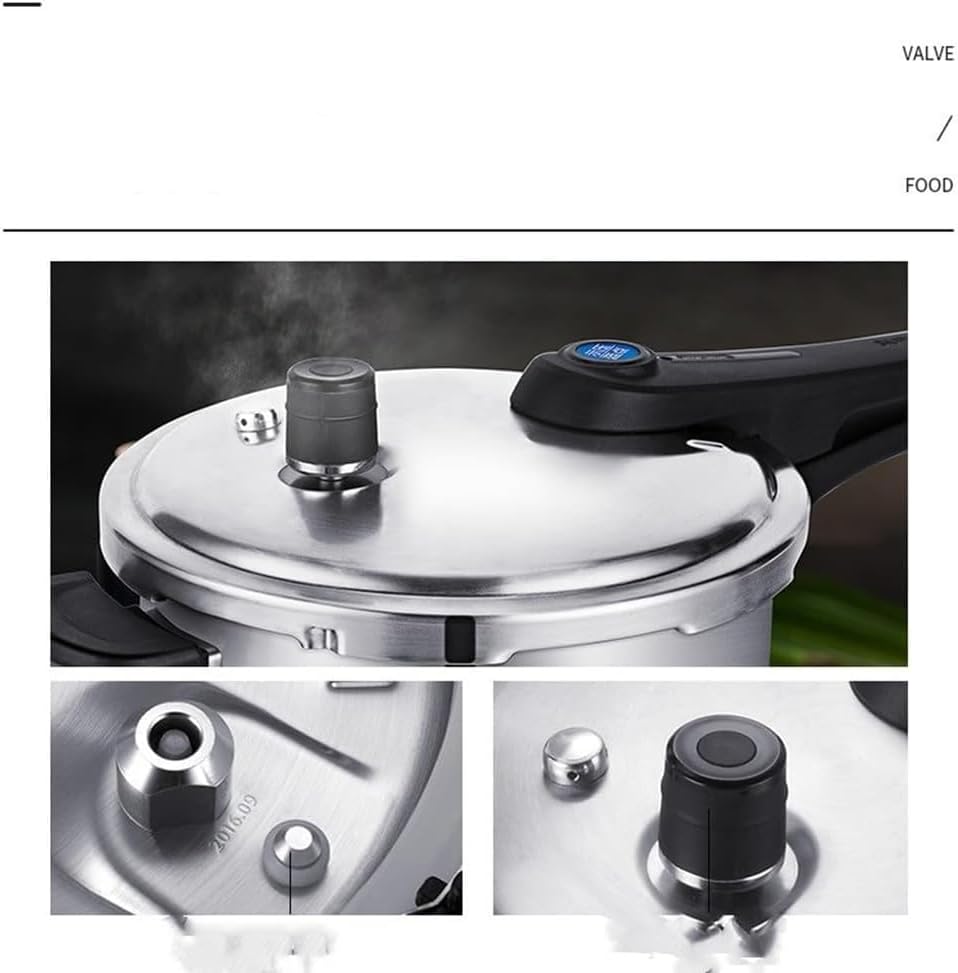
Figure 3.2: Detailed view of the pressure valve and lid interior. This image provides a closer look at the pressure release valve on the lid and the internal sealing mechanism, crucial for safe pressure cooking.

Figure 3.3: Close-up of the main handle and valve system. This image highlights the design of the main handle, including the "STOP" button mechanism, and provides another perspective on the pressure valve, emphasizing user safety and control.
4. Setup and First Use
- Unpacking: Carefully remove all packaging materials. Inspect the pressure cooker for any damage.
- Initial Cleaning: Before first use, wash the pot, lid, and all removable parts with warm soapy water. Rinse thoroughly and dry completely.
- Lid Assembly: Ensure the sealing gasket is properly seated inside the lid. Check that the pressure valve is clear and moves freely.
- Water Test (Recommended): For your first use, perform a water test to familiarize yourself with the cooker's operation and ensure proper sealing.
- Add 2-3 cups of water to the pot.
- Securely close the lid, ensuring the handles align and the lid is locked.
- Place the cooker on a heat source (stove or firewood).
- Bring to pressure, then allow it to cook for 5-10 minutes.
- Release pressure (see Section 5.3) and open the lid.
5. Operating Instructions
5.1 Filling the Pressure Cooker
- Always add at least 1 cup of liquid (water, broth, etc.) to the pot for pressure to build.
- Do not fill the cooker more than 2/3 full with food and liquid.
- When cooking foods that expand (e.g., rice, beans, grains), do not fill more than 1/2 full.
5.2 Closing and Heating
- Place the lid on the pot, aligning the arrow on the lid with the arrow on the handle of the pot.
- Rotate the lid handle clockwise until it locks securely into place. Ensure the lid is fully sealed.
- Place the pressure cooker on your chosen heat source (stove or firewood).
- Heat on high until the pressure indicator rises and steam begins to escape steadily from the pressure valve. This indicates that full pressure has been reached.
- Once full pressure is reached, reduce the heat to maintain a steady, gentle release of steam. Begin timing your recipe.
5.3 Releasing Pressure and Opening
There are two primary methods for releasing pressure:
- Natural Release: Remove the pressure cooker from the heat source and allow it to cool down naturally. The pressure indicator will drop on its own as the pressure dissipates. This method is ideal for foods that benefit from continued cooking, like stews and roasts.
- Quick Release (Manual Release): Carefully turn the pressure release valve to the "vent" or "release" position. Steam will rapidly escape. WARNING: Keep hands and face away from the steam. This method is suitable for delicate foods that can overcook quickly.
Opening the Lid: Only open the lid once the pressure indicator has fully dropped and no steam is escaping from the valve. Rotate the lid handle counter-clockwise to unlock and lift the lid away from you to avoid residual steam.
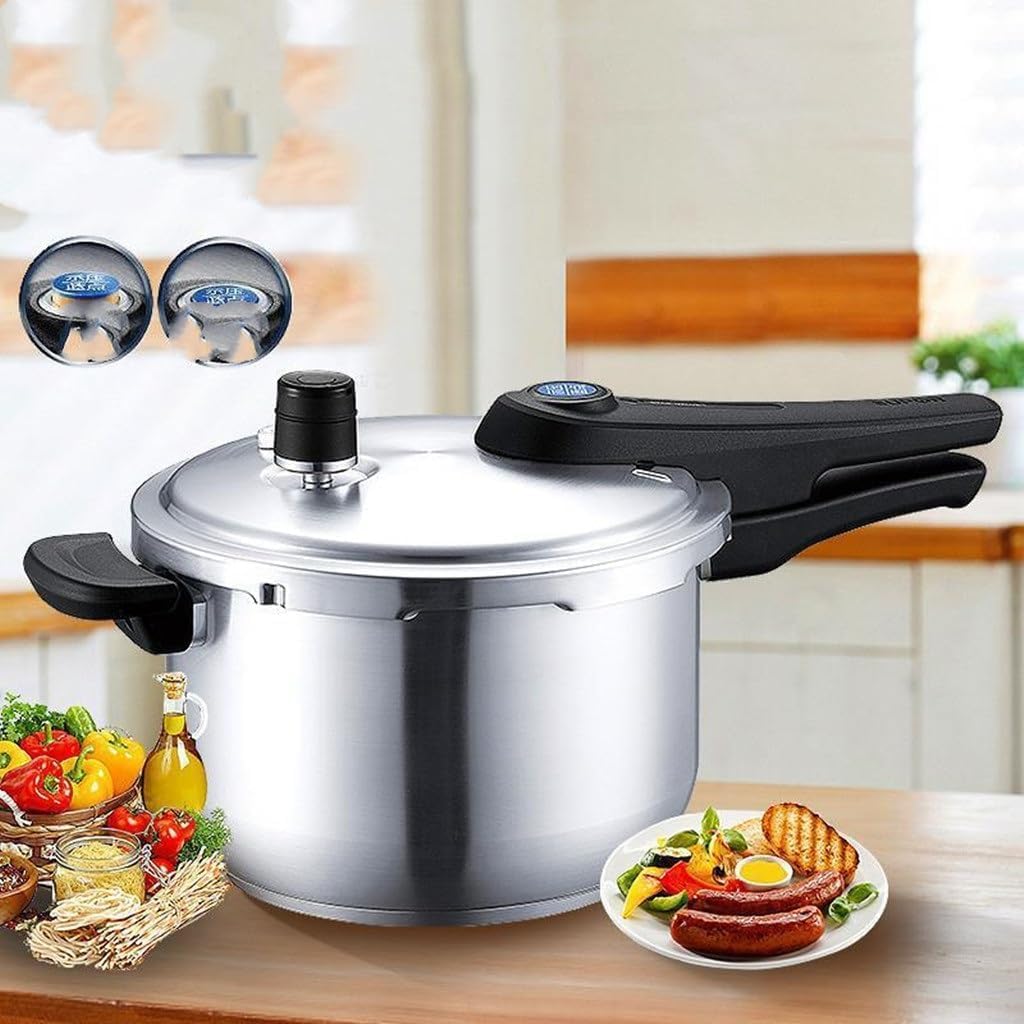
Figure 5.1: The pressure cooker in use, ready to serve. This image illustrates the pressure cooker in a typical kitchen environment, suggesting its integration into daily cooking routines and the delicious results it can produce.
6. Maintenance and Cleaning
Proper maintenance ensures the longevity and safe operation of your pressure cooker.
- After Each Use:
- Allow the cooker to cool completely before cleaning.
- Wash the pot and lid with warm, soapy water. For stubborn food residue, soak the pot before washing.
- Remove the sealing gasket from the lid and wash it separately. Ensure it is clean and free of food particles.
- Clean the pressure valve and ensure it is clear of any blockages. Use a small brush if necessary.
- Rinse all parts thoroughly and dry completely to prevent water spots and corrosion.
- Storage: Store the pressure cooker with the lid inverted or slightly ajar to allow air circulation and prevent odors.
- Gasket Replacement: The sealing gasket may wear out over time. Replace it annually or if you notice steam leaking from around the lid during cooking.
- Stainless Steel Care: To maintain the shine of the stainless steel, avoid abrasive cleaners or scouring pads.
7. Troubleshooting
If you encounter issues with your pressure cooker, refer to the table below:
| Problem | Possible Cause | Solution |
|---|---|---|
| Pressure not building | Lid not sealed properly; Insufficient liquid; Pressure valve clogged or open. | Ensure lid is locked correctly; Add more liquid; Check and clear pressure valve. |
| Steam leaking from lid edge | Gasket not seated correctly or damaged; Food debris on rim. | Reposition gasket; Clean rim and gasket; Replace gasket if damaged. |
| Food undercooked | Not enough cooking time; Pressure not maintained. | Increase cooking time; Ensure heat is consistent to maintain pressure. |
| Lid stuck after cooking | Residual pressure inside. | Do not force. Allow more time for natural pressure release or use quick release method. |
If the problem persists after trying these solutions, please contact customer support.
8. Specifications
- Product Type: Electric Pressure Cooker (Note: This model is designed for external heat sources like stoves/firewood, not electric plug-in)
- Model: 22CM (Diameter)
- Material: 304 Stainless Steel
- Compatibility: General Stove, Firewood
- Manufacturer: Generic
- ASIN: B0F883NFMD
9. Warranty and Support
For warranty information and customer support, please refer to the documentation provided with your purchase or contact the retailer/manufacturer directly. Keep your proof of purchase for any warranty claims.
For further assistance or inquiries, please reach out to Generic customer service.


