1. Introduction
This manual provides detailed instructions for the assembly, operation, and maintenance of your TJYGO Shoe Bench, Model BJ011-WD. This versatile furniture piece is designed to offer both comfortable seating and efficient storage for various items in your home.

Image 1.1: Overview of the TJYGO Shoe Bench, featuring a brown finish, 10 storage compartments, and a comfortable padded top.
2. Safety Information
Please read and understand all safety instructions before assembly and use. Failure to follow these instructions may result in injury or damage to the product.
- This product is intended for indoor use only.
- Protect the bench from moisture and extreme temperatures to prevent damage to materials.
- Do not exceed the maximum weight capacity of 330 lbs (150 kg) on the padded seat.
- Ensure all screws and fasteners are securely tightened during assembly and periodically check for tightness during use.
- Keep small parts away from children during assembly to prevent choking hazards.
3. Package Contents
Verify that all components are present before beginning assembly. If any parts are missing or damaged, please contact customer support.
- Bench Panels (various sizes)
- Padded Seat Cushion
- Assembly Hardware (screws, dowels, etc.)
- Assembly Tools (e.g., Allen wrench)
- Instruction Manual
4. Assembly and Setup
The TJYGO Shoe Bench is designed for straightforward assembly. Follow the visual instructions provided with your package. It is recommended to have a power drill (not included) for faster assembly, though manual tools are sufficient.
- Unpack Components: Carefully remove all parts from the packaging and lay them out on a clean, soft surface to prevent scratches. Verify against the parts list.
- Identify Parts: All parts are pre-labeled for easy identification.
- Assemble Frame: Follow the step-by-step visual guide to connect the main panels using the provided hardware. Ensure all connections are snug but do not overtighten.
- Install Cubby Dividers: Insert the internal dividers to create the 10 storage cubbies.
- Attach Padded Seat: Place the padded seat cushion on top of the assembled bench. The cushion features heavy-duty Velcro straps on the underside to secure it firmly to the bench.
- Final Check: Once assembled, gently shake the bench to ensure stability. Tighten any loose connections if necessary.
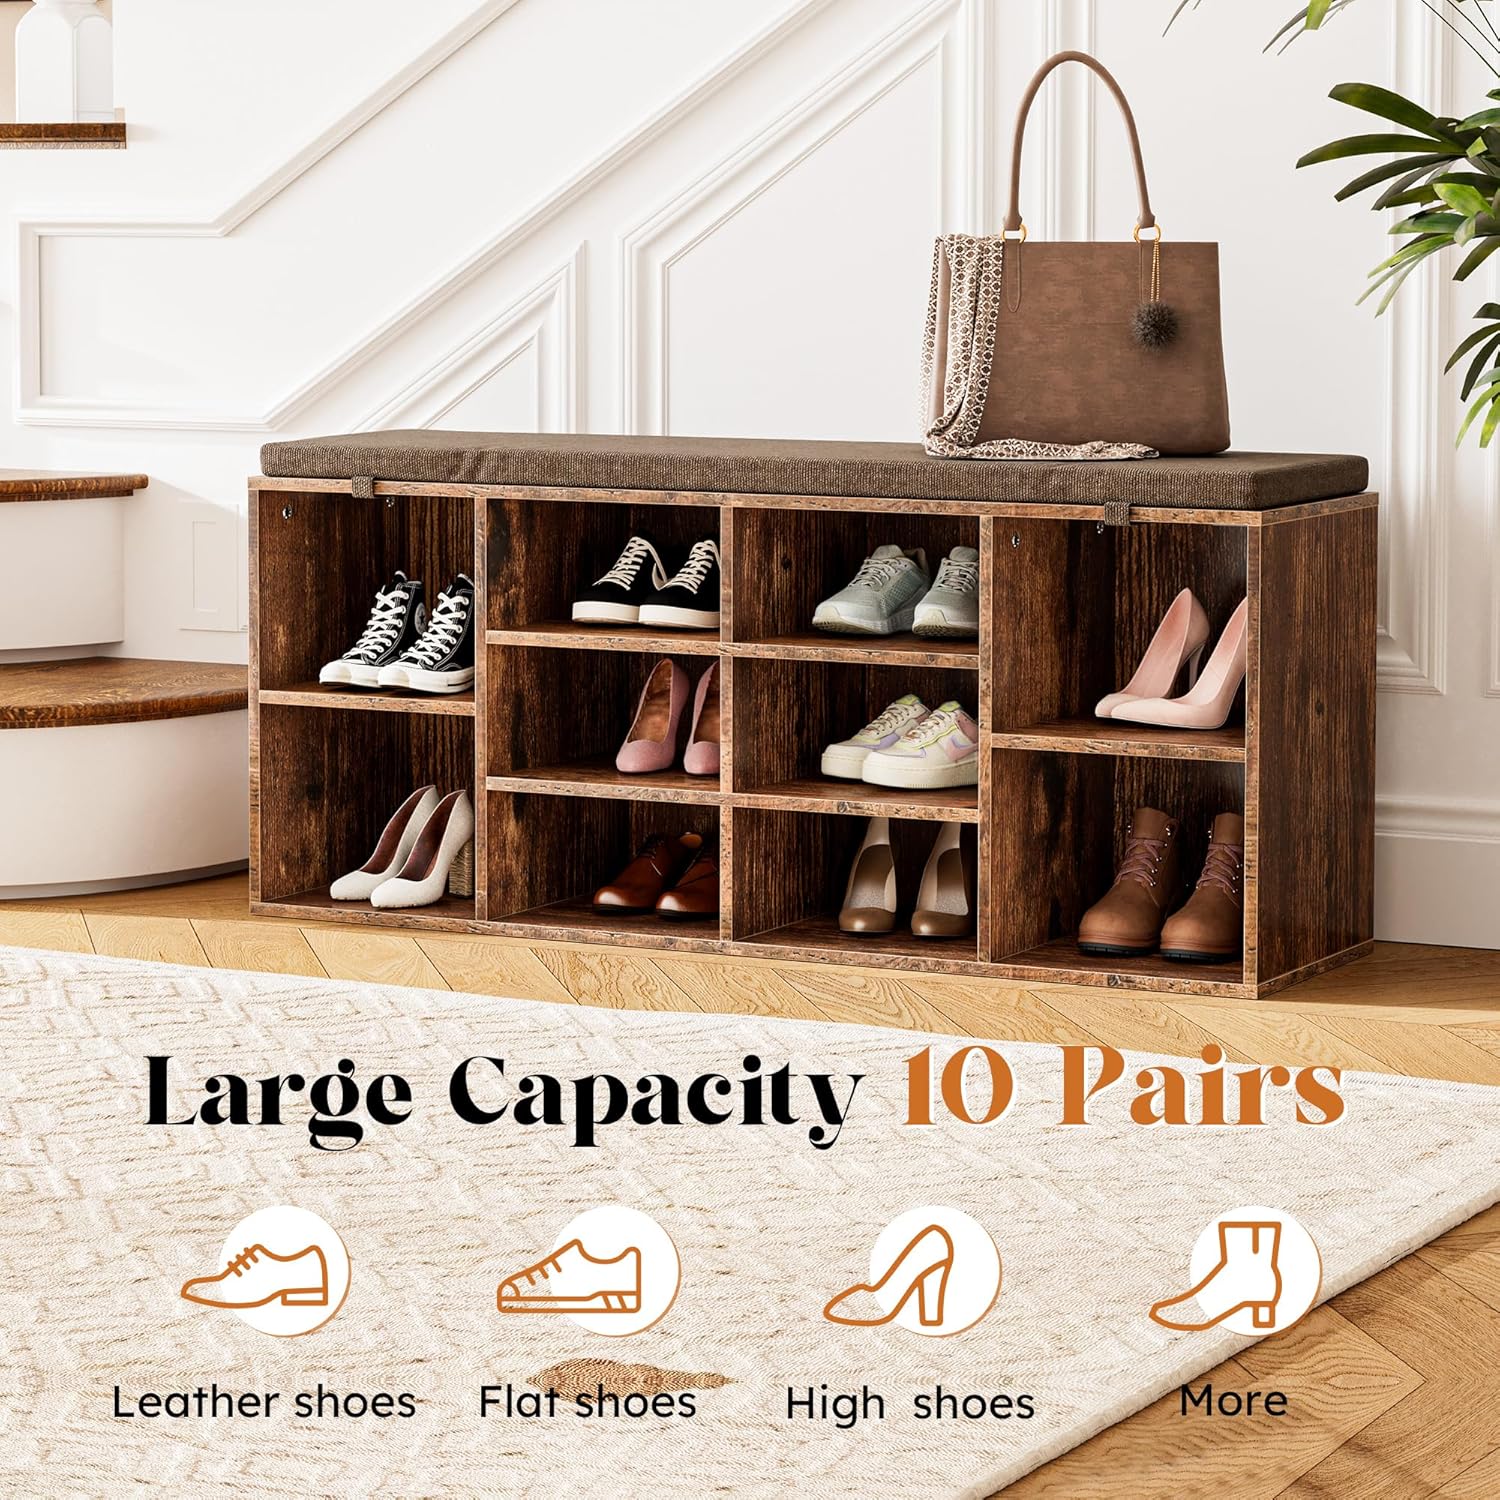
Image 4.1: Key dimensions of the assembled shoe bench.
5. Operating Instructions (Usage)
Your TJYGO Shoe Bench is designed for versatile use in various areas of your home.
5.1 Shoe Storage
The bench features 10 individual cubbies, providing organized storage for up to 10 pairs of shoes, including boots, sneakers, and sandals. This keeps your entryway or room tidy and shoes easily accessible.

Image 5.1: Example of shoe storage within the cubbies.
5.2 Seating Functionality
The 1.5-inch thick padded seat offers a comfortable surface for sitting, making it ideal for putting on or taking off shoes. The high-density sponge and breathable cotton-linen fabric ensure comfort, while the zippered cover is removable for cleaning.

Image 5.2: The bench provides comfortable seating.
5.3 Multi-Purpose Storage
Beyond shoes, the cubbies can be utilized for organizing various household items such as books, bags, children's toys, linens, or other small accessories. This makes the bench suitable for entryways, living rooms, bedrooms, or hallways.
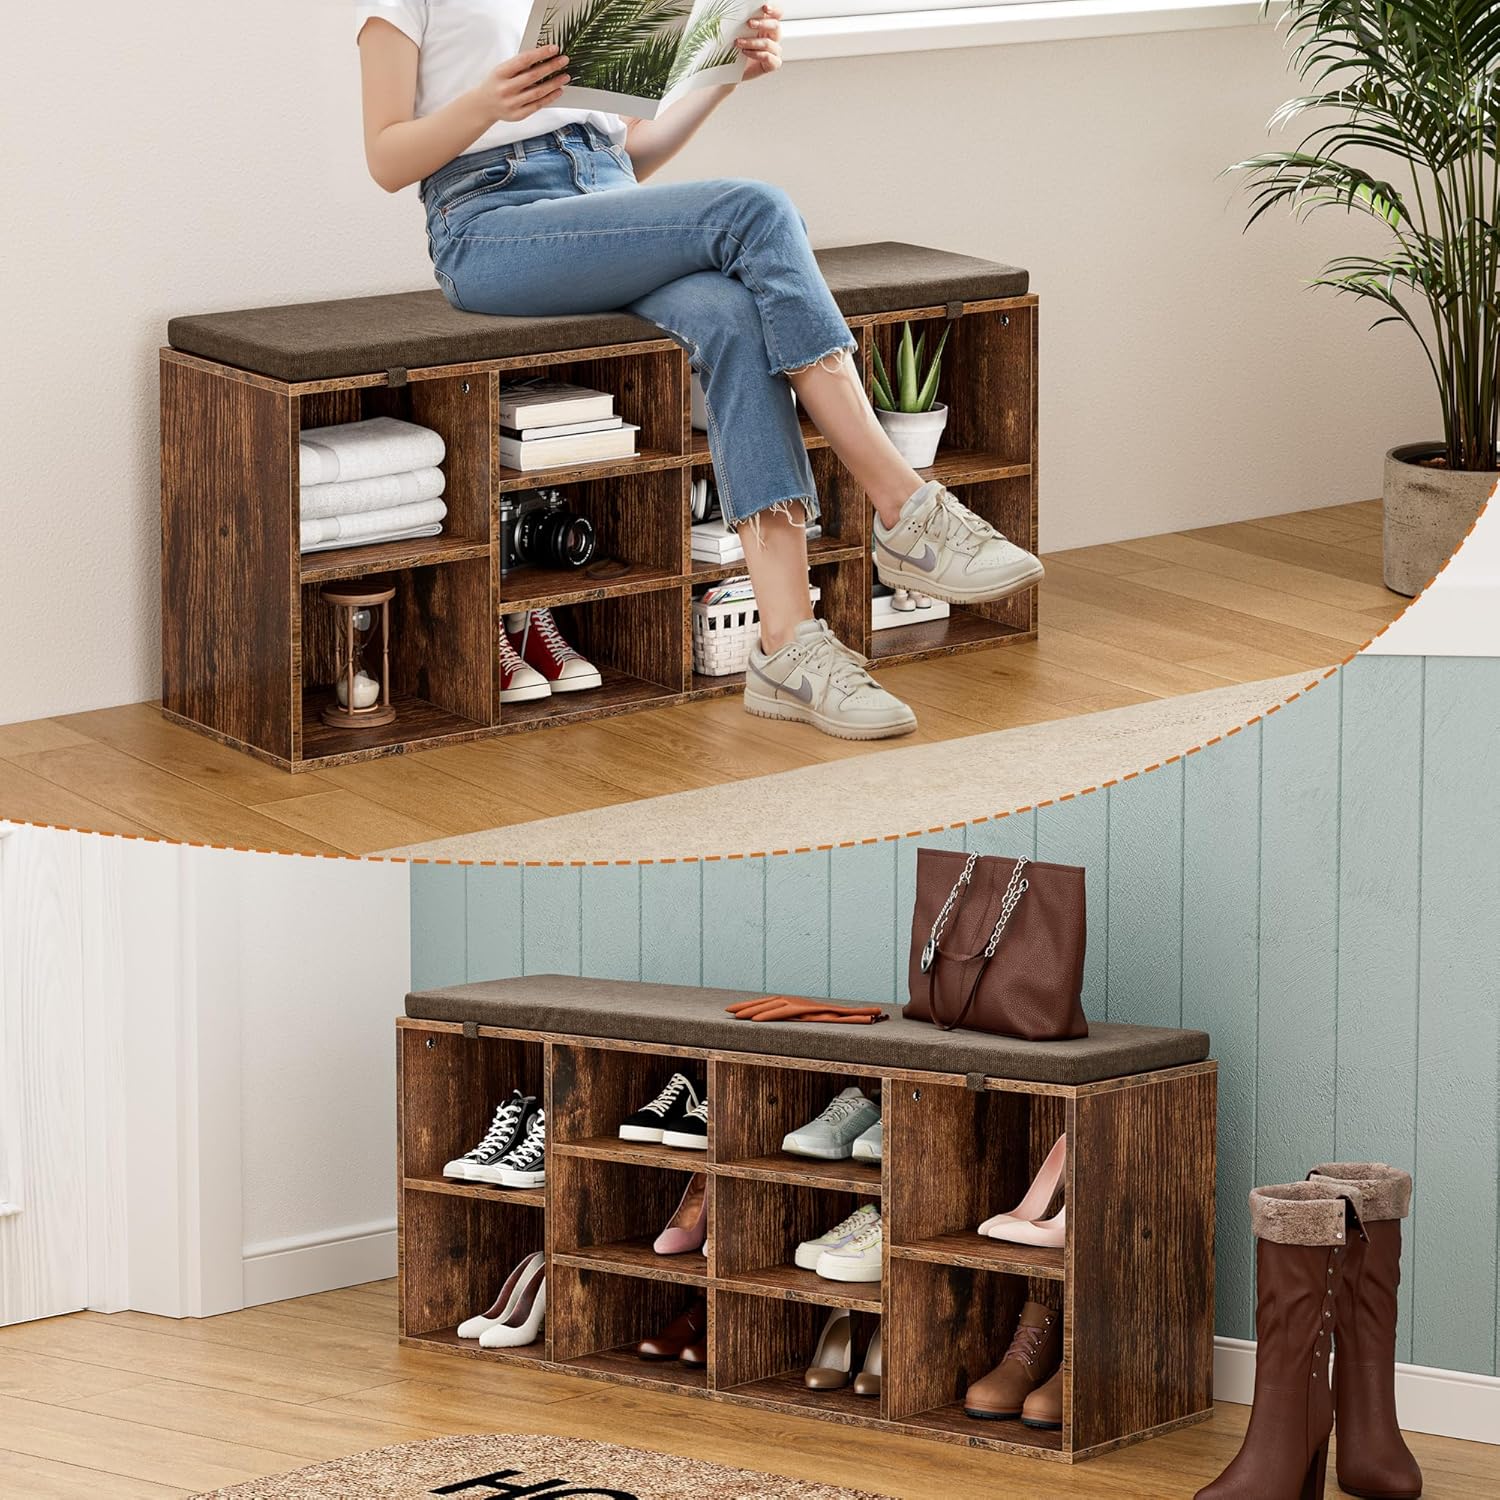
Image 5.3: Versatile storage options for various items.
6. Maintenance
Proper care will extend the life and appearance of your shoe bench.
- Cleaning the Frame: Wipe the wood finish with a soft, damp cloth. Avoid harsh chemicals or abrasive cleaners.
- Cushion Care: The cotton-linen fabric cover is removable via a zipper and is machine-washable. Follow the care instructions on the fabric label for best results. Ensure the cover is completely dry before reattaching.
- Regular Checks: Periodically inspect all screws and connections to ensure they remain tight. Retighten as needed to maintain stability.
- Avoid Direct Sunlight: Prolonged exposure to direct sunlight can cause fading or damage to the wood finish and fabric.

Image 6.1: Details of the removable and washable cushion.
7. Troubleshooting
If you encounter any issues with your shoe bench, refer to the following common solutions:
| Problem | Possible Cause | Solution |
|---|---|---|
| Bench feels unstable or wobbly. | Loose screws or uneven floor. | Check and tighten all assembly screws. Ensure the bench is placed on a flat, level surface. |
| Parts are missing or damaged. | Packaging error or shipping damage. | Contact TJYGO customer support with your purchase details for replacement parts. |
| Cushion slides off easily. | Velcro straps not properly engaged. | Ensure the heavy-duty Velcro straps on the underside of the cushion are securely attached to the bench surface. |
8. Specifications
| Feature | Detail |
|---|---|
| Brand | TJYGO |
| Model Number | BJ011-WD |
| Color | Brown |
| Dimensions (L x W x H) | 41" x 12" x 16.75" |
| Cushion Thickness | 1.5" |
| Material | Industrial-grade Particleboard, Cotton-Linen Fabric, High-density Sponge |
| Storage Cubbies | 10 |
| Weight Capacity | 330 lbs (150 kg) |
| Item Weight | 36.5 lbs |
| UPC | 756499858119 |
9. Warranty and Support
For warranty information or customer support, please refer to the contact details provided at the point of purchase or visit the official TJYGO website. Keep your purchase receipt for any warranty claims.
Manufacturer: TJYGO
Website: Visit the TJYGO Store on Amazon