1. Introduction
Thank you for purchasing the GODOX iT30pro O TTL Flash. This compact and powerful flash unit is designed for Olympus cameras, offering advanced features such as TTL auto-exposure, 1/8000s High-Speed Sync, 2.4G wireless master and receiver capabilities, and a full-color touchscreen for intuitive control. Its portable design and efficient power management make it ideal for on-location photography.

Image: The GODOX iT30pro O flash unit, highlighting its compact size and professional capabilities as a pocket flash for Olympus cameras.

Image: The GODOX iT30pro O flash shown being carried in a pocket, emphasizing its lightweight design (120g) and suitability for travel and on-location work.
2. Safety Information
Please read these safety instructions carefully before using the product to prevent damage to the product or injury to yourself or others. Keep this manual for future reference.
- Do not disassemble or modify the flash unit. High voltage components inside can cause electric shock.
- Keep the product dry. Do not handle with wet hands or immerse in water.
- Do not use the flash unit in the presence of flammable gases, chemicals, or other materials.
- Do not touch the flash tube after continuous firing to avoid burns.
- Use only the specified battery and charging accessories.
- Keep out of reach of children.
- Avoid direct eye exposure to the flash, especially at close range, as it may impair vision.
3. Package Contents
Verify that all items listed below are included in your package. If anything is missing or damaged, please contact your retailer.

Image: A visual representation of the GODOX iT30pro O flash unit and its included accessories, such as the USB-C charging cable, carrying pouch, and cleaning cloth.
- GODOX iT30pro O TTL Flash Unit
- USB-C Charging Cable
- Protective Pouch
- Cleaning Cloth
- User Manual (this document)
4. Product Overview
Familiarize yourself with the main components of your GODOX iT30pro O flash unit.

Image: Close-up of the GODOX iT30pro O's full-color touchscreen, showing the intuitive interface for adjusting settings like flash power and mode.
- Flash Head: Emits light.
- Built-in Diffuser: Integrated diffuser for softer light, activated by a lever.
- Full-Color Touchscreen: For intuitive menu navigation and setting adjustments.
- Rotary Dial: For precise control and fine-tuning of settings.
- SET Button: Confirms selections.
- MENU Button: Accesses main menu options.
- Power Button: Turns the unit on/off.
- Hot Shoe Mount: For attaching to the camera.
- Quick-Release Lever: For fast mounting and dismounting.
- USB-C Port: For charging the internal battery.
5. Setup
5.1 Charging the Battery
The GODOX iT30pro O features a high-capacity internal battery. Before first use, fully charge the unit.
- Connect the supplied USB-C charging cable to the USB-C port on the flash unit.
- Connect the other end of the cable to a USB power adapter (not included) or a computer's USB port.
- The charging indicator on the screen will show charging status. A full charge provides up to 560 full-power flashes.
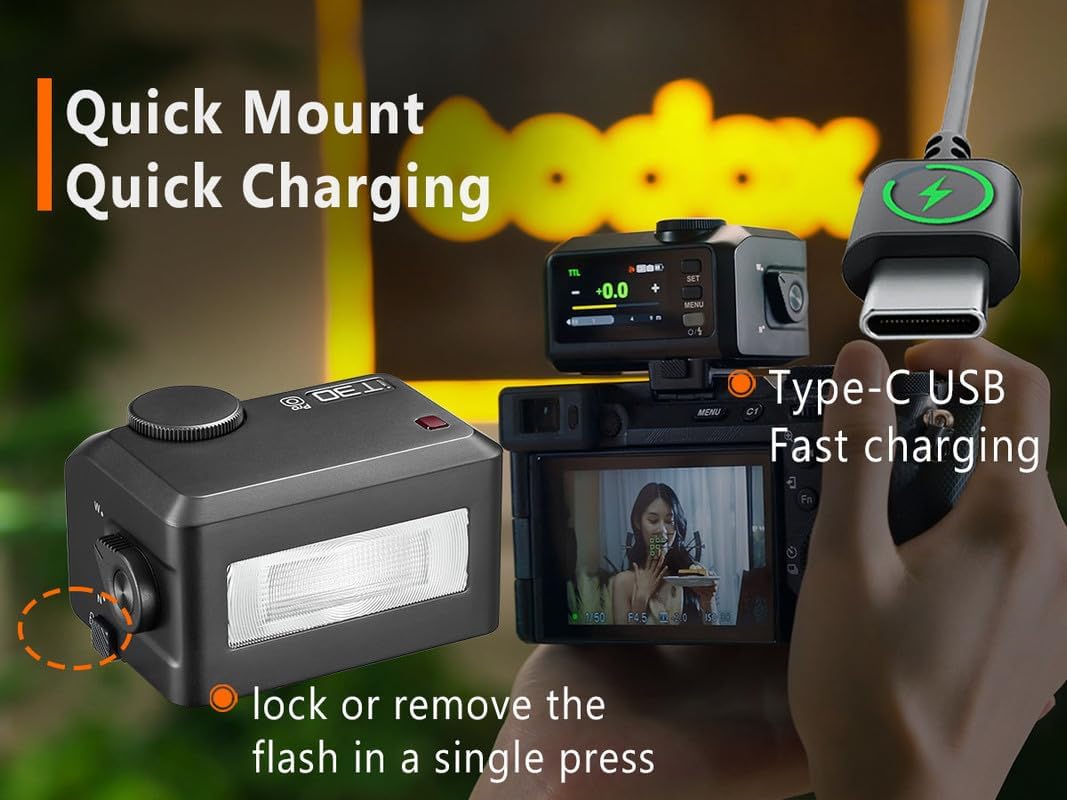
Image: The GODOX iT30pro O flash unit connected to a USB-C cable, demonstrating its fast charging capability. Also shows the quick-release mechanism for mounting.
5.2 Mounting the Flash to the Camera
The iT30pro O is designed for quick and secure attachment to your camera's hot shoe.
- Ensure your camera is turned off.
- Slide the flash unit's hot shoe mount into your camera's hot shoe.
- Press the quick-release lever to lock the flash securely in place. To remove, press the lever again and slide the flash off.
5.3 Powering On/Off
Press and hold the Power button (usually located near the screen) for a few seconds to turn the flash unit on or off.
6. Operating
6.1 Basic Flash Modes (TTL / Manual)
The iT30pro O supports both TTL (Through-The-Lens) auto-exposure and Manual flash modes.

Image: The GODOX iT30pro O's display showing TTL auto-exposure settings, including support for 1/8000s high-speed sync, front/rear curtain sync, multi-mode, and flash exposure compensation.
- TTL Mode: The flash automatically calculates the correct light output based on the camera's metering. This is ideal for quick shooting and changing light conditions. Select 'TTL' on the touchscreen.
- Manual (M) Mode: Allows you to manually set the flash power output (e.g., 1/1, 1/2, 1/4, etc.). This provides precise control over lighting. Select 'M' on the touchscreen and use the rotary dial to adjust power.
6.2 Using the Touchscreen and Rotary Dial
The iT30pro O offers dual control interfaces for flexibility.
- Touchscreen: Tap icons and values on the screen to navigate menus, change modes, and select settings.
- Rotary Dial: Rotate the dial to adjust numerical values (e.g., flash power, exposure compensation) or scroll through options. Press the dial to confirm selections in some menus.
6.3 High-Speed Sync (HSS)
HSS allows the flash to synchronize with shutter speeds up to 1/8000 second, enabling you to use flash with wide apertures in bright conditions.
- Enable HSS through the flash's menu or by setting your camera to a shutter speed faster than its native sync speed. The flash will automatically switch to HSS mode if supported by your camera.
6.4 Wireless Master & Receiver (Godox 2.4GHz X-system)
The iT30pro O can function as both a master and receiver unit within the Godox 2.4GHz X-system, allowing for complex multi-light setups.
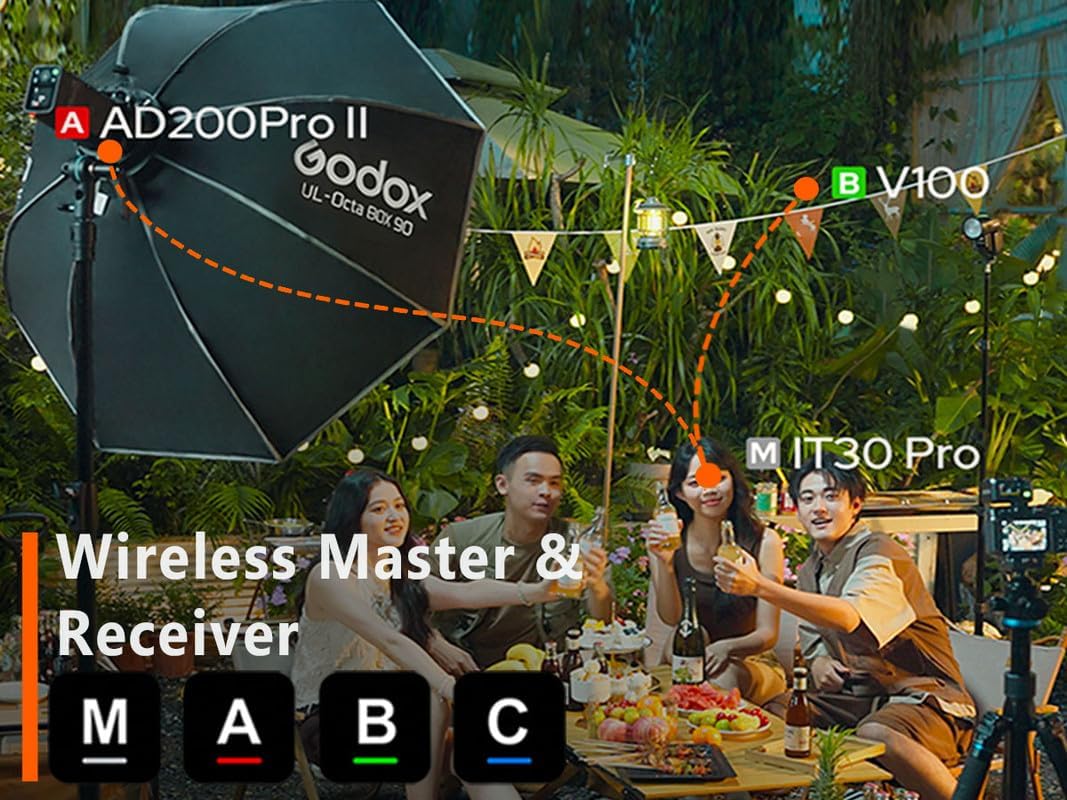
Image: An illustration of the GODOX iT30pro O (labeled 'M iT30 Pro') participating in a multi-light setup with other Godox flashes (AD200Pro II, V100) using the 2.4GHz X-system, demonstrating its wireless master and receiver capabilities across different groups (A, B, C).
- Master Mode: Mount the iT30pro O on your camera. Use the menu to set it as a master unit. You can then control other Godox X-system flashes (receivers) remotely, adjusting their power and groups.
- Receiver Mode: Set the iT30pro O as a receiver unit. It will then be triggered and controlled by a Godox X-system transmitter (e.g., another iT30pro O in master mode, or a dedicated X-series trigger).
- Refer to the on-screen menu for setting channels and groups (A, B, C, etc.) to avoid interference and manage multiple flashes.
6.5 Using the Built-in Diffuser
The integrated diffuser helps to soften the light output and provide wider coverage.

Image: A comparison showing the effect of the GODOX iT30pro O with the diffuser off ('N') versus diffuser on ('W'), illustrating how the built-in diffuser provides softer, more even lighting.
- To deploy the diffuser, locate the small lever on the side of the flash unit and flick it. The diffuser panel will slide into place over the flash head.
- To retract the diffuser, flick the lever again.
7. Maintenance
7.1 Cleaning
Regular cleaning helps maintain the performance and appearance of your flash unit.
- Use a soft, dry cloth (like the one provided) to wipe the body of the flash.
- For the touchscreen, use a microfiber cloth specifically designed for electronics. Avoid abrasive materials or harsh chemicals.
- Do not use water or solvents directly on the unit.
7.2 Battery Care
Proper battery care extends the lifespan of your flash.
- Charge the battery fully before long periods of storage.
- If storing for an extended time, recharge the battery every 3-6 months to prevent deep discharge.
- Avoid exposing the unit to extreme temperatures.
7.3 Storage
When not in use, store the flash unit in a cool, dry place, away from direct sunlight and excessive humidity. Use the provided protective pouch to prevent scratches.
8. Troubleshooting
If you encounter issues with your GODOX iT30pro O, refer to the table below for common problems and solutions.
| Problem | Possible Cause | Solution |
|---|---|---|
| Flash does not fire. | Low battery; Incorrect camera settings; Flash not securely mounted; Wireless interference. | Charge battery; Check camera's flash settings (e.g., flash enabled, not in silent mode); Re-mount flash; Change wireless channel/group. |
| Flash output is too dark/bright. | Incorrect flash exposure compensation (FEC); Incorrect manual power setting; TTL metering issue. | Adjust FEC; Adjust manual power; Ensure flash head is pointed correctly; Check camera's metering mode. |
| Wireless trigger not working. | Incorrect channel/group; Master/receiver mode mismatch; Distance too far; Obstructions. | Verify channel and group settings on both units; Ensure one is master and other is receiver; Reduce distance; Clear line of sight. |
| Touchscreen unresponsive. | Temporary software glitch; Screen protector interference. | Restart the flash unit; Ensure screen is clean and dry; Remove/reapply screen protector if applicable. |
If the problem persists after trying these solutions, please contact GODOX customer support.
9. Specifications
Technical specifications for the GODOX iT30pro O TTL Flash.
| Feature | Detail |
|---|---|
| Brand | GODOX |
| Model | iT30pro O |
| Compatibility | Olympus Cameras (TTL) |
| Flash Modes | TTL, Manual, Multi |
| Sync Modes | High-Speed Sync (HSS) up to 1/8000s, Front Curtain Sync, Rear Curtain Sync |
| Wireless System | Godox 2.4GHz X-system (Master & Receiver) |
| Display | Full-Color Touchscreen |
| Power Source | Built-in Rechargeable Battery |
| Full Power Flashes | Approx. 560 |
| Recycle Time | Approx. 1.5 seconds |
| Charging Port | USB-C |
| Item Weight | 1.6 ounces (approx. 45g) |
| Package Dimensions | 6 x 5 x 4 inches |
| UPC | 663992147797 |
10. Warranty and Support
GODOX products are manufactured to high quality standards and are warranted against manufacturing defects. For specific warranty terms and conditions, please refer to the warranty card included with your product or visit the official GODOX website.
For technical support, troubleshooting assistance, or service inquiries, please contact GODOX customer service through their official website or the retailer from whom you purchased the product. Please have your product model and serial number ready when contacting support.
GODOX Official Website: www.godox.com


