KAMRUI E1
KAMRUI Essenx E1 Mini PC User Manual
Model: E1
1. Introduction
The KAMRUI Essenx E1 Mini PC is a compact and powerful desktop computer designed for various applications, including business, home office, and entertainment. Equipped with an Intel Twin Lake-N150 processor, 8GB DDR4 RAM, and a 256GB SSD, it offers efficient performance and 4K display capabilities. This manual provides detailed instructions to help you set up, operate, and maintain your Mini PC.
2. Package Contents
Before you begin, please ensure all items are present in the package:
- 1 x KAMRUI Mini PC
- 1 x Power Adapter
- 1 x HDMI Cable
- 1 x VESA Mount
- 1 x User Manual (this document)

Image: The KAMRUI Essenx E1 Mini PC shown with its power adapter, HDMI cable, and VESA mount.
3. Setup Guide
3.1 Connecting Peripherals
- Connect Display: Use the provided HDMI cable to connect your monitor or TV to one of the HDMI 2.0 ports on the back of the Mini PC. Alternatively, use the DisplayPort (DP 1.4) for a 4K@60Hz connection. The Mini PC supports triple display output.
- Connect Keyboard and Mouse: Plug your USB keyboard and mouse into the available USB ports (USB 3.2 Gen2 Type-A or USB 2.0 Type-A). For wireless peripherals, ensure Bluetooth is enabled on the Mini PC and pair your devices.
- Connect Power: Insert the power adapter into the DC port on the back of the Mini PC, then plug the adapter into a power outlet.
- Network Connection (Optional): For a wired connection, connect an Ethernet cable to the RJ45 Gigabit Ethernet port. For wireless, the Mini PC supports 2.4G/5.0G WiFi.

Image: Detailed view of the Mini PC's front and back interfaces, highlighting USB, HDMI, DP, LAN, and audio ports.
3.2 Initial Power On
Press the power button located on the front of the Mini PC. The system will boot up. Follow the on-screen instructions to complete the initial operating system setup (e.g., Windows 11 Pro, if pre-installed).
4. Operating Instructions
4.1 Power Management
To turn off the Mini PC, use the operating system's shutdown function. A short press of the power button can put the system to sleep. The device supports smart wake/sleep and timed on/off scheduling for efficient power management.

Image: The Mini PC demonstrating its scheduled power management feature, indicating smart wake/sleep functionality.
4.2 Display Configuration
The Mini PC supports up to three displays simultaneously via its two HDMI 2.0 ports and one DisplayPort 1.4, all capable of 4K@60Hz output. You can configure display settings within your operating system to extend, duplicate, or use only one screen.

Image: A workstation setup showcasing the Mini PC's capability to support dual 4K displays, enhancing productivity.
4.3 Network and Bluetooth
The Mini PC features stable 2.4G/5.0G WiFi for wireless internet access and Bluetooth for connecting wireless peripherals such as keyboards, mice, and headphones.
5. Maintenance
5.1 Storage Expansion
The KAMRUI Essenx E1 Mini PC comes with a 256GB M.2 SSD. It supports expansion up to 2TB M.2 PCIe3.0 NVMe/SATA SSD, allowing for significant storage upgrades. Refer to the internal layout for M.2 slot access.

Image: An internal diagram illustrating the expandable storage options, including the 8GB DDR4 RAM and the 256GB M.2 SSD slot, which supports up to 2TB.
5.2 Cleaning
To ensure optimal performance and longevity, regularly clean the exterior of the Mini PC with a soft, dry cloth. Avoid using liquid cleaners or abrasive materials. Ensure ventilation ports are clear of dust and debris.
5.3 Software Updates
Keep your operating system and drivers updated to ensure system stability, security, and performance. Refer to your operating system's documentation for instructions on checking and installing updates.
6. Troubleshooting
If you encounter issues with your KAMRUI Essenx E1 Mini PC, refer to the following common troubleshooting steps:
- No Power: Ensure the power adapter is securely connected to both the Mini PC and a working power outlet. Try a different outlet.
- No Display: Verify that the HDMI or DisplayPort cable is firmly connected to both the Mini PC and the monitor. Ensure the monitor is powered on and set to the correct input source.
- No Internet Connection: For wired connections, check the Ethernet cable and router. For WiFi, ensure the WiFi adapter is enabled and you are connected to the correct network with the correct password.
- System Slowdown: Close unnecessary applications. Check for background processes consuming high resources. Consider expanding RAM or storage if consistently slow.
For more complex issues, please contact KAMRUI customer support.
7. Specifications
Detailed technical specifications for the KAMRUI Essenx E1 Mini PC:
| Feature | Specification |
|---|---|
| Processor | Intel Twin Lake-N150 (up to 3.6GHz, 4C/4T, 6MB L3 cache) |
| Graphics | Intel UHD Graphics (4K@60Hz support) |
| RAM | 8GB DDR4 (expandable) |
| Storage | 256GB M.2 SSD (supports up to 2TB M.2 PCIe3.0 NVMe/SATA SSD) |
| Wireless Connectivity | 2.4G/5.0G WiFi, Bluetooth |
| Ports | 2x USB3.2 Gen2 Type-A, 2x USB2.0 Type-A, 2x HDMI 2.0, 1x DP 1.4, 1x RJ45 Gigabit Ethernet, 1x 3.5mm Audio Jack, 1x DC Power |
| Operating System | OS (pre-installed, typically Windows 11 Pro) |
| Dimensions | Approx. 5.2 x 5.12 x 4.21 inches |
| Weight | Approx. 1.41 pounds |

Image: A detailed comparison table highlighting the Intel Processor N150's specifications and performance benchmarks against the N100 CPU.
8. Warranty and Support
KAMRUI provides comprehensive support for its products. For any inquiries or assistance, please use the contact information below:
- Email Support: support@kamrui.com
- Phone Support (US): +1-833-670-1528 (Monday-Friday, 9am-5pm EST)
- Offline Maintenance Service: KAMRUI offers maintenance points for exchange or repair of your Mini PC during the warranty period.
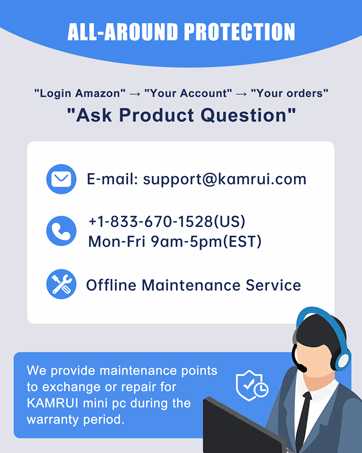
Image: Visual representation of KAMRUI's customer support channels, including email and phone contact details.
Ask a question about this manual
Ask about setup, troubleshooting, compatibility, parts, safety, or missing instructions. Manuals+ will review the question and use this page’s manual context to help answer it.