1. Safety Information
Please read all instructions carefully before assembly and use. Retain this manual for future reference.
- Ensure all screws and bolts are securely tightened during assembly. Regularly check all fasteners to ensure they remain tight.
- Keep the vanity away from electrical outlets and heat sources.
- Do not exceed the weight limit of 100 lbs (45 kg) on the vanity or stool.
- Supervise children during use to prevent accidents.
- This product meets ASTM F963-17 and CPSIA safety standards.
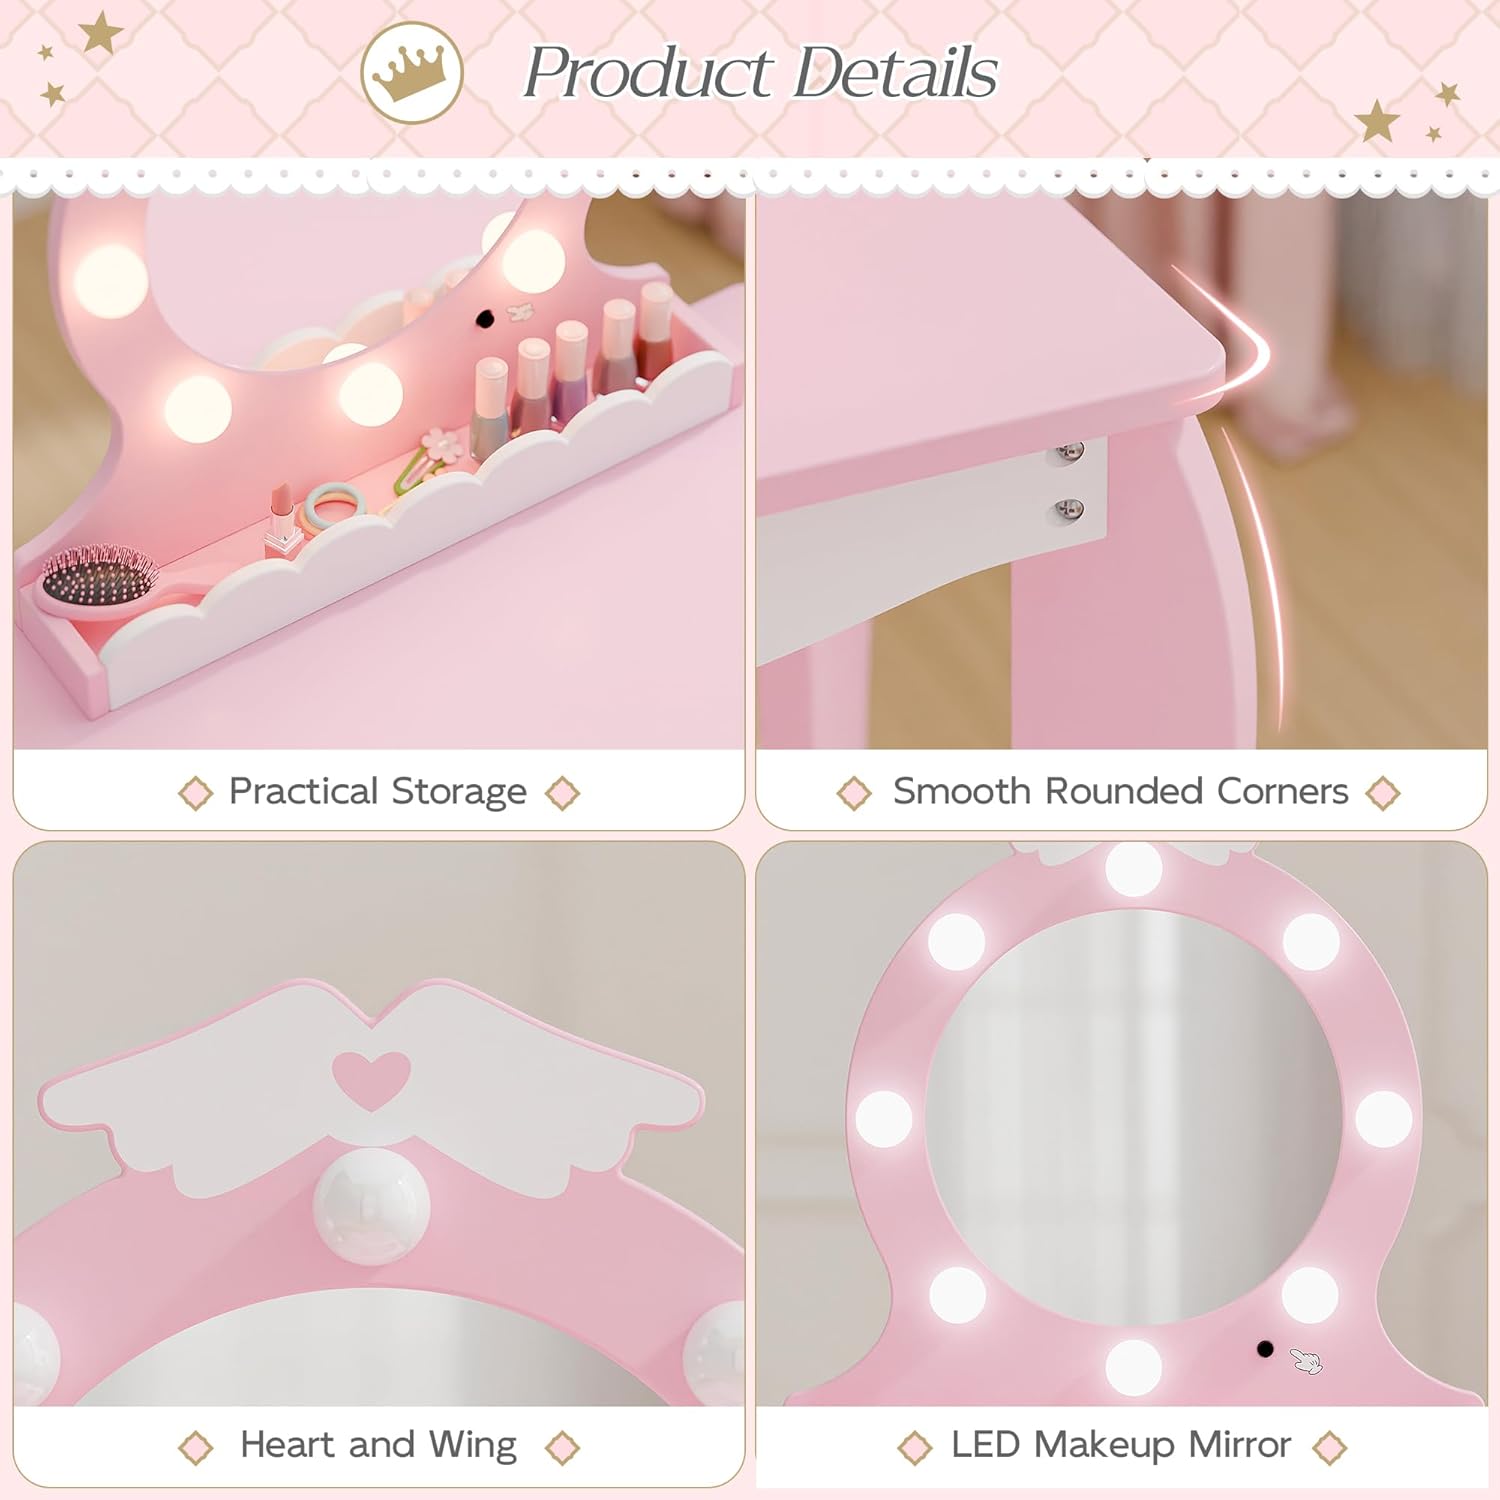
- The design incorporates kid-friendly materials and rounded corners to enhance safety during play and use.
- The smooth surface and rounded edges contribute to a safe environment for daily use.
2. Product Overview
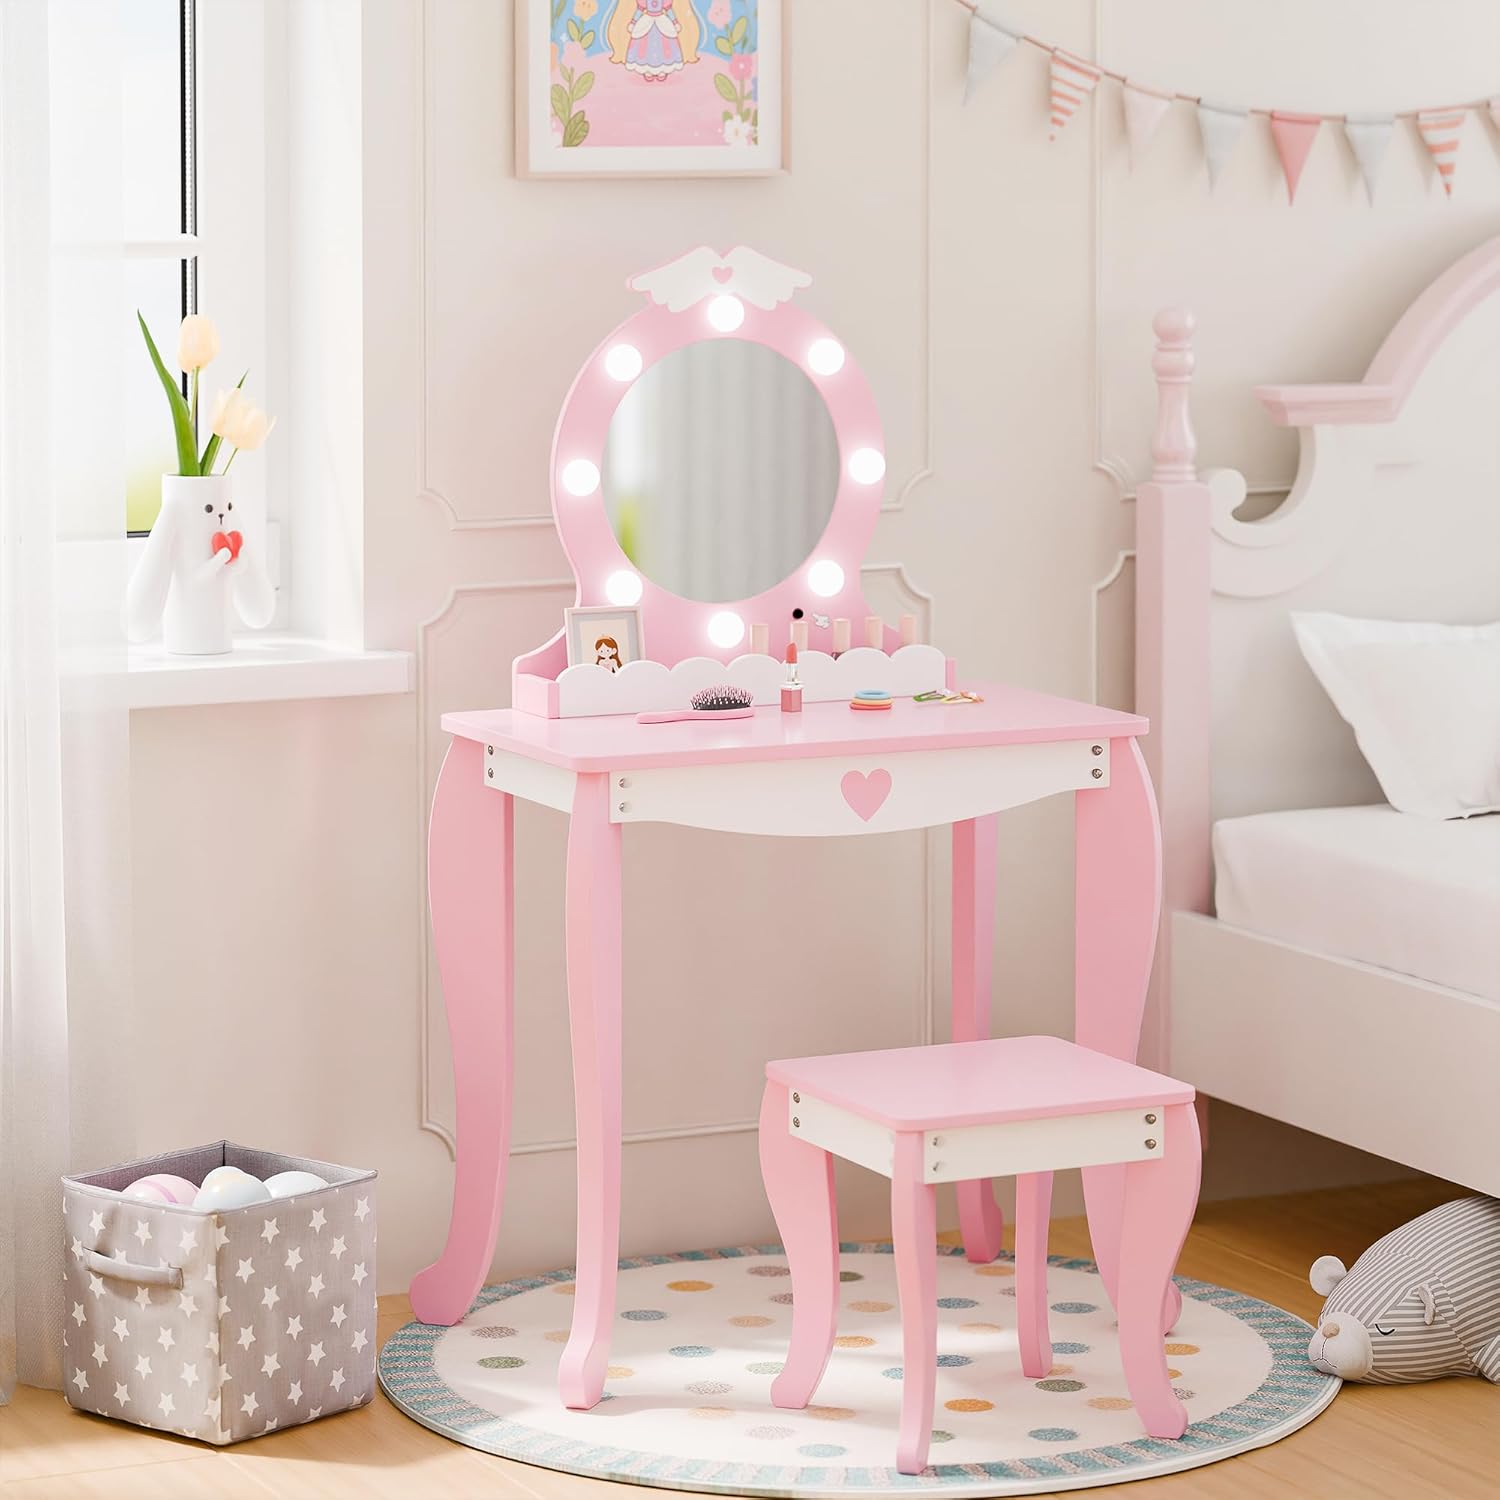
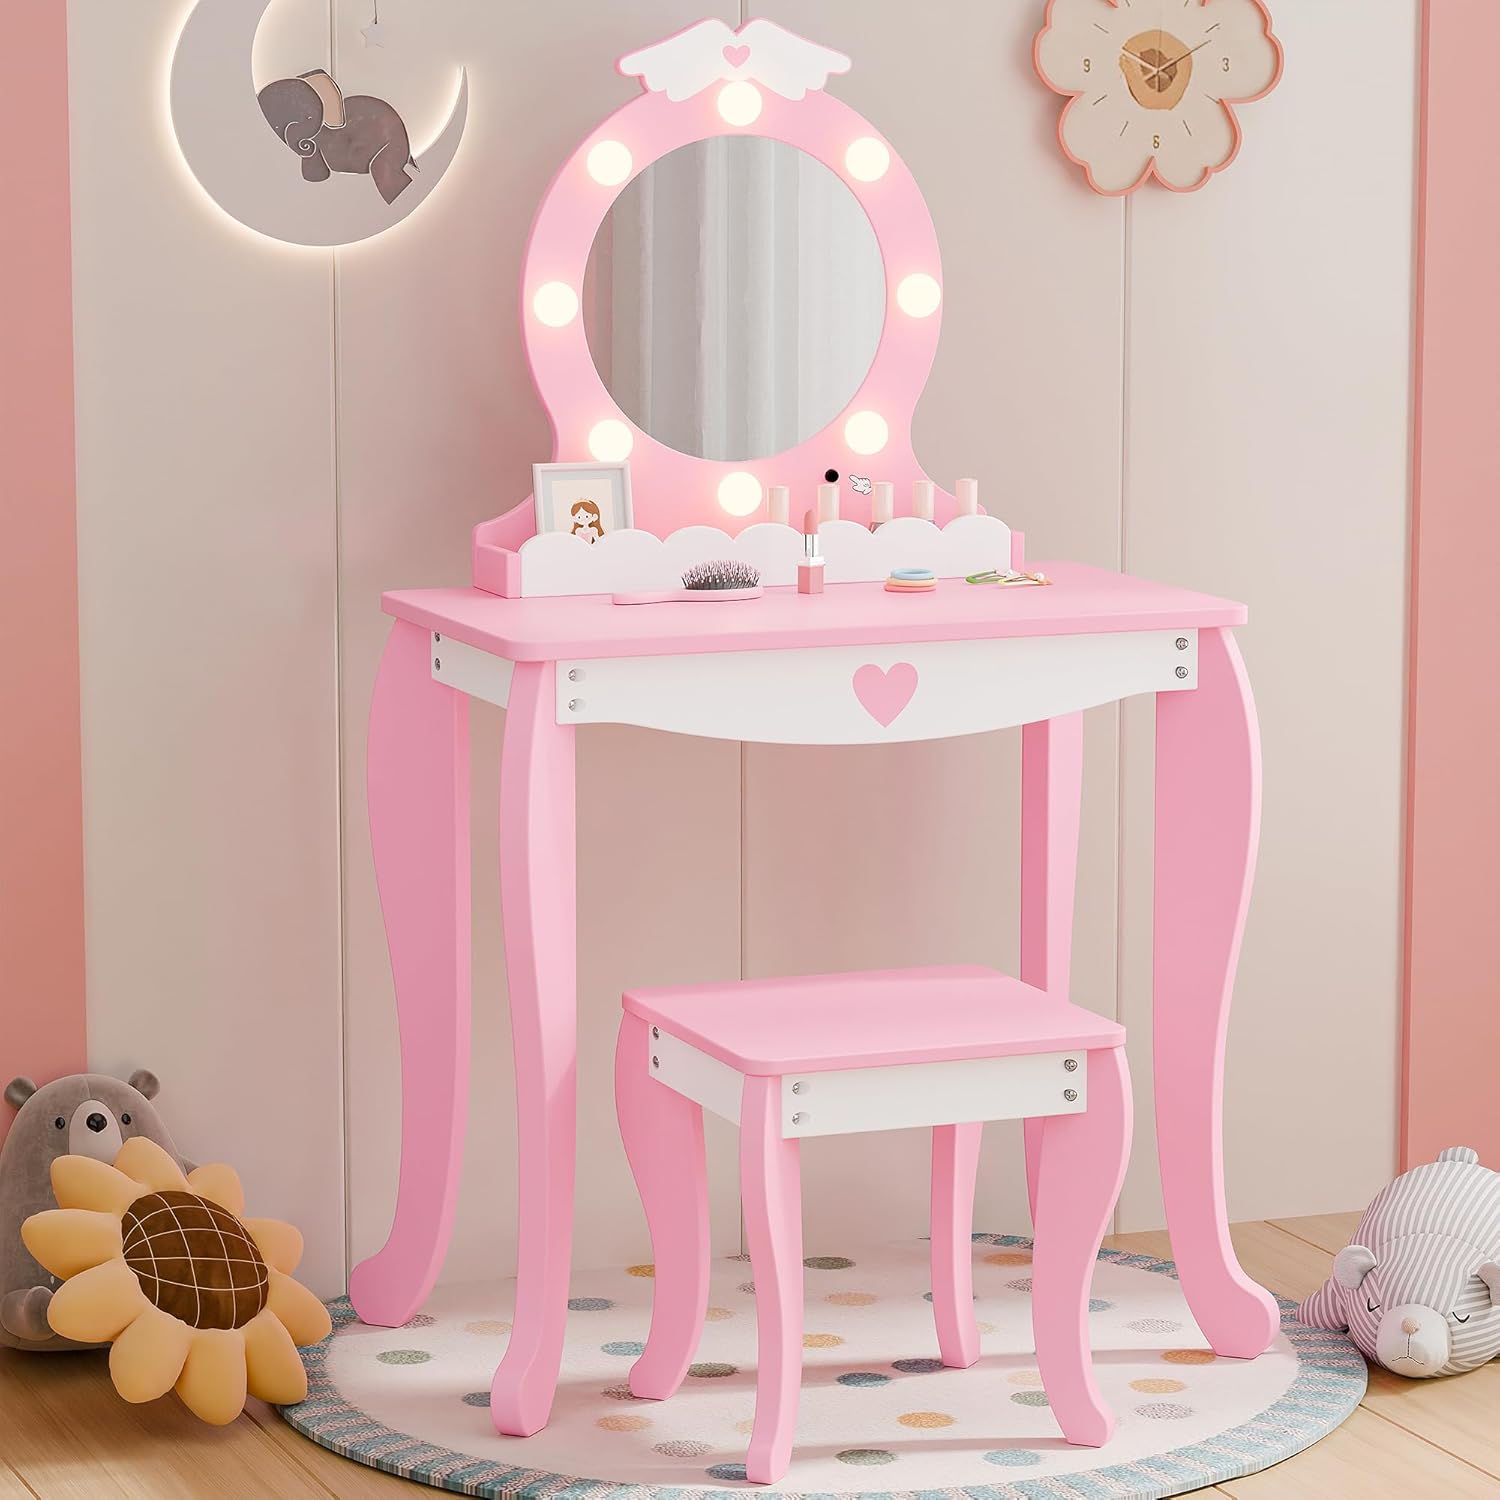
The MU Kids Vanity Set is designed for children, featuring a vanity desk, a lighted mirror, and a matching stool. It provides a dedicated space for creative play.
Key Features:
- Lighted Mirror: Features a two-tone LED mirror (warm and cool light) with a clear reflection.
- Storage Space: Includes a cloud-shaped drawer and a spacious tabletop for organizing small items.
- Sturdy Construction: Built from durable engineered wood with solid legs for stability.
- Child-Friendly Design: Smooth surfaces and rounded edges for safety.
3. Assembly Instructions
Assembly of the MU Kids Vanity Set is designed to be straightforward. All necessary tools and clear instructions are included in the packaging.
Required Tools (Included):
- Hex key
- Screwdriver
Assembly Steps:
- Unpack Components: Carefully remove all parts from the packaging and lay them out on a clean, soft surface to prevent scratches. Verify all components are present against the parts list in the included instruction booklet.
- Assemble Vanity Legs: Attach the vanity legs to the tabletop using the provided screws and hex key. Ensure they are securely fastened.
- Attach Mirror Unit: Secure the lighted mirror unit to the back of the vanity tabletop. Follow the specific instructions for aligning and fastening the mirror.
- Assemble Stool: Attach the stool legs to the stool seat using the provided hardware.
- Insert Drawer: Slide the cloud-shaped drawer into its designated slot under the tabletop.
- Final Check: Once assembled, gently shake the vanity and stool to ensure stability. Tighten any loose connections.
For detailed visual guidance, refer to the step-by-step diagrams in the instruction booklet provided with your product.
4. Operating Instructions
Lighted Mirror Operation:
- Battery Installation: The LED mirror requires 3 AA batteries (not included). Locate the battery compartment on the back of the mirror unit. Open the cover, insert the batteries according to the polarity indicators (+/-), and close the cover securely.
- Power On/Off: The mirror features a touch sensor switch. Lightly touch the sensor on the mirror frame to turn the lights on or off.
- Change Light Color: With the lights on, touch and hold the sensor to switch between the two-tone LED modes: 6000K Cold White and 3000K Warm White. Release when the desired light color is achieved.

5. Maintenance and Care
Proper care will ensure the longevity and appearance of your MU Kids Vanity Set.
- Cleaning: The smooth finish of the vanity and stool can be wiped clean with a soft, damp cloth. Avoid using abrasive cleaners or harsh chemicals, as these may damage the finish.
- Mirror Care: Clean the mirror surface with a glass cleaner and a soft, lint-free cloth. Do not spray cleaner directly onto the mirror; apply it to the cloth first.
- Dusting: Regularly dust the surfaces with a dry, soft cloth.
- Avoid Moisture: Do not expose the vanity set to excessive moisture or direct sunlight for prolonged periods, as this may cause warping or fading.
- Battery Replacement: Replace batteries in the mirror when the lights dim or stop working. Remove batteries if the vanity will not be used for an extended period.
6. Troubleshooting
Common Issues and Solutions:
- Lights on mirror not working:
- Check if batteries are correctly installed with correct polarity.
- Replace old batteries with new AA batteries.
- Ensure the touch sensor is clean and unobstructed.
- Vanity or stool feels wobbly:
- Check all screws and bolts and tighten them securely.
- Ensure the vanity is placed on a flat, even surface.
- Drawer is difficult to open/close:
- Ensure the drawer is properly aligned within its slot.
- Check for any obstructions inside the drawer slot.
7. Specifications
| Feature | Detail |
|---|---|
| Brand | MU |
| Model Number | MU-048 |
| Product Dimensions (Vanity) | 13.41"D x 24"W x 41"H (34.06 cm D x 60.96 cm W x 104.14 cm H) |
| Item Weight | 22.4 pounds (10.16 kg) |
| Frame Material | Engineered Wood |
| Furniture Finish | Painted |
| Color | Pink |
| Mirror Type | LED Lighted, Two-Tone (Warm/Cool) |
| Battery Requirement | 3 x AA batteries (not included) |
| Recommended Age | 3+ years |
8. Warranty and Support
For warranty information or technical support, please refer to the contact details provided with your purchase documentation or visit the official MU brand website. Please have your model number (MU-048) and purchase date available when contacting support.