1. Introduction
This manual provides detailed instructions for the installation, setup, operation, and maintenance of your ApeStellar SL02S Wi-Fi Smart Door Lock. This keyless entry door lock offers multiple access methods, including smartphone app control, keypad codes, and traditional mechanical keys. It features direct Wi-Fi connectivity, eliminating the need for a separate hub, and integrates with smart home systems like Amazon Alexa and Google Assistant.

Image 1.1: ApeStellar SL02S Wi-Fi Smart Door Lock, showing the lock, included keys, and the associated smartphone application interface.
2. Safety Information
- Read all instructions carefully before installation and use.
- Do not attempt to disassemble or repair the lock yourself. Contact customer support for assistance.
- Use only the specified battery type (4x AA alkaline batteries). Do not mix old and new batteries or different types of batteries.
- Keep mechanical keys in a secure location outside the property, accessible only to trusted individuals.
- Regularly check battery levels and replace batteries promptly when low battery warnings are issued.
3. Package Contents
Verify that all components are present before beginning installation:
- ApeStellar Keyless Entry Door Lock (Exterior Keypad Assembly)
- Interior Lever Assembly
- Latch Mechanism
- Mounting Plate
- Screws (various sizes for installation)
- Strike Plate
- 2 Backup Mechanical Keys
- Installation Instructions (this manual)
- Programming Instructions (integrated within this manual)
4. Specifications
| Feature | Detail |
|---|---|
| Brand | ApeStellar |
| Model Name | SL02S |
| Lock Type | Keypad, Smart Lever |
| Material | Zinc Alloy |
| Color | Matte Black |
| Dimensions (L x W x H) | 4.9 x 2.9 x 6.3 inches |
| Item Weight | 3.3 pounds |
| Connectivity | Wi-Fi (2.4GHz only, 802.11 b/g/n) |
| Power Source | 4x AA Batteries (not included) |
| Special Features | Auto-Lock, Back-Lit Keypad, One-Touch Lock, Passcode Unlock, App Control, Voice Control |
| Controller Type | Amazon Alexa, Google Assistant, Push Button, App |
| Door Hole Diameter | 2-1/8" (54mm) |
| Door Thickness | 1-3/8" to 1-3/4" (35 to 45mm) |
| Backset | Adjustable 2-3/8" or 2-3/4" (60mm or 70mm) |
5. Installation Guide
A standard screwdriver is the only tool required for installation. The process typically takes about 15 minutes.
5.1 Door Preparation and Compatibility
Ensure your door meets the following specifications:
- Door Hole Diameter: 2-1/8" (54mm)
- Door Thickness: 1-3/8" to 1-3/4" (35 to 45mm)
- Backset: Adjustable 2-3/8" or 2-3/4" (60mm or 70mm)
The lock is compatible with most standard US door types. If your existing deadbolt overlaps with the keypad door knob, you may need to adjust the deadbolt to a lower position.

Image 5.1: Illustration of the smart lock's compatibility with different door setups, including standard door knobs and deadbolts.
5.2 Hardware Installation Steps
- Install the Latch: Insert the latch into the door edge. Ensure the latch bolt faces the correct direction for your door swing. Secure with screws. Adjust the backset if necessary.
- Install the Exterior Keypad Assembly: Feed the cable from the exterior assembly through the door hole and under the latch. Position the exterior assembly flush against the door.
- Install the Mounting Plate: Route the cable through the mounting plate. Secure the mounting plate to the door using the provided screws, ensuring it is aligned with the exterior assembly.
- Connect the Cable: Connect the cable from the exterior assembly to the port on the interior lever assembly. Ensure a secure connection.
- Install the Interior Lever Assembly: Align the interior lever assembly with the mounting plate and secure it with screws. Ensure the lever operates smoothly.
- Install Batteries: Open the battery cover on the interior assembly and insert 4 new AA alkaline batteries. Close the cover.
- Install Strike Plate: Install the strike plate on the door frame, aligning it with the latch bolt. Secure with screws.

Image 5.2: Exploded diagram illustrating the components and steps for installing the ApeStellar SL02S smart door lock, including door dimensions.
6. App Setup and Connectivity
6.1 Download the App
Search for "TTLock" in your smartphone's app store (iOS or Android) and download the application. Create an account and log in.
6.2 Pairing with Wi-Fi
The ApeStellar SL02S connects directly to your 2.4GHz Wi-Fi network (802.11 b/g/n). No separate hub is required.
- Ensure your smartphone is connected to a 2.4GHz Wi-Fi network.
- Open the TTLock app and tap "Add Lock" or the '+' icon.
- Follow the on-screen instructions to search for and add your SL02S lock. You may need to press a button on the lock to activate pairing mode.
- Enter your Wi-Fi network name and password when prompted.
- Once connected, the app will confirm successful pairing.
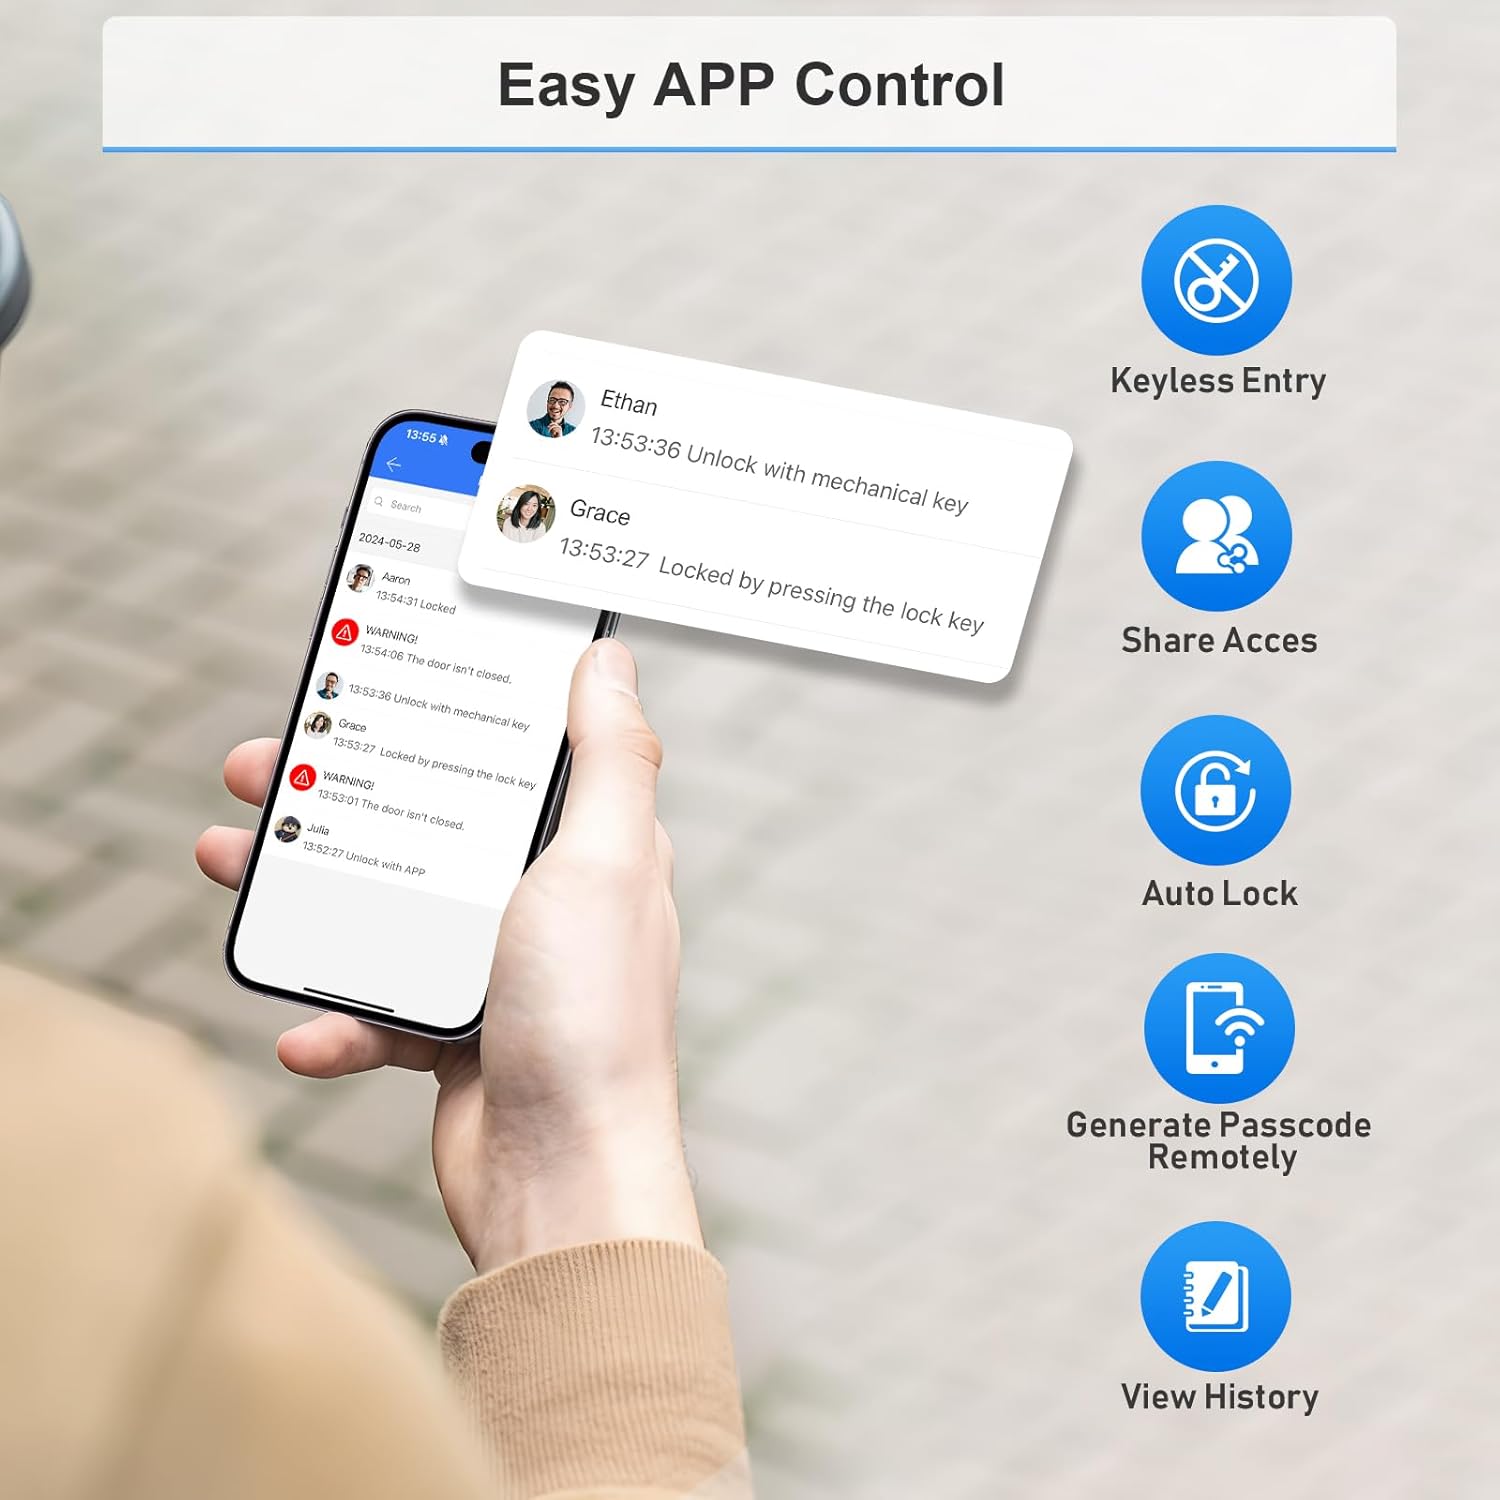
Image 6.1: The TTLock app interface demonstrating features such as remote unlocking, sharing access, auto-lock settings, generating passcodes, and viewing access history.
6.3 Smart Home Integration
The lock supports integration with Amazon Alexa and Google Assistant for voice control.
- Ensure your lock is successfully paired with the TTLock app and connected to Wi-Fi.
- Open the Amazon Alexa app or Google Home app.
- Search for and enable the "TTLock" skill/service.
- Link your TTLock account when prompted.
- Discover new devices. Your ApeStellar SL02S lock should appear.
- You can now use voice commands like "Alexa, unlock the front door" (you may need to set up a voice code for unlocking).

Image 6.2: Visual representation of the smart lock's compatibility with Amazon Alexa and Google Assistant for convenient voice control.
7. Operating Instructions
7.1 Multiple Access Methods
The ApeStellar SL02S offers several ways to unlock and lock your door:
- Smartphone App: Use the TTLock app to remotely lock/unlock, view activity, and manage settings.
- Keypad: Enter a valid passcode on the illuminated keypad.
- Mechanical Key: Use one of the provided backup keys for traditional access.
- Voice Control: Integrate with Amazon Alexa or Google Assistant for hands-free operation.
- Apple Watch: Unlock directly from your Apple Watch (via the TTLock app).

Image 7.1: Overview of the various methods available for unlocking the ApeStellar SL02S, including app, keypad, and physical key.
7.2 Managing Access Codes
The TTLock app allows you to generate and manage up to 50 unique access codes:
- Permanent Codes: For regular users like family members.
- Scheduled Codes: Valid only during specific dates and times (e.g., for cleaning services).
- One-Time Codes: Valid for a single use within a specified period.
- Recurring Codes: Valid for specific days of the week at set times.
To generate a code, open the TTLock app, select your lock, and navigate to the "Passcodes" section. Follow the prompts to create and share codes.
7.3 Auto-Lock Feature
The auto-lock feature automatically locks the door after a set duration (5-99 seconds) once it has been unlocked. This provides added security and peace of mind.
- To enable/disable or adjust the auto-lock time, go to the lock settings within the TTLock app.
7.4 One-Touch Locking
To manually lock the door from the outside, simply press and hold the '#' button on the keypad for a few seconds.

Image 7.2: Visual guide for setting up auto-lock in the app and performing one-touch locking from the keypad.
7.5 Activity Detection and Notifications
The TTLock app provides real-time notifications for various activities:
- Door lock/unlock events (who, when, and method).
- Door left ajar alerts.
- Low battery warnings.
You can view a detailed activity history within the app.
8. Maintenance
8.1 Battery Replacement
The lock requires 4 AA alkaline batteries (not included). When the battery level is low, the lock will issue an audible warning, and the app will display a low battery notification.
- Remove the battery cover on the interior lever assembly.
- Remove the old batteries.
- Insert 4 new AA alkaline batteries, ensuring correct polarity.
- Replace the battery cover.
Note: A 1-year battery life is estimated under normal usage conditions. Actual battery life may vary.
8.2 Cleaning
Clean the lock's exterior with a soft, damp cloth. Avoid using abrasive cleaners, solvents, or harsh chemicals, as these can damage the finish or electronic components.
9. Troubleshooting
| Problem | Possible Cause | Solution |
|---|---|---|
| Lock not responding / Keypad not lighting up | Low or dead batteries | Replace all 4 AA batteries with new alkaline batteries. |
| Cannot connect to Wi-Fi | Incorrect Wi-Fi band (only 2.4GHz supported); Weak Wi-Fi signal; Incorrect password. | Ensure your router is broadcasting a 2.4GHz network. Move closer to the router. Double-check Wi-Fi password. Restart router and lock. |
| App cannot find the lock | Lock not in pairing mode; Bluetooth off on phone; Lock too far from phone. | Ensure Bluetooth is enabled on your phone. Bring your phone close to the lock. Follow app instructions to activate pairing mode on the lock. |
| Passcode not working | Incorrect code entered; Code expired or outside scheduled time; Lock malfunction. | Verify the passcode and its validity period in the TTLock app. Try using a mechanical key or the app to unlock. |
| Auto-lock not engaging | Auto-lock feature disabled or set to a long duration; Door sensor issue. | Check auto-lock settings in the TTLock app. Ensure the door closes completely and the latch engages properly. |
10. Warranty and Support
ApeStellar products are designed for reliability and performance. For warranty information, technical support, or any questions not covered in this manual, please refer to the contact information provided with your purchase or visit the official ApeStellar website.
Please retain your proof of purchase for warranty claims.


