1. Introduction
Thank you for choosing the JOYIN 47-inch Light-Up Standing Ghost with Witch Hat Halloween Decoration. This manual provides essential information for the safe assembly, operation, and maintenance of your product. Please read these instructions carefully before use and retain them for future reference.
This product is designed to enhance your Halloween decor with its luminous standing ghost figures, featuring a witch hat and remote-controlled lighting modes. It is suitable for both indoor and outdoor use, providing a festive and spooky atmosphere.
2. Package Contents
Please verify that all components are present in your package:
- Two (2) 47-inch Luminous Standing White Ghosts with Witch Hats
- Two (2) Telescopic Stands with Bases
- Two (2) LED Light Strings (pre-attached or separate)
- Two (2) Remote Controls
- Instruction Leaflet (this document)
Note: 3 AA batteries per ghost (total 6 AA batteries) are required and are not included.

Figure 2.1: Remote control and battery box components.
3. Assembly and Setup
Follow these steps to assemble your standing ghost decorations:
- Unfold the Telescopic Stand: Carefully unfold the metal support stand until its legs are fully extended and stable.
- Extend to Desired Height: Extend the telescopic pole to your preferred height (up to 47 inches). Twist to lock the pole securely in place. The stand is height-adjustable, allowing for variations between 40 inches and 55 inches.
- Thread Light String: If the light string is separate, thread it through the holes located under the ghost's head component.
- Attach Head to Stand: Attach the ghost's head component onto the top of the extended stand. Twist to secure it firmly.
- Wrap Light String: Wrap the LED light string around the pole. Use zip-ties or integrated fasteners to keep it in place, ensuring even light distribution.
- Drape Ghost Body: Drape the ghost fabric body over the assembled stand and head. Ensure the felt face parts (eyes and mouth) are correctly positioned.

Figure 3.1: Step-by-step assembly guide.
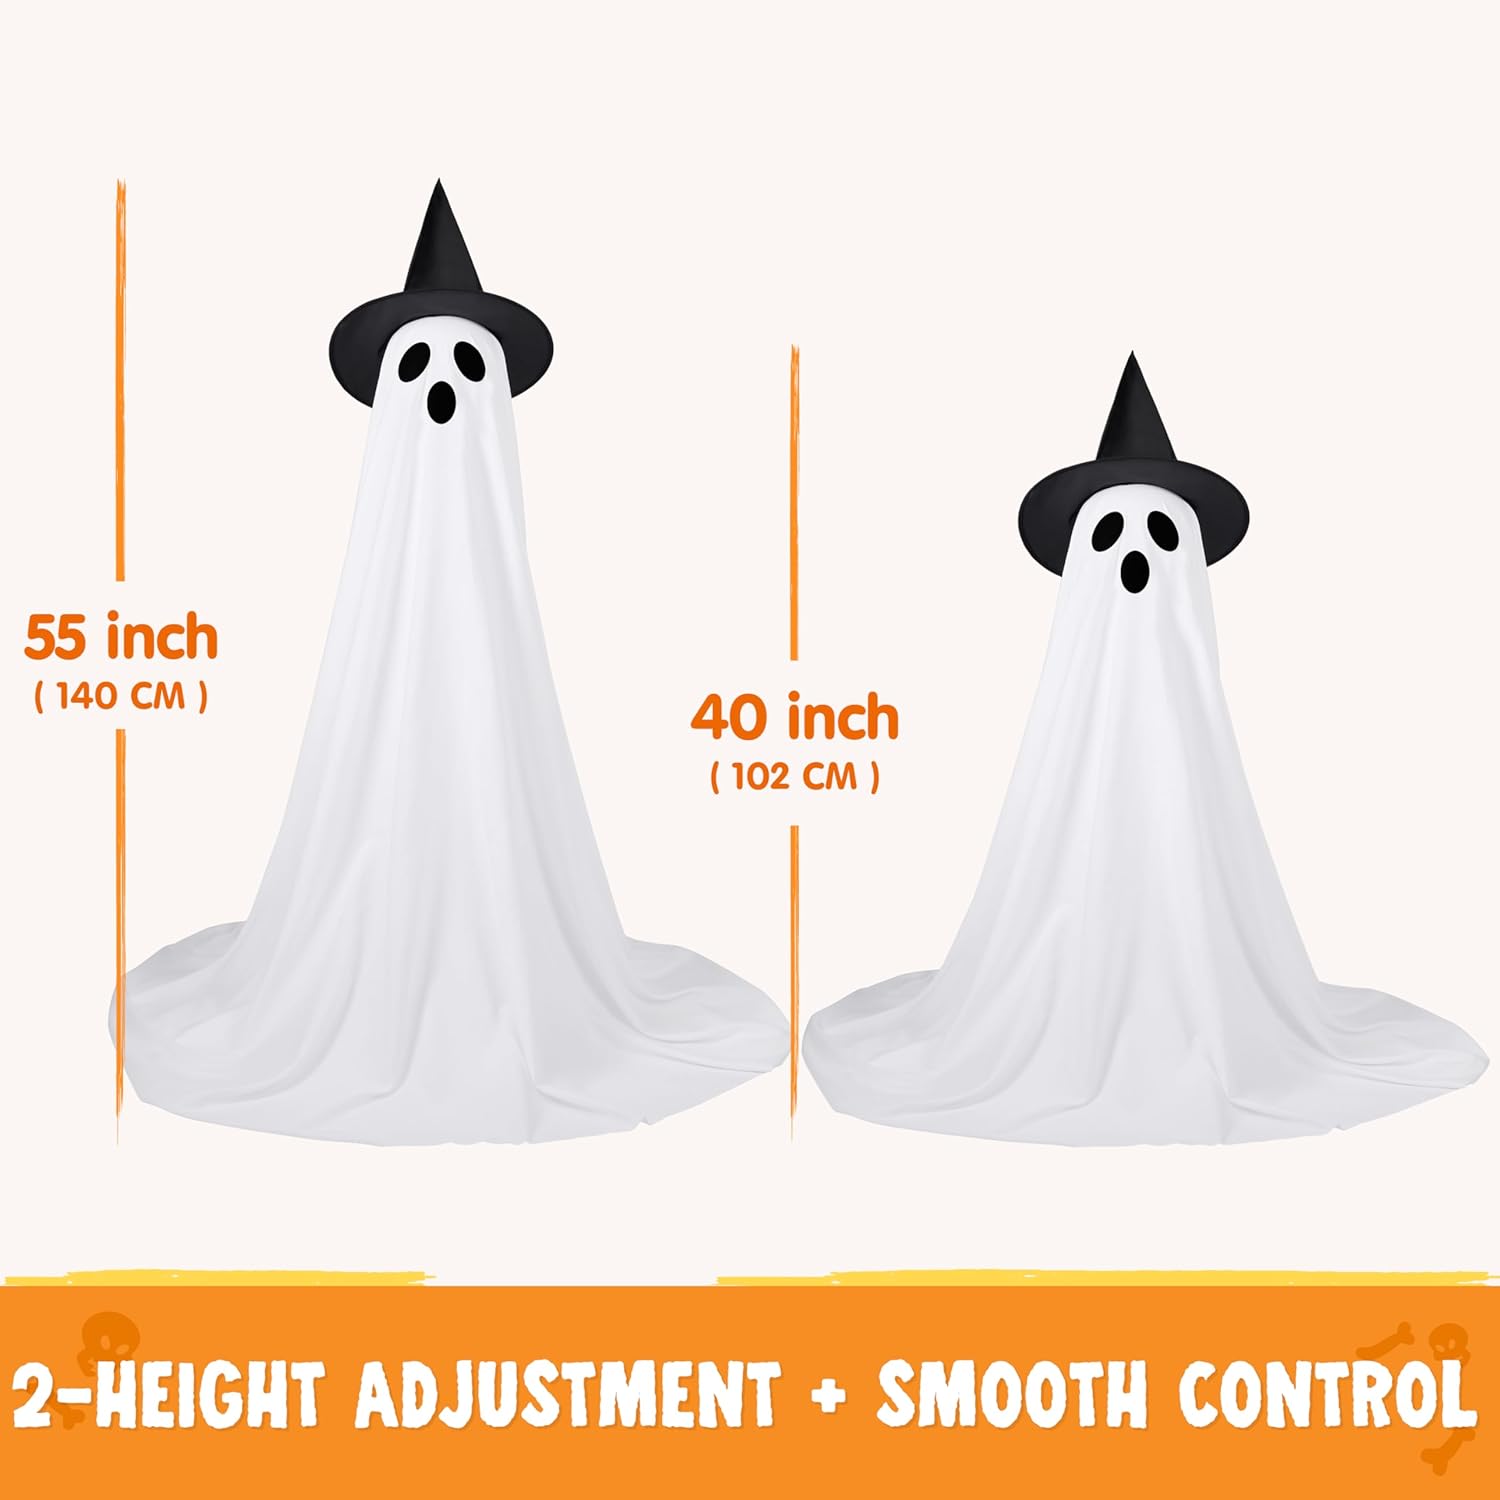
Figure 3.2: Height adjustment options for the standing ghost.
4. Operation
4.1. Battery Installation
Each ghost requires 3 AA batteries (not included) for its LED lights. To install:
- Locate the battery compartment on the back of the ghost's head or within the light string unit.
- Open the battery compartment cover. A small screwdriver may be required.
- Insert 3 AA batteries, ensuring correct polarity (+/-).
- Close the battery compartment cover securely.

Figure 4.1: Battery installation process.
4.2. Remote Control Functions
Use the provided remote control to manage the lighting effects:
- ON/OFF: Powers the lights on or off.
- Mode Selection: Cycle through 8 different lighting modes:
- Combination
- In Wave
- Sequential
- Slo Glo
- Chasing/Flash
- Slow Fade
- Twinkle/Flash
- Steady On
- Timer Function: The lights are equipped with an automatic timing function. Once activated, the lights will glow for a set period (typically 6 hours on, 18 hours off) and automatically repeat the cycle daily. Refer to the remote for specific timer button functionality.
5. Maintenance
Proper care will extend the lifespan of your decoration:
- Cleaning: Gently wipe the ghost fabric with a soft, damp cloth if it becomes dirty. Do not use harsh chemicals or abrasive cleaners.
- Storage: When not in use, disassemble the decoration and store it in a cool, dry place away from direct sunlight. Remove batteries before long-term storage to prevent leakage.
- Battery Replacement: Replace all batteries simultaneously with new ones of the same type. Do not mix old and new batteries or different battery types.
- Outdoor Use: While designed for outdoor use, prolonged exposure to extreme weather conditions (heavy rain, strong winds, snow) may reduce product longevity. Consider bringing indoors during severe weather.
6. Troubleshooting
If you encounter issues with your JOYIN standing ghost decoration, refer to the following common problems and solutions:
| Problem | Possible Cause | Solution |
|---|---|---|
| Lights do not turn on. | Dead or incorrectly installed batteries. | Check battery polarity. Replace all batteries with new AA batteries. |
| Remote control not working. | Remote battery dead or obstruction. | Ensure line of sight to the receiver. Replace the remote's battery (if applicable, usually a button cell). |
| Ghost falls over easily. | Stand not fully extended or secured; lightweight design. | Ensure the telescopic stand is fully extended and locked. For outdoor use, consider anchoring the base with weights or stakes (not included) to improve stability, especially in windy conditions. |
| Lights are dim. | Low battery power. | Replace batteries. |
7. Product Specifications
- Product Dimensions: 16.38 x 10.63 x 7.09 inches (packaged)
- Assembled Height: Adjustable, approximately 40 to 55 inches
- Item Weight: 5.39 pounds (per pack of two)
- Model Number: 17585
- ASIN: B0F82HH9QK
- Power Source: 3 x AA batteries (per ghost, not included)
- Lighting Modes: 8 modes with timer function
- Material: Polyester fabric, alloy bracket
8. Safety Information
- Keep batteries out of reach of children.
- Do not expose the battery compartment to water.
- Do not attempt to modify or repair the product. Contact customer support if issues arise.
- Ensure the product is placed on a stable, level surface to prevent tipping.
- Dispose of used batteries according to local regulations.
9. Warranty and Support
For warranty information or technical support, please refer to the retailer's return policy or contact JOYIN customer service directly through their official channels. Please have your model number (17585) and purchase details available when contacting support.