Onecolor C
User Manual for Hidden Shower Faucets Set 12" Brass Rain Shower System
Model: Onecolor C (ASIN: B0F82F5KXR)
Product Overview
This hidden shower faucet set is designed to provide a modern and functional showering experience. It features a single-handle control for hot and cold water, an ultra-thin rainfall shower head, and a digital display for temperature. The system is designed for in-wall installation, offering a sleek and minimalist aesthetic.
Key Features:
- Ultra-thin rainfall shower head for a luxurious showering experience.
- Digital display temperature LED for precise control and comfort.
- Wall-mounted design for a clean and integrated look.
- In-wall hidden digital control for a minimalist aesthetic.
- 3-way flow functions for versatile showering options.
- Single handle for easy hot and cold water control.
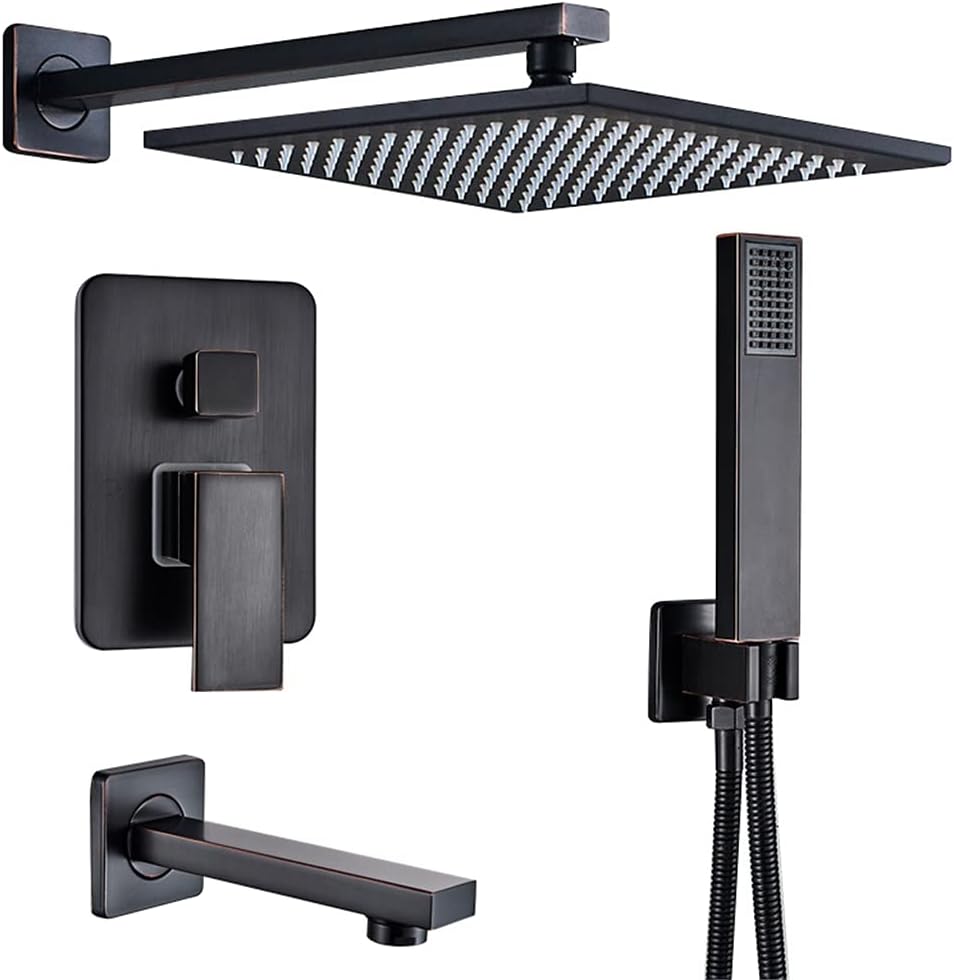
Figure 1: Overview of the Hidden Shower Faucets Set, including the rainfall shower head, handheld shower, control panel, and tub spout.
Components Included
The package typically includes the following components:
- Rainfall Shower Head (12-inch)
- Shower Mixer Valve with Digital Display
- Handheld Shower with Hose
- Shower Arm
- Tub Spout
- Mounting Hardware and Installation Accessories
Setup and Installation
Professional installation is highly recommended for this hidden shower system due to its in-wall design. Ensure all local plumbing codes are followed.
Pre-Installation Checklist:
- Verify all components are present and undamaged.
- Ensure water supply is turned off at the main valve.
- Have necessary tools: pipe wrench, screwdriver, level, measuring tape, sealant, etc.
Installation Steps (General Guide):
- Prepare Wall Cavity: Create or ensure an adequate cavity in the wall for the hidden mixer valve and associated plumbing.
- Install Mixer Valve: Securely mount the mixer valve body within the wall cavity, ensuring it is level and at the correct depth relative to the finished wall surface. Connect hot and cold water lines.
- Connect Shower Arm and Head: Install the shower arm to the appropriate outlet from the mixer valve and attach the rainfall shower head.
- Install Handheld Shower and Tub Spout: Connect the handheld shower hose and mount the holder. Install the tub spout to its designated outlet.
- Test Connections: Before closing the wall, slowly turn on the water supply and check for any leaks at all connections.
- Install Trim Plates and Handles: Once plumbing is verified, install the decorative trim plates and the single control handle.
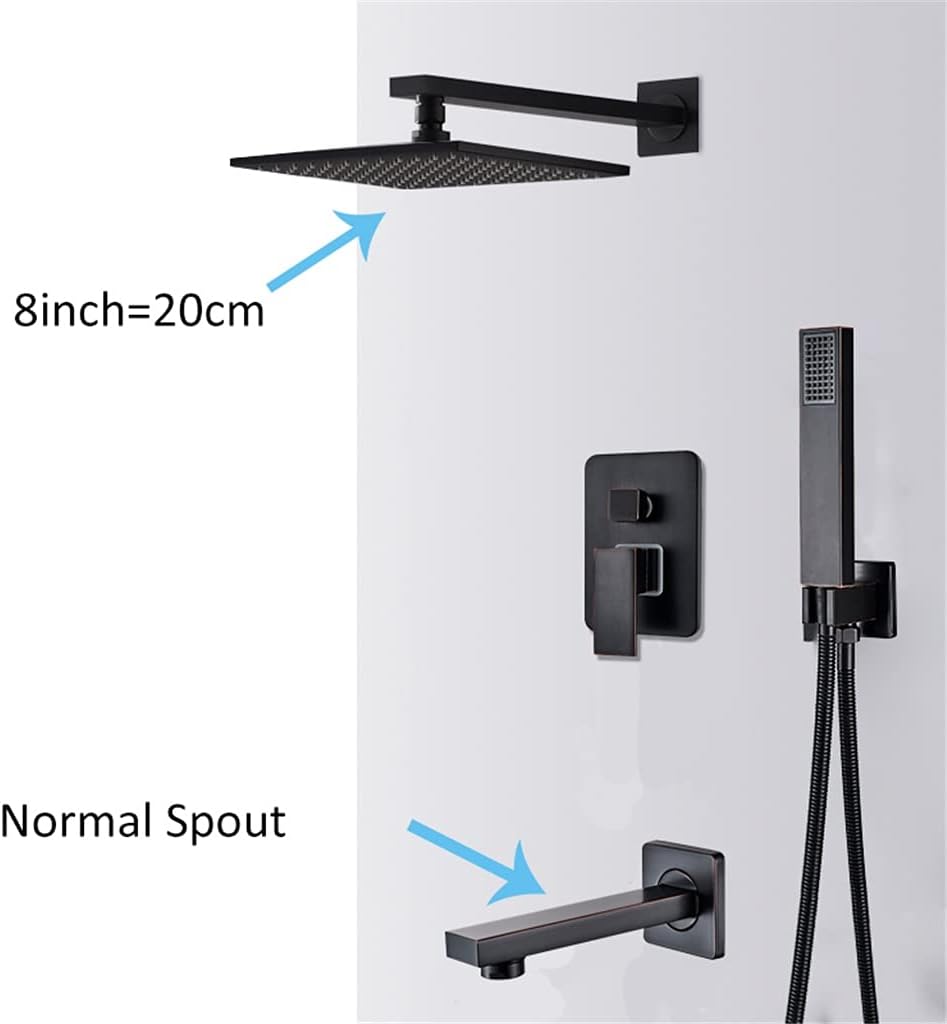
Figure 2: Illustrative diagram showing the approximate size of the shower head (8 inches / 20 cm) and the design of the tub spout, useful for planning installation space.
Operating Instructions
This shower system features a single handle for water flow and temperature control, along with a digital display for temperature monitoring and 3-way flow functions.
Using the Single Handle:
- Turn On/Off: Lift the handle to turn on the water flow. Push down to turn off.
- Adjust Temperature: Rotate the handle left for hotter water and right for colder water. The digital display will show the current water temperature.
- Adjust Flow: The handle also controls the water flow intensity. Lift higher for more flow, lower for less.
Switching Flow Functions:
The system includes a diverter to switch between the rainfall shower head, handheld shower, and tub spout. This is typically controlled by a separate knob or button on the main control panel.
- Locate the diverter control on the main valve trim.
- Rotate or push the diverter to select the desired water outlet (e.g., rainfall, handheld, tub spout).
Maintenance
Regular cleaning and maintenance will ensure the longevity and optimal performance of your shower system.
Cleaning the Finish:
- Use a soft cloth and mild soap or a non-abrasive cleaner specifically designed for bathroom fixtures.
- Avoid abrasive cleaners, scouring pads, or harsh chemicals, as these can damage the finish.
- Rinse thoroughly with clean water and dry with a soft cloth to prevent water spots.
Cleaning Shower Head Nozzles:
- Over time, mineral deposits can clog the nozzles. Gently rub the rubber nozzles on the rainfall shower head and handheld shower to dislodge any buildup.
- For stubborn deposits, a solution of equal parts white vinegar and water can be used. Soak the shower head (if removable) or apply the solution with a cloth. Rinse thoroughly.
Troubleshooting
| Problem | Possible Cause | Solution |
|---|---|---|
| Low Water Flow | Clogged shower head nozzles; partially closed shut-off valve; low water pressure in home. | Clean shower head nozzles. Ensure shut-off valves are fully open. Consult a plumber for home water pressure issues. |
| Inconsistent Water Temperature | Improper hot/cold water supply balance; issue with mixer valve cartridge. | Check water heater settings. If problem persists, professional inspection of the mixer valve may be required. |
| Leaks from Connections | Loose connections; damaged O-rings or seals. | Tighten connections carefully. If leaks persist, replace O-rings or seals. Professional assistance may be needed for in-wall leaks. |
| Digital Display Not Working | Power supply issue (if battery operated); internal fault. | Check battery compartment (if applicable). If not battery operated, contact a qualified technician. |
Specifications
| Attribute | Detail |
|---|---|
| Brand | Generic |
| Model Color | Onecolor |
| Size | C (Rainfall head > 400mm / 12 inches) |
| Main Material | Brass (as per product title) |
| Included Components | Rainfall Shower Head, Mixer Valve, Handheld Shower, Shower Arm, Tub Spout, Mounting Hardware |
| Manufacturer | Generic |
| Package Dimensions | 1 x 1 x 1 cm; 15 kilograms (Note: These dimensions seem generic/placeholder) |
| ASIN | B0F82F5KXR |
| Date First Available | May 9, 2025 |
Warranty and Support
Specific warranty information for this product is not provided in the available data. For warranty claims, technical support, or replacement parts, please contact the seller or manufacturer directly through the platform where the product was purchased.
For general inquiries, refer to the seller's contact information on the product listing page.
Note: Always retain your proof of purchase for any warranty or support claims.
Ask a question about this manual
Ask about setup, troubleshooting, compatibility, parts, safety, or missing instructions. Manuals+ will review the question and use this page’s manual context to help answer it.