Introduction
Thank you for choosing the Pinmoco Full Size Headboard with Outlets and Storage Shelf. This manual provides essential information for the safe assembly, operation, and maintenance of your new headboard. Please read this manual thoroughly before assembly and retain it for future reference.
Safety Information
- Always follow the assembly instructions carefully. Incorrect assembly can lead to instability and potential injury.
- Ensure all connections are secure before use. Periodically check and tighten fasteners.
- Do not overload the storage shelf. Distribute weight evenly.
- Only use the integrated power outlets for devices within their specified electrical ratings. Do not exceed the maximum wattage.
- Keep liquids away from electrical outlets to prevent electric shock.
- This product is intended for indoor use only.
Package Contents
Before beginning assembly, ensure all parts and hardware are present. Refer to the separate assembly guide included in your package for a detailed list of components. Typically, your package should contain:
- Headboard frame components (metal and wood)
- Upholstered headboard panel
- Storage shelf components
- Integrated power strip with outlets and USB ports
- Assembly hardware (screws, bolts, washers, Allen wrench)
- Assembly Guide
- LED light strip and remote control (if included with your model)
Setup and Assembly
Assembly of the Pinmoco Headboard requires two adults. Please follow the step-by-step instructions provided in the dedicated Assembly Guide included with your product. Below are general guidelines:
- Unpack and Identify Parts: Carefully remove all components from the packaging. Lay them out on a clean, soft surface to prevent scratches. Cross-reference all parts with the list in the Assembly Guide.
- Assemble the Frame: Begin by connecting the main metal frame components using the provided hardware. Ensure all bolts are finger-tightened initially.
- Attach the Upholstered Panel: Secure the upholstered headboard panel to the frame as directed in the guide.
- Install the Storage Shelf: Mount the wooden storage shelf onto the top of the headboard frame.
- Integrate Power Outlets: Secure the power strip with outlets and USB ports into its designated slot on the headboard. Ensure the power cord is routed safely.
- Attach to Bed Frame: The headboard features adjustable holes for compatibility with various bed frames. Align the headboard's mounting brackets with your bed frame's pre-drilled holes and secure using appropriate bolts (may be included with headboard or bed frame). Adjust the height as needed before fully tightening.
- Final Tightening: Once all components are in place and the headboard is attached to the bed frame, go back and securely tighten all bolts and screws. Do not overtighten.


Operating Instructions
Using the Integrated Outlets
The headboard is equipped with a built-in power strip featuring standard AC outlets and USB charging ports. To use them:
- Ensure the headboard's main power cord is securely plugged into a functional wall outlet.
- Plug your electronic devices into the available AC outlets or USB ports.
- Always check device compatibility and power requirements before plugging in.
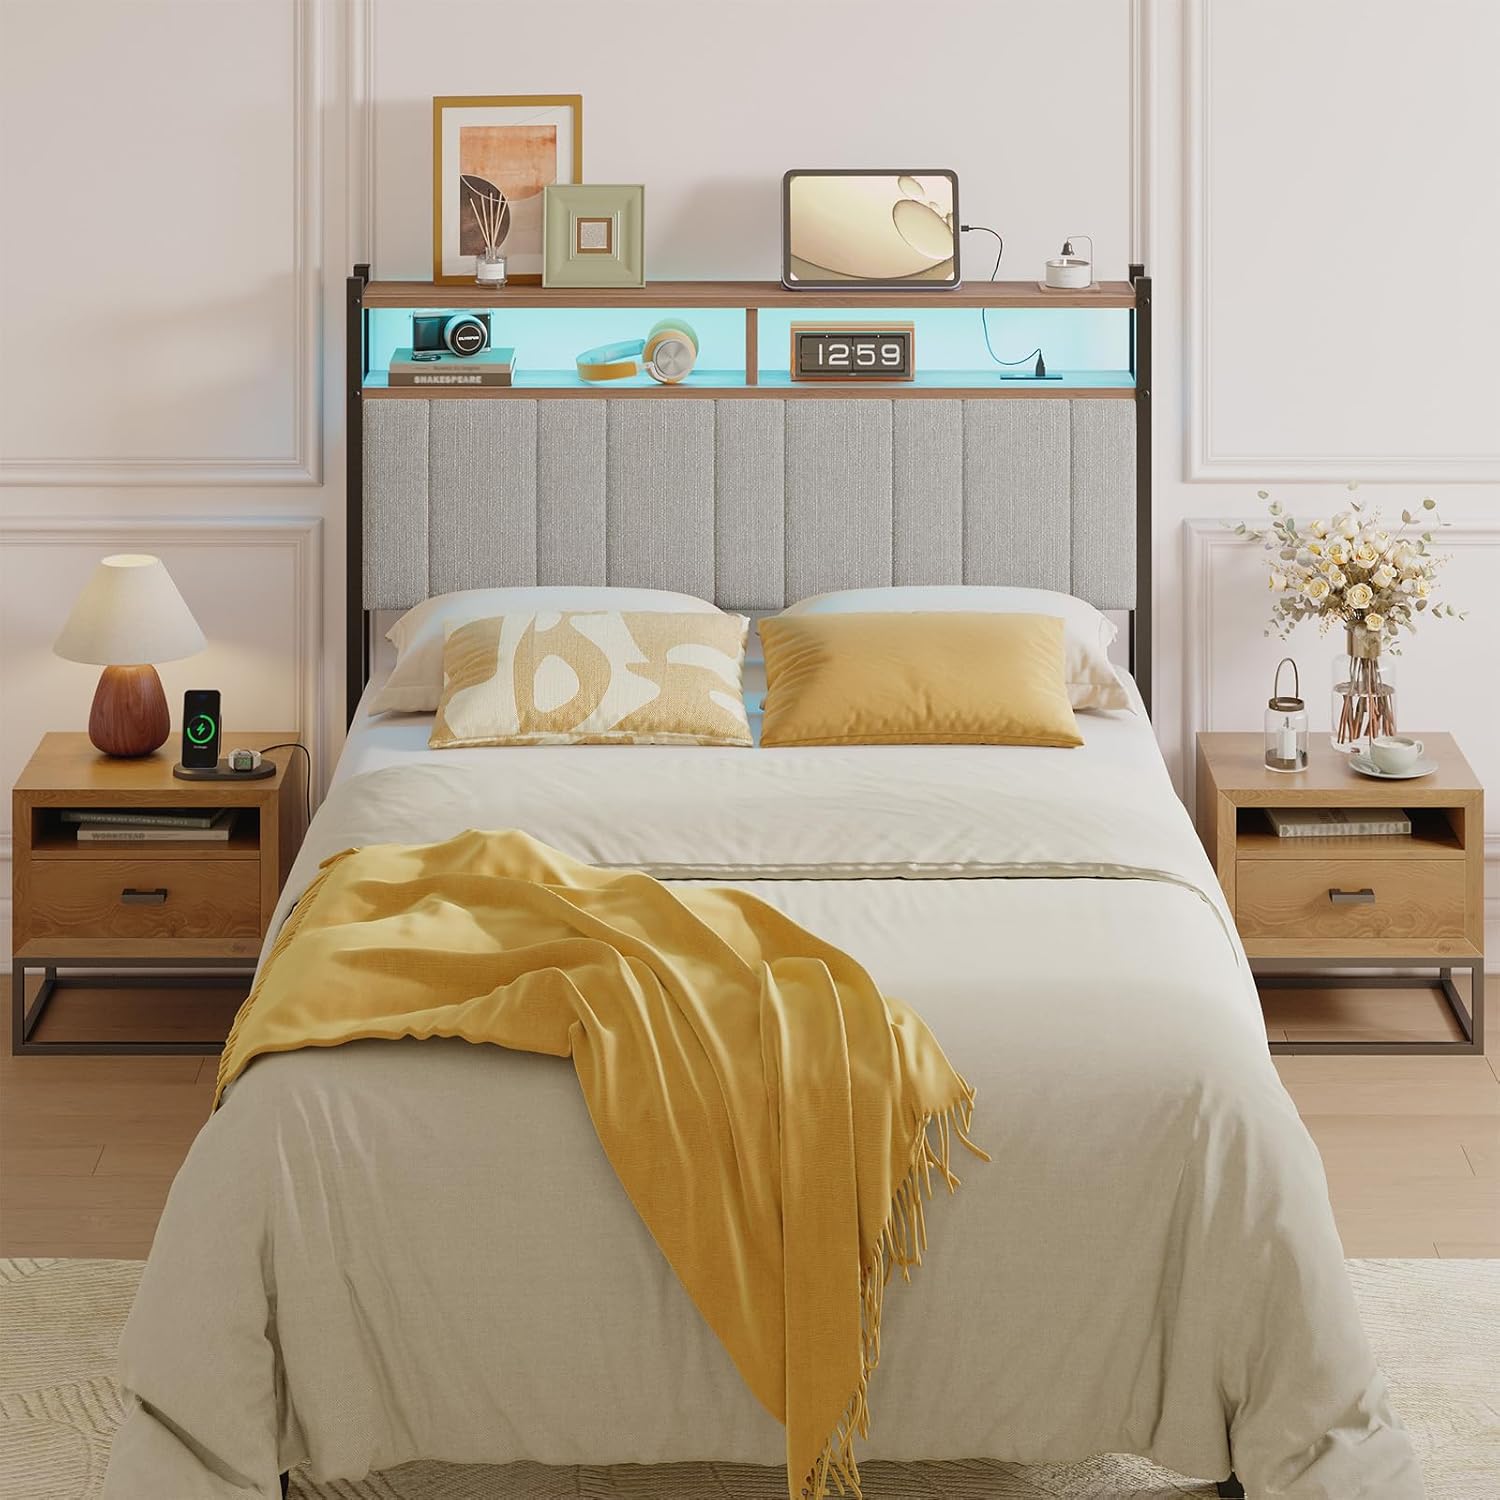
Utilizing the Storage Shelf
The top wooden shelf provides convenient storage for small items such as books, glasses, or decorative pieces. Ensure items are placed securely and do not obstruct the power outlets or fall off easily.
LED Light with Remote Control (if applicable)
If your model includes an LED light strip, it can be controlled via a remote. Refer to the separate instructions for the LED light for specific functions like color change, brightness adjustment, and modes. Ensure the LED light is properly connected to the headboard's power source.
Maintenance
Regular maintenance will help prolong the life and appearance of your headboard.
- Cleaning the Frame: Wipe the metal and wood surfaces with a soft, damp cloth. Avoid harsh chemicals or abrasive cleaners that could damage the finish.
- Cleaning the Upholstery: For the upholstered panel, use a soft brush or vacuum cleaner with an upholstery attachment to remove dust and debris. For spills, blot immediately with a clean, dry cloth. For stubborn stains, consult a professional upholstery cleaner or use a mild fabric cleaner according to its instructions, testing on an inconspicuous area first.
- Electrical Components: Keep the power outlets and USB ports clean and free of dust. Do not attempt to clean them with liquids while plugged in.
- Fastener Check: Periodically check all bolts and screws to ensure they remain tight. Retighten as necessary to maintain stability.
Troubleshooting
If you encounter issues with your headboard, refer to the following common solutions:
| Problem | Possible Cause | Solution |
|---|---|---|
| Headboard feels wobbly or unstable. | Loose fasteners; incorrect attachment to bed frame. | Check and tighten all assembly bolts and screws. Ensure the headboard is securely attached to your bed frame using the appropriate hardware and adjustable holes. |
| Integrated outlets are not providing power. | Headboard power cord not plugged in; wall outlet not working; tripped circuit breaker; faulty power strip. | Verify the headboard's power cord is fully plugged into a functional wall outlet. Test the wall outlet with another device. Check your home's circuit breaker. If the issue persists, contact customer support. |
| LED light not working. | Loose connection; remote control battery dead; faulty LED strip. | Check all connections for the LED light strip. Replace the remote control battery. If the issue continues, contact customer support. |
Specifications
| Feature | Detail |
|---|---|
| Brand | Pinmoco |
| Model Number | B1100137A-GREY |
| Size | Full (Grey) |
| Product Dimensions (W x H x D) | 54.7" x 42.13" x 6.3" (139cm x 107cm x 16cm) |
| Item Weight | 34.8 pounds |
| Color | White (Upholstery color may vary by specific model/variant) |
| Included Components | Assembly Guide, Headboard components, Power strip |
| Special Features | Integrated Outlets, USB Ports, Storage Shelf, Adjustable Height, LED Light with Remote Control |
Warranty and Support
For warranty information, please refer to the documentation provided at the time of purchase or contact your retailer. Pinmoco stands behind the quality of its products.
If you require further assistance, have questions about assembly, or need to report a missing/damaged part, please contact Pinmoco customer support through their official channels. You can often find contact information on the brand's website or through your purchase platform.
Visit the Pinmoco Store on Amazon for more information.