Introduction
This manual provides detailed instructions for the setup, operation, maintenance, and troubleshooting of your VIDVIS SV-TCNW Trail Camera. Please read this manual thoroughly before using the camera to ensure optimal performance and longevity of the device. Keep this manual for future reference.
Package Contents
Verify that all items listed below are included in your package:
- VIDVIS WiFi Trail Camera (1)
- Solar Panel (1)
- 32GB Micro SD Card (1)
- Installation Strap (1)
- USB Type-C Cable (1)
- Metal Bracket (1)
- Screws (4)
- Rubber Plugs (4)
- Metal Base (1)
- User Manual (1)

Figure 1: Included components of the VIDVIS Trail Camera package.
Product Overview
The VIDVIS SV-TCNW is a high-performance trail camera designed for outdoor monitoring. It features 4K video recording and 64MP photo capabilities, enhanced night vision, and a solar power system for extended operation.
Key Features:
- UHD 4K Video & 64MP Photos: Capture clear images and videos with a 5 million lens and 2.0-inch LCD screen.
- Advanced Night Vision: Equipped with 850nm low-glow infrared lights for clear night recordings up to 65 feet (20 meters).
- Fast Trigger Speed: 0.2-second trigger speed with a 90-degree detection angle and up to 70 feet PIR detection range.
- Solar Power & Rechargeable Battery: Features a built-in 5000mAh rechargeable battery and includes a portable solar panel for continuous power.
- WiFi & Bluetooth Connectivity: Connects to the "TrailCam Go" App for viewing and downloading media within 49 feet (Note: Does not support home WiFi connection).
- IP66 Waterproof Rating: Designed to withstand harsh outdoor conditions, including temperatures from -15°C to 60°C (-5°F to 140°F).
- Included 32GB SD Card: Supports MicroSD cards up to 256GB with loop recording functionality.
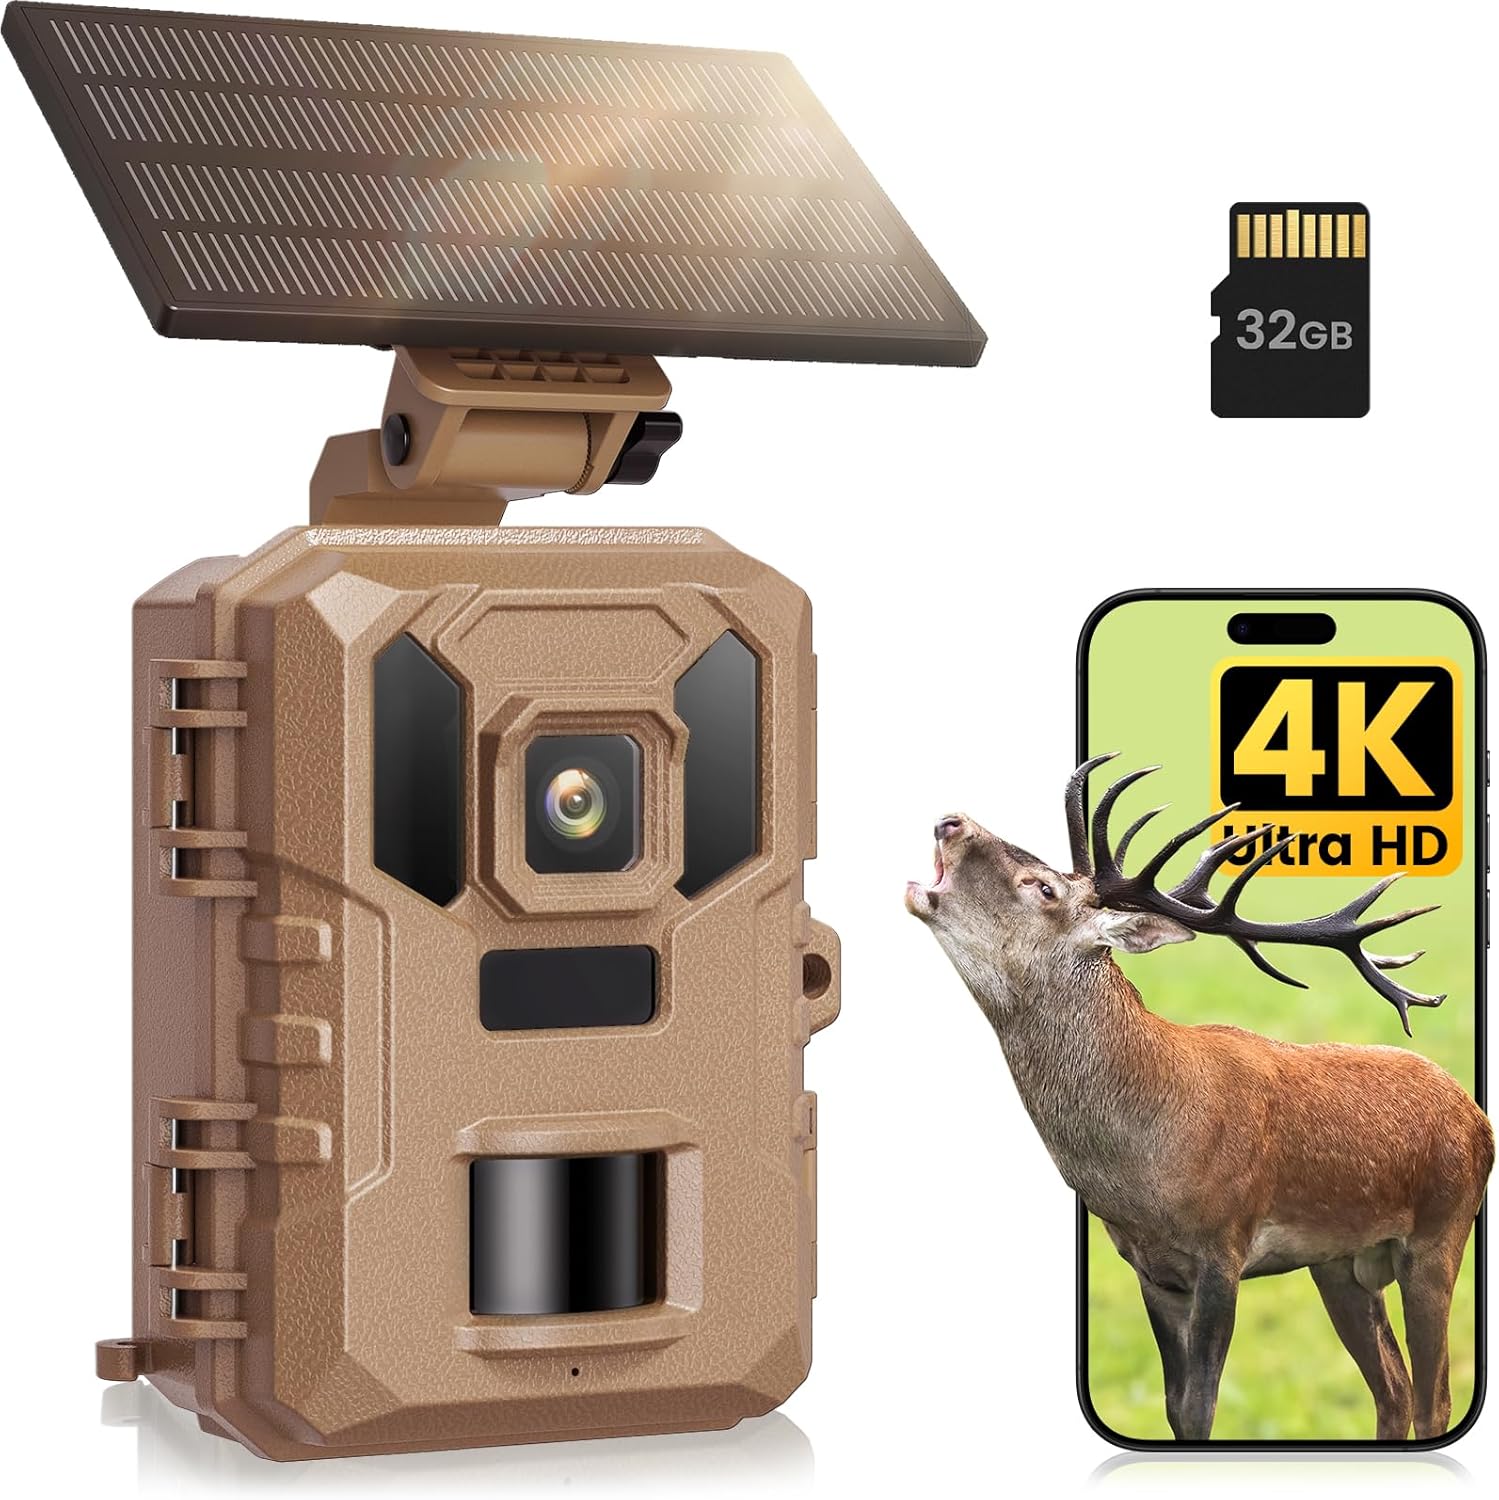
Figure 2: VIDVIS Trail Camera SV-TCNW with solar panel and key features highlighted.

Figure 3: Visual representation of 4K video and 64MP photo quality.

Figure 4: The 2-inch color LCD screen and loop recording feature.
Setup
1. SD Card Installation and Formatting
- Open the camera casing.
- Insert the included 32GB Micro SD card into the designated slot. Ensure it is inserted correctly until it clicks into place.
- Turn the camera to 'ON' mode.
- Access the camera's menu and navigate to the 'Format SD Card' option. Confirm to format the card. This prepares the card for optimal use with the camera.
2. Powering the Camera
The camera is powered by a built-in 5000mAh rechargeable battery and can be supplemented by the included solar panel.
- Initial Charge: Before first use, fully charge the built-in battery using the provided USB Type-C cable and a standard USB power adapter (not included).
- Solar Panel Connection: Connect the solar panel to the camera's power input port. Position the solar panel to receive maximum direct sunlight for continuous charging.

Figure 5: Powering options for the trail camera, including solar and direct charging.

Figure 6: Solar panel setup for extended outdoor operation.
3. Mounting the Camera
Use the included installation strap or metal bracket to secure the camera in your desired location.
- Strap Mounting: Thread the strap through the camera's mounting slots and secure it around a tree or pole.
- Bracket Mounting: Use the metal bracket, screws, and rubber plugs to mount the camera to a wall or other flat surface. Adjust the bracket for optimal camera angle.
4. Initial Settings
After powering on, use the camera's internal menu to configure basic settings:
- Set the current date and time.
- Select your preferred recording mode (Photo, Video, Photo+Video).
- Adjust photo resolution (e.g., 64MP) and video resolution (e.g., 4K).
- Configure PIR sensitivity and trigger interval.

Figure 7: Quick installation and initial setup steps.
Operating the Camera
1. Recording Modes
The camera supports several recording modes:
- Photo Mode: Captures still images when motion is detected.
- Video Mode: Records video clips when motion is detected.
- Photo + Video Mode: Captures a still image followed by a video clip upon motion detection.
- Time Lapse Mode: Captures photos or videos at set intervals, regardless of motion. Note: Motion detection is disabled in this mode and it consumes more power.

Figure 8: Time Lapse Mode functionality.
2. Motion Detection and Trigger Speed
The camera features a rapid 0.2-second trigger speed and a 90-degree wide-angle lens, ensuring quick capture of wildlife. The PIR detection range extends up to 70 feet.

Figure 9: Illustration of the 0.2-second trigger speed.

Figure 10: Trigger speed comparison and wide-angle detection.
3. Night Vision
The camera utilizes 850nm low-glow infrared LEDs to capture clear images and videos in complete darkness, with a night vision range of up to 65 feet (20 meters).

Figure 11: Night vision capabilities with 850nm IR LEDs.

Figure 12: Crystal clear night vision recording.
4. WiFi and Bluetooth Connection & App Control
The camera features built-in WiFi and Bluetooth for connection to the "TrailCam Go" app on your smartphone. This allows for remote viewing, downloading, and sharing of media within a range of approximately 49 feet (15 meters).
Important Note: The camera does not support connection to home WiFi networks. It establishes a direct connection with your smartphone via its own WiFi signal.

Figure 13: WiFi and App control for live viewing and media management.

Figure 14: Step-by-step guide for WiFi connection via the app.

Figure 15: Remote access and control via the 'TrailCam Go' app.
5. Viewing and Downloading Media
You can view and download captured photos and videos using three methods:
- Via "TrailCam Go" App: Connect your smartphone to the camera's WiFi/Bluetooth and use the app's gallery function.
- Via USB Cable: Connect the camera directly to a computer using the provided USB Type-C cable.
- Via SD Card Reader: Remove the Micro SD card from the camera and insert it into an SD card reader connected to a computer (SD card reader not included).

Figure 16: Various methods for media playback.
6. Customizing Work Time
You can set specific work hours for the camera to operate, which helps conserve battery life and focus on critical monitoring periods.

Figure 17: Customizing camera work time to optimize battery usage.
7. Map Location Tracking
The app allows you to mark the camera's location on a map for easy navigation and record-keeping. Note: This feature does not provide real-time tracking and should not be relied upon for theft recovery.

Figure 18: Marking camera locations on a map via the app.
Maintenance
Proper maintenance ensures the longevity and optimal performance of your trail camera.
- Cleaning: Regularly clean the camera lens, PIR sensor, and solar panel with a soft, dry cloth. Avoid abrasive materials or harsh chemicals.
- Battery Care: Ensure the built-in battery is regularly charged, especially if the solar panel is not consistently exposed to sunlight. Avoid fully depleting the battery for extended periods.
- SD Card Management: Periodically review and back up your media. Format the SD card regularly (e.g., monthly) to maintain performance and prevent data corruption. The camera supports loop recording, overwriting older files when the card is full.
- Waterproofing: Ensure all latches and covers are securely closed to maintain the IP66 waterproof rating. While designed for outdoor use, avoid submerging the camera.
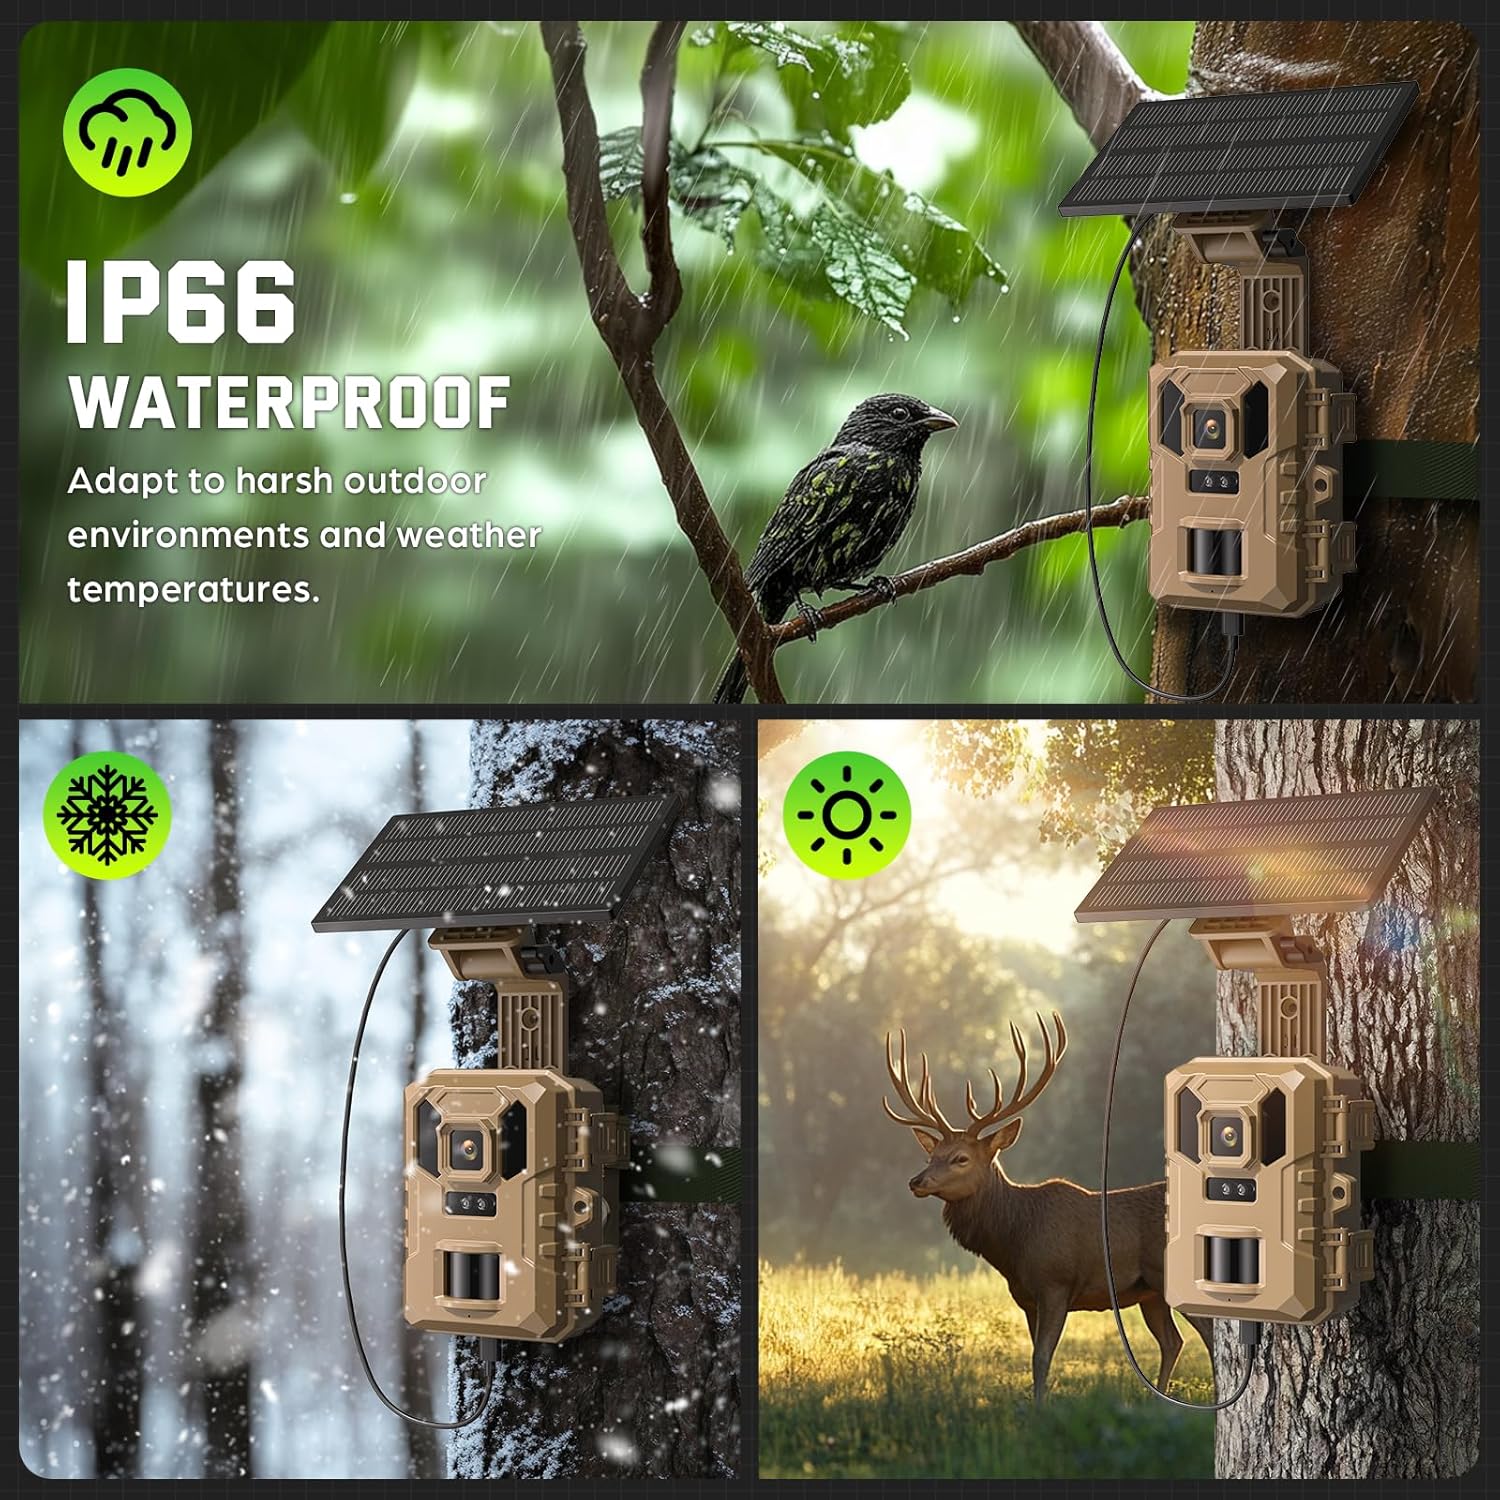
Figure 19: The camera's IP66 waterproof design for various weather conditions.

Figure 20: Durability and weather resistance of the trail camera.
Troubleshooting
If you encounter issues with your VIDVIS Trail Camera, refer to the following common problems and solutions:
| Problem | Possible Cause | Solution |
|---|---|---|
| Camera not powering on | Low or depleted battery; Incorrect battery installation. | Charge the built-in battery fully. Ensure the solar panel is connected and receiving sunlight. |
| Poor image/video quality | Dirty lens; Incorrect resolution settings; Insufficient light (night vision). | Clean the lens. Check camera settings for desired resolution. Ensure night vision is active in low light. |
| Motion detection not working | PIR sensor blocked; Incorrect sensitivity settings; Camera in Time Lapse mode. | Clear any obstructions from the PIR sensor. Adjust PIR sensitivity in settings. Ensure camera is not in Time Lapse mode if motion detection is desired. |
| Cannot connect to App via WiFi/Bluetooth | Out of range; Obstructions; Incorrect connection procedure. | Ensure you are within 49 feet (15 meters) of the camera. Minimize obstructions (e.g., glass, thick walls). Follow the WiFi connection guide in the 'Operating' section. Remember, it does not connect to home WiFi. |
| SD card error | SD card not formatted; Corrupted card; Incompatible card. | Format the SD card in the camera. Try a different compatible Micro SD card (up to 256GB). |
Specifications
| Feature | Detail |
|---|---|
| Model Name | SV-TCNW |
| Video Capture Resolution | 4K |
| Maximum Webcam Image Resolution | 64 MP |
| Connectivity Technology | Wireless (Bluetooth, Wi-Fi) |
| Power Source | Battery-Powered, Corded Electric, Solar Power |
| Built-in Battery | 5000mAh |
| Trigger Speed | 0.2 seconds |
| Viewing Angle | 90 Degrees |
| PIR Detection Range | Up to 70 feet |
| Night Vision Range | 20 Meters (65 feet) |
| Infrared LEDs | 850nm Low-glow |
| Water Resistance Level | IP66 Waterproof |
| Operating Temperature | -15°C to 60°C (-5°F to 140°F) |
| Flash Memory Installed Size | 32 GB (included) |
| Flash Memory Supported Size Maximum | 256 GB (Micro SD) |
| Product Dimensions | 4.4 x 3.5 x 2.9 inches |
| Item Weight | 14.2 ounces (0.89 Pounds) |
Warranty and Support
VIDVIS is committed to providing quality products and customer satisfaction.
- 1-Year Warranty: Your VIDVIS Trail Camera is covered by a 1-year manufacturer's warranty from the date of purchase.
- 30-Day Return Policy: You may return the product within 30 days of purchase according to the retailer's return policy.
- Lifetime Customer Support: For any questions, technical assistance, or support needs, please contact VIDVIS customer service.
For further assistance, please visit the official VIDVIS store or contact their customer support channels.


