Introduction
Thank you for purchasing the hygger Aquarium Cooling Fan. This manual provides essential information for the safe and efficient operation of your new cooling fan. Please read it thoroughly before use and retain it for future reference.
Product Features
- Temperature Control: This compact cooling fan is designed for effective summer temperature management. It can lower water temperature by approximately 3°C at 30°C (80% RH). Cooling efficiency varies with usage and environmental conditions; higher humidity reduces effectiveness, while lower humidity increases it.
- 5-Speed Adjustment: The fan offers 5 distinct speed settings, allowing for adaptable use across various environmental conditions and seasons.
- 5 Timer Settings: An integrated timer function provides options for 0.5, 1, 2, 4, or 12 hours of operation via the external controller. This feature enables automatic fan shutdown, eliminating the need for manual intervention.
- 180° Angle Adjustment: Compatible with both frameless and framed aquariums up to 30cm, the fan's airflow angle can be adjusted by 180° to ensure wide-area cooling.
- Independent Switch: The fan unit features an independent side switch for convenient power control, removing the necessity to unplug the power adapter each time.
- Easy Installation: Designed with a simple clip-on mechanism, the fan is suitable for aquarium walls up to 11mm thick. This design simplifies setup compared to more complex chiller systems.
- Evaporative Cooling: The fan operates by utilizing evaporative cooling to reduce water temperature. This process increases water evaporation from the aquarium, necessitating regular monitoring of water levels and replenishment. Frequent water temperature checks are also recommended to prevent overcooling.
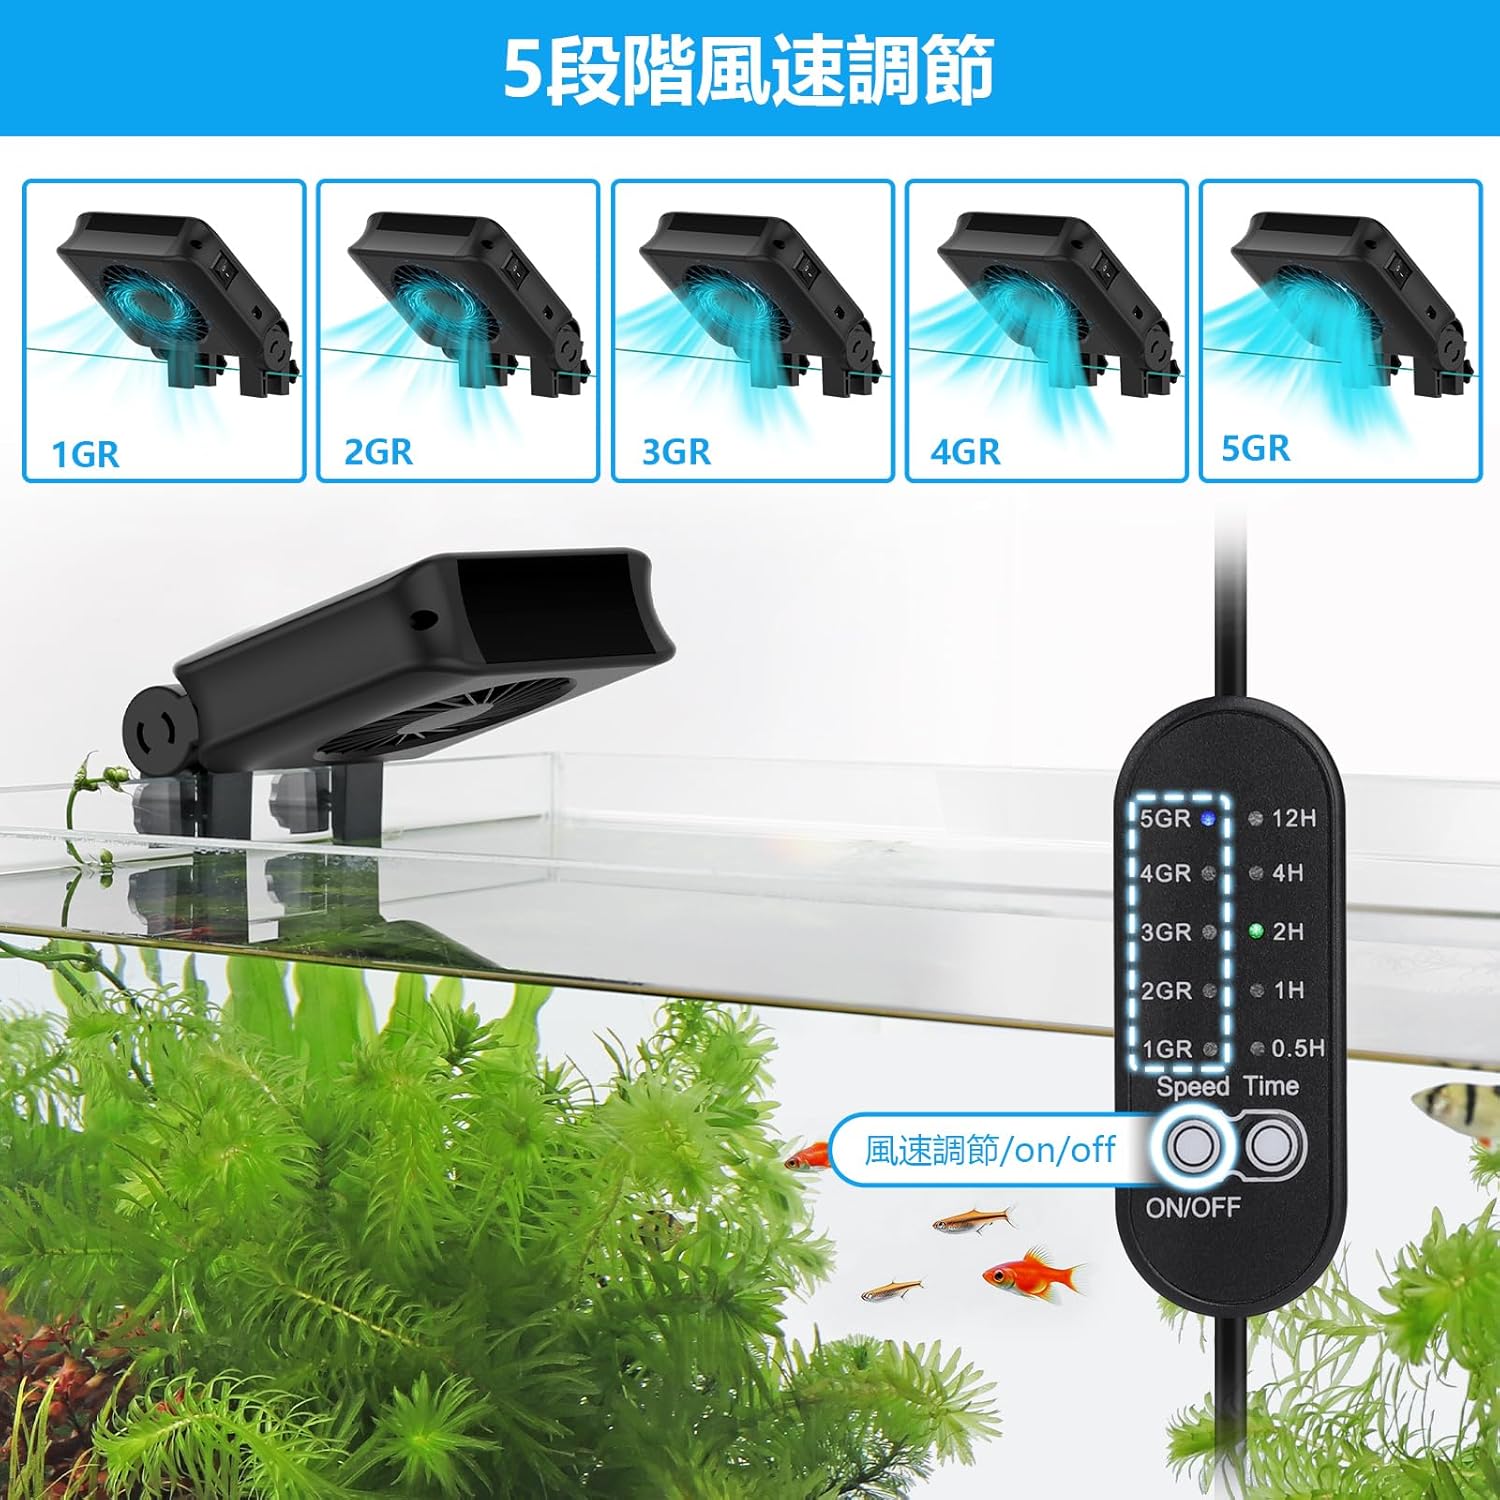
Image: Fan controller displaying 5 speed settings.
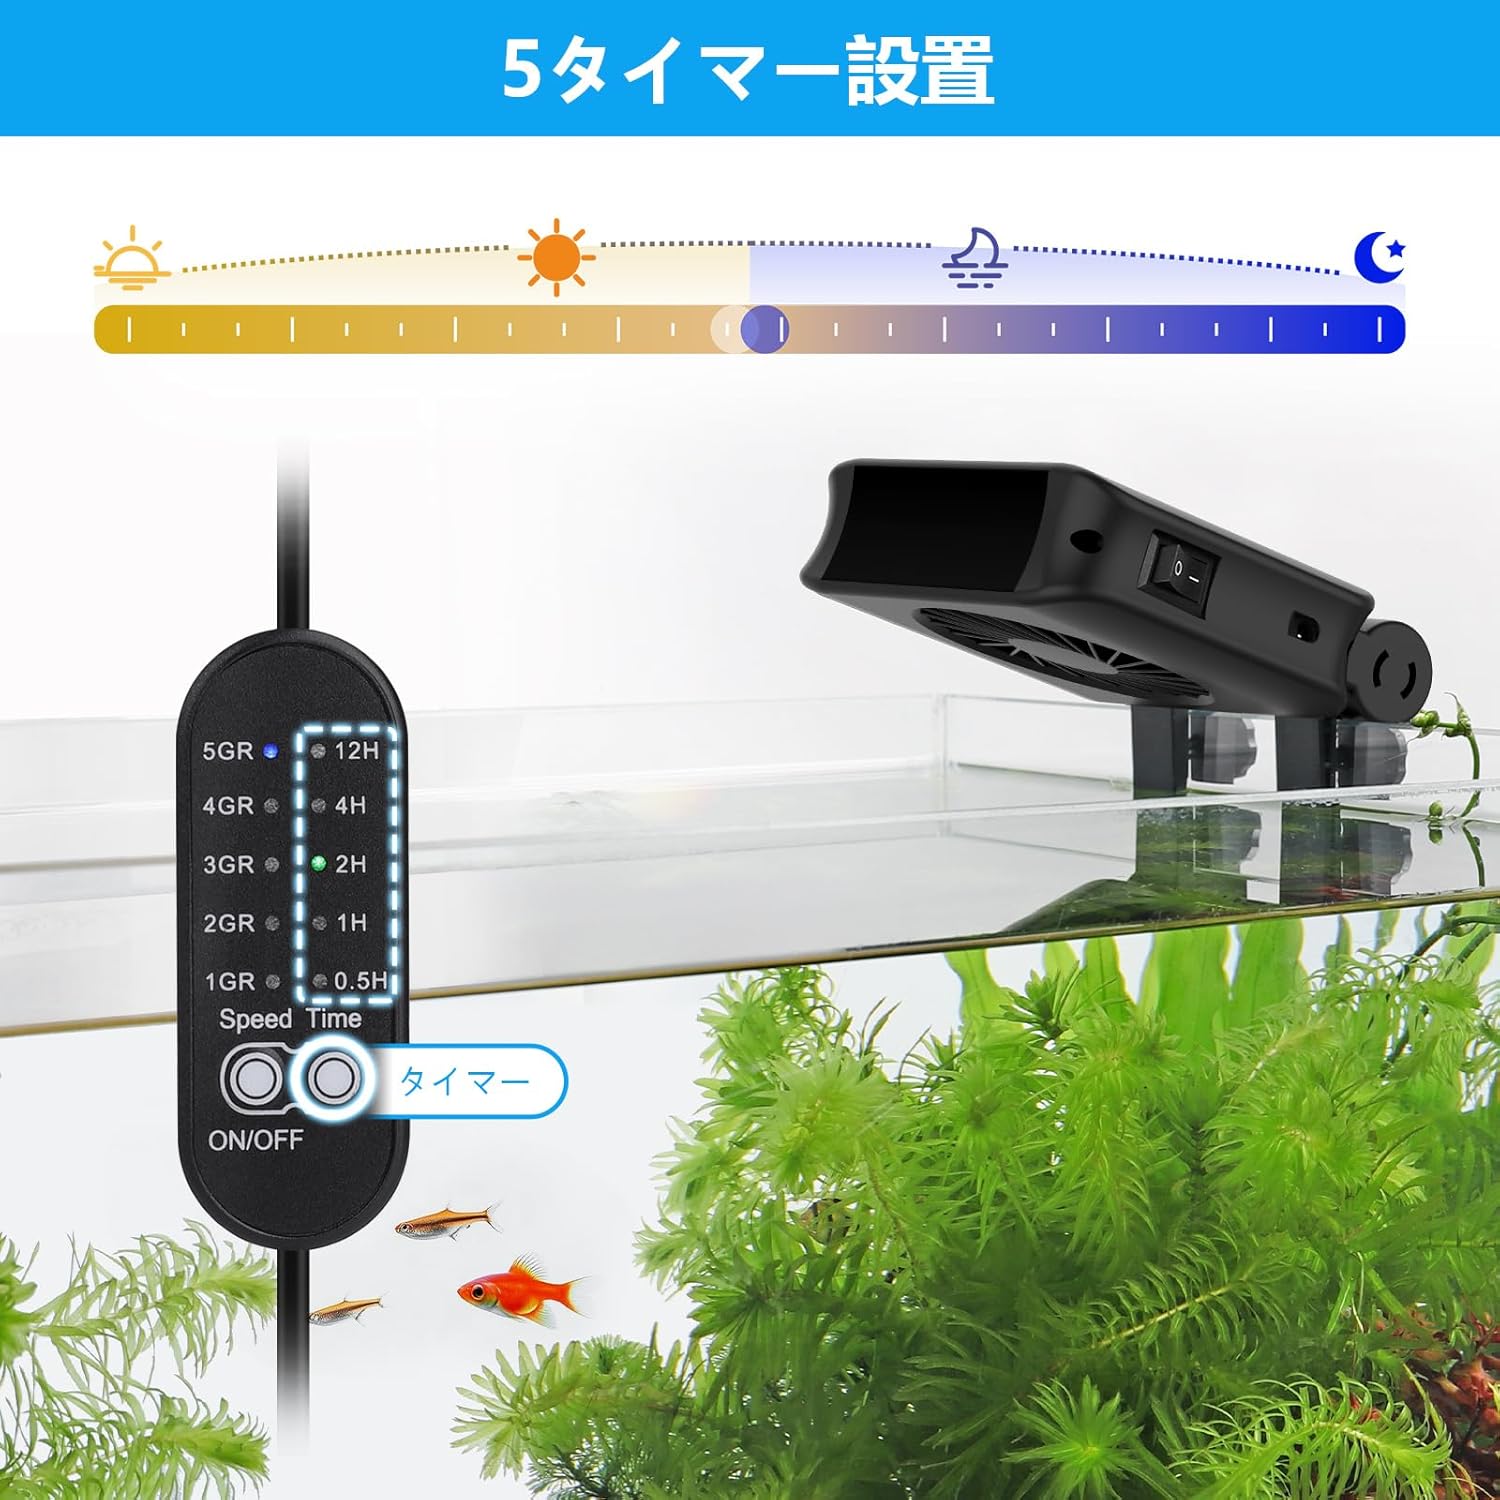
Image: Fan controller displaying 5 timer settings.

Image: Fan installed on an aquarium, demonstrating cooling airflow.

Image: Fan showing 180-degree angle adjustment and clip installation mechanism.

Image: Close-up of the fan's blades and motor.
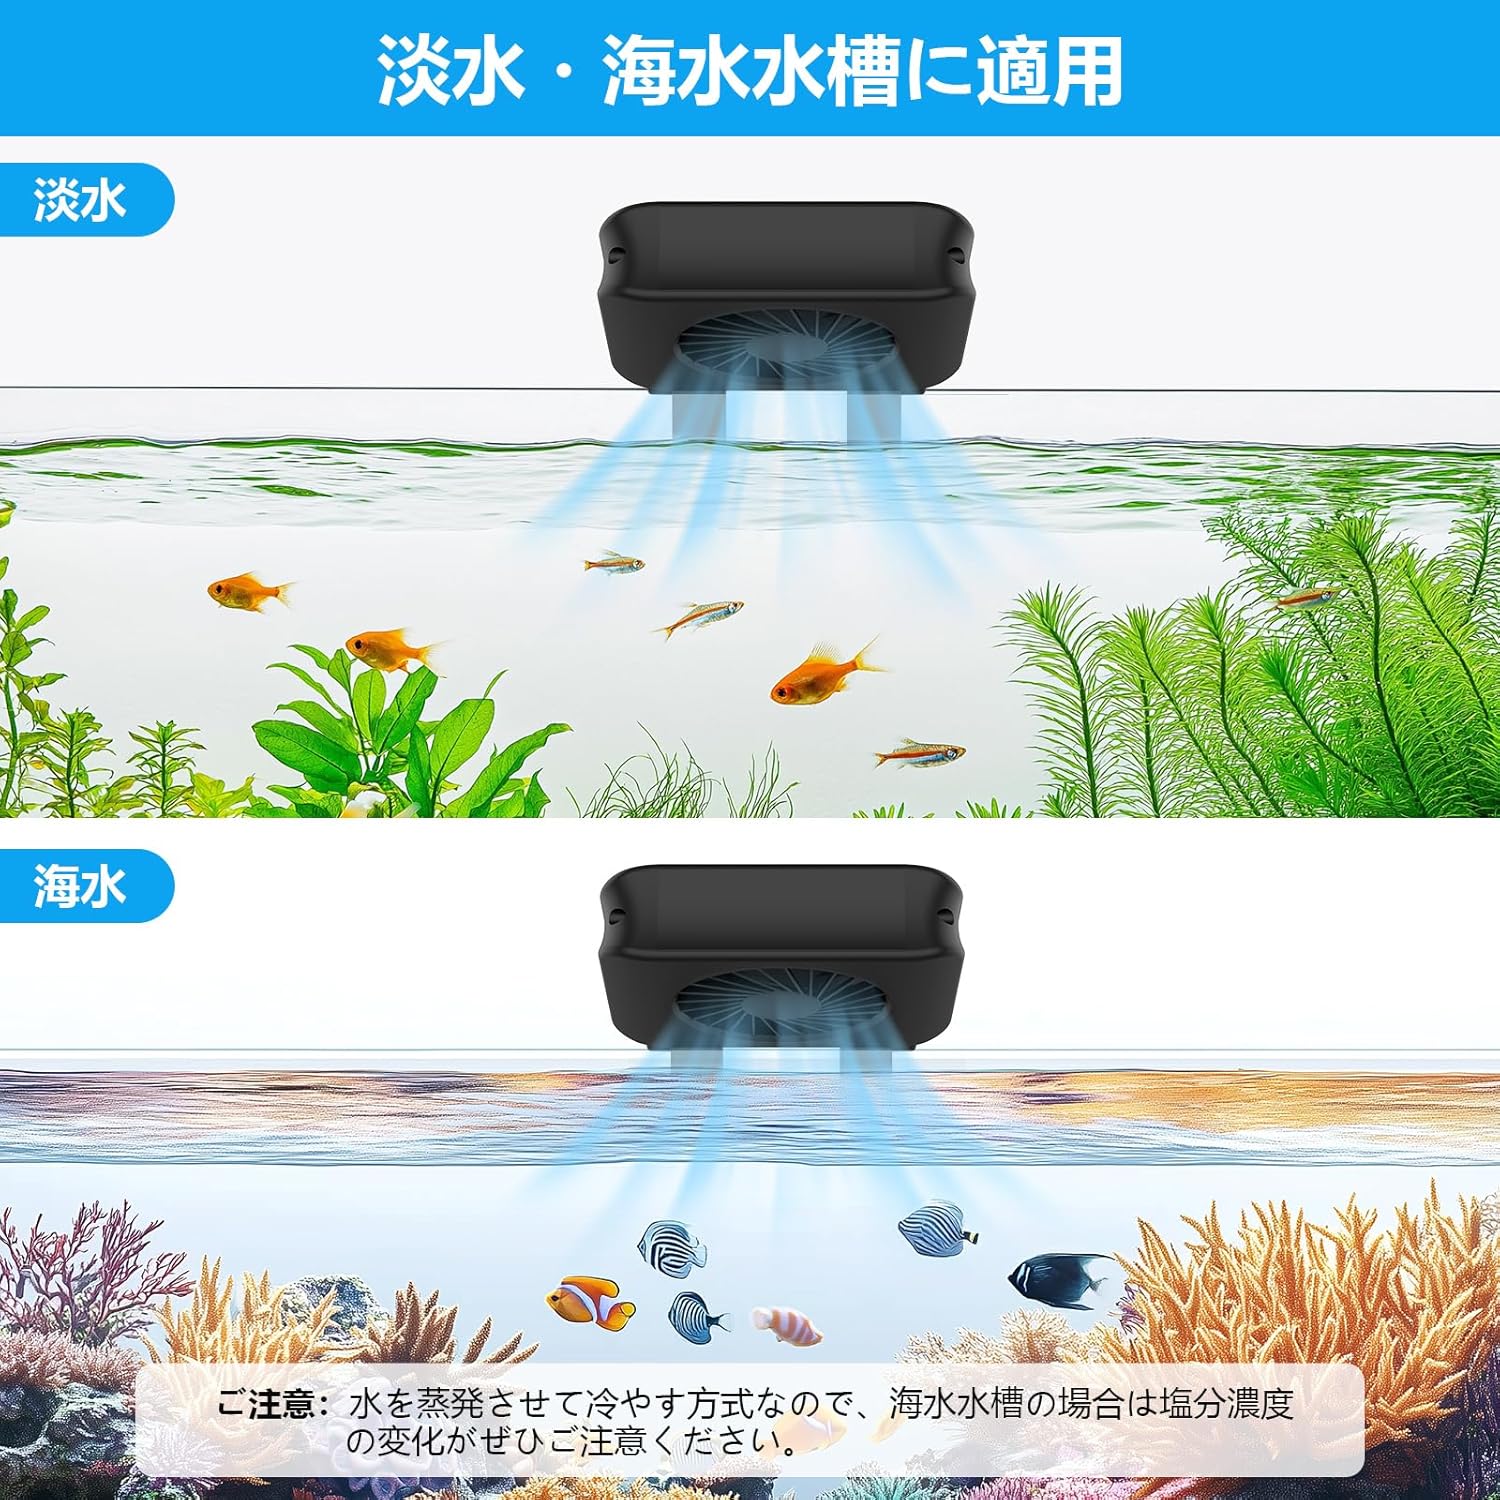
Image: Fan shown in use with both freshwater and saltwater aquariums.
Package Contents
- Aquarium Cooling Fan (1 unit)
- External Controller
- Power Adapter
- Instruction Manual
Safety Instructions
To ensure safe operation and prevent damage, please observe the following safety guidelines:
- Ensure the power supply voltage matches the fan's requirements before plugging in.
- Do not immerse the fan, controller, or power adapter in water. This product is not submersible.
- Keep the device out of reach of children and pets.
- Always unplug the fan from the power outlet before performing any maintenance, cleaning, or if any malfunction occurs.
- Do not operate the fan if the power cord, plug, or any part of the unit is damaged. Contact customer support for assistance.
- Ensure adequate ventilation around the fan to prevent overheating.
- This product is designed for indoor aquarium use only.
Setup
Installation
- Identify a suitable location on your aquarium rim. The fan's clip is designed for tank walls up to 11mm thick.
- Loosen the adjustment screws on the fan's clip.
- Position the fan securely on the aquarium rim, ensuring the fan blades are clear of obstructions and the airflow is directed towards the water surface.
- Tighten the adjustment screws to firmly secure the fan in place.
- Adjust the fan's angle (up to 180°) to optimize airflow across the water surface for maximum cooling efficiency.
Power Connection
- Connect the fan cable to the designated port on the external controller.
- Connect the power adapter to the external controller.
- Plug the power adapter into a suitable electrical outlet.
Operating Instructions
Power On/Off
Use the independent switch located on the side of the fan unit to turn the device on or off. This allows for quick control without disconnecting the power adapter.
Speed Adjustment
The external controller provides 5 fan speed settings. Press the speed button on the controller to cycle through the available settings (indicated as 1GR to 5GR) to achieve your desired airflow.
Timer Function
To utilize the timer function, press the timer button on the external controller. You can select operating durations of 0.5, 1, 2, 4, or 12 hours. The fan will automatically power off once the selected time has elapsed.
Maintenance
Regular maintenance ensures optimal performance and longevity of your cooling fan.
- Regular Cleaning: Always unplug the fan before cleaning. Use a soft, dry cloth to gently wipe the fan blades and housing. Do not use abrasive cleaners, solvents, or immerse the unit in water.
- Water Level Monitoring: As the fan uses evaporative cooling, water in your aquarium will evaporate faster than usual. Regularly check the water level and replenish it with dechlorinated water to maintain stable water parameters.
- Water Temperature Monitoring: Frequently monitor the aquarium water temperature using a reliable thermometer to prevent overcooling, especially during cooler periods or when the fan is set to higher speeds for extended durations.
Troubleshooting
Refer to the table below for common issues and their solutions.
| Problem | Possible Cause | Solution |
|---|---|---|
| Fan not turning on | No power, switch off, faulty connection | Check power adapter connection, ensure fan's independent switch is ON, test power outlet, ensure controller is connected correctly. |
| Insufficient cooling | Low fan speed, obstructed airflow, high ambient humidity | Increase fan speed, ensure no obstructions block airflow, adjust fan angle, note that high humidity reduces evaporative cooling efficiency. |
| Excessive water evaporation | Normal operation for evaporative cooling | Regularly monitor water levels and replenish as needed. This is an expected effect of the cooling mechanism. |
| Fan is noisy or vibrating | Loose mounting, dust buildup on blades | Ensure the fan is securely mounted to the aquarium rim. Unplug and gently clean fan blades if dust or debris is present. |
Specifications
| Feature | Detail |
|---|---|
| Model Number | BJP-HG051 |
| Color | Black |
| Fan Quantity | 1 Fan |
| Applicable Tank Wall Thickness | Up to 11mm |
| Speed Settings | 5 levels |
| Timer Settings | 0.5h, 1h, 2h, 4h, 12h |
| Angle Adjustment | 180° |
| Special Use | Indoor Aquarium |
| Battery Use | No |
Warranty and Support
hygger offers a 1-year warranty from the date of purchase against manufacturing defects. If a problem occurs, hygger is committed to providing sincere and responsible support for one year from the purchase date. For technical support, warranty claims, or any inquiries, please contact hygger customer service through their official website or the retailer where the product was purchased. Please retain your proof of purchase for warranty validation.