1. Product Overview
The CHEOTIME IP65 Outdoor Digital Timer Box is a versatile and durable solution designed to automate the operation of various electrical devices. With its robust IP65-rated enclosure, it is built to withstand challenging outdoor conditions, including rain, dust, and extreme temperatures, ensuring reliable performance year-round. This programmable timer allows you to set up to 16 custom ON/OFF schedules daily or weekly, providing precise control for applications such as landscape lighting, billboards, streetlights, and irrigation systems. Its intuitive interface and built-in battery backup for settings retention make it an efficient tool for optimizing energy consumption and reducing utility costs.

Figure 1.1: Front view of the IP65 Outdoor Digital Timer Box with transparent cover closed.
2. Key Features
- Robust Weatherproof Design: Engineered with an IP65-rated enclosure, this timer withstands rain, dust, and extreme temperatures, ensuring reliable operation outdoors year-round. Its durable construction blocks water ingress, making it ideal for landscape lighting, streetlights, or industrial equipment exposed to harsh environments.
- Flexible Daily Automation: Program up to 16 custom on/off cycles daily or weekly, adapting to schedules for lights, speakers, or heating systems. The intuitive interface allows quick setup without manual adjustments, while a built-in battery backup retains settings during power outages.
- Energy & Cost Efficiency: Optimize energy use by eliminating unnecessary runtime. Excellent for reducing utility bills in scenarios like warehouse lighting or signage, where precise timing minimizes wasted power.
- Versatile Compatibility: Safely control diverse loads (resistive, inductive, motor-driven) up to 6KW, including streetlights, neon signs, and heating units. Ideal for residential, commercial, or industrial automation.
- Easy Setup: A removable control module and pre-sized wiring holes simplify installation. Includes protective covers and clear instructions for quick, secure setup without professional help.

Figure 2.1: The timer box demonstrating its IP65 rating in an outdoor environment.
3. Package Contents
Please verify that all items listed below are included in your package:
- 1 x Digital Time Switch Box
- 2 x Dust Proof Cover Key
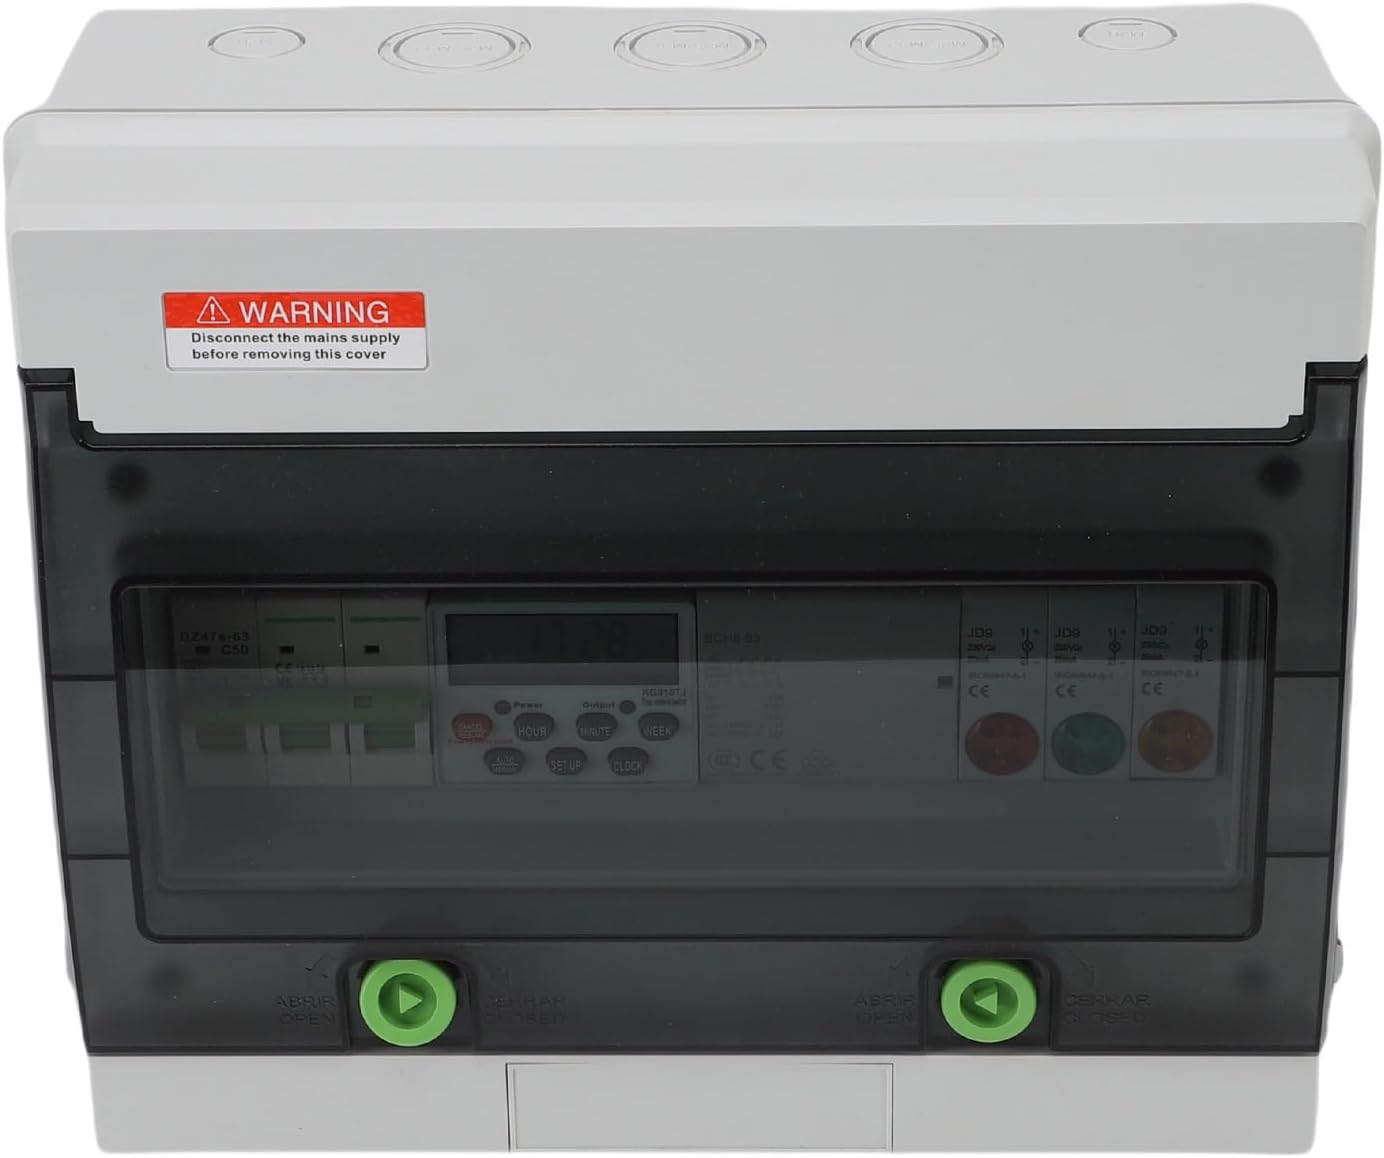
Figure 3.1: Contents of the package, showing the timer box with its internal wiring and the two dust-proof cover keys.
4. Product Specifications
| Attribute | Value |
|---|---|
| Item Type | Digital Time Switch Box |
| Material | ABS, PCV, Pa66 |
| IP Rating (Housing) | IP65 (External), IP50 (Internal) |
| Air Switch Rated Voltage | 400V AC |
| Air Switch Rated Current | 50A |
| Time Controlled Switch Rated Insulation Voltage Ui | AC380V |
| Time Controlled Switch Rated Impulse Withstand Voltage Uimp | AC 1.5kV |
| Rated Control Power Supply Voltage Us | AC50/60Hz 380V |
| Pollution Level | 3 |
| Load Power (Resistive) | 6KW |
| Load Power (Inductive) | 1.8KW |
| Load Power (Motor) | 1.2KW |
| Load Power (Lamp) | 0.9KW |
| Daily Travel Time Error | ±2 seconds |
| Mechanical Life | 100,000 times |
| Electrical Life | 10,000 times |
| Display Power Supply | 1 x 380mAh AAA battery (built-in) |
| Product Dimensions | 27.99 x 23.98 x 12.98 cm |
| Item Weight | 1.95 kg |
5. Setup and Installation
Before beginning installation, ensure the main power supply is disconnected to prevent electrical shock. It is recommended that installation be performed by a qualified electrician.
5.1 Mounting the Timer Box
- Choose a suitable outdoor location that is easily accessible for wiring and programming, yet protected from direct impact.
- Use appropriate mounting hardware (not included) to securely fasten the timer box to a wall or stable surface. Ensure the box is level.
5.2 Wiring Instructions
The timer box is designed for three-phase mains connection. Refer to the internal wiring diagram below for correct connections. Ensure all connections are tight and secure.
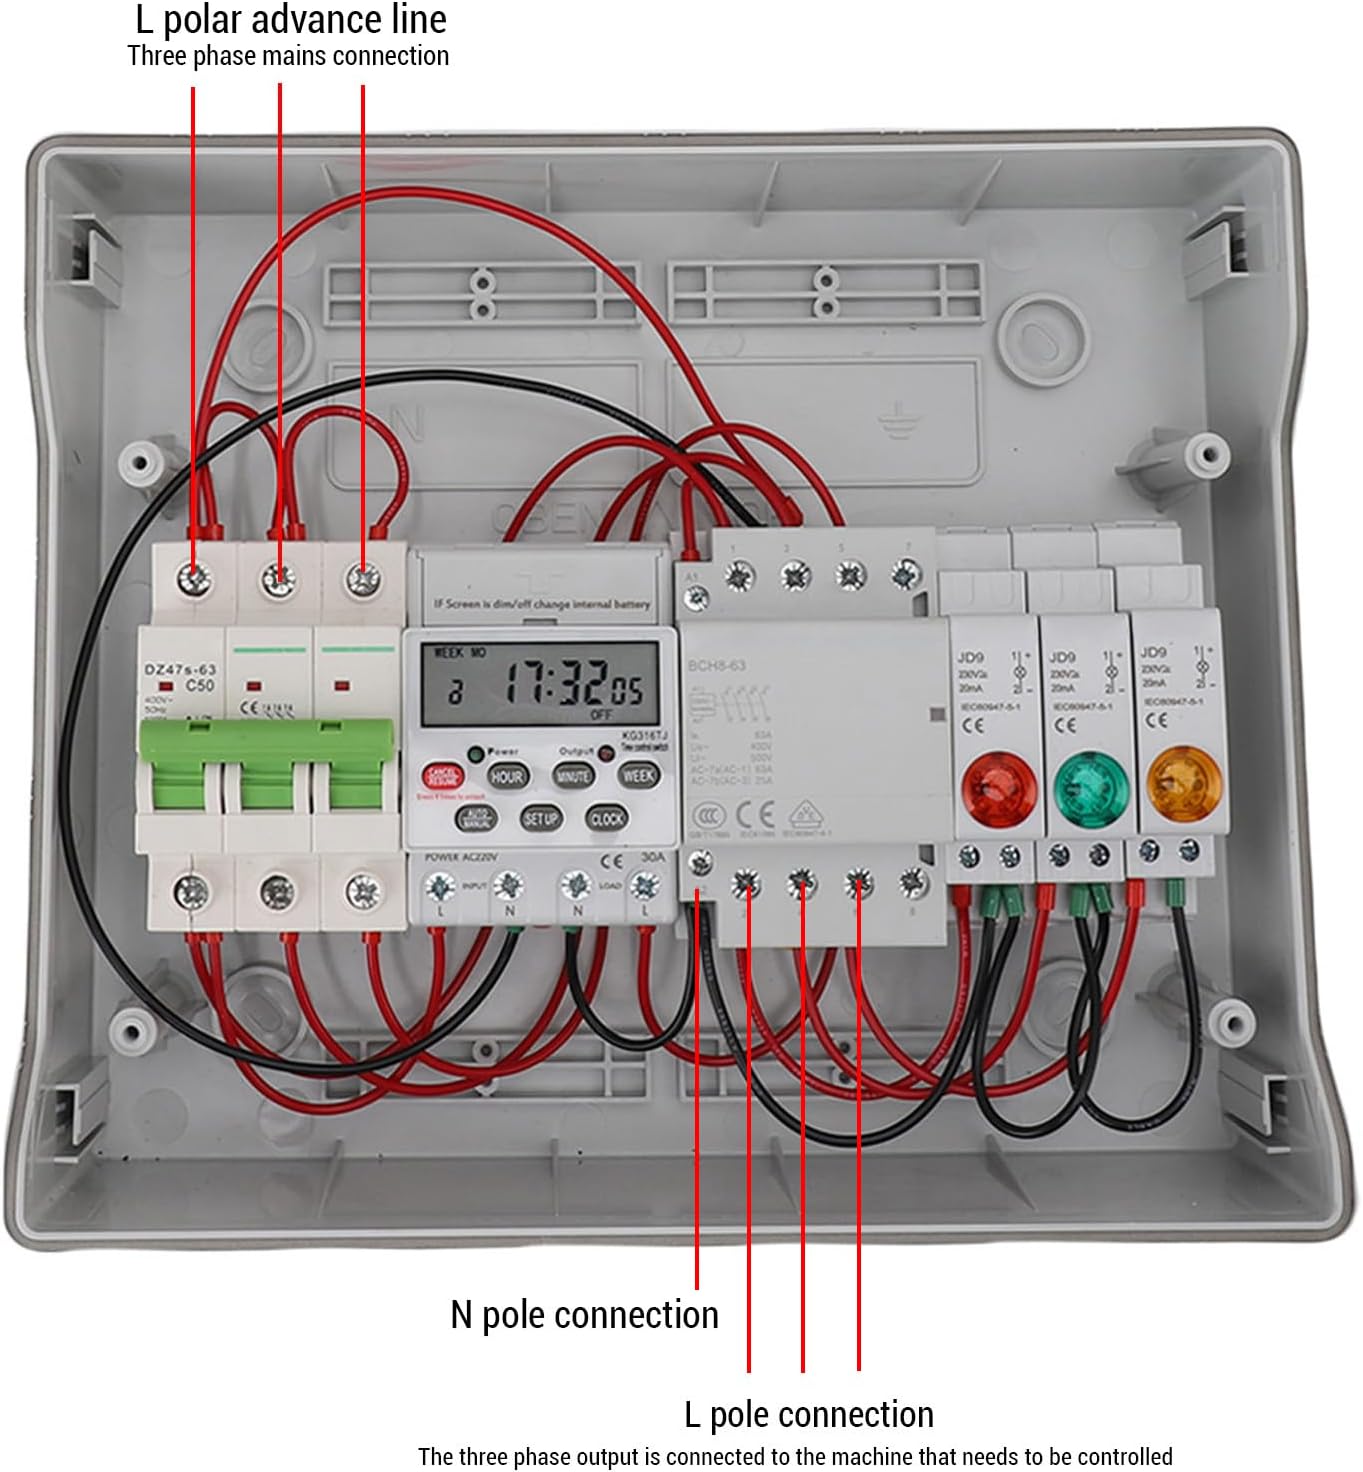
Figure 5.1: Internal wiring diagram showing L polar advance line, N pole connection, and L pole connection points.
- L Polar Advance Line: Connect the incoming live (phase) wires to the designated L polar advance line terminals.
- N Pole Connection: Connect the incoming neutral wire to the designated N pole connection terminal.
- L Pole Connection (Output): Connect the live (phase) wires of the device to be controlled to the L pole connection output terminals.
- Grounding: Ensure proper grounding of the timer box and connected devices according to local electrical codes.
After wiring, close the transparent cover and secure it using the provided dust-proof keys.
6. Operating Instructions
The digital display and control buttons allow for easy programming of the timer. The built-in battery ensures settings are retained even during power outages.

Figure 6.1: Digital display and control buttons (HOUR, MINUTE, WEEK, SETUP, CLOCK, AUTO/MANUAL, CANCEL/RESUME).
6.1 Setting Current Time
- Press the CLOCK button.
- Use the HOUR, MINUTE, and WEEK buttons to set the current hour, minute, and day of the week respectively.
- Press CLOCK again to save the settings.
6.2 Programming ON/OFF Schedules
The timer supports up to 16 ON/OFF programs.
- Press the SETUP button once to enter the first ON program setting (display shows '1 ON').
- Use HOUR, MINUTE, and WEEK buttons to set the desired ON time and day(s) of the week.
- Press SETUP again to enter the first OFF program setting (display shows '1 OFF').
- Use HOUR, MINUTE, and WEEK buttons to set the desired OFF time and day(s) of the week.
- Repeat steps 1-4 for additional ON/OFF programs (up to 16).
- After setting all desired programs, press the CLOCK button to exit programming mode and return to the current time display.
6.3 Manual Override (AUTO/MANUAL)
The AUTO/MANUAL button allows you to switch between automatic mode and manual ON/OFF states.
- Pressing AUTO/MANUAL cycles through: AUTO ON (always on, ignoring programs), AUTO OFF (always off, ignoring programs), and AUTO (follows programmed schedules).
- Ensure the timer is set to AUTO for programmed schedules to function.
6.4 Cancelling Programs
To cancel a specific program, navigate to that program using the SETUP button and then press the CANCEL/RESUME button.
7. Maintenance
The CHEOTIME IP65 Outdoor Digital Timer Box is designed for minimal maintenance due to its durable and weatherproof construction.
- Cleaning: Periodically wipe the exterior of the timer box with a soft, damp cloth to remove dust and dirt. Do not use abrasive cleaners or solvents.
- Inspection: Regularly inspect the wiring connections and the integrity of the enclosure for any signs of damage or wear. Ensure the transparent cover is securely closed to maintain the IP65 rating.
- Battery: The internal AAA battery powers the display and retains settings. If the display becomes dim or settings are lost frequently, the battery may need replacement. Consult a qualified technician for battery replacement.
8. Troubleshooting
| Problem | Solution |
|---|---|
| Device does not turn ON/OFF as programmed. |
|
| Display is blank or dim. |
|
| Timer loses settings after power outage. |
|
| Short circuit protection (SCPD) trips. |
|
9. Warranty and Support
For warranty information, technical support, or service inquiries regarding your CHEOTIME IP65 Outdoor Digital Timer Box, please contact the manufacturer or your point of purchase. Keep your purchase receipt as proof of purchase for any warranty claims.
You can visit the official CHEOTIME store for more information and support: CHEOTIME Store