Outsunny 840-268V80CW
Outsunny 13' x 10' Electric Awning User Manual
Model: 840-268V80CW | Brand: Outsunny
1. Product Overview
The Outsunny Electric Awning provides controllable shade and enhances your outdoor living space. This motorized and electric-powered awning can be operated via a remote controller or manually with a hand crank. It features integrated LED lights for evening use and is constructed with durable, UV40+ resistant materials.

Figure 1: Outsunny Electric Awning installed on a patio.
2. Safety Instructions
- Read all instructions carefully before assembly and installation.
- Ensure the wall where the awning will be mounted is structurally sound and capable of holding at least 75 lbs (34 kg).
- Do not operate the awning in strong winds, heavy rain, or snow. Retract the awning immediately under such conditions to prevent damage.
- Keep hands and loose clothing clear of moving parts during operation.
- Ensure all electrical connections are secure and comply with local electrical codes.
- Do not attempt to modify the awning's structure or electrical components.
3. Package Contents
Before beginning assembly, verify that all parts listed in the included assembly manual are present and undamaged. If any parts are missing or damaged, contact customer support immediately.

Figure 2: Product packaging indicating one package.
4. Setup and Installation
Installation of this electric awning requires careful attention to detail and may require multiple individuals due to its size and weight. It is recommended to thoroughly review the assembly manual provided with the product before starting.
- Wall Preparation: Ensure the mounting surface is flat, sturdy, and capable of supporting the awning's weight (minimum 75 lbs).
- Installation Height: The recommended installation height is between 8.2 and 11.5 feet (2.5 - 3.5 meters) from the ground.
- Clearance: If mounting above a door or window, an additional 11.75 inches (30 cm) of clearance is required above the opening.
- Assembly: Follow the step-by-step instructions in the provided assembly manual. Pay close attention to the alignment of parts, especially when sliding the awning fabric into the groove of the center rod.
- Adjusting Limits: After installation, it is crucial to set the inner and outer stop limits for the motor to prevent overheating and ensure proper retraction and extension. Refer to the specific instructions in your assembly manual for limit adjustment.
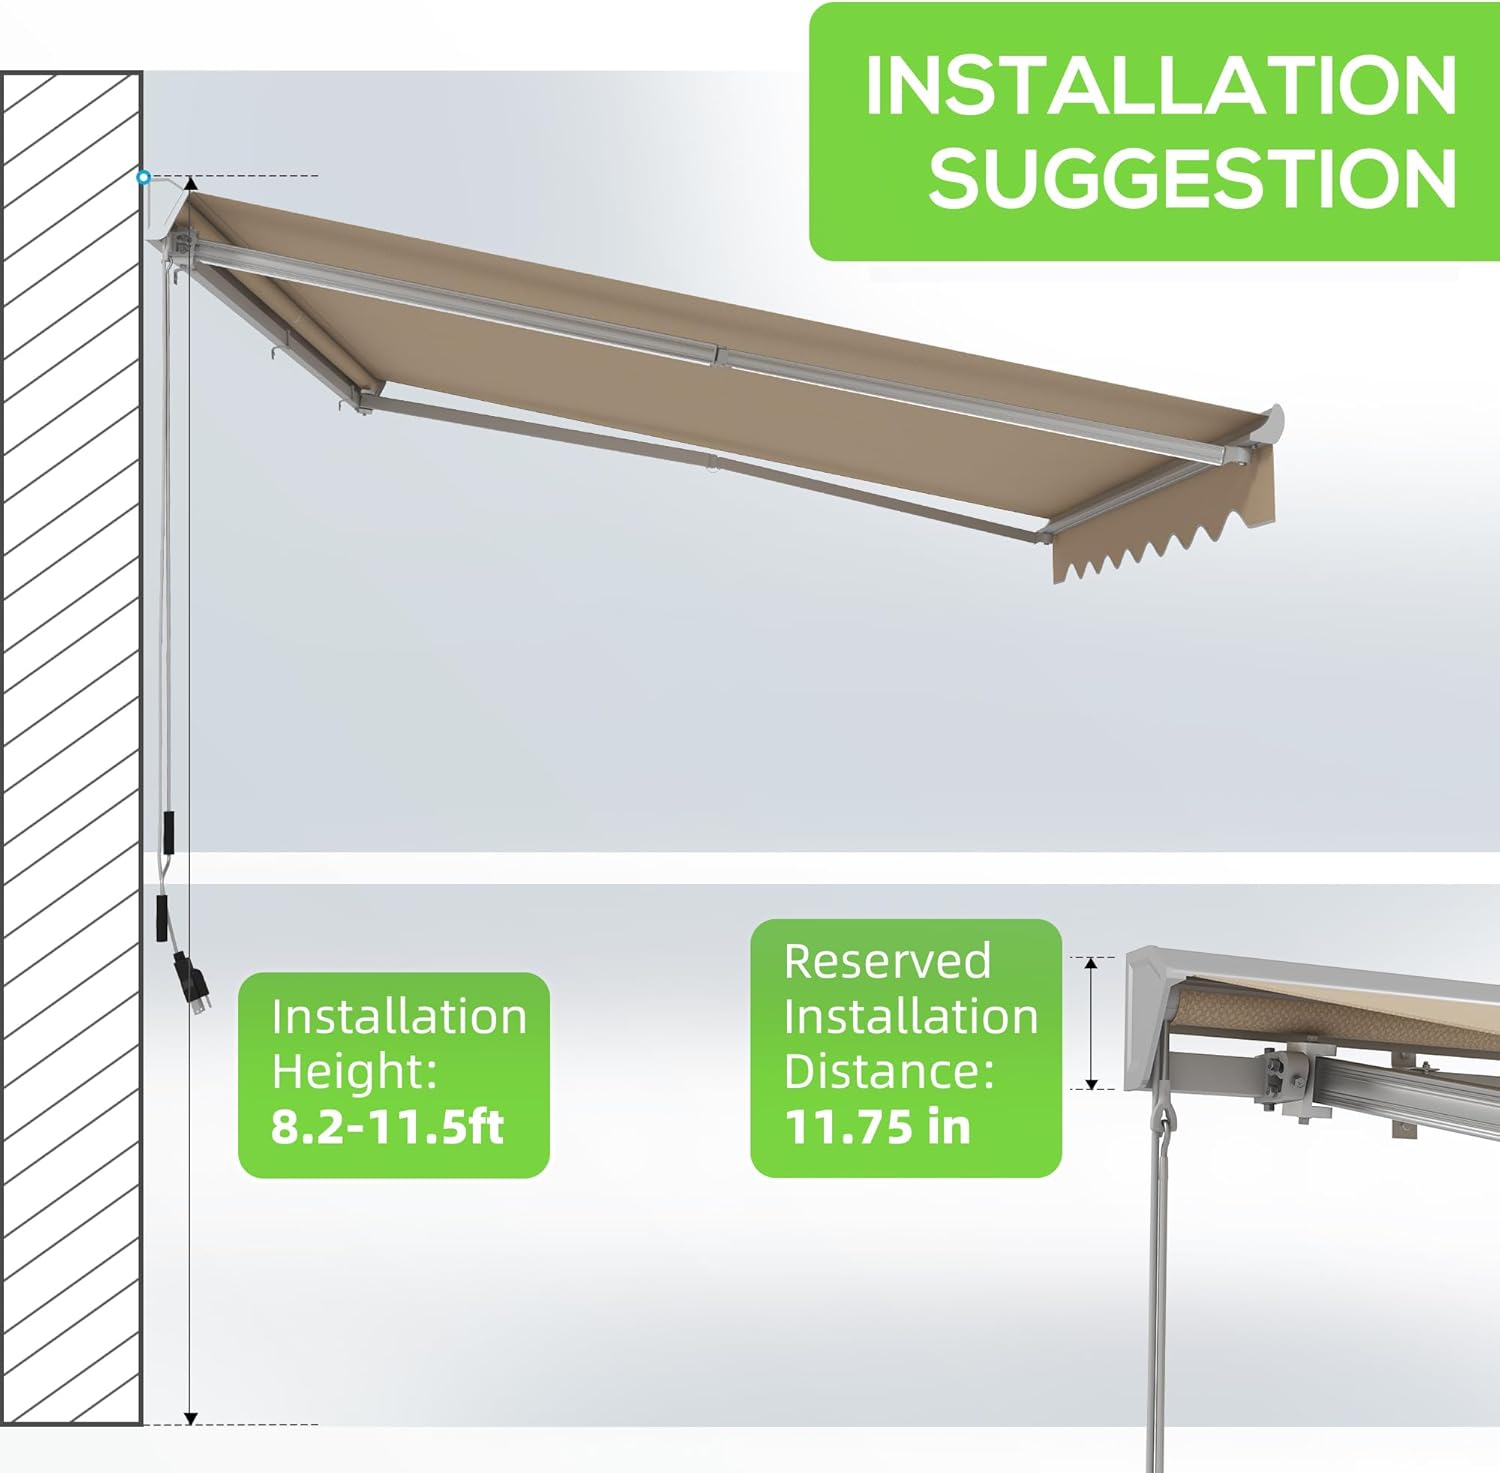
Figure 3: Installation height and clearance suggestions.

Figure 4: Deluxe half cassette design provides protection for the roller, fabric, and arm system.
5. Operating Instructions
5.1. Electric Operation (Remote Controller)
The awning can be extended or retracted using the provided remote controller. The accessibility control range is approximately 32.8 feet (10 meters).
- Press the "Extend" button to deploy the awning.
- Press the "Retract" button to pull the awning back.
- Press the "Stop" button to halt the awning at any desired position.
5.2. Manual Operation (Crank Handle)
In case of power outage or remote controller malfunction, the awning can be operated manually using the crank handle.
- Insert the crank handle into the designated loop on the awning mechanism.
- Turn the handle clockwise to extend the awning.
- Turn the handle counter-clockwise to retract the awning.

Figure 5: Dual-method adjustable protection via remote controller and crank handle.
5.3. Adjusting Awning Angle
The tilt angle of the awning can be adjusted from 45° to 85° to optimize shade throughout the day. Refer to your assembly manual for specific instructions on how to adjust the tilt mechanism.

Figure 6: Awning angle can be adjusted from 45-85 degrees from the wall.
5.4. LED Lights Operation
The integrated LED lights provide illumination for evening use. The operation of the LED lights is typically controlled by a separate switch or button on the remote controller.
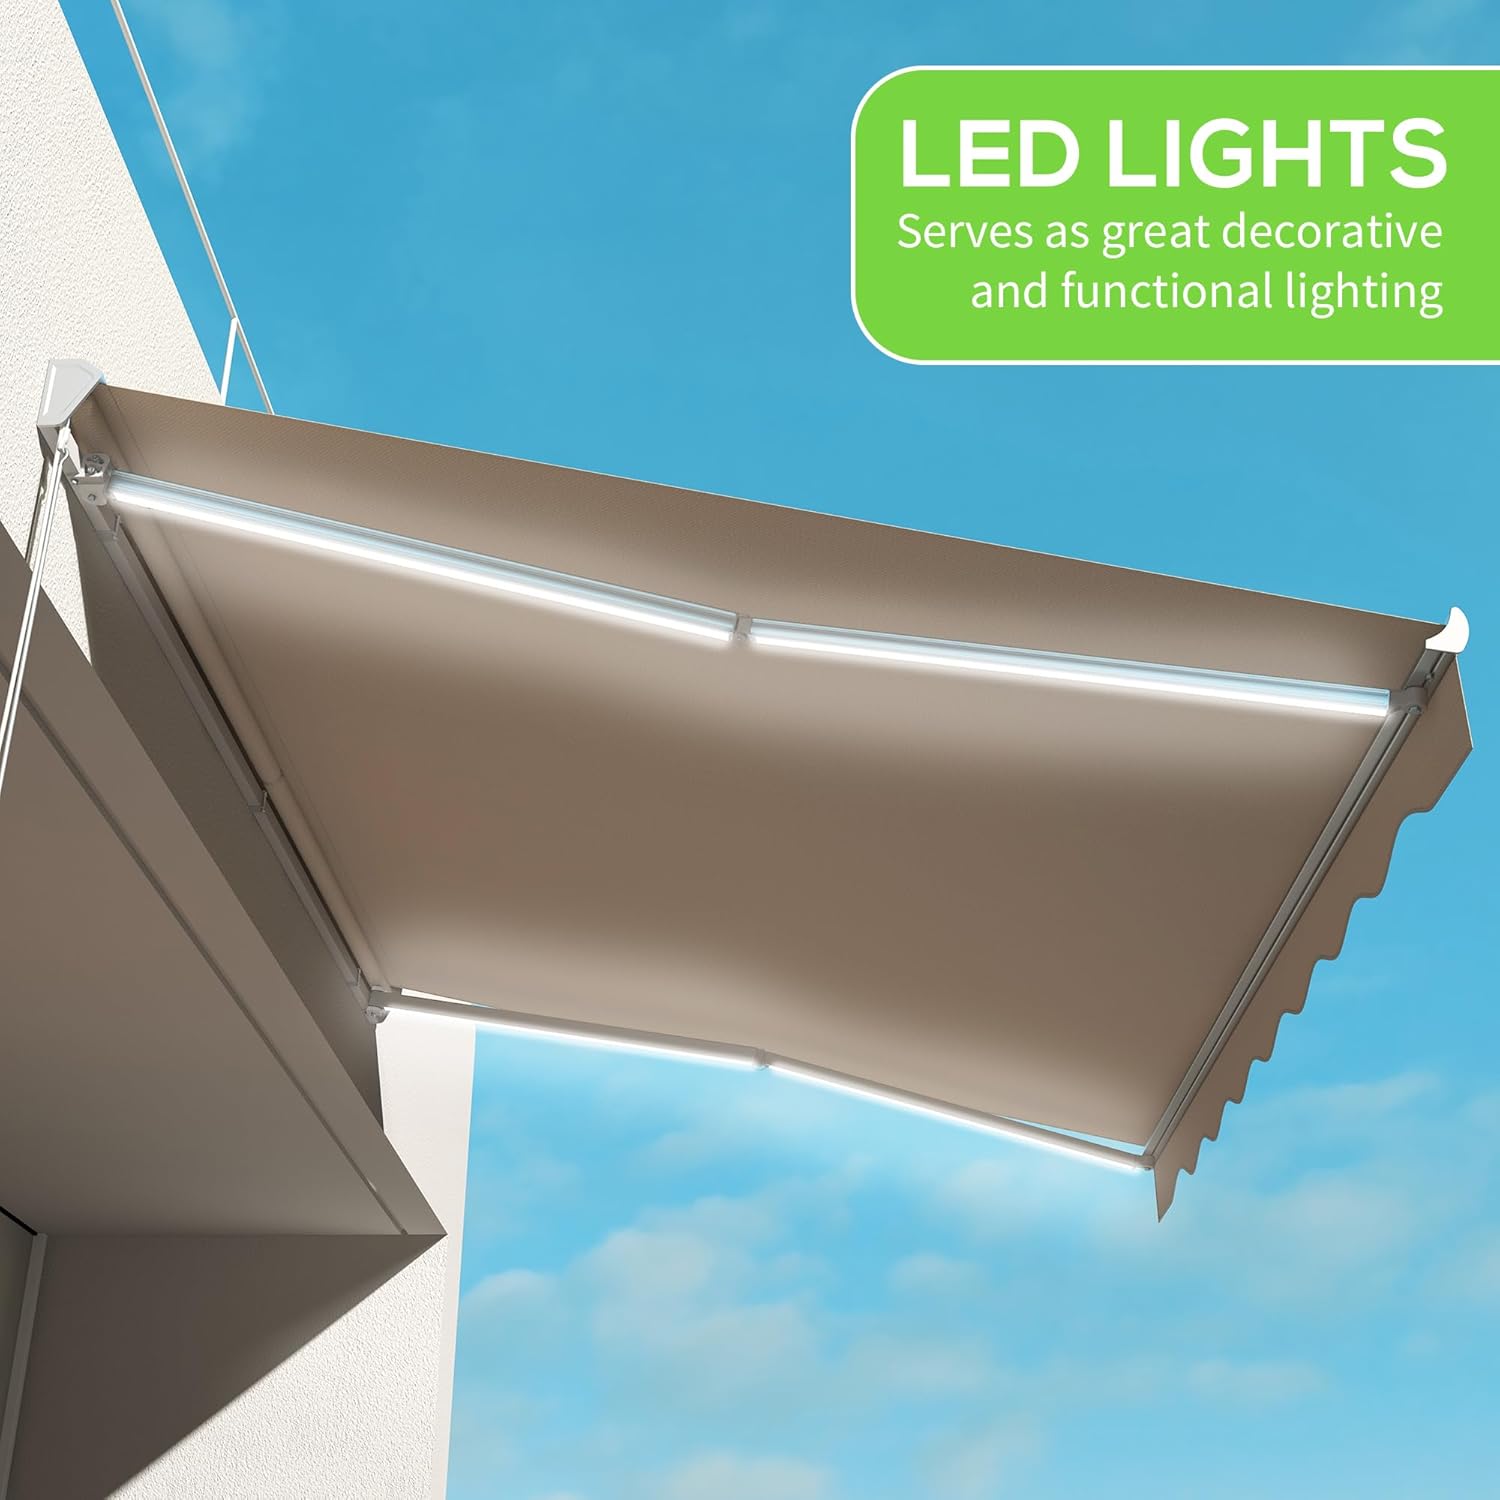
Figure 7: LED lights provide decorative and functional lighting.
6. Maintenance
- Cleaning: Clean the awning fabric regularly with mild soap and water. Do not use harsh chemicals or abrasive cleaners. Allow the fabric to dry completely before retracting to prevent mildew.
- Frame Inspection: Periodically inspect the aluminum frame and mounting hardware for any signs of wear, corrosion, or loosening. Tighten any loose bolts or screws.
- Fabric Care: The awning fabric is made of PA-coated polyester, offering UV40+ sun protection and resistance to elements. While durable, avoid prolonged exposure to extreme weather conditions.
- Retraction: Always retract the awning during strong winds, heavy rain, or when not in use for extended periods to prolong its lifespan.

Figure 8: Awning fabric properties: UV40+ resistant, resistant to sun fading, breakdown, and rust.
7. Troubleshooting
| Problem | Possible Cause | Solution |
|---|---|---|
| Awning does not extend/retract electrically. | Power supply issue, remote battery low, motor overheating, limit settings incorrect. | Check power connection. Replace remote batteries. Allow motor to cool down (approx. 20 minutes). Re-adjust limit settings as per manual. |
| Awning arms do not sit correctly when retracted. | Misalignment during installation, loose anchor points, incorrect limit settings. | Inspect for obstructions. Check and tighten all anchor points. Adjust the outer support anchor and limit settings. |
| Awning makes unusual noises during operation. | Loose components, lack of lubrication, debris in mechanism. | Inspect all bolts and screws for tightness. Clean any debris from the mechanism. Apply silicone lubricant to moving parts if necessary. |
| Awning fabric appears damaged or ripped. | Improper installation (e.g., fabric caught during sliding), exposure to extreme weather. | For minor tears, temporary repairs can be made. For significant damage, contact customer support for replacement fabric or professional repair. |
8. Specifications
| Feature | Detail |
|---|---|
| Model Number | 840-268V80CW |
| Size | 13' x 10' (Shaded Area: 153.5" W x 118.1" D) |
| Product Dimensions | 118.1"D x 153.5"W x 59.1"H |
| Color | Cream White |
| Material | Polyester, Aluminum |
| Fabric Type | PA-coated Polyester |
| UV Protection | UV40+ |
| Operation Mode | Automatic (Electric) / Manual (Crank) |
| Installation Height | 8.2 - 11.5 ft (2.5 - 3.5 m) |
| Min. Clearance (above door/window) | 11.75 Inches (30 cm) |
| Adjustable Tilt Angle | 45-85° from the wall |
| Item Weight | 74.8 Pounds (33.9 kg) |
| Manufacturer | Aosom LLC |
| UPC | 196393123126 |

Figure 9: Awning dimensions.
9. Warranty and Support
Outsunny products are manufactured by Aosom LLC. For any product-related inquiries, technical assistance, or warranty claims, please contact Aosom LLC customer support.
- Returns: This product is eligible for 30-day easy returns. Please refer to your purchase agreement for detailed return policies.
- Customer Support: For assistance, please visit the Aosom Direct seller page or contact their customer service directly.
Ask a question about this manual
Ask about setup, troubleshooting, compatibility, parts, safety, or missing instructions. Manuals+ will review the question and use this page’s manual context to help answer it.