1. Introduction
Thank you for choosing the PESEIL Portable Tire Inflator Air Compressor, Model T09. This device is designed for convenient and efficient inflation of various items, including car tires, bicycle tires, motorcycle tires, and sports balls. Featuring a powerful motor, intelligent preset modes, and an automatic shut-off function, it provides a reliable solution for your inflation needs. Please read this manual thoroughly before use to ensure proper operation and to maximize the product's lifespan.
2. Safety Information
- Always keep the device away from children.
- Do not operate the inflator in wet conditions or near flammable liquids or gases.
- Ensure the inflation hose is securely connected to the valve stem before starting inflation.
- Do not over-inflate items. Always refer to the recommended pressure for the item being inflated. The device features an auto shut-off function to prevent over-inflation.
- Allow the device to cool down after prolonged use to prevent overheating.
- Do not modify or disassemble the device. Repairs should only be performed by qualified personnel.
- Use only the provided charging cable and accessories.
- If the device exhibits unusual noise, smell, or smoke, discontinue use immediately and contact support.
3. Package Contents
Verify that all items are present in your package:
- PESEIL Portable Tire Inflator (Model T09)
- American threaded air hose (1)
- USB-C to USB-C charging cable (60cm) (1)
- Storage bag (1)
- Ball needle (universal) (1)
- Swimming ring mouth / Inflatable nozzle (1)
- French valve adapter (1)
- Instruction manual (1)

Image 3.1: All components included with the PESEIL T09 Portable Tire Inflator.
4. Product Overview
The PESEIL T09 Portable Tire Inflator is a compact and powerful device designed for versatile inflation. It features a digital display, intuitive controls, and multiple safety features.
4.1 Key Features
- Powerful 28-Cylinder Motor: Delivers rapid inflation with a 40L/min super flow rate and 140W high power.
- High Pressure Capability: Supports up to 150 PSI, suitable for various inflation needs.
- Automatic Shut-Off: Stops inflation automatically once the preset pressure is reached, preventing over-inflation.
- Intelligent Preset Modes: Includes modes for Car, Motorcycle, Bicycle, and Ball, with customizable pressure settings.
- Integrated LED Light: Features three modes (constant, flashing, SOS) for illumination during nighttime use or emergencies.
- Portable Design: Compact size (approximately 5x2x4 inches) with a storage bag for easy transport.
- Integrated Accessory Storage: Valve cores and nozzles can be stored directly within the pump body.
- Type-C Charging: Convenient charging compatible with various USB-C power sources.

Image 4.1: PESEIL T09 Portable Tire Inflator.
4.2 Control Panel and Display

Image 4.2: Control Panel Layout.
- Current Pressure Display: Shows the real-time pressure of the connected item.
- Preset Pressure Display: Shows the target pressure set by the user.
- Units Indicator: Displays the current pressure unit (PSI, BAR, KPA, Kg/cm²).
- Battery Level Indicator: Shows the remaining battery charge.
- Light Button: Activates and cycles through LED light modes (constant, flashing, SOS).
- Mode Button: Cycles through preset inflation modes (Car, Motorcycle, Bicycle, Ball, Custom).
- '+' / '-' Buttons: Adjusts the preset pressure value.
- Power/Start/Stop Button: Long press to power on/off; short press to start/stop inflation.
- Type-C Input: Charging port for the device.
4.3 Versatility

Image 4.3: Multi-functional use of the inflator.
The PESEIL T09 is designed to inflate a wide range of items:
- Car Tires
- Motorcycle Tires
- Bicycle Tires
- Sports Balls (e.g., basketballs, soccer balls)
- Small Inflatables (e.g., swimming rings)
5. Setup
5.1 Charging the Device
- Connect the provided USB-C charging cable to the Type-C input port on the inflator.
- Connect the other end of the cable to a compatible USB power adapter (not included) or a car charger.
- The battery indicator on the display will show charging status. Charge the device fully before first use.
5.2 Attaching the Air Hose and Nozzles
- Screw the American threaded air hose securely into the inflation port on the top of the device.
- For car, motorcycle, or bicycle (Schrader valve) tires, directly screw the other end of the air hose onto the tire's valve stem.
- For sports balls, attach the ball needle to the air hose.
- For French valves (Presta valves on some bicycles), attach the French valve adapter to the air hose, then connect to the valve.
- For swimming rings or other small inflatables, attach the swimming ring mouth/inflatable nozzle to the air hose.

Image 5.1: Integrated accessory storage.
6. Operating Instructions
6.1 Basic Inflation Steps
- Connect: Securely attach the appropriate air hose and nozzle to the item you wish to inflate.
- Power On: Long press the Power/Start/Stop button (⏻) for 3 seconds to turn on the inflator. The display will light up.
- Detect Pressure: Once connected, the device will automatically detect and display the current pressure of the item (if above 2 PSI).
- Select Mode: Press the Mode button (↻) to cycle through the preset modes: Car, Motorcycle, Bicycle, Ball, and Custom. Each mode has a default pressure range.
- Set Target Pressure: Use the '+' and '-' buttons to adjust the desired target pressure. The device will remember your custom setting for each mode.
- Start Inflation: Short press the Power/Start/Stop button (⏻) to begin inflation.
- Auto Shut-Off: The inflator will automatically stop when the target pressure is reached.
- Stop Manually: To stop inflation manually at any time, short press the Power/Start/Stop button (⏻).
- Disconnect: Carefully disconnect the air hose from the item. Some air may escape during disconnection, which is normal.
- Power Off: Long press the Power/Start/Stop button (⏻) for 3 seconds to turn off the inflator. The device will also automatically power off after 3 minutes of inactivity to conserve battery.

Image 6.1: Preset Inflation Modes.
6.2 Changing Pressure Units
While the device is powered on, long press the Mode button (↻) to cycle through pressure units: PSI, BAR, KPA, and Kg/cm².
6.3 Using the LED Light
The integrated LED light can be used for illumination in low-light conditions or as an emergency signal.
- Short press the Light button (☀) once to turn on the constant light mode.
- Short press again to switch to flashing mode.
- Short press a third time to switch to SOS mode.
- Short press a fourth time to turn off the light.
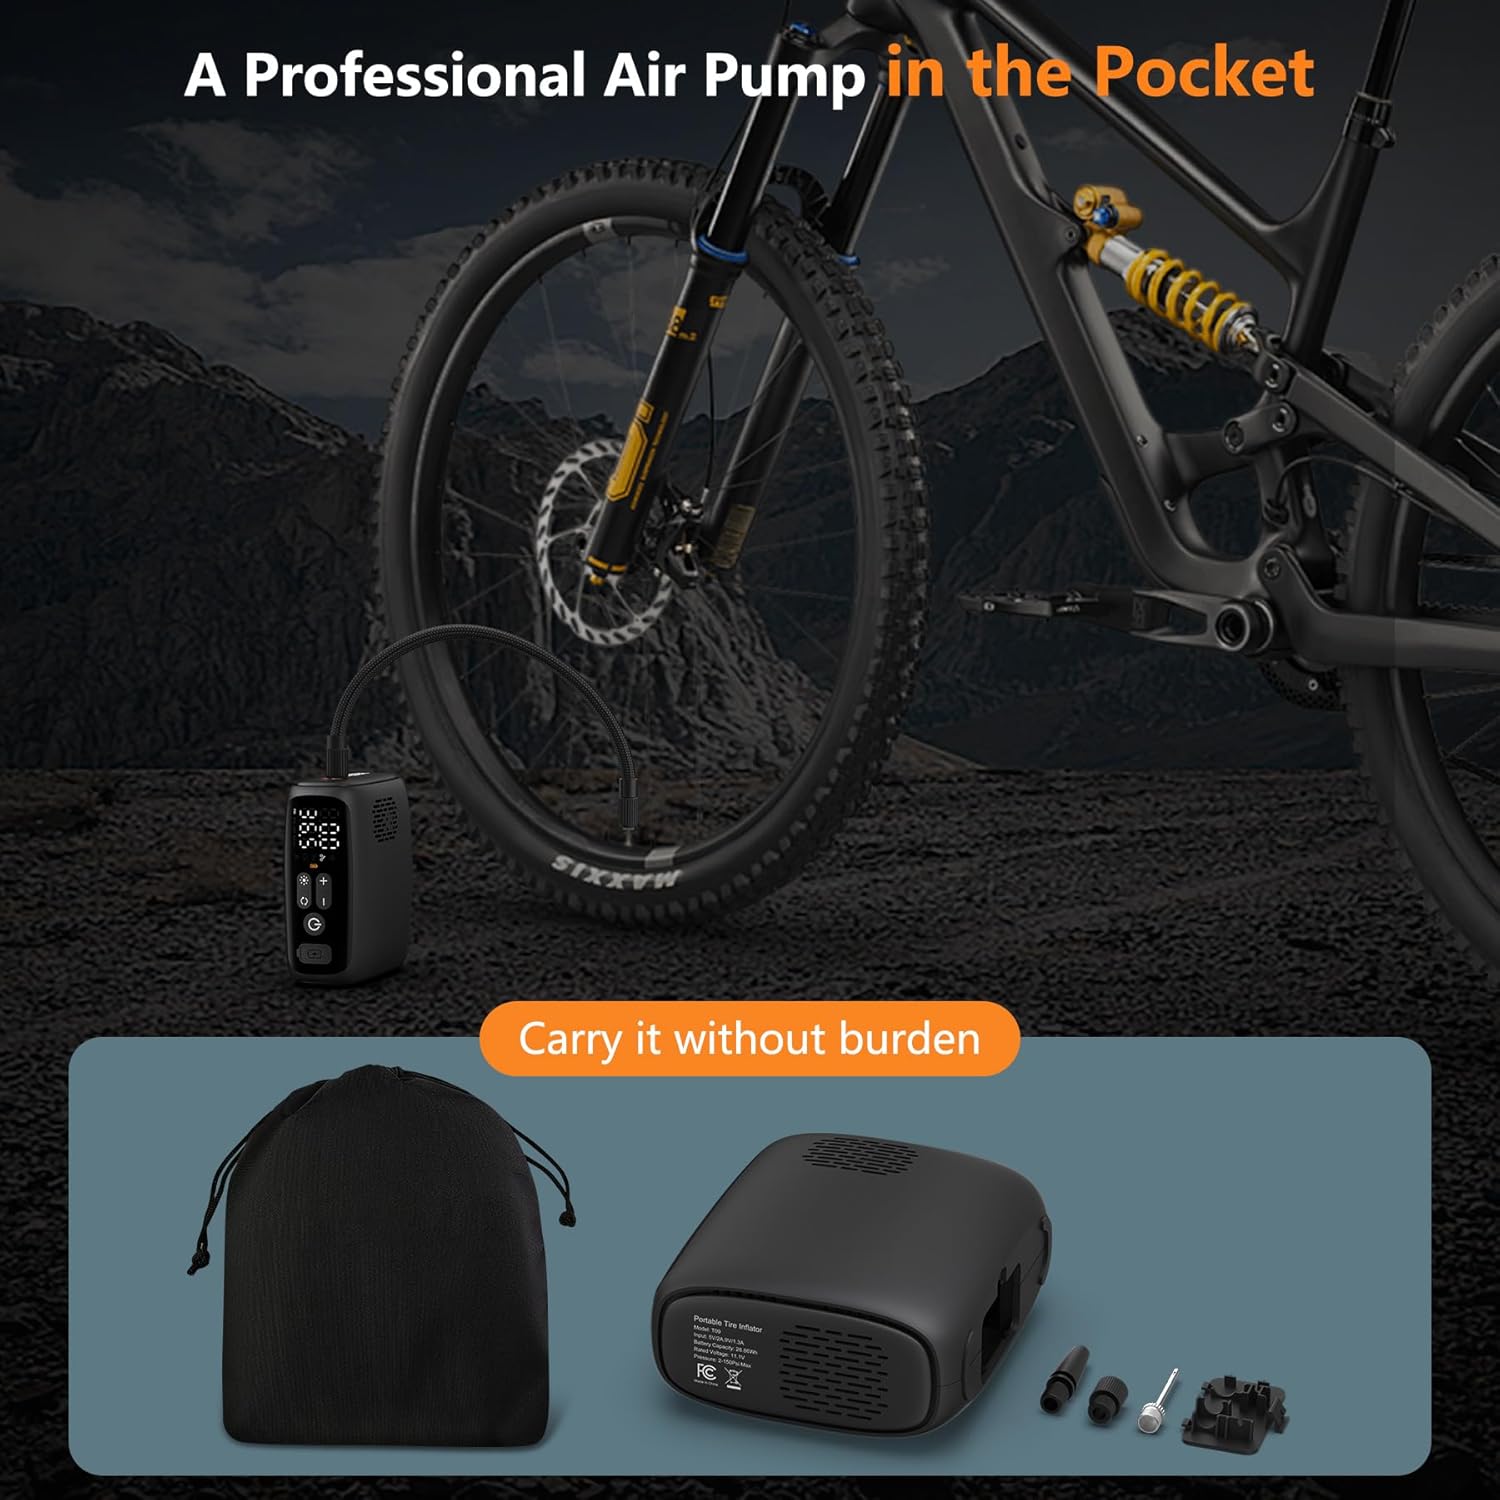
Image 6.2: Inflating at night with LED light.

Image 6.3: Emergency lighting modes.
7. Maintenance
7.1 Cleaning
- Ensure the device is powered off and disconnected from any power source before cleaning.
- Wipe the exterior of the inflator with a soft, dry cloth.
- Do not use abrasive cleaners, solvents, or immerse the device in water.
7.2 Storage
- Store the inflator and its accessories in the provided storage bag when not in use.
- Keep the device in a cool, dry place, away from direct sunlight and extreme temperatures.
- For long-term storage, charge the battery to approximately 50-70% every 3-6 months to maintain battery health.
8. Troubleshooting
If you encounter issues with your PESEIL T09 inflator, refer to the following common problems and solutions:
| Problem | Possible Cause | Solution |
|---|---|---|
| Device does not power on. | Low battery; device not properly charged. | Charge the device fully using the provided USB-C cable. |
| Inflation does not start. | Air hose not securely connected; target pressure is lower than current pressure; device in standby mode. | Ensure hose is tightly screwed on. Set target pressure higher than current pressure. Short press the Power/Start/Stop button to start. |
| Inaccurate pressure reading. | Loose connection; sensor malfunction. | Ensure a tight connection to the valve. If issue persists, contact customer support. |
| Slow inflation. | Low battery; air leak from connection; very large item being inflated. | Charge the device. Check all connections for leaks. For very large items, inflation may naturally take longer. |
| Device overheats and stops. | Prolonged continuous use. | Allow the device to cool down for at least 10-15 minutes before resuming use. |
If the problem persists after attempting these solutions, please contact PESEIL customer support for assistance.
9. Specifications
| Feature | Specification |
|---|---|
| Brand | PESEIL |
| Model Name | WX-T09 (Item model number: T09) |
| Voltage | 12 Volts |
| Power Source | Battery Powered |
| Maximum Power | 140 Watts |
| Air Flow Capacity | 40 Liters Per Minute (approx. 10.5 Gallons Per Minute) |
| Maximum Operating Pressure | 150 PSI |
| Noise Level | 65 Decibels |
| Item Weight | 2 pounds |
| Package Dimensions | 5 x 4 x 3 inches |
| Batteries | 3 x 12V batteries (included) |
| Color | Black |
| UPC | 850063711937 |
10. Warranty and Support
PESEIL products are manufactured with quality and reliability in mind. While specific warranty details are not provided in this manual, please retain your proof of purchase for any warranty claims. For technical support, troubleshooting assistance, or inquiries regarding your product, please contact PESEIL customer service through the retailer where you purchased the product or visit the official PESEIL website for contact information.
Protection plans may be available for purchase separately to extend coverage beyond the standard warranty period. Please check with your retailer for details.


