1. Introduction
Thank you for choosing the TEKTRO HD-M275 Hydraulic Disc Brake system. This manual provides essential information for the proper installation, operation, and maintenance of your hydraulic disc brakes. Please read this manual thoroughly before attempting any installation or use to ensure safety and optimal performance.
The TEKTRO HD-M275 is designed for mountain bikes, offering reliable stopping power and control. This system includes left front and right rear brake levers, calipers, hoses, and for certain variants, Tektro TR160-24 rotors.
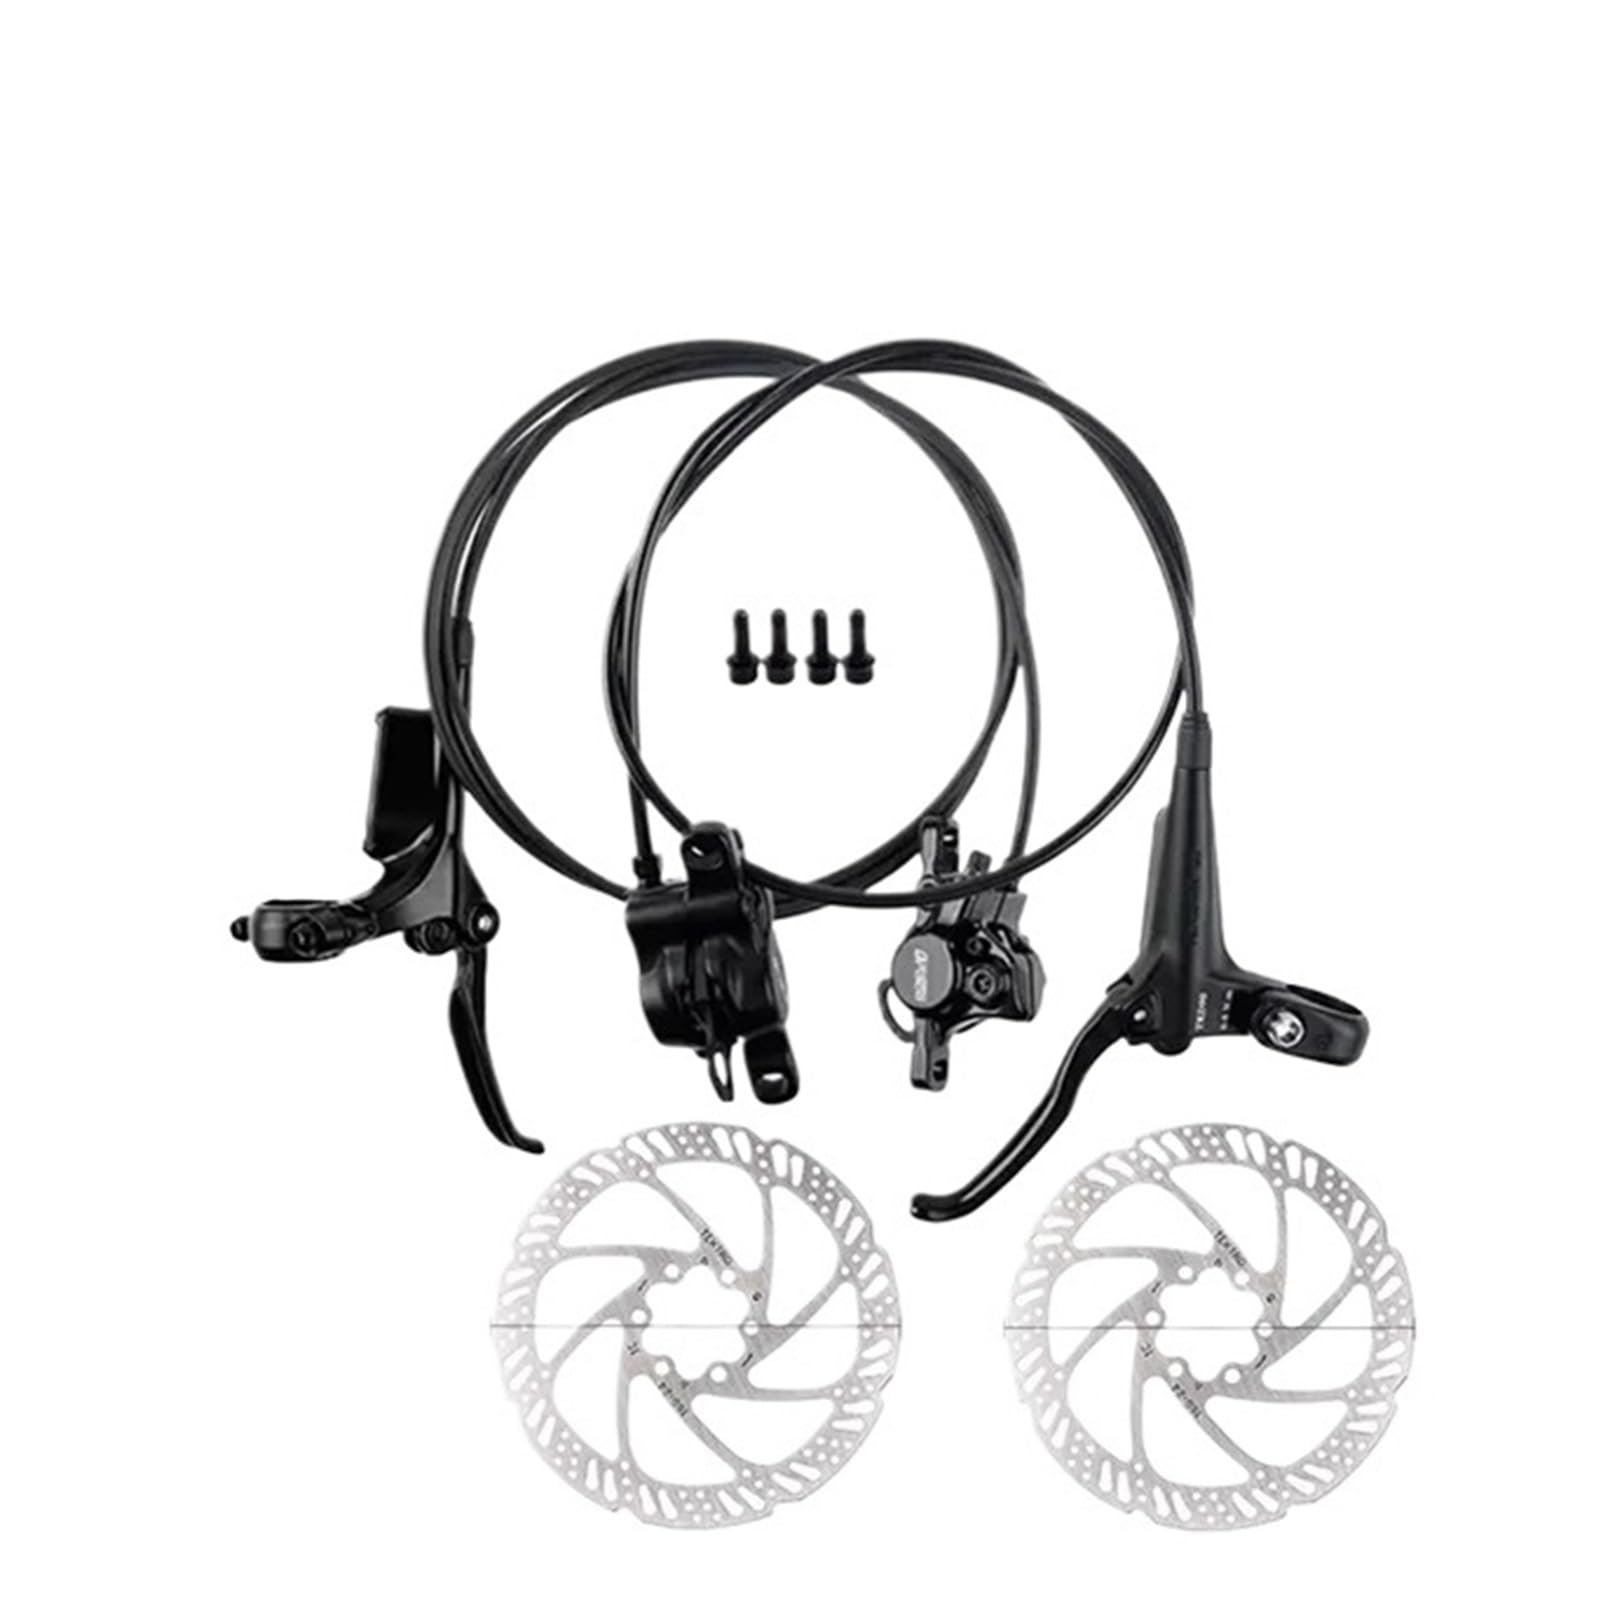
Figure 1: Overview of the TEKTRO HD-M275 Hydraulic Disc Brake System.
2. Safety Information
Always prioritize safety when working with bicycle components. Improper installation or maintenance of brake systems can lead to serious injury or death. If you are unsure about any part of the installation or adjustment process, consult a qualified bicycle mechanic.
- Wear appropriate safety gear, including eye protection, during installation and maintenance.
- Ensure all bolts are tightened to the manufacturer's specified torque settings. Overtightening or undertightening can cause component failure.
- Do not use contaminated brake fluid. Only use genuine TEKTRO mineral oil.
- Keep brake fluid away from brake pads and rotors. Contamination will severely reduce braking performance.
- After installation, always test the brakes thoroughly in a safe area before riding.
- Brake components can become very hot during use. Avoid touching them immediately after riding.
3. Package Contents
Please verify that all components are present and undamaged before beginning installation. The exact contents may vary slightly depending on the specific variant purchased.
- Left Front Hydraulic Brake Lever and Caliper Assembly (with hose)
- Right Rear Hydraulic Brake Lever and Caliper Assembly (with hose)
- Mounting bolts for calipers
- Optional: 2x Tektro TR160-24 Rotors (160mm)
- Optional: Rotor mounting bolts

Figure 2: Included components of the HD-M275 system.
4. Setup and Installation
This section outlines the general steps for installing the TEKTRO HD-M275 hydraulic disc brake system. Specific frame and fork designs may require slight variations.
4.1. Rotor Installation (if applicable)
- Ensure your wheel hub is compatible with 6-bolt rotors.
- Align the rotor with the bolt holes on the hub. Ensure the rotation direction arrow on the rotor matches the forward rotation of the wheel.
- Install the 6 rotor bolts. Tighten them gradually in a star pattern to the manufacturer's specified torque (typically 4-6 Nm).

Figure 3: Tektro TR160-24 Rotors.
4.2. Brake Lever Installation
- Identify the left (front brake) and right (rear brake) levers.
- Loosen the clamp bolt on each brake lever.
- Slide the levers onto the handlebar, positioning them comfortably for your riding style. Typically, the front brake lever is on the left and the rear brake lever is on the right.
- Ensure the levers are angled correctly and do not interfere with other handlebar components (shifters, grips).
- Lightly tighten the clamp bolts. Final tightening will occur after caliper alignment.

Figure 4: TEKTRO HD-M275 Brake Levers.
4.3. Caliper Installation
- Remove the red plastic pad spacer from the caliper. Do not squeeze the brake lever without the spacer or rotor installed, as this can cause the pads to close and be difficult to reset.
- Mount the front caliper to your fork's disc brake mount and the rear caliper to your frame's disc brake mount using the provided bolts. Ensure any necessary adapters are used for your specific frame/fork.
- Insert the wheel into the dropouts and secure it.
- Loosely tighten the caliper mounting bolts, allowing the caliper to move slightly.
- Squeeze the brake lever firmly and hold it. While holding the lever, tighten the caliper mounting bolts to the manufacturer's specified torque (typically 6-8 Nm). This aligns the caliper with the rotor.
- Release the brake lever and check for proper alignment. The rotor should spin freely without rubbing the pads. If rubbing occurs, repeat the alignment process.

Figure 5: TEKTRO HD-M275 Levers and Calipers.
4.4. Bleeding the System (if necessary)
The TEKTRO HD-M275 system typically comes pre-bled. However, if hoses were cut or if the brake feel is spongy, bleeding will be necessary. Refer to the official TEKTRO bleeding instructions or consult a professional mechanic. This process involves specific tools and brake fluid.
5. Operating Instructions
5.1. Initial Bedding-In Process
New brake pads and rotors require a bedding-in process to achieve optimal performance. This process transfers a thin layer of pad material to the rotor, improving friction and reducing noise.
- Find a safe, flat area with no traffic.
- Accelerate to a moderate speed (approx. 15-20 mph).
- Apply the brakes firmly but gradually, slowing down to walking speed. Do not come to a complete stop.
- Repeat this process 20-30 times for each brake.
- Allow the brakes to cool down completely between sets of repetitions.
- Avoid hard braking or prolonged dragging of the brakes during the bedding-in period.
5.2. Brake Usage
- Front Brake (Left Lever): Provides significant stopping power. Use with caution, especially on loose surfaces, to avoid locking the front wheel.
- Rear Brake (Right Lever): Offers stability and control. Use in conjunction with the front brake for effective stopping.
- Always apply both brakes simultaneously for maximum control and stopping power.
- Modulate brake pressure to control speed rather than simply on/off braking.
6. Maintenance
Regular maintenance ensures the longevity and performance of your TEKTRO HD-M275 hydraulic disc brakes.
6.1. Cleaning
- Clean rotors with isopropyl alcohol and a clean cloth to remove dirt, oil, or grease.
- Keep brake pads clean and free from contamination. If pads become contaminated, they must be replaced.
- Clean calipers and levers with mild soap and water. Avoid high-pressure washing directly on brake components.
6.2. Brake Pad Inspection and Replacement
Inspect brake pads regularly for wear. Replace pads when the friction material is worn down to approximately 0.5mm or less, or if they show signs of contamination (e.g., oil, grease, glazing).
- Remove the wheel.
- Remove the pad retaining pin or clip.
- Carefully slide out the old brake pads.
- Using a clean pad spreader or plastic tire lever, gently push the caliper pistons back into their bores.
- Insert new, clean brake pads, ensuring they are correctly seated.
- Reinstall the pad retaining pin or clip.
- Reinstall the wheel and perform the bedding-in process for the new pads.

Figure 6: TEKTRO Brake Pads and retaining pin.
6.3. Brake Fluid Check and Bleeding
Brake fluid levels should be checked periodically. If the brake lever feels spongy or if there's a noticeable decrease in braking performance, the system may need to be bled to remove air bubbles or replace old fluid. This is a technical procedure best performed by a qualified mechanic or by following official TEKTRO service instructions carefully.
6.4. Rotor Inspection
Inspect rotors for excessive wear, warping, or damage. Replace rotors if they are bent, cracked, or worn below their minimum thickness (usually stamped on the rotor). Contaminated rotors that cannot be cleaned effectively should also be replaced.
7. Troubleshooting
This section addresses common issues you might encounter with your hydraulic disc brakes.
| Problem | Possible Cause | Solution |
|---|---|---|
| Squealing Brakes | Contaminated pads/rotor, misaligned caliper, worn pads, new pads/rotor not bedded in. | Clean rotor with isopropyl alcohol. Replace contaminated pads. Realign caliper. Perform bedding-in procedure. |
| Spongy Lever Feel | Air in the hydraulic system, low brake fluid. | Bleed the brake system. Check for leaks. |
| Reduced Braking Power | Contaminated pads/rotor, worn pads, air in system, improper bedding-in. | Clean/replace pads/rotor. Bleed system. Re-perform bedding-in. |
| Brake Rubbing | Misaligned caliper, bent rotor, sticky piston. | Realign caliper. True or replace bent rotor. Clean and lubricate pistons (consult mechanic). |
| Leaking Fluid | Damaged hose, loose fitting, damaged seal. | Inspect all connections and hoses. Tighten fittings. Replace damaged components. Seek professional service. |
8. Specifications
- Model: TEKTRO HD-M275
- Brake Type: Hydraulic Disc Brake
- Brake Fluid: TEKTRO Mineral Oil
- Lever Material: Aluminum Alloy
- Rotor Compatibility: 6-bolt (e.g., Tektro TR160-24, 160mm)
- Hose Length (Variant D): Left front 850mm, Right rear 1600mm
- Item Weight: Approximately 11.9 ounces (337 grams)
- Package Dimensions: 0.39 x 0.39 x 0.39 inches (approximate)
9. Warranty and Support
For warranty information and technical support, please refer to the official TEKTRO website or contact your authorized TEKTRO dealer. Keep your proof of purchase for any warranty claims.
Always use genuine TEKTRO replacement parts for optimal performance and to maintain warranty validity.


