Important Safety Instructions
Read all instructions thoroughly before operating the appliance to ensure safe and proper use. Keep this manual for future reference.
- Do not operate the oven when empty.
- Do not attempt to tamper with, or make any adjustments or repairs to the door, control panel, safety interlock switches, or any other part of the oven.
- Do not heat liquids or other foods in sealed containers, as they are liable to explode.
- Always use microwave-safe cookware.
- Supervise children closely when the microwave is in use.
For detailed safety information, refer to the full safety manual provided with your product.
Product Overview
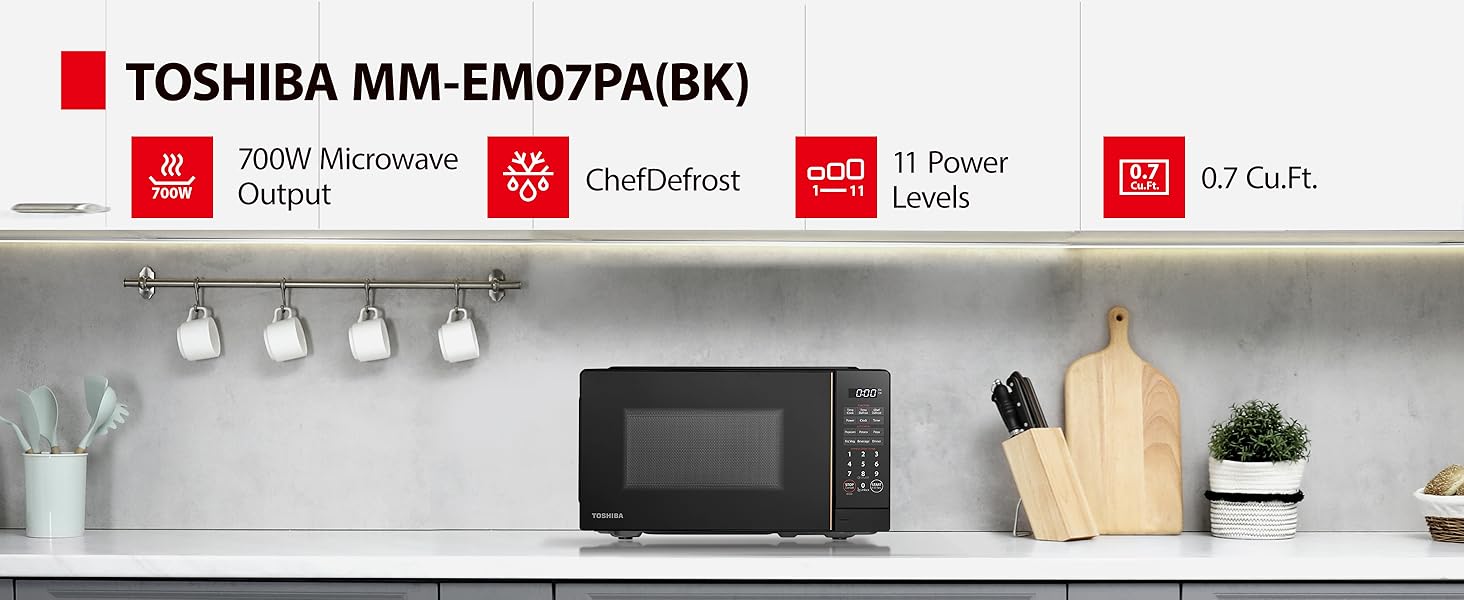
This section provides an overview of the TOSHIBA MM-EM07PA(BK) microwave oven's components and control panel.
Components

The image above shows the front view of the TOSHIBA MM-EM07PA(BK) microwave oven, highlighting its sleek black design and digital control panel.
- Oven Cavity
- Glass Turntable (9.6-inch)
- Turntable Ring Assembly
- Control Panel
- Door with Handle
Control Panel
The control panel features a digital display and various buttons for different functions.

This image provides a detailed view of the microwave's control panel, showing the various buttons and their labels for easy operation.
- Time Cook: Set manual cooking time.
- Chef Defrost: Advanced defrosting function.
- Power: Adjust power levels (11 unique levels).
- Timer: Set kitchen timer.
- Auto Menu: Pre-set options for Popcorn, Pizza, Potato, Frozen Veggie, Beverage, Dinner.
- Express Cook (1-6 min): One-touch cooking for 1 to 6 minutes.
- Number Pad (0-9): For setting time and quantities.
- STOP/Cancel/Eco: Stop cooking, cancel settings, or activate Eco Mode.
- START/+30 Sec: Start cooking or add 30 seconds to cooking time.
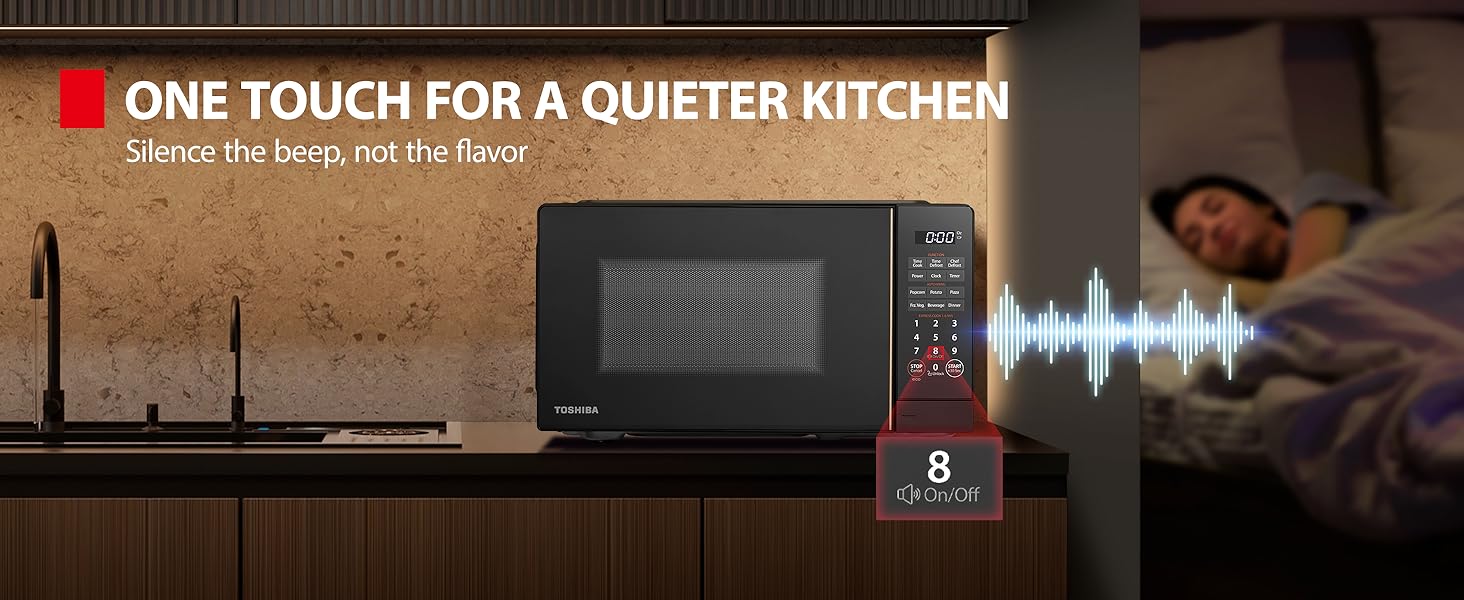
- Sound On/Off (Button 8): Mute or unmute the beeping sound.
Setup
Unpacking
Carefully remove the microwave oven and all packing materials from the carton.
- Remove any protective film from the surface of the cabinet.
- Check the oven for any damage, such as dents or a misaligned door. Do not operate the oven if it is damaged.
- Place the glass turntable and turntable ring assembly inside the oven cavity.
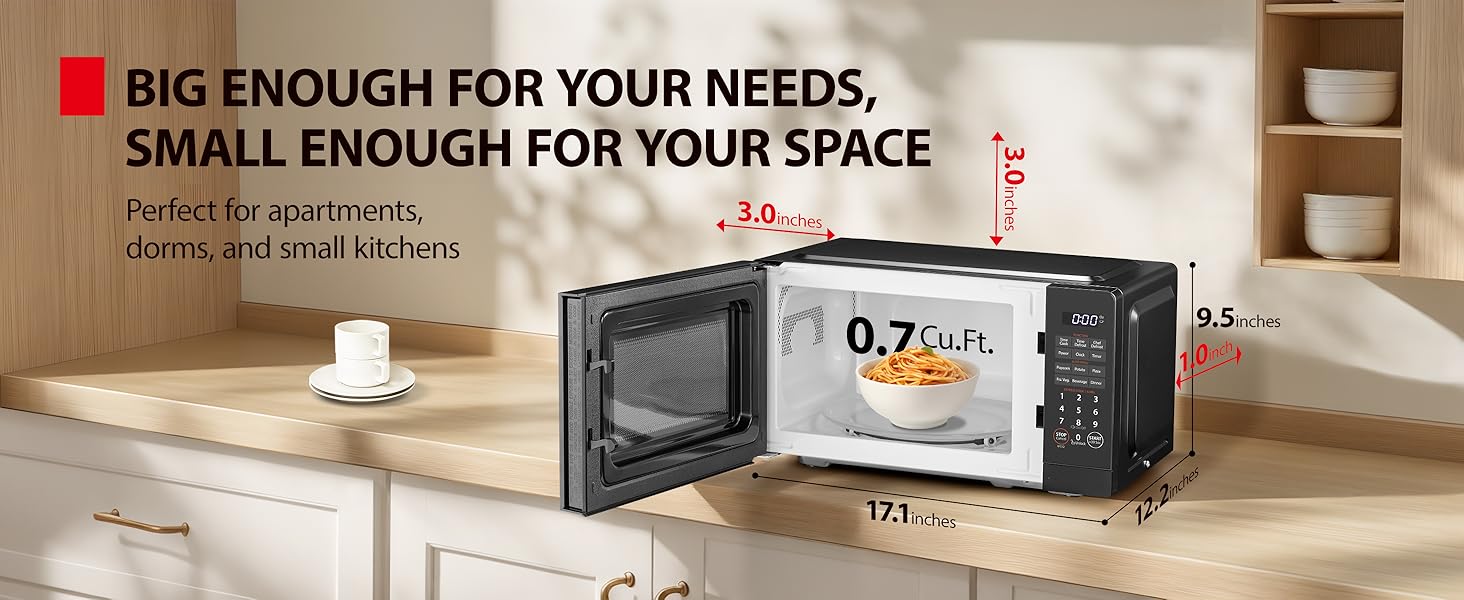
Placement
Place the microwave oven on a flat, stable surface that can support its weight. Ensure adequate ventilation around the unit.
- External dimensions (WDH): 17.1 x 12.2 x 9.5 inches.
- Allow at least 3 inches of clearance on the top, sides, and rear for proper ventilation.

The image illustrates the compact size of the microwave, showing its external dimensions and how it fits on a standard kitchen counter, emphasizing its space-saving design.
This image shows the microwave placed on a kitchen counter, demonstrating the recommended clearance around the unit for optimal performance and ventilation.
Initial Setup
Plug the microwave into a grounded electrical outlet. The display will show "0:00".
- Setting the Clock: Press the "Clock" button, use the number pad to enter the current time, then press "Clock" again to confirm.
- Eco Mode: To minimize standby power, press the "Eco" button. The display will show "ECO". Press again to deactivate.

This image highlights the Eco Mode feature, showing a graphic indicating 61% standby power reduction, promoting energy efficiency.
Operating Instructions
Basic Microwave Cooking
To cook food using a specific time and power level:
- Place food in a microwave-safe container on the glass turntable.
- Close the door.
- Press "Time Cook".
- Use the number pad to enter the desired cooking time (e.g., "1", "3", "0" for 1 minute 30 seconds).
- Press "Power" repeatedly to select the desired power level (100% is default). There are 11 power levels available.
- Press "START/+30 Sec" to begin cooking.
11 Unique Power Levels
The microwave offers 11 power levels for versatile cooking.

This image displays a visual guide to the 11 power levels, suggesting appropriate uses for each, from deodorization to heating liquids.
This image further illustrates the application of the 11 power levels with various food items, providing practical examples for users.
ChefDefrost Feature
The ChefDefrost feature provides faster and more uniform defrosting.
- Place the frozen food on the turntable.
- Press "Chef Defrost".
- Use the number pad to enter the weight of the food.
- Press "START/+30 Sec".

This image presents a graph demonstrating the efficiency of the ChefDefrost technology, showing up to 40% faster defrosting.

This image visually explains the ChefDefrost feature, emphasizing its ability to automatically set power and time for optimal meat defrosting.
Auto Menus
The microwave includes 6 pre-set auto menu options for common foods.
- Place food in the oven.
- Press the desired auto menu button (e.g., "Popcorn", "Pizza", "Potato", "Frz. Veggie", "Beverage", "Dinner").
- The oven will automatically set the cooking time and power level.
- Press "START/+30 Sec".

This image visually lists the six auto menu options available on the microwave, making it easy to identify pre-programmed cooking settings.

This image provides examples of foods that can be cooked using the auto menu functions, such as pizza, potatoes, and popcorn.

This image continues to illustrate the auto menu options with examples like frozen vegetables, beverages, and full dinner plates.
Mute Mode
To silence the beeping sound that signals the end of cooking or button presses:
- Press and hold the "8" button for 3-5 seconds.
- The sound will be turned off. Repeat the process to turn the sound back on.

This image visually explains the mute mode feature, showing the "8" button and a sound wave graphic to indicate the sound on/off function.
This image highlights the benefit of the mute mode, showing a quiet kitchen environment, ideal for not disturbing others.
Child Lock Function
The microwave features a mandatory two-step child lock for safety, complying with applicable third-party safety standards.

This diagram provides clear, step-by-step instructions on how to activate, deactivate, and unlock the child lock feature on the microwave.

This image reinforces the safety aspect of the child lock, showing a family in a kitchen setting.
Maintenance and Cleaning
Regular cleaning and maintenance will ensure the longevity and optimal performance of your microwave oven.
Cleaning the Exterior
- Wipe the exterior with a damp cloth and mild detergent.
- Avoid abrasive cleaners or scouring pads.
Cleaning the Interior
- Wipe the interior cavity with a damp cloth after each use to prevent food buildup.
- For stubborn stains, place a bowl of water with lemon slices inside and microwave for 2-3 minutes. Let it sit for 5 minutes, then wipe clean.
- The glass turntable and turntable ring can be removed and washed with warm, soapy water.
This video demonstrates a user's experience with a loud, rattling noise during microwave operation, which may indicate a need for cleaning or inspection of internal components.
Troubleshooting
If you encounter issues with your microwave oven, refer to the following common problems and solutions.
| Problem | Possible Cause | Solution |
|---|---|---|
| Oven not starting | Door not closed properly; Power cord unplugged; Fuse blown or circuit breaker tripped. | Ensure door is securely closed; Check power cord connection; Check household fuse/circuit breaker. |
| Food not heating | Incorrect cooking time/power level; Microwave-safe cookware not used. | Adjust time/power; Use appropriate cookware. |
| Loud noise during operation | Turntable not seated correctly; Debris under turntable ring; Internal component issue. | Re-seat turntable; Clean under turntable ring; Contact customer support if noise persists. |
If the issue persists after attempting these solutions, please contact TOSHIBA customer support.
Specifications
- Model: MM-EM07PA(BK)
- Capacity: 0.7 Cubic Feet
- Output Power: 700W
- Input Power: 1020W
- Voltage: 120 Volts (AC)
- External Dimensions (WDH): 17.1 x 12.2 x 9.5 inches
- Internal Dimensions (WDH): 11.8 x 11.7 x 8.1 inches
- Item Weight: 22.1 pounds
- Turntable Size: 9.6-inch glass
- Color: Black
- Material: Glass (turntable)
- Special Features: Child Safety Lock, ChefDefrost, Eco Mode, Express Cook, One Touch Button, Sound On/Off
- Installation Type: Countertop
Warranty and Support
For warranty information and technical support, please visit the official TOSHIBA website or contact their customer service.


