1. Introduction
This manual provides detailed instructions for the safe and efficient operation of your ALLIWAVA PR550 Mini Projector. Please read this manual thoroughly before using the product and retain it for future reference.
The ALLIWAVA PR550 is a portable projector designed for various entertainment and presentation needs, featuring advanced connectivity and image adjustment capabilities.
2. Safety Information
- Do not look directly into the projector lens when the lamp is on.
- Ensure proper ventilation around the projector to prevent overheating.
- Keep the projector away from water or other liquids.
- Use only the power adapter supplied with the device.
- Do not attempt to disassemble or repair the projector yourself. Contact support for assistance.
- The remote control does not come with batteries. Insert two AAA batteries (not included) before use.
3. Package Contents
Verify that all items are present in the package:
- ALLIWAVA PR550 Mini Projector
- HDMI Cable
- Power Adapter
- Remote Control (batteries not included)
- User Manual (this document)
4. Product Overview
Familiarize yourself with the components and controls of your PR550 projector.
4.1 Front View

Image: Front view of the ALLIWAVA PR550 Mini Projector. This image displays the main projection lens and the ALLIWAVA brand name on the front panel.
4.2 Side View

Image: Side view of the ALLIWAVA PR550 Mini Projector. This image highlights the ventilation grilles on the side of the projector, essential for heat dissipation.
4.3 Rear View and Ports

Image: Rear view of the ALLIWAVA PR550 Mini Projector. This image shows the HDMI, USB, AC power input, and 3.5mm audio output ports located on the rear panel.
- HDMI Port: Connect to devices like laptops, TV sticks, gaming consoles.
- USB Port: Connect USB drives for media playback.
- AC Input: For power connection.
- 3.5mm Audio Output: Connect external speakers or headphones.
4.4 Remote Control

Image: The ALLIWAVA PR550 Mini Projector shown alongside its remote control. The remote control is used for navigation, focus adjustment, and system switching.
The remote control allows for easy navigation and adjustment of projector settings, including electric focus. Remember to install two AAA batteries (not included) before use.
5. Setup
5.1 Placement
The PR550 projector offers flexible placement options:
- Table Placement: Place the projector on a stable, flat surface.
- Tripod Installation: The projector can be mounted on a standard tripod.
- Ceiling Mount: For permanent installations, the projector can be ceiling mounted.

Image: Illustration demonstrating three common installation methods for the projector: on a tripod, on a table, and mounted to a ceiling.
The projector can project an image size ranging from 40 to 120 inches with a 1.37:1 throw ratio. Adjust the distance from the projection surface to achieve the desired screen size.

Image: A visual representation of how different projection distances result in various screen sizes, specifically 40, 90, and 120 inches.
5.2 Power Connection
Connect the supplied power adapter to the AC input port on the projector and then plug it into a power outlet.
5.3 Initial Power On
Press the power button on the projector or the remote control to turn on the device. The projector will boot up and display the main interface.
5.4 Electric Focus Adjustment
The PR550 features electric focus for precise image clarity. Use the focus buttons on the remote control to sharpen the image until it is clear.

Image: A user's hand operating the remote control to adjust the electric focus of the projector, with a visual representation of the focus ring on the projected image.
5.5 Auto Vertical Keystone Correction
The projector automatically corrects vertical keystone distortion up to ±40°. This feature ensures that the projected image maintains a rectangular shape even when the projector is not perfectly aligned with the screen.

Image: A graphical representation of the automatic vertical keystone correction feature, showing a trapezoidal image being corrected to a perfect rectangle.
6. Operating Instructions
6.1 Connecting External Devices
- HDMI: Connect your laptop, TV stick, or gaming console to the HDMI port using an HDMI cable. Select the HDMI input source from the projector's menu.
- USB: Insert a USB drive into the USB port. The projector's media player will typically detect the drive, allowing you to browse and play media files.
- Audio Output: Connect external speakers or headphones to the 3.5mm audio output port for enhanced sound.
6.2 Wireless Connectivity
- WiFi 6 (2.4G+5G):
Navigate to the projector's settings menu, select "Network" or "WiFi," and connect to your desired wireless network. WiFi 6 provides faster and more stable transmission.

Image: A user operating the projector wirelessly, demonstrating the 5G+2.4G ultra-fast wireless connection capability.
- Bluetooth 5.2:
The projector supports Bluetooth 5.2 for connecting to external Bluetooth audio devices like speakers or headphones. Go to the Bluetooth settings, enable Bluetooth, and pair with your device. Note that the Bluetooth function is for audio devices only, not for smartphone connection.
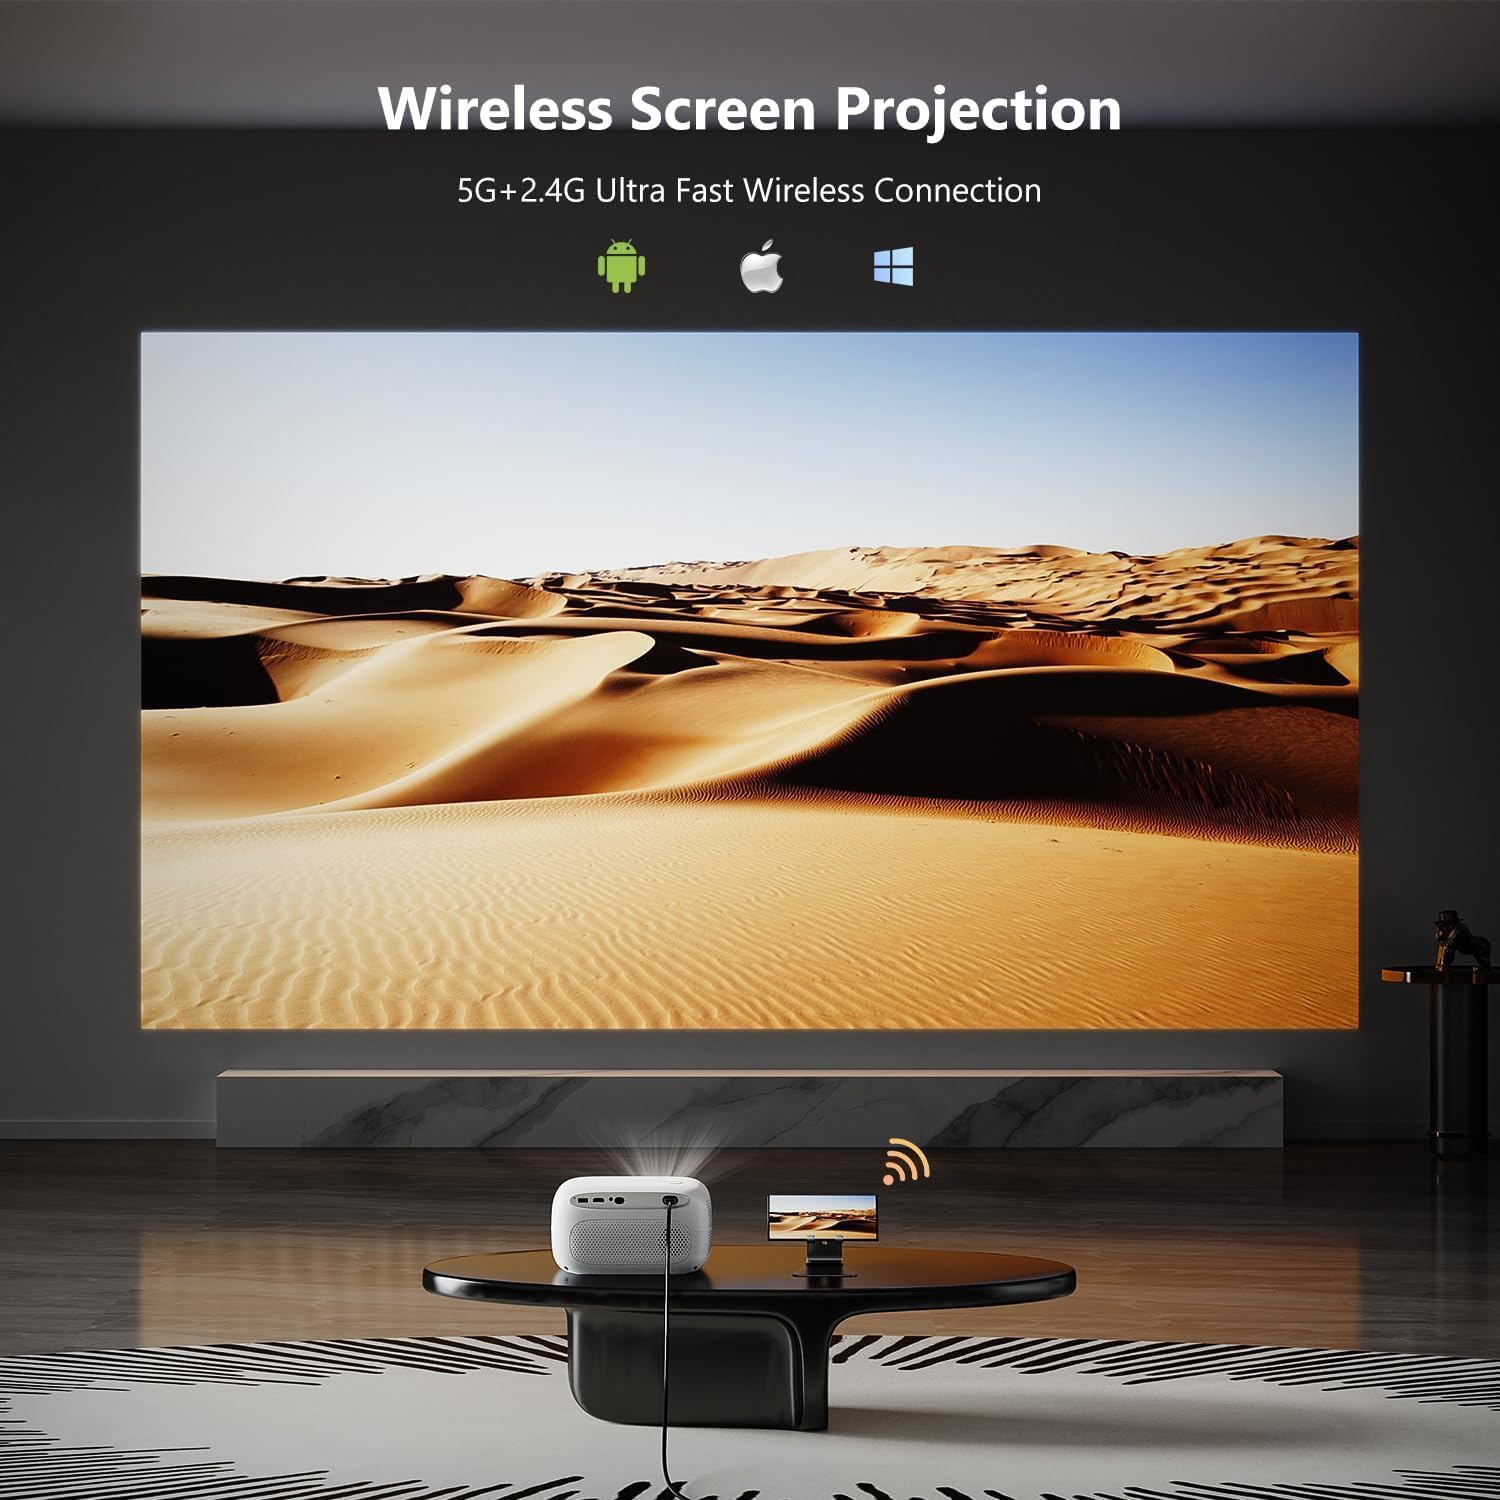
Image: The ALLIWAVA PR550 Mini Projector on a table, surrounded by Bluetooth headphones and a speaker, illustrating its Bluetooth 5.2 audio connectivity.
6.3 Screen Mirroring
The projector supports wireless screen projection from compatible smartphones (Android and iOS) and PCs. Access the screen mirroring function from the projector's main menu.
Image: A projector displaying a mirrored screen from a mobile device, showcasing the wireless screen projection feature.
Important Note: Due to copyright protections, certain streaming applications like Netflix, Amazon Prime Video, and Hulu do not support direct screen mirroring. For these applications, it is recommended to use a TV stick or other compatible device connected via HDMI, or install the apps directly on the projector if supported by the system.
6.4 System Upgrade
The projector supports upgrading to Android 11.0, allowing for the installation of various applications. Check the system settings for available updates.

Image: A detailed view of the remote control and a projected screen displaying the projector's smart interface with app icons, illustrating the system's capabilities.
7. Maintenance
- Cleaning the Lens: Use a soft, lint-free cloth specifically designed for optical lenses. Do not use abrasive cleaners.
- Cleaning the Casing: Wipe the projector's exterior with a soft, dry cloth. Avoid using harsh chemicals.
- Ventilation: Ensure the ventilation openings are clear of dust and obstructions to maintain optimal performance and prevent overheating.
- Storage: When not in use for extended periods, store the projector in a cool, dry place, protected from dust.
8. Troubleshooting
| Problem | Possible Cause | Solution |
|---|---|---|
| No Power | Power cable disconnected; Power outlet issue. | Check power cable connection; Try a different power outlet. |
| Blurry Image | Focus not adjusted; Projector too close/far. | Use electric focus on remote; Adjust projection distance. |
| Distorted Image (not rectangular) | Projector not level; Auto keystone not active. | Ensure projector is on a flat surface; Verify auto keystone is enabled. |
| No Sound | Volume too low; External audio device not connected/paired; Incorrect audio output selected. | Increase volume; Check Bluetooth connection or 3.5mm cable; Select correct audio output in settings. |
| No Signal | Incorrect input source; Device not connected properly. | Select correct HDMI/USB input; Reconnect source device. |
| Screen Mirroring Issues | Copyright restrictions; Network instability. | Use HDMI for restricted apps; Ensure stable WiFi connection. |
9. Specifications
| Feature | Detail |
|---|---|
| Model | PR550 |
| Brand | ALLIWAVA |
| Display Resolution | Native 1920 x 1080 (4K Supported) |
| Brightness | 18000 Lumens |
| Connectivity | WiFi 6 (2.4G+5G Dual-band), Bluetooth 5.2, HDMI, USB, 3.5mm Audio Out |
| Special Features | Electric Focus, Auto Vertical Keystone Correction (±40°), Built-in Stereo Speakers, Android 11.0 Support |
| Projection Size | 40''-120'' |
| Product Dimensions | 10 x 5.9 x 11.6 inches |
| Item Weight | 4.51 pounds |
10. Warranty and Support
ALLIWAVA provides comprehensive support for your PR550 Mini Projector:
- Warranty: Full 1-year product support from the date of purchase.
- After-Sales Assistance: Lifetime after-sales support is available.
- Contact Support: For any questions or issues, please contact us via email at support@alliwava.com.