Introduction
Thank you for choosing the Wheatronic 20-Inch Caged Ceiling Fan with Lights and Remote. This fan combines a farmhouse-inspired design with modern functionality, providing both air circulation and illumination for your living space. Designed for flush mounting, it is suitable for various rooms including bedrooms, kitchens, and living rooms. This manual provides essential information for safe installation, operation, and maintenance of your new ceiling fan.
Safety Information
Please read all instructions carefully before beginning installation. Failure to follow these instructions may result in electric shock, fire, or personal injury.
- Electrical Safety: Always disconnect power at the circuit breaker or fuse box before installation or servicing. Ensure all electrical connections comply with local codes and ordinances. If you are unfamiliar with electrical wiring, consult a qualified electrician.
- Mounting: The mounting structure must be capable of supporting the weight of the fan. Ensure the outlet box is securely attached to the building structure.
- Blade Clearance: Maintain a minimum clearance of 7 feet from the floor to the fan blades and 24 inches from the wall to the blade tips.
- Bulb Requirements: Use only E26 base bulbs, maximum 60 watts per bulb. Do not exceed the recommended wattage.
- Remote Control: Keep the remote control away from water and extreme temperatures.
- Cleaning: Always turn off the power before cleaning the fan. Use a soft, damp cloth; avoid harsh chemicals.
Package Contents
Verify that all components are present before beginning installation:
- Fan Blades
- Remote Control
- Mounting Hardware
- Instruction Manual (this document)
- Ceiling Fan Unit (with integrated light fixture and cage)
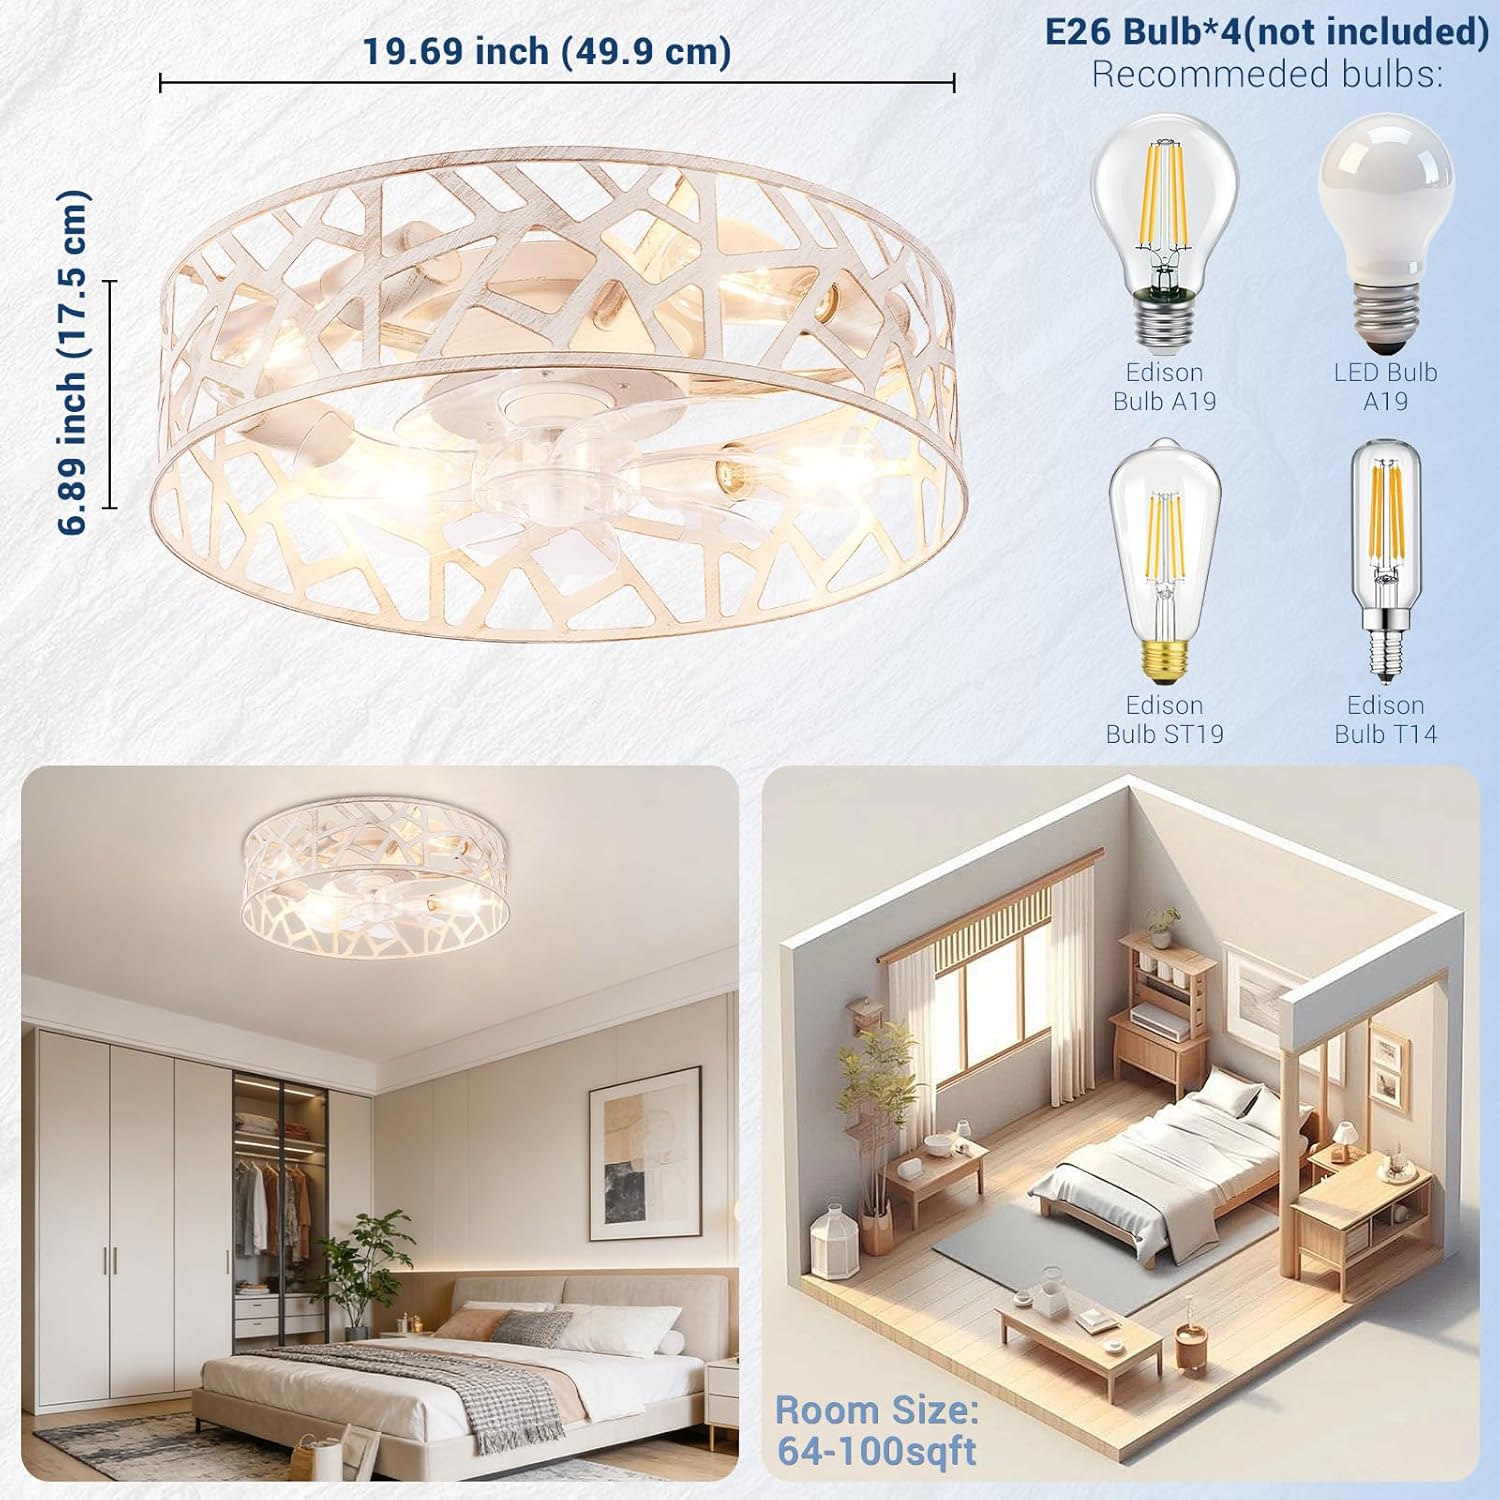
Image: Overview of the Wheatronic 20-inch Caged Ceiling Fan, showing its dimensions (19.69 inches diameter, 6.89 inches height) and examples of compatible E26 bulbs (Edison Bulb A19, LED Bulb A19, Edison Bulb ST19, Edison Bulb T14).
Specifications
| Brand | Wheatronic |
| Model Number | CF8 |
| Model Name | CF820w |
| Color | White |
| Material | Metal |
| Style | Farmhouse |
| Light Fixture Form | Close to Ceiling / Flush Mount |
| Room Type | Bedroom, Living Room, Dining Room, Kitchen, Kids, Nursery, Bathroom, Home Office |
| Power Source | AC |
| Control Method | Remote |
| Light Source | Bulb (E26 base) |
| Number of Light Sources | 4 (bulbs not included) |
| Voltage | 120 Volts (AC) |
| Wattage | Max 60 watts per bulb |
| Item Dimensions (L x W x H) | 20"L x 20"W x 6"H |
| Required Assembly | Yes |
| Indoor/Outdoor Usage | Indoor |
Setup and Installation
Installation requires basic electrical knowledge. If you are unsure, consult a qualified electrician. Ensure power is OFF at the circuit breaker before starting.
- Prepare the Mounting Location: Ensure the ceiling electrical box is securely mounted and capable of supporting the fan's weight.
- Assemble the Fan: Follow the detailed assembly instructions provided in the included manual for attaching fan blades and any decorative elements to the main unit.
- Wiring Connections: Connect the fan's electrical wires to the household wiring according to the wiring diagram in the full instruction manual. Typically, this involves connecting live, neutral, and ground wires.
- Mount the Fan: Secure the fan unit to the ceiling electrical box using the provided mounting hardware. Ensure all screws are tightened securely.
- Install Bulbs: Screw four E26 base bulbs (not included) into the light sockets.
- Restore Power: Once installation is complete and all connections are secure, restore power at the circuit breaker.

Image: An illustrative diagram of the fan's internal structure and components, indicating the general assembly process.
Operating Instructions
Your Wheatronic ceiling fan is operated using the included remote control.
Remote Control Functions:

Image: Detailed view of the remote control, highlighting buttons for General Off/Right Code, Light On/Off, Fan On/Off, Fan Speed (1-6 gears), Timing (1-2-4 hours), Silencer, Auxiliary Switch, and Fan Forward/Reverse.
- Power On/Off: Press the "Fan On/Off" button to turn the fan on or off. Use "Light On/Off" for the light.
- Fan Speed Adjustment: Use the "Fan 1-6 gears" buttons to select desired fan speed. Speed 1-2 is Low Wind, 3-4 is Medium Wind, and 5-6 is High Wind.
- Timer Function: Press the "Timing" buttons (1H, 2H, 4H) to set the fan to automatically turn off after 1, 2, or 4 hours.
- Forward/Reverse Function: Press the "Fan Forward / Reverse" button to change the direction of the fan blades.
- Summer Mode (Downward Airflow): Blades rotate counter-clockwise to create a cooling breeze.
- Winter Mode (Upward Airflow): Blades rotate clockwise to circulate warm air trapped near the ceiling.
- Silencer: This function may mute remote beeps or provide a quieter operation mode.
- Auxiliary Switch: Refer to the full manual for specific functions of this button, if any.

Image: The ceiling fan operating in a bedroom, demonstrating the downward airflow for cooling during warmer seasons.

Image: A visual representation of the fan's summer mode (downward airflow for cooling) and winter mode (upward airflow for heat circulation).
Maintenance
Regular maintenance ensures optimal performance and longevity of your ceiling fan.
- Cleaning: Turn off power before cleaning. Use a soft, lint-free cloth to wipe down the fan housing and blades. Do not use abrasive cleaners or solvents.
- Bulb Replacement: Ensure power is off before replacing bulbs. Allow bulbs to cool completely. Replace with E26 base bulbs, maximum 60 watts.
- Tighten Fasteners: Periodically check and tighten all screws and fasteners on the fan and mounting hardware to prevent wobbling or noise.
Troubleshooting
Refer to this section for common issues and their solutions.
| Problem | Possible Cause | Solution |
|---|---|---|
| Fan does not start | No power; loose wiring; remote control battery low. | Check circuit breaker. Ensure all wiring connections are secure. Replace remote control batteries. |
| Light does not turn on | Bulbs faulty or loose; no power; remote control issue. | Check bulbs and tighten if loose, replace if faulty. Verify power supply. Check remote control battery. |
| Fan wobbles | Loose mounting screws; unbalanced blades. | Ensure mounting bracket and fan screws are tight. Check if blades are securely attached. |
| Fan is noisy | Loose screws; internal components rubbing. | Tighten all screws. Ensure no wires are touching the fan blades or motor housing. |
| Lights are not dimmable | The product description may have been misinterpreted; this model's lights are not designed to be dimmable via the remote. | This model does not support dimming functionality through the remote control. Ensure compatible non-dimmable E26 bulbs are used. |
| Fan requires remote to turn on | This is standard operation for the fan. | The fan function is exclusively controlled by the remote. It does not have a memory function to automatically turn on with a wall switch. |
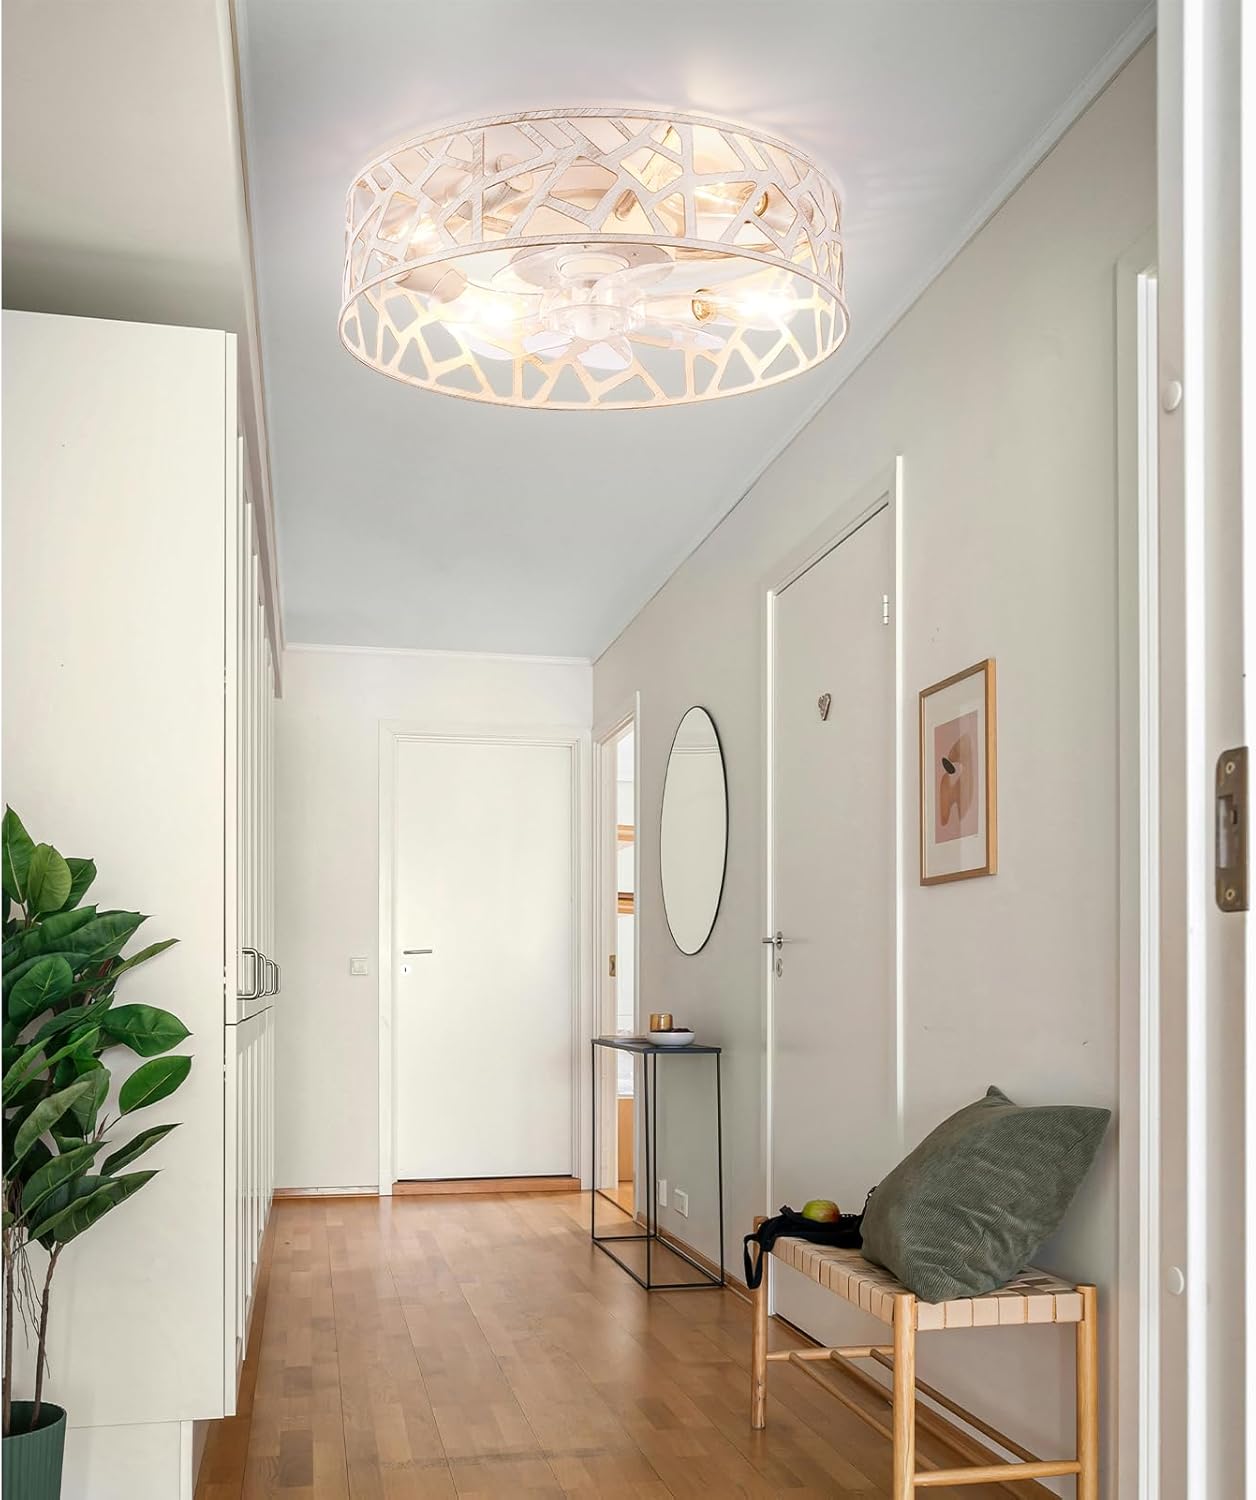
Image: A visual representation of the fan's quiet operation, suitable for bedrooms, with a noise level of approximately 45 dB, comparable to a whisper.
Warranty and Support
Wheatronic provides a 12-month product warranty for this ceiling fan. This warranty covers manufacturing defects and ensures reliable performance.
For any inquiries, issues, or warranty-related concerns, please contact our dedicated 24-hour customer service team. Refer to the contact information provided with your purchase or visit the official Wheatronic website for support.
Manufacturer Warranty Description: 1 year.


