Important Safety Information
Please read all instructions carefully before assembly and use. Retain this manual for future reference.
- Always follow the assembly instructions carefully.
- Keep hands and fingers away from the sliding doors when opening and closing to prevent injury.
- Ensure all connections are securely tightened before use. Periodically check and re-tighten as necessary.
- Do not overload shelves. Distribute weight evenly.
- This cabinet is designed for indoor use only.
- To prevent tip-over incidents, secure the cabinet to a wall using the provided anti-tip hardware. This is especially important in homes with children or pets.

Package Contents
Verify that all components are present before beginning assembly. If any parts are missing or damaged, please contact customer support.
- Cabinet Panels (Top, Bottom, Sides, Back, Shelves)
- Sliding Door Components
- Metal Handles
- Metal Support Legs
- Assembly Hardware (screws, dowels, cam locks, etc.)
- Anti-Tip Hardware
- Instruction Manual
Assembly Instructions
Assembly typically requires two adults and basic tools (e.g., screwdriver, hammer). Follow the numbered steps provided in the included assembly guide for detailed instructions.
- Unpack and Identify Parts: Carefully remove all components from the packaging. Lay them out on a clean, soft surface to prevent scratches. Identify each part using the provided diagrams in the separate assembly guide.
- Assemble the Frame: Begin by connecting the side panels to the bottom panel using the designated hardware. Ensure all connections are snug.
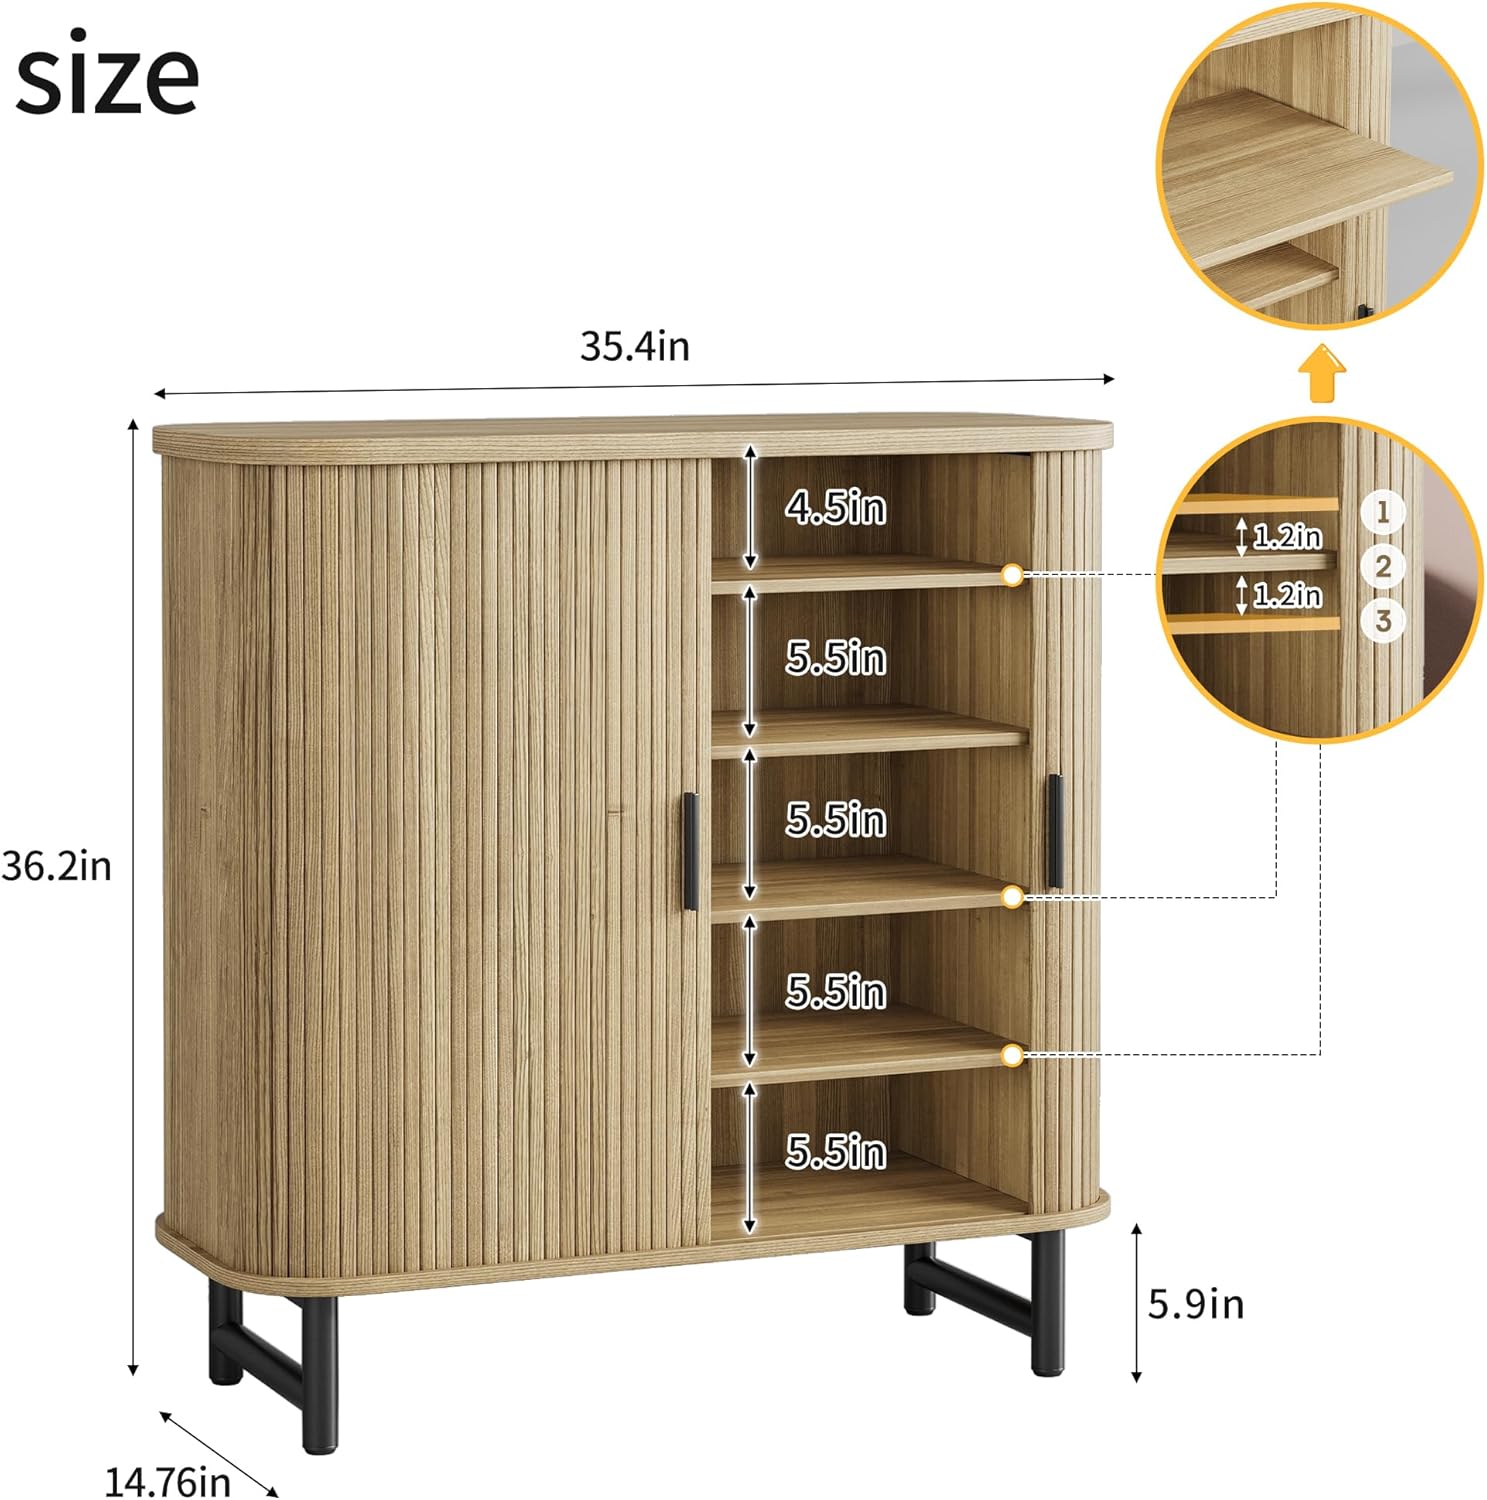
- Install Shelves: Insert the fixed and adjustable shelves into their respective positions. Note that the second shelf is fixed for structural stability and cannot be adjusted.
- Attach Back Panel: Secure the back panel to the assembled frame.
- Install Sliding Doors: Carefully install the fluted sliding doors into their tracks. Ensure they move freely.
- Attach Handles and Legs: Secure the metal handles to the doors and attach the metal support legs to the bottom of the cabinet.
- Final Placement and Anti-Tip Installation: Move the assembled cabinet to its desired location. Install the anti-tip hardware as shown in Figure 1 to secure the cabinet to the wall.
Product Features
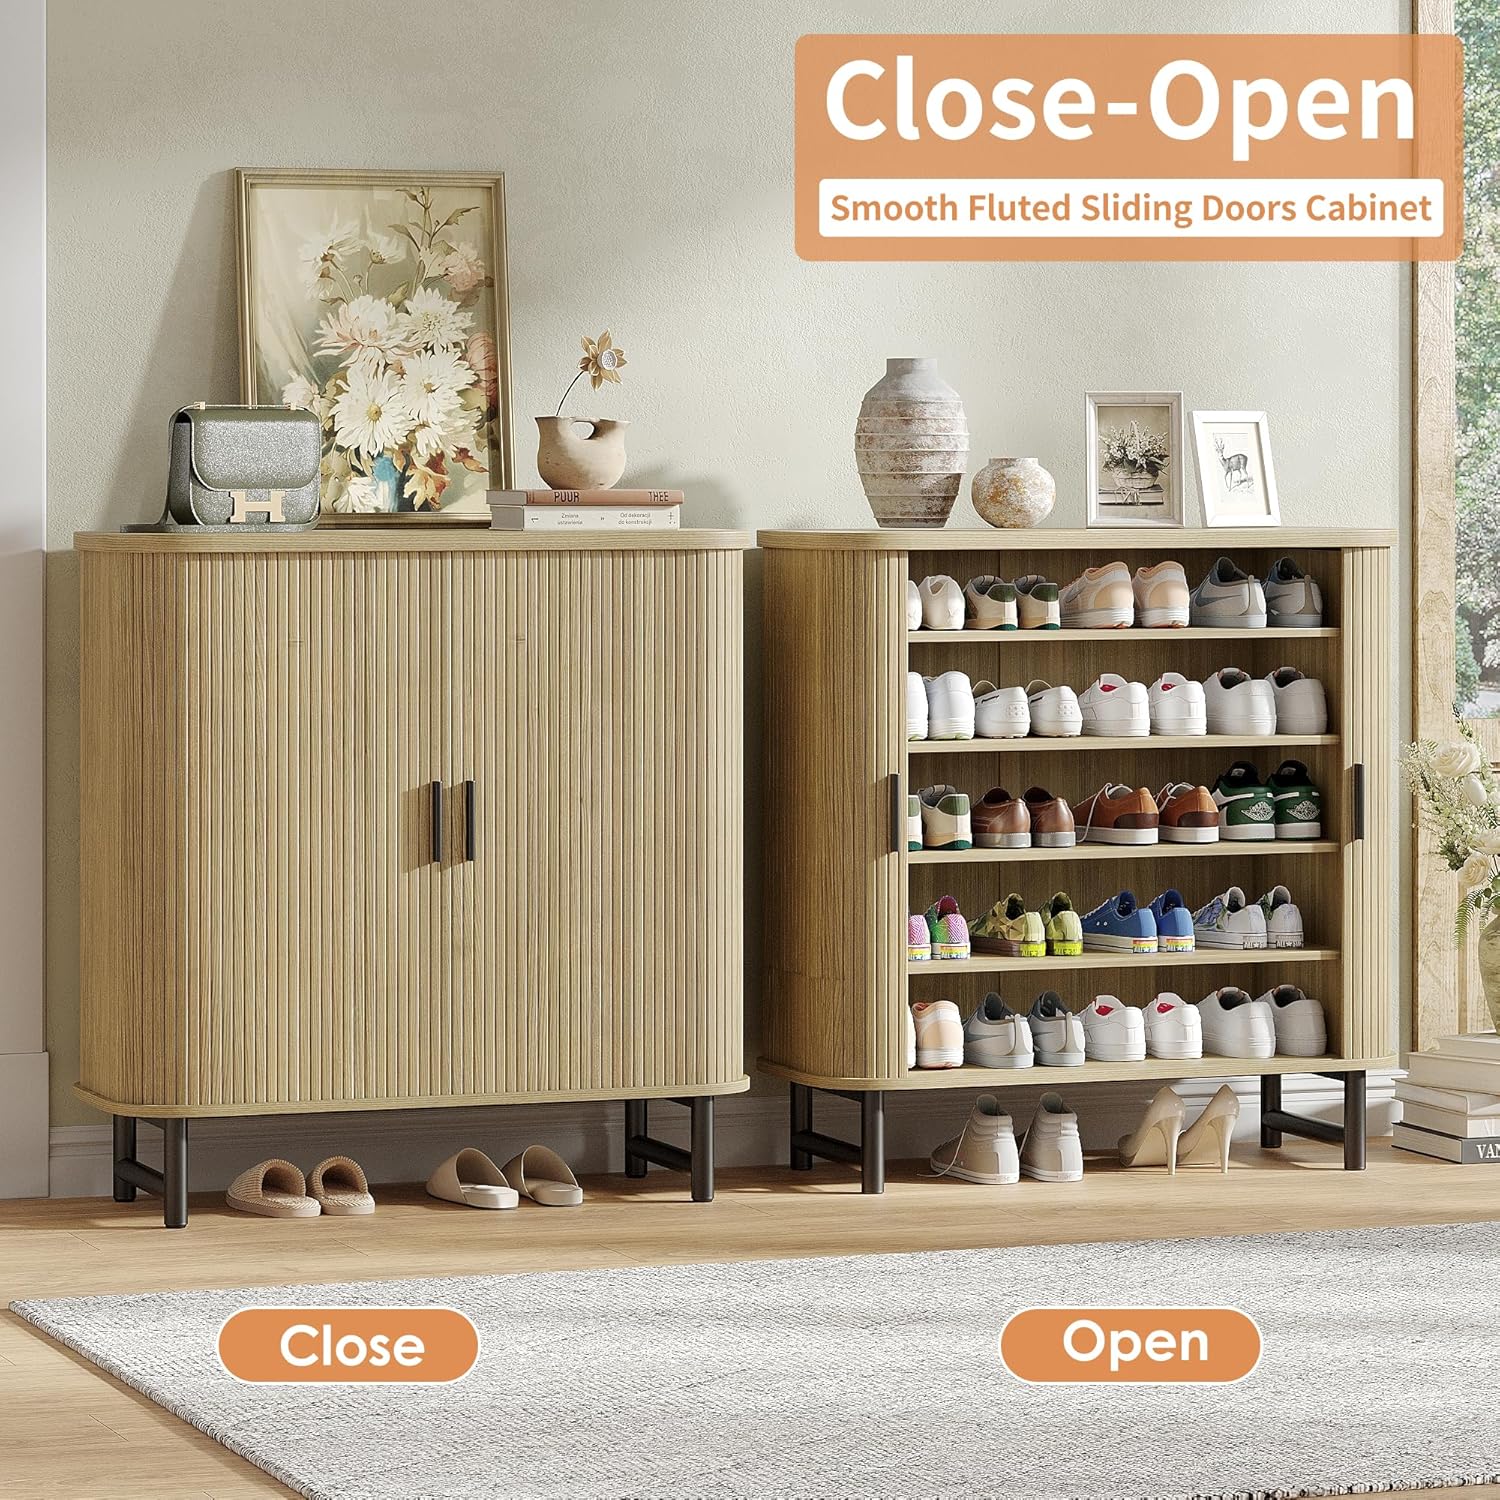
- Smooth Fluted Sliding Doors: Features a unique groove sliding door mechanism designed for smooth operation. The wood is polished and waxed, allowing the doors to become smoother with increased use.
- Elegant Wood Texture: Natural wood grain design provides a modern and elegant aesthetic, blending with various decor styles. The randomly distributed wood texture adds a natural atmosphere.
- Large Storage Capacity: Offers 5 layers of storage space behind the doors for shoes, 1 top storage space for display items, and 1 heightened bottom space for slippers or easy cleaning access.
- Adjustable Shelves: Four shelves in the middle section are adjustable to 3 different height positions. Partitions can also be removed to accommodate taller items like boots. (Note: The second shelf is fixed).
- Multifunctional Design: Suitable for use in entryways, living rooms, as a kitchen pantry, coffee bar, or sideboard buffet.

Setup
- Choose Location: Select a flat, stable surface for the cabinet. Ensure there is enough clearance for the sliding doors to operate smoothly.
- Leveling: If the floor is uneven, use shims under the metal support legs to ensure the cabinet is level and stable.
- Secure to Wall: As detailed in the "Important Safety Information" section and Figure 1, install the anti-tip hardware to secure the cabinet to a wall.
Operating Instructions
Sliding Doors
The cabinet features smooth fluted sliding doors. To open, gently push the door panel towards the side. To close, pull the door panel back to the center. The doors are designed to become smoother with continued use.
Adjustable Shelves
The four middle shelves can be adjusted to three different height positions. To adjust a shelf:
- Empty the shelf of all contents.
- Carefully lift the shelf and remove it from its current supports.
- Relocate the shelf supports to the desired height.
- Place the shelf back onto the supports, ensuring it is level and secure.
For storing taller items like boots, shelves can be completely removed. Note that the second shelf from the top is fixed and cannot be adjusted or removed.
Maintenance
- Cleaning: Wipe the cabinet surfaces with a soft, damp cloth. Avoid using harsh chemicals, abrasive cleaners, or polishes that may damage the wood finish.
- Spills: Promptly wipe up any spills to prevent water damage or staining.
- Door Mechanism: The sliding doors are designed to become smoother with use. If they become stiff, ensure the tracks are free of debris. Avoid applying lubricants unless specifically recommended by the manufacturer.
- Hardware: Periodically check all screws and fasteners to ensure they are tight. Re-tighten as needed to maintain stability.
Troubleshooting
| Problem | Possible Cause | Solution |
|---|---|---|
| Doors do not slide smoothly. | New product stiffness; debris in tracks; uneven assembly. | Continue using the doors, as they are designed to become smoother over time. Check tracks for any obstructions and remove them. Verify that the cabinet is assembled correctly and is level. |
| Cabinet feels unstable or wobbly. | Uneven floor; loose hardware; anti-tip not installed. | Ensure the cabinet is on a level surface; use shims if necessary. Check and tighten all assembly hardware. Install the anti-tip hardware securely to a wall. |
| Missing parts or damaged components. | Packaging error; shipping damage. | Do not proceed with assembly. Contact Maupvit customer support immediately for replacement parts. |
Specifications
| Brand | Maupvit |
| Model Number | B0F7LSG1KW |
| Color | Natural |
| Material | Wood |
| Product Dimensions (D x W x H) | 14.76"D x 35.43"W x 36.22"H |
| Number of Shelves | 5 (4 adjustable, 1 fixed) |
| Number of Doors | 2 (Sliding) |
| Mounting Type | Floor Mount (Freestanding with anti-tip option) |
| Assembly Required | Yes |
Warranty and Support
Maupvit is committed to product quality and customer satisfaction. This product comes with a 10-year quality warranty and lifetime maintenance support.
For any questions, missing parts, or support needs, please contact Maupvit customer service through the retailer's platform or the official Maupvit website.
For more information about Maupvit products, visit the Maupvit Store.