1. Introduction
This manual provides detailed instructions for the installation, operation, and maintenance of your NB ERGONOMIC F7 Extra Height Gaming Monitor Arm. Please read this manual thoroughly before installation and use to ensure proper function and safety.
2. Product Overview
The NB ERGONOMIC F7 Monitor Arm is designed to enhance your workspace by providing versatile monitor positioning. Key features include:
- Extra Height Adjustment: Rises up to 27 inches above the desk, suitable for standing workstations or stacked screen setups.
- Wide Compatibility: Supports most curved, ultra-wide, or flat monitors from 32 to 60 inches, weighing between 2 to 20 kg. Compatible with VESA 75x75mm and 100x100mm patterns.
- Multi-Angle Adjustability: Offers 360° rotation, -50° to +50° tilt, and -90° to +90° swivel for optimal viewing angles.
- Easy Installation: Features a quick-release head design for single-person installation and supports both C-Clamp and Grommet Hole mounting methods.
- Integrated RGB Lighting: Built-in RGB lighting with one-click color mode switching to customize your setup's ambiance.
- Durable Construction: Made from premium-grade aluminum with Mechanical ProSpring Technology for easier tension adjustment and advanced gear locking system for stability. Includes built-in cable management.
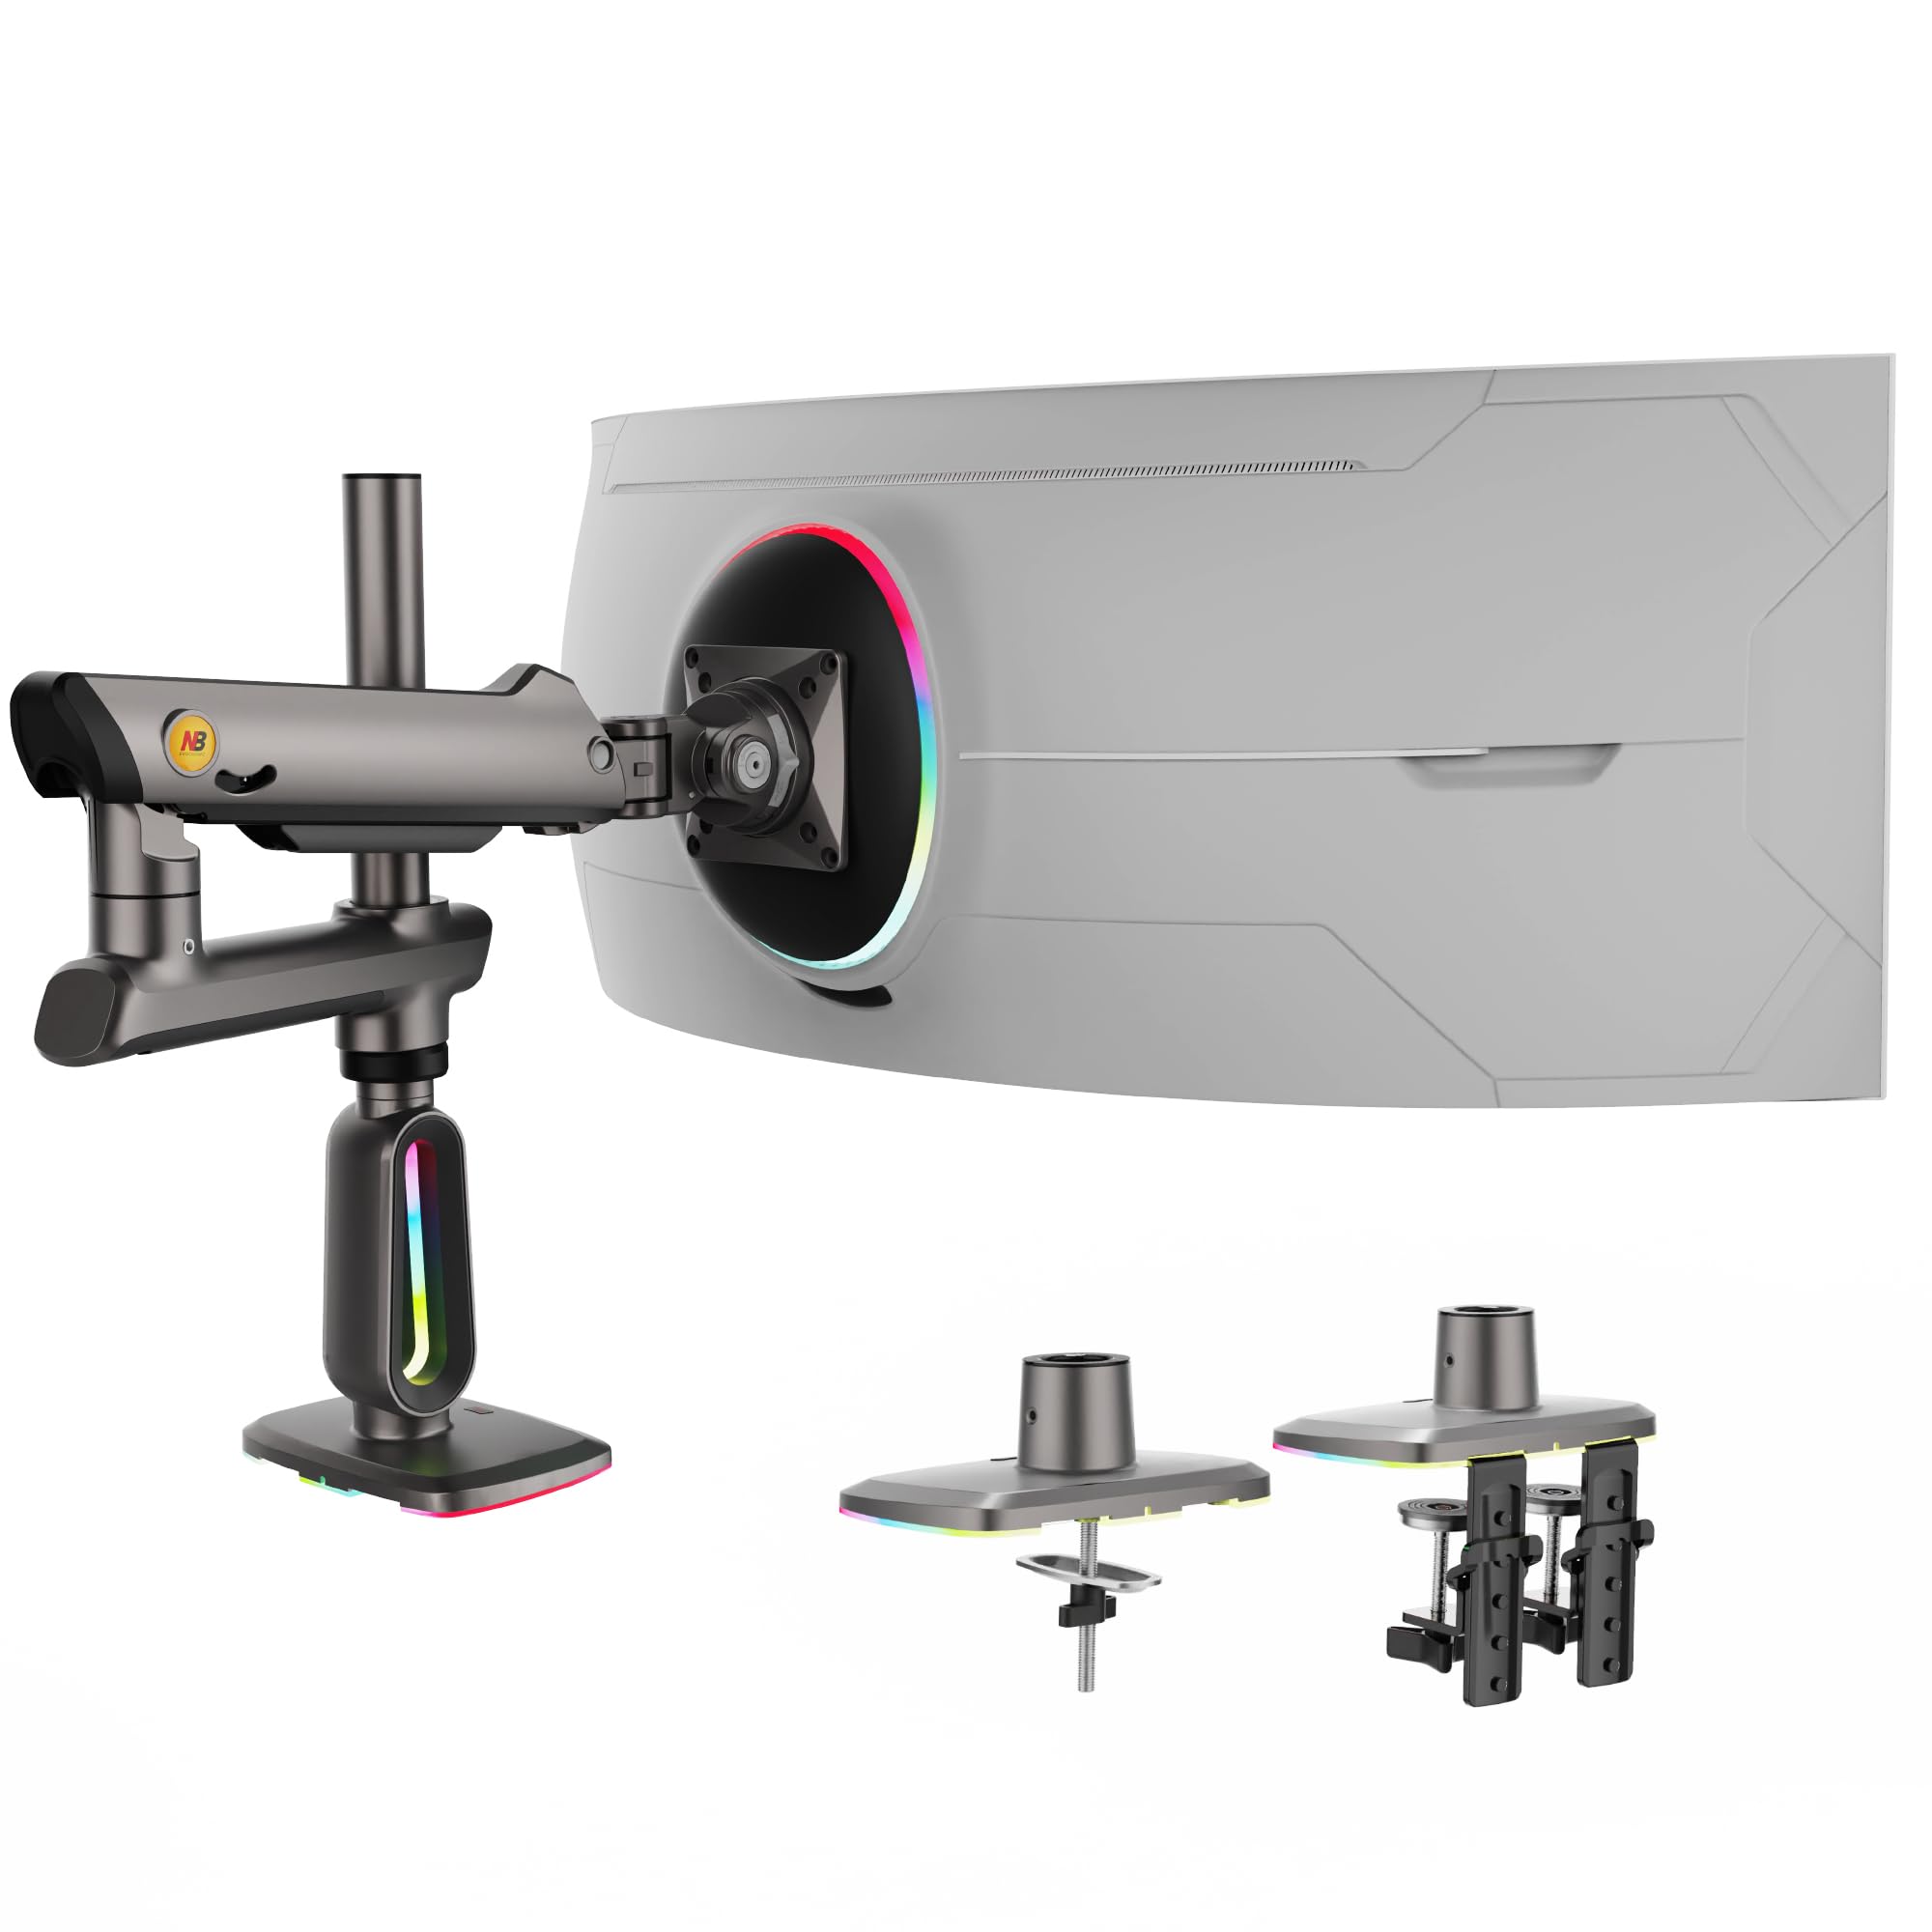
Image: The NB ERGONOMIC F7 Extra Height Gaming Monitor Arm, showcasing its sleek design and integrated RGB lighting at the base.
3. Package Contents
Verify that all components are present before beginning installation:
- Monitor Arm Assembly (Main Arm, Pole, Base with RGB)
- VESA Plate
- C-Clamp Mounting Hardware (Clamps, Screws, Pads)
- Grommet Hole Mounting Hardware (Bolt, Plate, Knob)
- Hex Keys (various sizes)
- Monitor Mounting Screws (various sizes for VESA)
- Cable Management Clips
- User Manual

Image: All parts of the monitor arm, including the main arm, base, VESA plate, and mounting hardware, are displayed.
4. Setup and Installation
Follow these steps carefully to install your monitor arm. Two mounting options are available: C-Clamp and Grommet Hole.
4.1. Choose Your Mounting Method
Determine whether to use the C-Clamp for desk edges or the Grommet Hole mount for desks with existing cable pass-throughs. Ensure your desk thickness and hole diameter are compatible.
- C-Clamp: For desk thickness 0.8" - 3.5".
- Grommet Hole: For hole diameter 0.43" - 0.87".
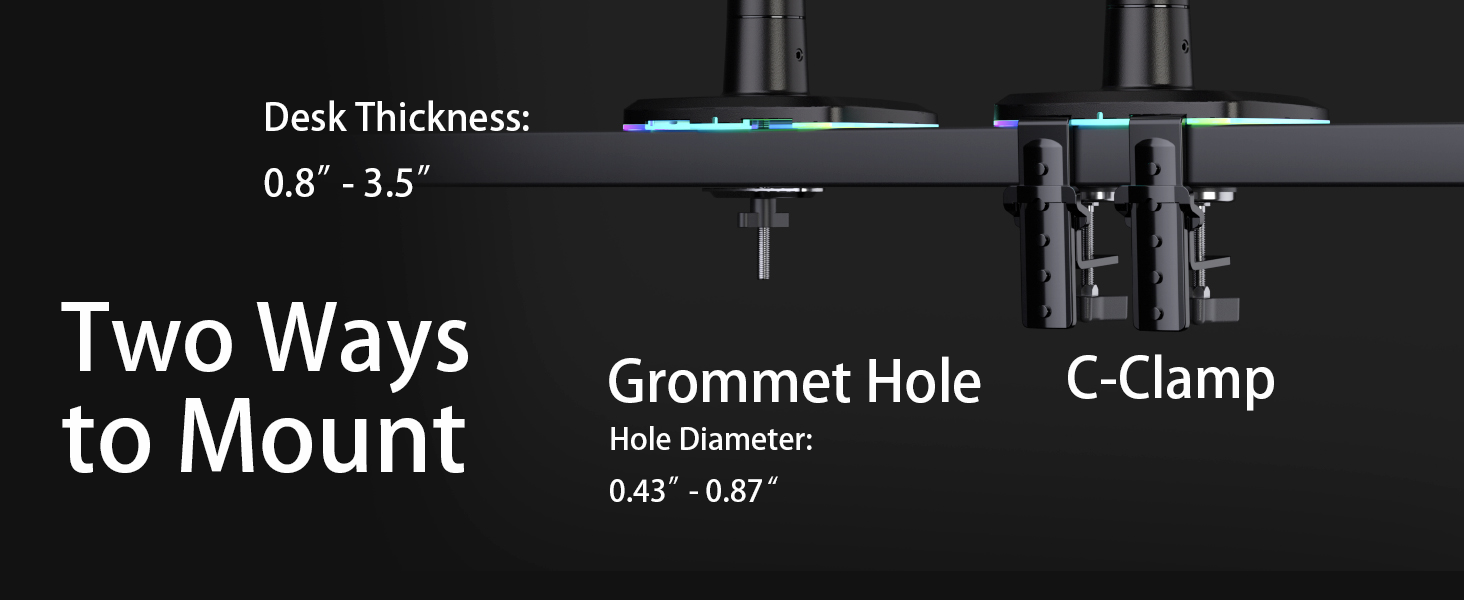
Image: Illustration of the two mounting methods: C-Clamp for desk edges and Grommet Hole for desks with existing openings, along with their respective compatibility specifications.
4.2. Install the Base
Attach the base to your desk using your chosen method. Ensure it is securely tightened.
Video: This video demonstrates the complete installation process for the F7 monitor arm, including both C-Clamp and Grommet Hole mounting, and attaching the monitor.
4.3. Assemble the Arm
- Insert the main pole into the base and secure it.
- Slide the arm assembly onto the pole. Adjust the height and tighten the set screw.
- Attach the VESA plate to the back of your monitor using the provided screws. Ensure the screws are appropriate for your monitor's depth.
- Slide the monitor with the attached VESA plate onto the arm's mounting head until it clicks into place. Secure with the quick-release lever.

Image: A large curved monitor mounted on the NB ERGONOMIC F7 arm, demonstrating its stability and height capabilities.
5. Operating Instructions
5.1. Adjusting Monitor Position
The monitor arm allows for flexible adjustments:
- Height Adjustment: Gently push or pull the monitor up or down. If the monitor does not stay in position, adjust the tension screw on the arm (refer to Maintenance section).
- Tilt: Tilt the monitor screen -50° to +50° vertically.
- Swivel: Swivel the monitor arm 360° horizontally at the base.
- Rotation: Rotate the monitor screen 360° for portrait or landscape orientation.
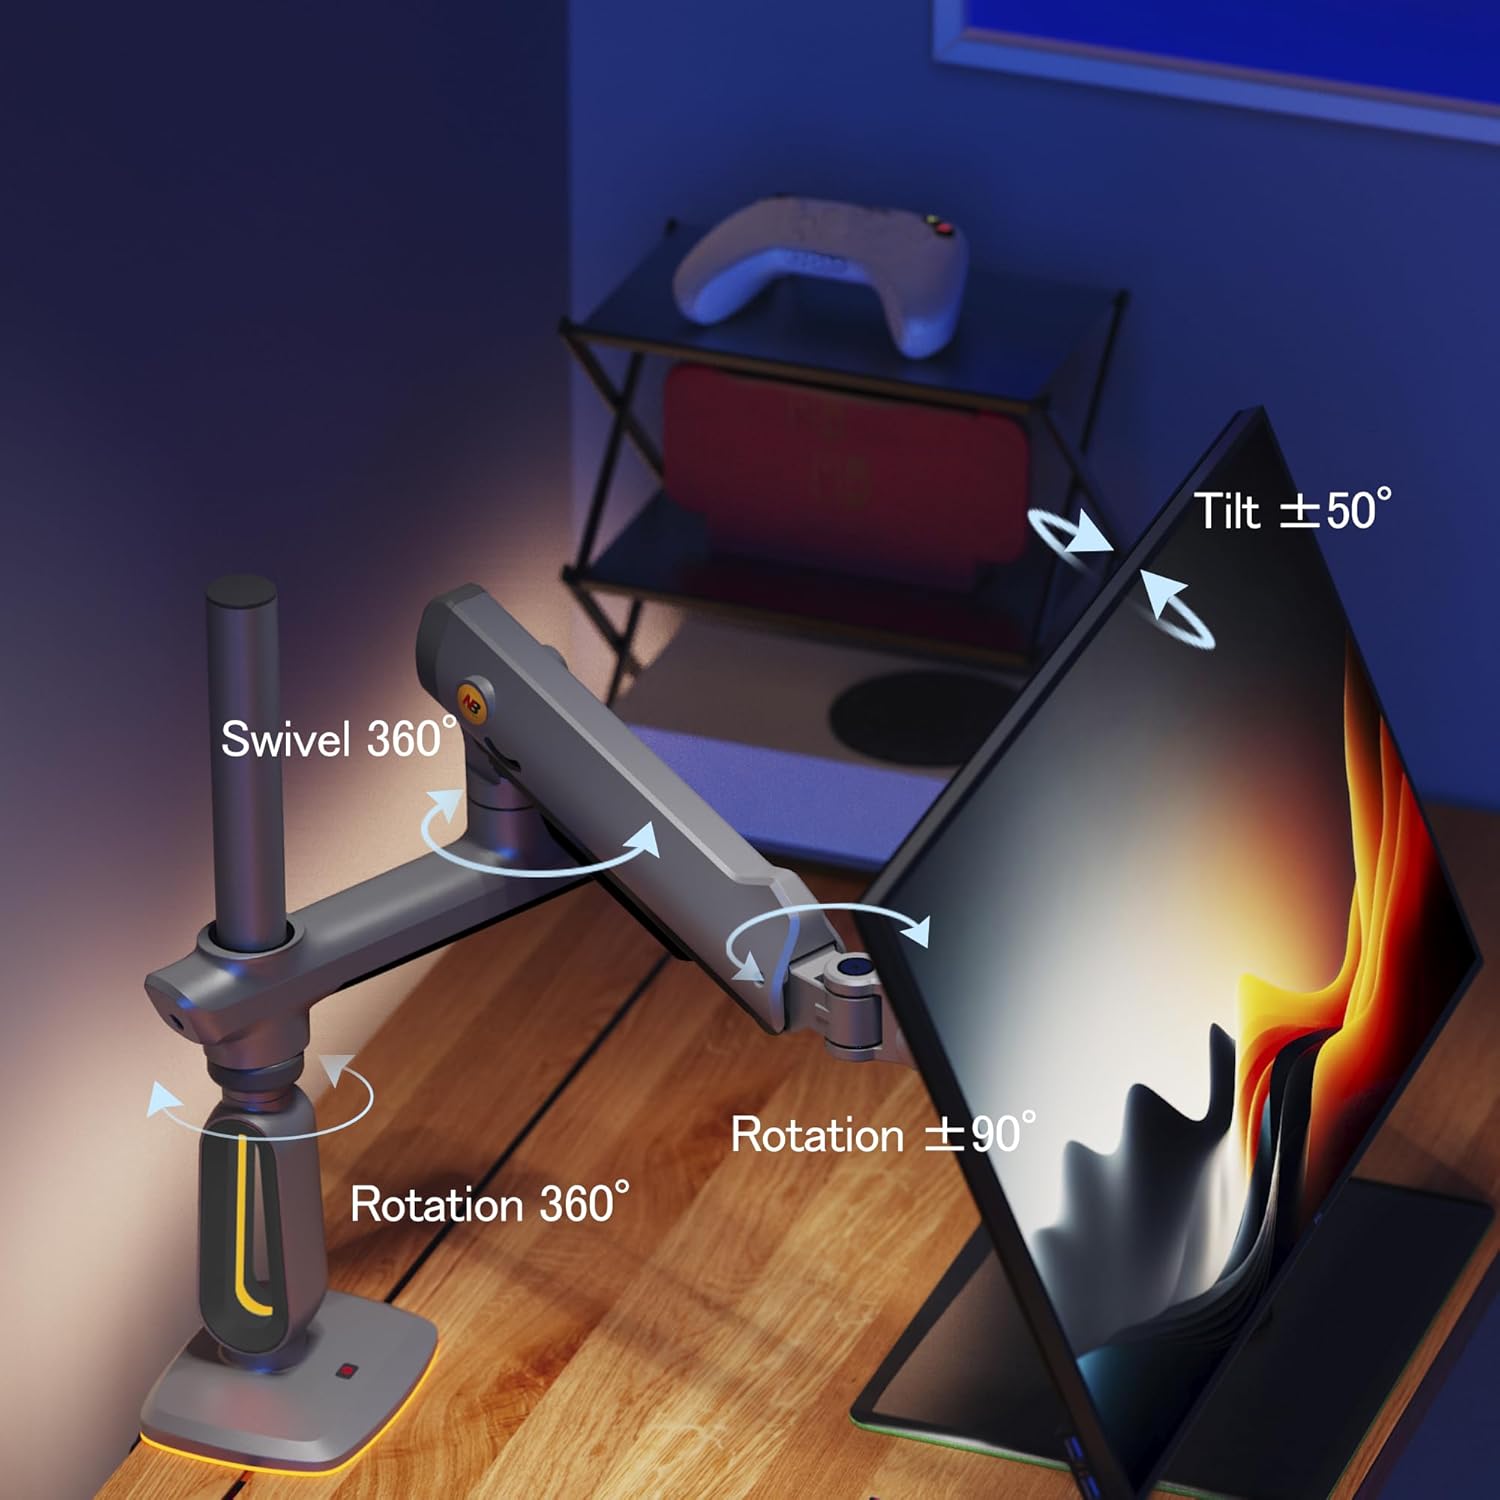
Image: Visual representation of the monitor arm's adjustable movements, including 360° swivel, ±50° tilt, and 360° rotation.
5.2. RGB Lighting Control
The base of the monitor arm features integrated RGB lighting. Connect the USB cable from the arm to a USB port on your computer or a USB power adapter. Press the button on the base to cycle through different color modes and turn the light on/off.
Video: This video showcases the RGB lighting features of the F7 monitor arm and its various color modes.
6. Maintenance
- Tension Adjustment: If the monitor sags or is too stiff to move, use the provided hex key to adjust the tension screw on the arm. Turn clockwise to increase tension (for heavier monitors) or counter-clockwise to decrease tension (for lighter monitors).
- Cleaning: Wipe the arm and base with a soft, damp cloth. Avoid abrasive cleaners.
- Cable Management: Periodically check and organize cables within the integrated cable management channels to prevent strain and maintain a tidy setup.
7. Troubleshooting
- Monitor Sags/Doesn't Hold Position: Adjust the tension screw on the arm. Ensure the monitor weight is within the 2-20 kg range.
- Monitor Too Stiff to Move: Adjust the tension screw on the arm to decrease tension.
- RGB Light Not Working: Ensure the USB cable is securely connected to a powered USB port. Press the control button on the base to cycle modes or turn on.
- Arm Feels Loose: Check all mounting screws (C-Clamp or Grommet) and arm connection screws for tightness.
8. Specifications
| Brand | NB ERGONOMIC |
| Model | F7 |
| Mounting Type | Tabletop Mount (C-Clamp or Grommet Hole) |
| Movement Type | Articulating |
| Material | Aluminum |
| Color | Grey Black |
| Compatible Devices | Monitor |
| Minimum Screen Size | 32 Inches |
| Maximum Screen Size | 60 Inches |
| Load Capacity | 2 kg to 20 kg |
| VESA Compatibility | 75x75mm, 100x100mm |
| Maximum Tilt Angle | 50 Degrees (-50° to +50°) |
| Swivel | 360 Degrees |
| Rotation | 360 Degrees (-90° to +90°) |
| Item Weight | 7.2 Kilograms |
9. Warranty and Support
This product comes with a 2-year warranty from the date of purchase. For warranty claims, technical support, or any questions regarding your NB ERGONOMIC F7 Monitor Arm, please contact NB ERGONOMIC customer service through their official website or the retailer where the product was purchased.
Please retain your proof of purchase for warranty validation.