1. Introduction
Thank you for choosing the GGM Gastro KMHK13000 Ride-On Sweeper. This manual provides essential information for the safe and efficient operation, maintenance, and troubleshooting of your new machine. Please read this manual thoroughly before operating the sweeper to ensure proper use and to prevent damage or injury. Keep this manual in a safe place for future reference.
2. Safety Instructions
Operating the KMHK13000 requires adherence to strict safety protocols. Failure to follow these instructions may result in serious injury or damage to the equipment.
- Read the Manual: Always read and understand the entire instruction manual before operating the sweeper.
- Authorized Personnel: Only trained and authorized personnel should operate this machine.
- Personal Protective Equipment (PPE): Wear appropriate PPE, including safety glasses, hearing protection, and sturdy footwear.
- Area Preparation: Ensure the operating area is clear of obstacles, debris, and unauthorized personnel.
- Machine Inspection: Before each use, inspect the machine for any damage, loose parts, or worn brushes. Do not operate if damage is found.
- Battery Safety: Follow all battery charging and handling instructions. Avoid contact with battery acid.
- Slope Operation: Exercise extreme caution when operating on inclines or declines. Do not exceed recommended slope angles.
- Emergency Stop: Familiarize yourself with the location and operation of the emergency stop button.
- Maintenance Safety: Disconnect power before performing any maintenance or cleaning.
3. Product Overview
The GGM Gastro KMHK13000 is a robust ride-on sweeper designed for efficient cleaning of large areas. It features a comfortable operator cabin and multiple brushes for comprehensive debris collection.
3.1 Main Components
- Operator Cabin: Enclosed area for the driver, featuring steering wheel and controls.
- Main Brush: Central brush for sweeping larger debris.
- Side Brushes: Two front-mounted side brushes for sweeping debris from edges and corners into the path of the main brush.
- Debris Hopper: Collection container for swept materials.
- Control Panel: Dashboard with ignition, lights, brush controls, and indicators.
- Wheels: Heavy-duty wheels for stability and maneuverability.
3.2 Product Dimensions
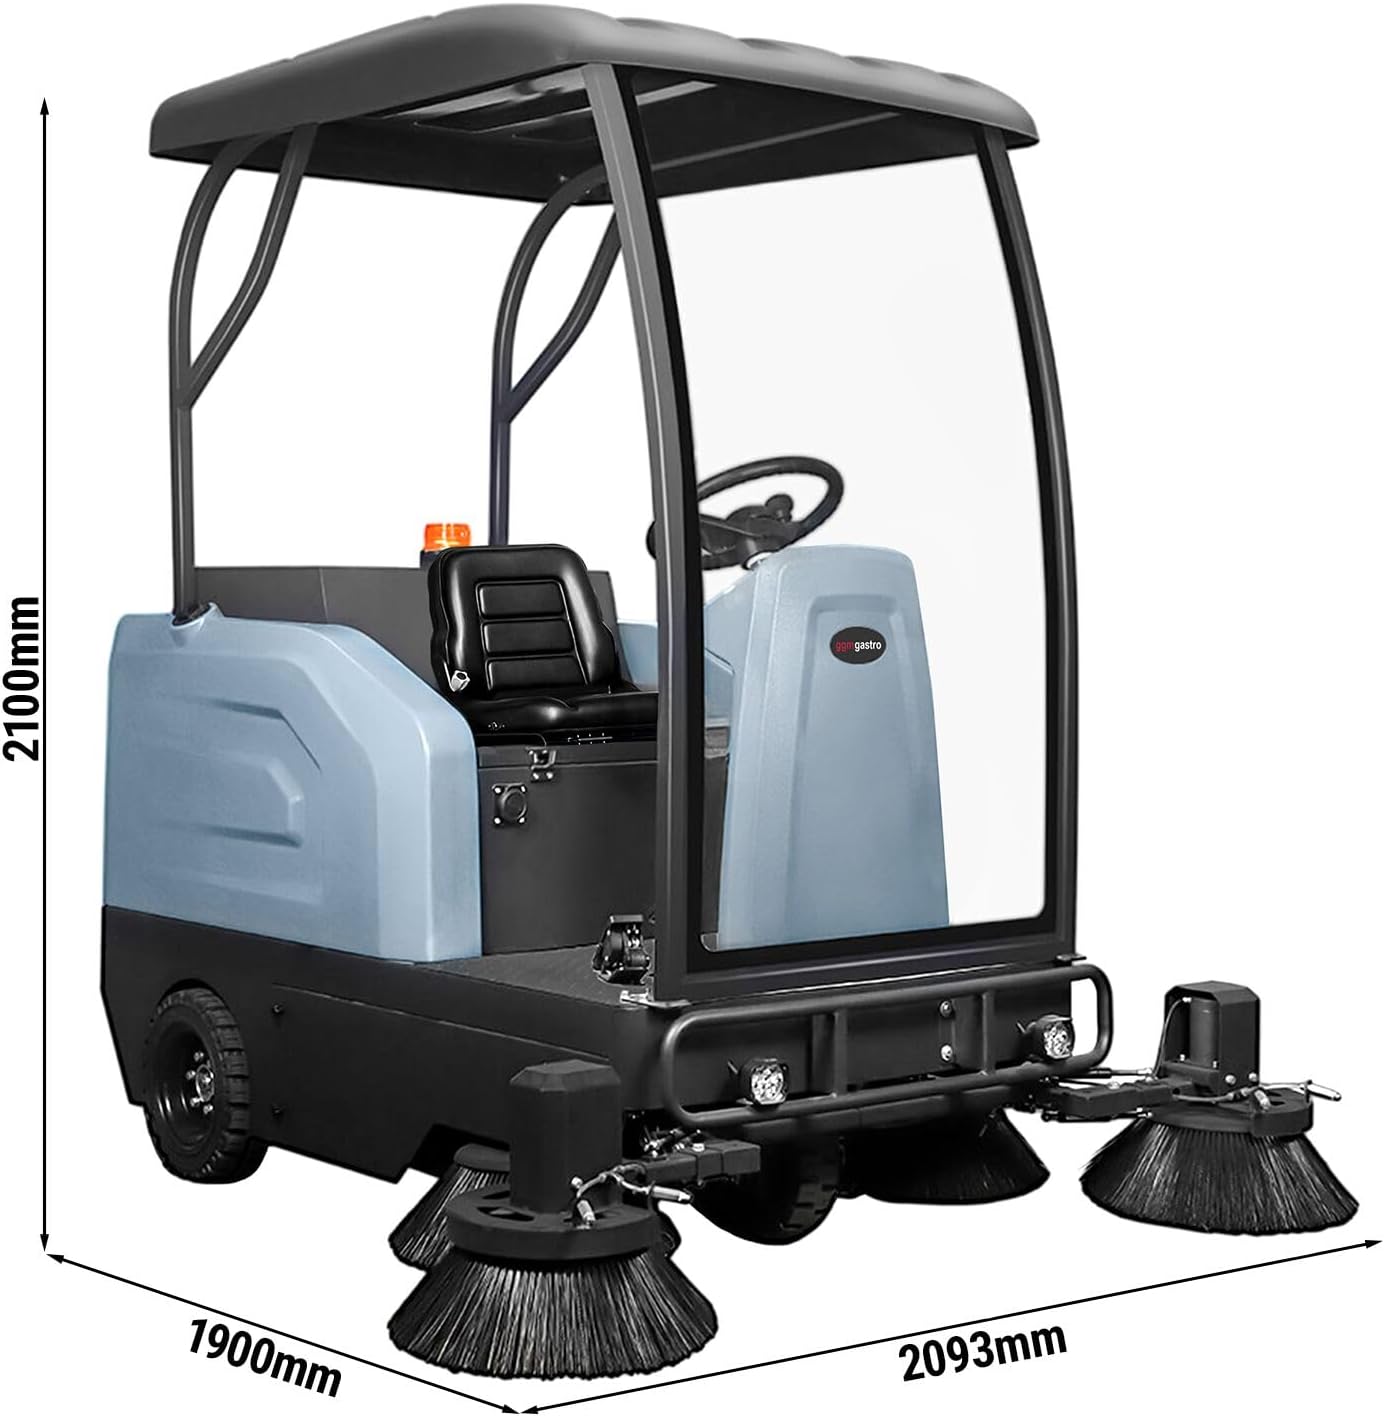
The overall dimensions of the KMHK13000 sweeper are approximately 2100 mm (height), 1900 mm (width), and 2093 mm (length). These dimensions are crucial for planning storage and operational routes.
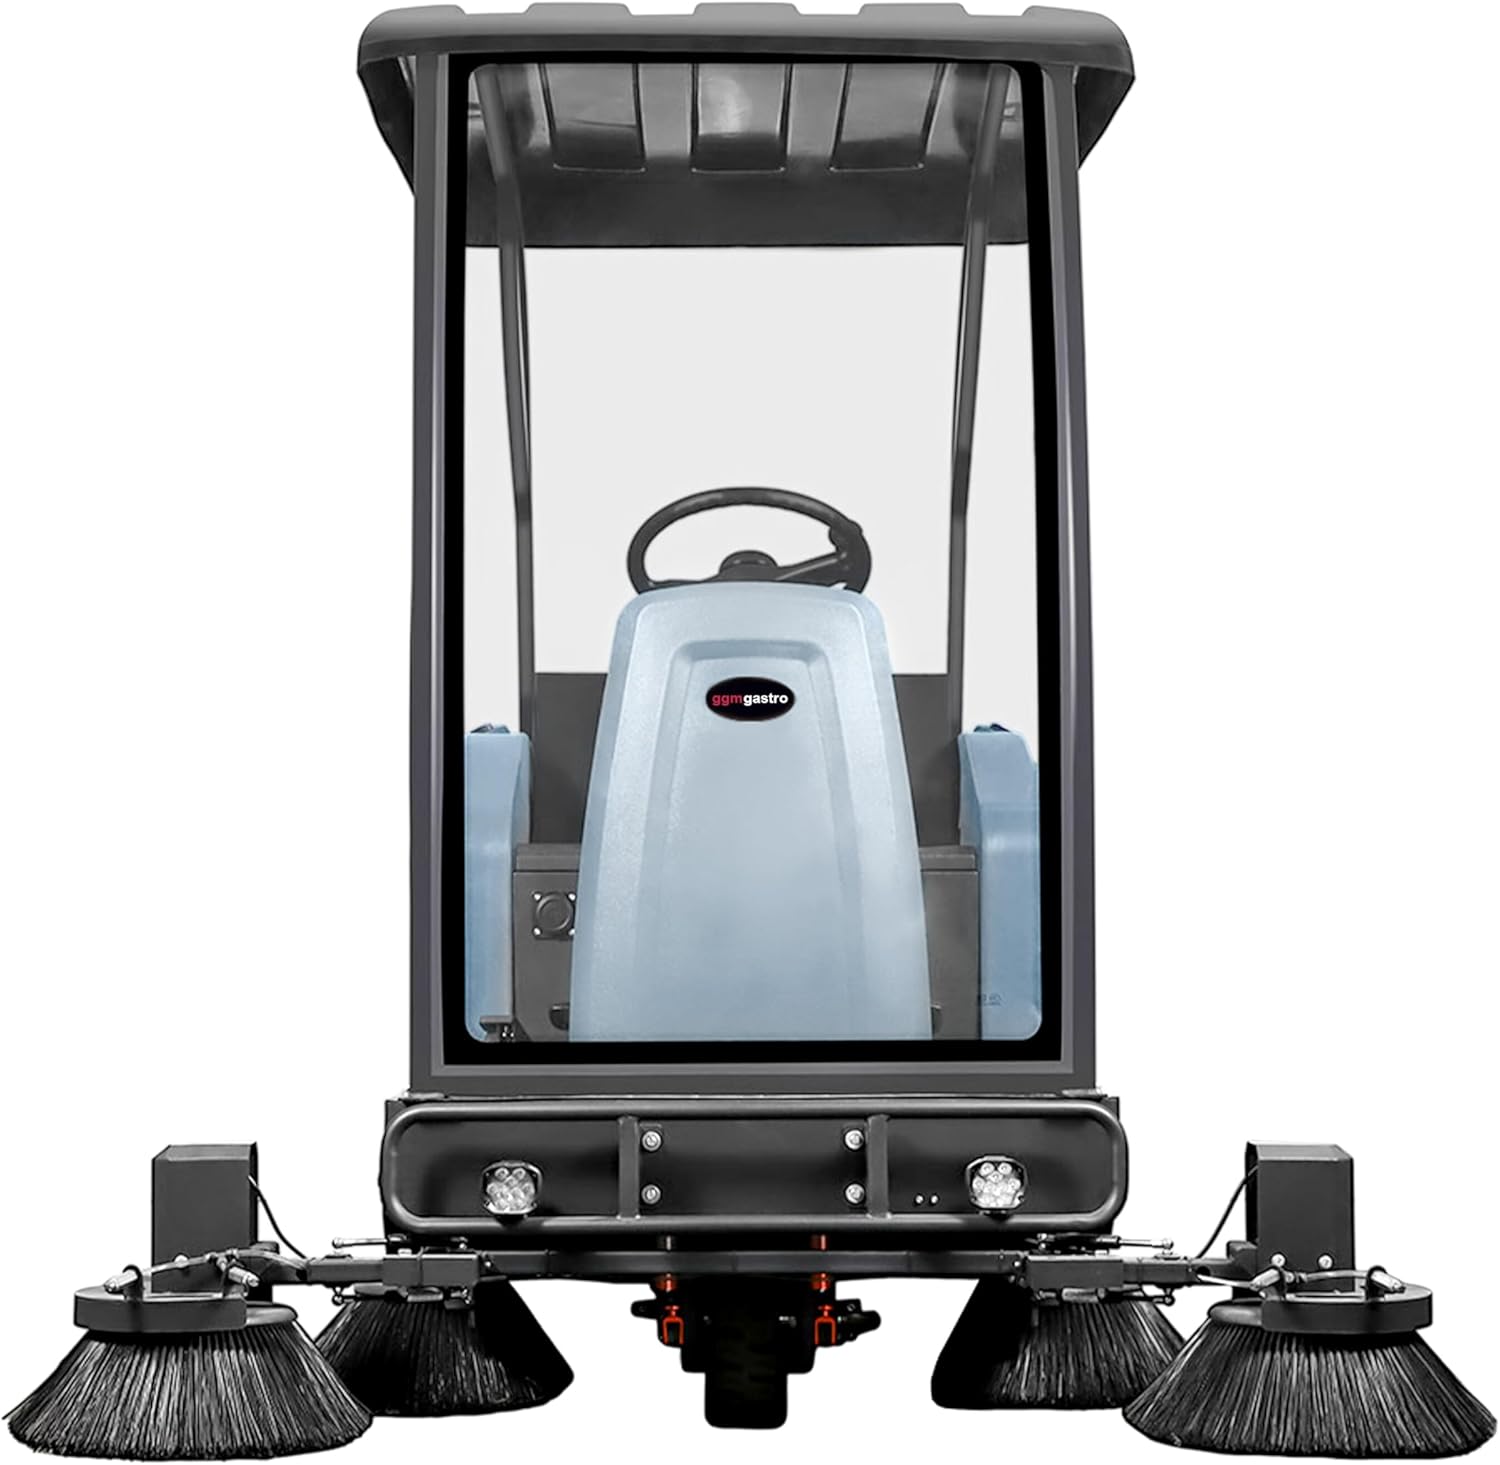
This image provides a clear view of the front of the sweeper, highlighting the operator's position and the dual side brushes designed to efficiently gather debris.
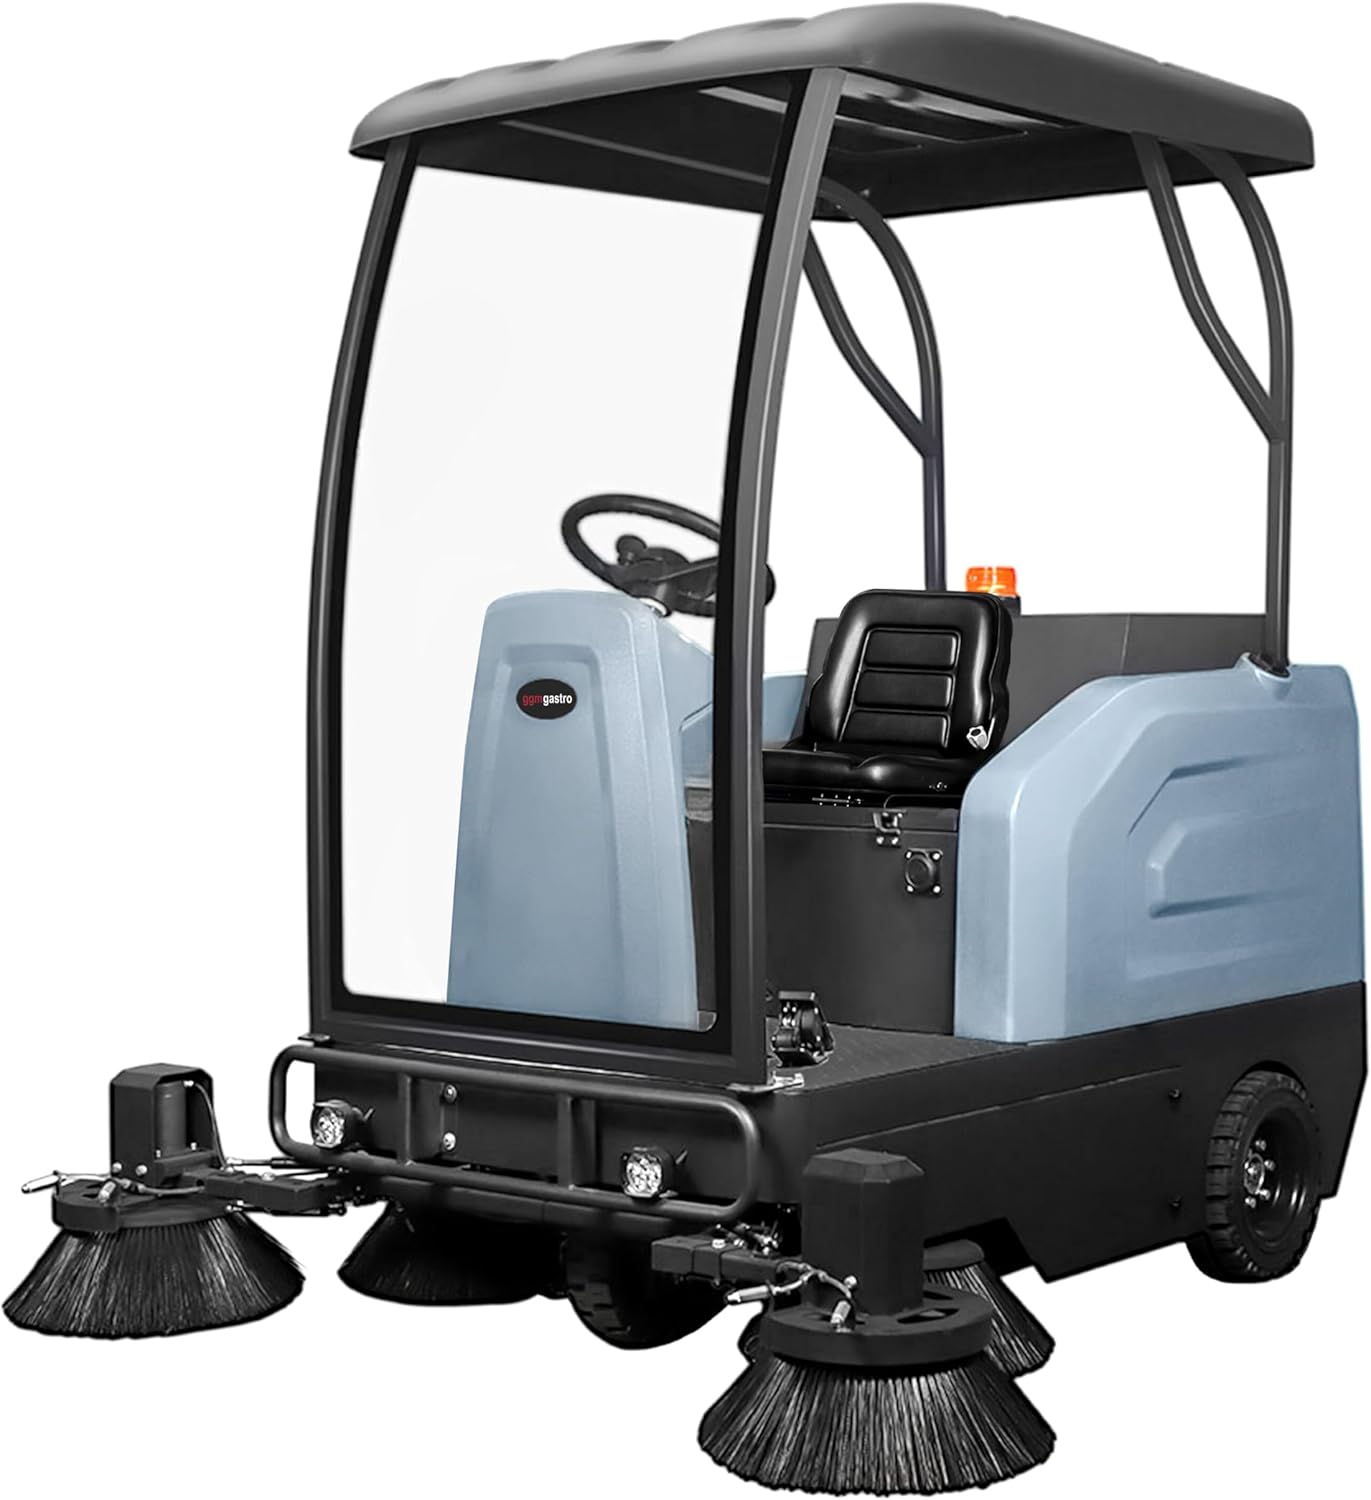
The side view demonstrates the compact yet powerful design of the sweeper, with the operator cabin positioned centrally for optimal visibility and control.
4. Setup
Before initial operation, perform the following setup procedures:
- Unpacking: Carefully remove the sweeper from its packaging. Inspect for any shipping damage.
- Battery Charging: Ensure the battery is fully charged before first use. Connect the charger according to the charger's instructions. Do not overcharge.
- Brush Installation: If brushes are not pre-installed, follow the instructions for attaching the main and side brushes securely. Ensure they are correctly aligned.
- Fluid Levels: Check all fluid levels (e.g., hydraulic fluid if applicable, battery electrolyte if not sealed). Refer to specific labels on the machine.
- Tire Pressure: Verify that tire pressures are at the recommended levels.
- Operator Seat Adjustment: Adjust the operator seat for comfort and optimal control access.
5. Operating Instructions
Follow these steps for safe and effective operation of the KMHK13000 sweeper.
5.1 Pre-Operation Checklist
- Confirm battery charge level.
- Check brushes for wear and proper attachment.
- Empty debris hopper if necessary.
- Inspect the area to be swept for large obstacles.
5.2 Starting the Sweeper
- Enter the operator cabin and adjust the seat.
- Insert the key into the ignition and turn it to the "ON" position.
- Wait for system checks to complete (if applicable).
- Engage the main power switch.
5.3 Sweeping Operation
- Lower the main brush and side brushes using the respective controls.
- Select the appropriate sweeping speed.
- Begin sweeping, maintaining a steady speed and overlapping passes for thorough cleaning.
- Monitor the debris hopper and empty it when full to maintain sweeping efficiency.
5.4 Stopping the Sweeper
- Raise the main brush and side brushes.
- Drive the sweeper to a designated parking area.
- Turn the ignition key to the "OFF" position and remove it.
- Engage the parking brake.
- Empty the debris hopper.
6. Maintenance
Regular maintenance is crucial for the longevity and optimal performance of your KMHK13000 sweeper. Always disconnect power before performing maintenance.
6.1 Daily Maintenance
- Clean the debris hopper and filter system.
- Inspect brushes for wear and entanglement. Remove any wrapped debris.
- Wipe down the exterior of the machine.
- Check battery charge and recharge as needed.
6.2 Weekly Maintenance
- Check tire pressure.
- Inspect all electrical connections for corrosion or looseness.
- Lubricate moving parts as indicated in the machine's lubrication points diagram (refer to separate service manual if provided).
6.3 Brush Replacement
Brushes should be replaced when bristles are significantly worn or damaged. Refer to the specific instructions for brush removal and installation, typically involving releasing retaining clips or bolts.
7. Troubleshooting
This section addresses common issues you might encounter with your KMHK13000 sweeper. For problems not listed here, contact GGM Gastro customer support.
| Problem | Possible Cause | Solution |
|---|---|---|
| Sweeper does not start. | Low battery charge, emergency stop engaged, faulty ignition. | Charge battery, disengage emergency stop, check ignition connections. |
| Poor sweeping performance. | Worn brushes, full debris hopper, incorrect brush pressure. | Replace brushes, empty hopper, adjust brush pressure. |
| Unusual noises during operation. | Debris caught in brushes, loose components, motor issue. | Stop machine and remove debris, tighten loose parts, contact service if motor noise persists. |
| Battery not holding charge. | Faulty battery, charger issue, improper charging. | Test battery and charger, ensure correct charging procedure. Consider battery replacement. |
8. Specifications
Key technical specifications for the GGM Gastro KMHK13000 Ride-On Sweeper.
- Model: KMHK13000
- Brand: GGM Gastro
- Working Performance: Up to 13,000 m²/h (approximate)
- Dimensions (L x W x H): Approximately 2093 mm x 1900 mm x 2100 mm
- Power Source: Battery-powered (specifics may vary, refer to machine label)
- Material: Reference: 34644
- ASIN: B0F7KYL686
9. Warranty and Support
For warranty information, please refer to the separate warranty document provided with your purchase or contact GGM Gastro customer service. For technical support, spare parts, or service inquiries, please contact your authorized GGM Gastro dealer or visit the official GGM Gastro website.
GGM Gastro Official Website: www.ggmgastro.com